
Related Manuals for Mastervolt CombiMaster 12V/2000W 100A


Summary of Contents for Mastervolt CombiMaster 12V/2000W 100A
- Page 1 COMBIMASTER 120V Series INVERTER CHARGER COMBINATION WITH AC–IN SUPPORT USER AND INSTALLATION MANUAL 10000015714/06...
-
Page 2: Table Of Contents
CombiMaster 120V Series – User and Installation Manual TABLE OF CONTENTS 4.8.1 Remote switch ........17 1 SAFETY INSTRUCTIONS ......3 4.8.2 Alarm output ........17 General ..........3 System integration (CZone/MasterBus) 18 Warnings regarding the use of batteries . 4 Location .......... -
Page 3: Safety Instructions
3. Do not expose the CombiMaster Inverter/Charger to rain, snow, spray, moisture, excessive pollution, aggressive environments, ammonia, salt or condensing circumstances. 4. Use of an attachment not recommended or sold by Mastervolt may result in a risk of fire, electric shock, or injury to persons. -
Page 4: Warnings Regarding The Use Of Batteries
CombiMaster 120V Series – User and Installation Manual 1.2 Warnings regarding the use of batteries 1. WARNING – RISK OF EXPLOSIVE GASES i. WORKING IN VICINITY OF A LEAD-ACID BATTERY IS DANGEROUS. BATTERIES GENERATE EXPLOSIVE GASES DURING NORMAL BATTERY OPERATION. FOR THIS REASON, IT IS OF UTMOST IMPORTANCE THAT EACH TIME BEFORE SERVICING THE COMBIMASTER INVERTER/CHARGER IN THE VICINITY OF THE BATTERY, YOU READ THIS MANUAL AND FOLLOW THE INSTRUCTIONS... -
Page 5: Location
Mastervolt parts and/or to commit to undertake such testing as a part of the manufacturing process. In addition, the manufacturer must agree to indemnify and not hold Mastervolt responsible for any claims arising from the use of the Mastervolt parts in the life support equipment. -
Page 6: General Information
Sale. Warranty The Mastervolt product warranty covers the CombiMaster 120V Series for the first two years after the purchase date, on the condition that the product is installed and used according to the instructions in this manual. Installation or use that do not comply with these instructions may result in under performance, damage or failure of the product and may void this warranty. -
Page 7: Product Description
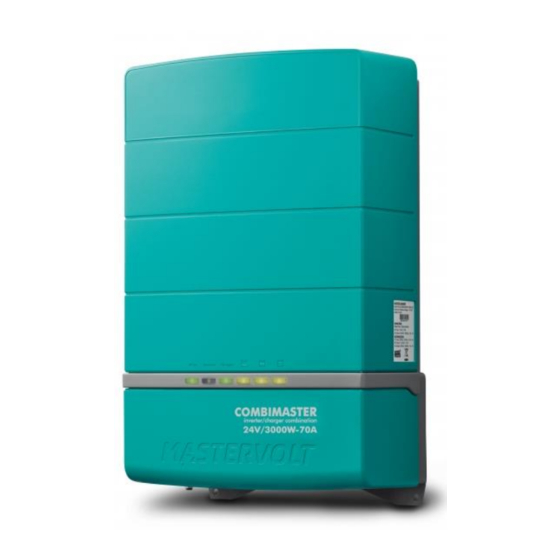
CombiMaster 120V Series – User and Installation Manual 3 PRODUCT DESCRIPTION The CombiMaster Inverter/Charger is a battery charger, inverter and AC transfer system in one compact case. Overview of the connections Front side with open connection compartment Bottom side Figure 2. Connections Grounding system jumper Resettable thermal fuse (30A) AC input... - Page 8 CombiMaster 120V Series – User and Installation Manual • Charger mode; When external AC power is AC IN AC OUT available on the AC input, the battery will be charged and the AC output is supplied by the external power. BATTERIES •...
-
Page 9: Remote Control
CombiMaster 120V Series – User and Installation Manual Remote control The CombiMaster Inverter/Charger can be monitored from a remote panel like the SmartRemote or a Touch 5 (in a CZone network). Some settings can only be adjusted from a laptop/notebook or PC connected to the CombiMaster Inverter/Charger via a USB Interface. -
Page 10: Installation
CombiMaster 120V Series – User and Installation Manual 4 INSTALLATION Unpacking The delivery includes: • CombiMaster Inverter/Charger • 1× Temperature sensor • 1× MasterBus terminator • 1× Drop cable CZone/MB (1m) • Mounting bracket • User and installation manual After unpacking, check the contents for possible damage. Do not use the product if it is damaged. If in doubt, contact your supplier. -
Page 11: Batteries
CombiMaster 120V Series – User and Installation Manual Batteries Model Recommended battery capacity 200 − 1000 Ah 12V/2000W-100A Minimum based on Mastervolt Gel 320 − 1600 Ah 12V/3000W-160A batteries. If connecting batteries of a 120 − 600 Ah 24V/2000W-60A different manufacturer, make sure the 140 −... -
Page 12: Wiring
Do not use the chassis frame as the negative conductor. Tighten securely. The positive cable must be fused and connected to the positive post of the battery bank. Use a fuse that matches the applied wire size. The fuse with fuse-holder is available from your local Mastervolt distributor. 4.5.2 AC wiring... -
Page 13: Ac Safety Grounding
CombiMaster Inverter/Charger to the other devices. Both networks need a terminating device on both ends of the network. Do not make ring networks. For more details on networks, please contact your Mastervolt supplier. Things you need Make sure you have all the parts you need to install a CombiMaster Inverter/Charger: •... -
Page 14: Installation Step-By-Step
CombiMaster 120V Series – User and Installation Manual • AC cable to connect the AC input to an AC power source. See section 4.5.2 for specifications. • Batteries. See section 4.3 for specifications. • Appropriate and reliable cable terminals, cable lugs, battery terminals and cord end terminals. We recommend as a minimum tool kit: •... - Page 15 CombiMaster 120V Series – User and Installation Manual Step 5. Connect the 5/16" grounding lug to the central grounding point. Step 6. Open the connection compartment by loosening the two screws at the bottom and then lifting the front cover plate. Step 7.
- Page 16 CombiMaster 120V Series – User and Installation Manual Step 11. Option: Connect the CombiMaster Inverter/Charger to the CZone or MasterBus network. See section 4.9 for more information on system integration. Adding the CombiMaster Inverter/Charger to a CZone network 1 Disconnect the backbone at the closest backbone connection and add in a tee connector.
-
Page 17: Accessories Connector (Dry Contacts)
CombiMaster 120V Series – User and Installation Manual Accessories connector (dry contacts) The screw terminal at the bottom side of the CombiMaster Remote Inverter/Charger, offers the following contacts: switch input Alarm output 4.8.1 Remote switch By default, the upper two contacts (Remote) of the accessories connector are connected by a jumper to close the circuit. -
Page 18: System Integration (Czone/Masterbus)
Use an RJ45 MasterBus cable (not included) and daisy chain the CombiMaster Inverter/Charger to the other MasterBus devices, forming a local data network. Points to consider: ˗ Connections between the devices are made by standard MasterBus cables. Mastervolt can supply these cables. ˗ Up to 63 MasterBus devices can be connected together. -
Page 19: Settings
CombiMaster 120V Series – User and Installation Manual 5 SETTINGS Adjustment of the settings of the CombiMaster Inverter/Charger can be made in two different ways: • By means of DIP switches. • From a laptop connected to the CombiMaster Inverter/Charger via a USB Interface. Some settings, like the AC IN Limit setting for example, can only be changed in this way. -
Page 20: Masterbus Configuration
MasterBus network via a MasterBus USB interface. MasterAdjust software is available as free to download software on the Mastervolt website: www.mastervolt.com. This tool runs on a Windows laptop or notebook. When the CombiMaster Inverter/Charger is connected to MasterBus, open MasterAdjust. -
Page 21: History
5.2.4 Configuration Settings The configuration can be done in MasterAdjust, from a laptop or notebook connected to the CombiMaster Inverter/Charger via a Mastervolt USB Interface. See applicable user manuals for details. The following table lists the parameters as shown in MasterAdjust. -
Page 22: Events - System Automation
CombiMaster 120V Series – User and Installation Manual Value Meaning Default Adjustable Range Absorption Voltage Absorption voltage 14.25 / 12-15 / 24-30V 28.50V Minimum time Minimum time that the charger stays in 15 min 0-600 min absorption phase Maximum time Maximum time that the charger stays in 240 min 0-600 min... -
Page 23: Czone Configuration
CombiMaster 120V Series – User and Installation Manual The CombiMaster Inverter/Charger can be configured as an event source. An event source can be used to initiate an event command and an event action by another device that is connected to the MasterBus. - Page 24 CombiMaster 120V Series – User and Installation Manual 1. Enter an understandable Module Name. 2. Each device on a CZone network has a unique CZone address; the Dipswitch. This number must match the physical DIP switch settings. When connected to the system: either select one from the drop-down list or edit graphically.
- Page 25 CombiMaster 120V Series – User and Installation Manual 10. Check and adjust the AC settings. In Energy Save Mode the power consumption will be reduced when there is no load on AC OUT. Please note that small loads, such as the clock on a microwave oven, are most likely not to work in this mode.
-
Page 26: Operation
CombiMaster 120V Series – User and Installation Manual 6 OPERATION Switching On / Charge only The main switch on the bottom of the CombiMaster Inverter/Charger has two positions: • Inverter and charger on (I) • Charge only, inverter off (). Note: When the main switch is in this position (), it consumes 1mA DC power when not connected to AC. -
Page 27: 3-Step+ Charge Process
The 3-step+ charge system is also safe for all the connected equipment. WARNING! The MLI charging voltages on this charger fit the Mastervolt Li-ion (MLI) batteries but do not necessarily fit other Li-ion batteries! Always follow the instructions provided by the battery manufacturer! -
Page 28: Temperature Compensated Charging
CombiMaster 120V Series – User and Installation Manual Temperature compensated charging By installing the battery temperature sensor sensor (for Lead Acid batteries only), the charge voltages are automatically adapted for deviating temperatures. When the battery temperature is low, the charge voltage increases. -
Page 29: Maintenance
CombiMaster 120V Series – User and Installation Manual Maintenance No specific maintenance to the CombiMaster Inverter/Charger is required. Examine your electrical installation on a regular basis, at least once a year. Defects such as loose connections, damaged wiring etc. must be corrected immediately. If necessary, use a soft clean cloth to clean the CombiMaster Inverter/Charger. -
Page 30: Troubleshooting
CombiMaster 120V Series – User and Installation Manual 7 TROUBLESHOOTING If you cannot solve a problem using the fault-finding table, contact your supplier or Mastervolt. Make sure you have the part and serial number at hand. Malfunction Possible cause What to do... - Page 31 CombiMaster 120V Series – User and Installation Manual Malfunction Possible cause What to do Battery low causing Discharged battery Connect AC input to recharge battery CombiMaster Note: when charging an empty battery Inverter/Charger from a different power source, like an shutdown alternator, the CombiMaster Inverter/Charger must be reset manually...
-
Page 32: Technical Data
CombiMaster 120V Series – User and Installation Manual 8 TECHNICAL DATA Specifications are subject to change without prior notice. Inverter specifications 12V/2000W- 12V/3000W- 24V/2000W- 24V/3000W- Model 100A 160A Part number/product code 35512000 35513000 35522000 35523000 Nominal battery voltage Inverter output voltage 120V (inverter only) or 90-140V (AC input support mode) Frequency 50Hz / 60Hz (configurable) -
Page 33: Charger Specifications
Yes, reduced (25%) charge current at low (<9V/<18V) battery voltage Note: the following charge specifications are based on Mastervolt batteries. Specifications for a given chemistry of a different manufacturer may vary. If connecting batteries of a different manufacturer, make sure the manufacturer's recommendations are met. Individual adjustments are possible if in the configuration the battery type "User defined"... -
Page 34: Transfer System Specifications
CombiMaster 120V Series – User and Installation Manual Transfer system specifications Model All models AC input (switched) AC input fuse Yes, resettable thermal fuse AC output Max connected continuous load: 40A* Transfer speed 10ms for narrow input range, 20ms for wide range Transfer voltage range 90-140V Transfer frequency range... -
Page 35: Dimensions
CombiMaster 120V Series – User and Installation Manual Dimensions Figure 8. Dimensions in inches [mm]... - Page 36 Customer Service Customer Service Customer Service T: +31 (0) 20 34 22 100 T: +1 800 307 6702, Option 1 T: +64 9 415 7261 Option 1 E: info@mastervolt.com E: orderentry@marinco.com E: enquiries@bepmarine.com Technical Support Technical Support Technical Support T: +31 (0) 20 34 22 100...
Need help?
Do you have a question about the CombiMaster 12V/2000W 100A and is the answer not in the manual?
Questions and answers
Hi i got a 12v 3000W mastervolt inverter i removed dip swich board and puting it back ther are 2 5 pin conector i dont know which one is it