Table of Contents
Advertisement
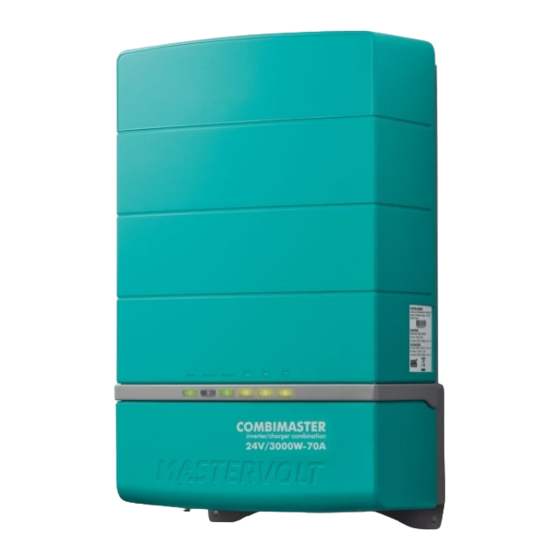
COMBIMASTER
12/2000-100, 12/3000-160, 24/2000-60, 24/3000-70,
12/3500-200, 24/3500-100, 24/4500-120, 48/5000-70
INVERTER CHARGER COMBINATION
USER AND INSTALLATION MANUAL
For the latest version of this manual, visit our website:
EN
Para descargar este manual en otros idiomas, visite nuestro sitio web:
ES
Pour télécharger ce manuel dans d'autres langues, consultez notre site Web :
FR
120V Series: 12/1500-60,
WITH AC–IN SUPPORT
www.mastervolt.com
Advertisement
Table of Contents

Related Manuals for Mastervolt COMBIMASTER 120V Series


Summary of Contents for Mastervolt COMBIMASTER 120V Series
- Page 1 WITH AC–IN SUPPORT USER AND INSTALLATION MANUAL For the latest version of this manual, visit our website: Para descargar este manual en otros idiomas, visite nuestro sitio web: Pour télécharger ce manuel dans d'autres langues, consultez notre site Web : www.mastervolt.com...
-
Page 2: Table Of Contents
CombiMaster 120V Series – User and Installation Manual TABLE OF CONTENTS 1 SAFETY INSTRUCTIONS ..........3 6 OPERATION ............... 34 General ........... 3 Switching on / charge only ..... 34 Warnings regarding the use of batteries .. 4 Status LEDs ........... 34 Location ........... -
Page 3: Safety Instructions
3. Do not expose the CombiMaster Inverter/Charger to rain, snow, spray, moisture, excessive pollution, aggressive environments, ammonia, salt or condensing circumstances. 4. Use of an attachment not recommended or sold by Mastervolt may result in a risk of fire, electric shock, or injury to persons. -
Page 4: Warnings Regarding The Use Of Batteries
CombiMaster 120V Series – User and Installation Manual Warnings regarding the use of batteries 1. WARNING – RISK OF EXPLOSIVE GASES i. WORKING IN VICINITY OF A LEAD-ACID BATTERY IS DANGEROUS. BATTERIES GENERATE EXPLOSIVE GASES DURING NORMAL BATTERY OPERATION. FOR... -
Page 5: Location
Such agreement will require the equipment manufacturer either to contract additional reliability testing of the Mastervolt parts and/or to commit to undertake such testing as a part of the manufacturing process. Furthermore, the manufacturer must agree to indemnify and not hold Mastervolt responsible... -
Page 6: General Information
Sale. Warranty The Mastervolt product warranty covers the CombiMaster 120V Series for the first two years after the purchase date, on the condition that the product is installed and used according to the instructions in this manual. Installation or use that do not comply with these instructions may result in under performance, damage or failure of the product and may void this warranty. -
Page 7: Product Description
CombiMaster 120V Series – User and Installation Manual 3 PRODUCT DESCRIPTION The CombiMaster Inverter/Charger is a battery charger, inverter and AC transfer system in one compact case. Overview of the connections 3.1.1 Models 1500W, 2000W, 3000W Front side with open connection compartment Bottom side Figure 2. -
Page 8: Models 3500W, 4500W, 5000W
CombiMaster 120V Series – User and Installation Manual 3.1.2 Models 3500W, 4500W, 5000W Front side with open connection compartment Bottom side Figure 3. Connections for models with product code: 35513500, 35523500, 35524500, 35545000. Neutral-ground bonding "On/Charge only"-switch AC input 10 5/16" Ground stud... - Page 9 CombiMaster 120V Series – User and Installation Manual DC power supply mode: During an installation • procedure, it may be desirable to test onboard systems before connecting a battery bank. To do this, start the CombiMaster Inverter/Charger with no load connected. Wait for one minute and then connect a low power DC load.
-
Page 10: Protection
CombiMaster 120V Series – User and Installation Manual Protection Overload or short circuit: while in the inverter mode, the CombiMaster Inverter/Charger will shut • down within 5 seconds of 200% overload or after 10 seconds 150%. Transfer switch overload: the transfer switch of the CombiMaster Inverter/Charger is protected •... -
Page 11: Installation
After unpacking, check the contents for possible damage. Do not use the product if it is damaged. If in doubt, contact your Mastervolt dealer. Check from the identification label (see section 2.3) whether the battery voltage is the same as the nominal output voltage of the CombiMaster Inverter/Charger (e.g. -
Page 12: Batteries
CombiMaster 120V Series – User and Installation Manual Batteries Model Recommended battery capacity 12V/1500W-60A 120−600 Ah 12V/2000W-100A 200−1000 Ah Minimum, based on Mastervolt Gel 12V/3000W-160A 320−1600 Ah batteries. If connecting batteries of a 12V/3500W-200A 400−2000 Ah different manufacturer, make sure 24V/2000W-60A 120−600 Ah... -
Page 13: Connection Examples
CombiMaster 120V Series – User and Installation Manual Connection examples These schematics illustrate the general placement of a standalone CombiMaster Inverter/Charger in a circuit. It is not meant to provide detailed wiring instructions for any particular electrical installation. For information on multi-unit configurations, see chapter 7. -
Page 14: Models 3500W, 4500W, 5000W
CombiMaster 120V Series – User and Installation Manual 4.4.2 Models 3500W, 4500W, 5000W Figure 5: Installation drawing for models with product code: 35513500, 35523500, 35524500, 35545000... -
Page 15: Wiring
CombiMaster 120V Series – User and Installation Manual Wiring WARNING The wire sizes stated in this manual are only guidelines. Fusing is based on the gauge and length of the cable, which in turn depend on the load connected to the CombiMaster Inverter/Charger. -
Page 16: Ac Wiring
CombiMaster 120V Series – User and Installation Manual 4.5.2 AC wiring WARNING The ground wire offers protection only if the case of the CombiMaster Inverter/Charger is connected to the safety ground. Connect the ground terminal (PE / GND) to the hull or the chassis of the boat or vehicle that this CombiMaster Inverter/Charger is equipped on. -
Page 17: Ac Safety Grounding
CombiMaster 120V Series – User and Installation Manual 4.5.3 AC safety grounding WARNING If installed in a head, galley, machinery space, or on a weather deck, Ground Fault Circuit Interrupters (GFCIs) of 30mA must be integrated in the AC input and AC output of the CombiMaster Inverter/Charger. -
Page 18: Network Wiring (Czone/Masterbus)
Use an RJ45 MasterBus cable (not included) and daisy chain the CombiMaster Inverter/Charger to the other MasterBus devices, forming a local data network. Points to consider: ˗ Connections between the devices are made by standard MasterBus cables. Mastervolt can supply these cables. ˗ Up to 63 MasterBus devices can be connected together. -
Page 19: Tools And Materials Needed
CombiMaster 120V Series – User and Installation Manual Tools and materials needed Make sure you have all the materials you need to install a CombiMaster Inverter/Charger: • For CZone setup, a tee connector. • For MasterBus setup, an RJ45 MasterBus cable. -
Page 20: Installation Step-By-Step
CombiMaster 120V Series – User and Installation Manual Installation step-by-step The drawings used in this section are based on the 3000W model. Where necessary, the difference is indicated. Step 1. Turn off the electrical power. Step 2. On a solid surface, mark the holes for the mounting bracket and secure the mounting bracket to the surface. - Page 21 CombiMaster 120V Series – User and Installation Manual Step 5. Connect the 5/16" grounding lug to the central grounding point. Step 6. Open the connection compartment by loosening the two screws at the bottom and then lifting the front cover plate.
- Page 22 CombiMaster 120V Series – User and Installation Manual Step 8. Integrate a fuse holder in the positive battery wire Models1500W, 2000W, 3000W: but do not place the fuse yet! Fit crimp-on ring terminals to the DC cables. Connect the DC cabling of the battery bank;...
-
Page 23: Accessories Connector (Dry Contacts)
CombiMaster 120V Series – User and Installation Manual Adding the CombiMaster Inverter/Charger to a CZone network 1 Disconnect the backbone at the closest backbone connection and add in a tee connector. 2 Reconnect the backbone connection with the new tee connector in place. -
Page 24: Remote Switch
CombiMaster 120V Series – User and Installation Manual 4.8.1 Remote switch By default, the upper two contacts (Remote) of the accessories connector are connected by a jumper to close the circuit. If desired, remove the jumper and use these contacts to connect a remote switch that mimics the main On/Charge only switch. -
Page 25: Settings
Adjustment of the settings of the CombiMaster Inverter/Charger can be made in two different ways: • By means of DIP switches. • From a laptop connected to the CombiMaster Inverter/Charger via a Mastervolt USB Interface. Some settings, like the AC IN Limit setting for example, can only be changed in this way. -
Page 26: Masterbus Configuration
CombiMaster 120V Series – User and Installation Manual MasterBus configuration MasterBus is a CAN based data network for communication between Mastervolt devices. When the CombiMaster Inverter/Charger is connected, open MasterAdjust on a Windows laptop or notebook connected to the MasterBus network via a Mastervolt USB interface. MasterAdjust software is available as free to download software on the Mastervolt website: www.mastervolt.com. - Page 27 CombiMaster 120V Series – User and Installation Manual • Cluster information for a parallel unit in single-phase Menu Description Cluster Cluster state the configuration state of the cluster (should be Activated) Cluster size the number of CombiMaster Inverter/Charger units in parallel...
-
Page 28: Alarms Tab
5.2.4 Configuration tab The configuration can be done in MasterAdjust, from a laptop or notebook connected to the CombiMaster Inverter/Charger via a Mastervolt USB Interface. See applicable user manuals for details. The following table lists the parameters as shown in MasterAdjust. - Page 29 CombiMaster 120V Series – User and Installation Manual Value Meaning Default Adjustable Range Device Menu language of this device English English, Nederlands, Language Deutsch, Français, Castellano, Italiano, Norsk, Svenska, Suomi, Dansk Name Name of this device. This name will be...
- Page 30 CombiMaster 120V Series – User and Installation Manual Value Meaning Default Adjustable Range Float Voltage Float voltage 13.25 12-15 Return to Bulk Delay time before the charger returns to 30 s 0-600sec Bulk after reaching the Return to Bulk voltage Return to Bulk Bulk return voltage.
-
Page 31: Events Tab - System Automation
CombiMaster 120V Series – User and Installation Manual 5.2.5 Events tab – System automation A MasterBus device can be programmed to initiate an action at another connected device. This is very helpful in automation of your system but is not required. In MasterBus this is done by means of event- based commands. -
Page 32: Czone Configuration
(.zcf). The CZone Configuration Tool can be downloaded from the CZone Portal. Adding the CombiMaster 120V Series to a CZone system configuration Precondition: This section assumes that a CZone system is already configured and the CZone Configuration Tool is open. - Page 33 CombiMaster 120V Series – User and Installation Manual 12. Check and adjust the AC settings. In Energy Save Mode the power consumption will be reduced when there is no load on AC OUT. Please note that small loads, such as the clock on a microwave oven, are most likely not to work in this mode.
-
Page 34: Operation
CombiMaster 120V Series – User and Installation Manual 6 OPERATION Switching on / charge only The "On/Charge only"-switch on the bottom of the CombiMaster Inverter/Charger has two positions: On: Inverter and charger on (I) • • Charge only: Charger on, inverter off (). -
Page 35: Remote Control
The 3-step+ charge system is also safe for all the connected equipment. WARNING The MLI charging voltages on this charger fit the Mastervolt Li-ion (MLI) batteries but do not necessarily fit other Li-ion batteries! Always follow the instructions provided by the battery manufacturer! -
Page 36: Temperature Compensated Charging
CombiMaster 120V Series – User and Installation Manual Temperature compensated charging By installing the battery temperature sensor (for Lead Acid batteries only), the charge voltages are automatically adapted for deviating temperatures. When the battery temperature is low, the charge voltage increases. -
Page 37: Maintenance
CombiMaster 120V Series – User and Installation Manual Maintenance No specific maintenance to the CombiMaster Inverter/Charger is required. Examine your electrical installation on a regular basis, at least once a year. Defects such as loose connections, damaged wiring etc. must be corrected immediately. -
Page 38: Parallel And Split-Phase Systems
CombiMaster 120V Series – User and Installation Manual 7 PARALLEL AND SPLIT-PHASE SYSTEMS General information WARNING The information in this chapter is intended for qualified personnel. The installation should be performed by a Certified Electrical Technician to ensure a safe and trouble-free installation. -
Page 39: Materials Needed
MasterBus cables between units* Communication cable* Current Sharing cable* Cable Strain Relief Bracket* * Mastervolt offers various cable kits that contain this item. See the Mastervolt website for details. Preparations Make sure that all power sources (AC and DC) are turned off. •... -
Page 40: Dc Wiring
CombiMaster 120V Series – User and Installation Manual DC wiring Notes: – DC wiring is the same for parallel and split-phase systems. – Use ONE battery bank whose capacity is suitable for the application. – Always use the same length cables! Be aware that to keep the drawings in this chapter clear and easy to read, the cable lengths have not been drawn in proportion to each other. -
Page 41: Ac Wiring
CombiMaster 120V Series – User and Installation Manual AC wiring CAUTION! The AC input and output for each CombiMaster Inverter/Charger must be protected with properly sized circuit breakers that switch off simultaneously L and Neutral. Note: In parallel configurations, always use cables of equal gauge and length! Different cable length in the AC wiring causes unequal power distribution through the CombiMaster Inverter/Charger. -
Page 42: Ac Wiring Of Single-Phase Parallel Units
CombiMaster 120V Series – User and Installation Manual 7.5.1 AC wiring of single-phase parallel units Connect the AC input L, PE and N wires to the AC IN screw terminals. Primary Replica 1 Replica 2 AC IN L (BLACK) PE (GREEN) -
Page 43: Ac Wiring Of Split-Phase Units (One Unit For Each Phase)
CombiMaster 120V Series – User and Installation Manual 7.5.2 AC wiring of split-phase units (one unit for each phase) • Connect the AC input L1, L2, N and PE of each unit in split-phase by means of a busbar. • An Equipment Leakage Circuit Interrupter (ELCI) must be installed with or in addition to the main (shore) power disconnect circuit breaker. - Page 44 CombiMaster 120V Series – User and Installation Manual • Connect the AC output L1, L2, N and PE of each unit in split-phase by means of a busbar. • The AC output of each unit must be protected by means of properly sized circuit breakers (85A max) that switch off simultaneously L1, L2 and Neutral.
-
Page 45: Ac Wiring Of Split-Phase (Two Parallel Units For Each Phase)
CombiMaster 120V Series – User and Installation Manual 7.5.3 AC wiring of split-phase (two parallel units for each phase) • Connect the AC input L1, N and PE of the Primary (L1) and Replica 1 (L1) unit in parallel by means of a busbar. -
Page 46: Network Wiring
CombiMaster 120V Series – User and Installation Manual • Connect the AC output L1, N and PE of the Primary (L1) and Replica 1 (L1) unit in parallel by means of a busbar. The cables length and wire gauge must be identical. -
Page 47: Network Wiring Of Single-Phase Parallel Units
CombiMaster 120V Series – User and Installation Manual 7.6.2 Network wiring of single-phase parallel units Primary Replica 1 Replica 2 MasterBus cables* ( GREEN Communication cables ( GRAY Current Sharing cables ( BLACK Figure 19: Three units in parallel – MasterBus network wiring * In case of a CZone network, connect drop cables instead of MasterBus cables. -
Page 48: Network Wiring Of Two Units In Split-Phase With Two Units In Parallel
CombiMaster 120V Series – User and Installation Manual 7.6.4 Network wiring of two units in split-phase with two units in parallel Primary (L1) Replica 1 (L1) Replica 2 (L2) Replica 3 (L2) MasterBus cables* ( GREEN Communication cables ( GRAY... -
Page 49: Dip Switches (For A Single-Phase Parallel Configuration In A Basic Masterbus System)
CombiMaster 120V Series – User and Installation Manual 7.7.1 DIP switches (for a single-phase parallel configuration in a basic MasterBus system) Step 1. Make sure that all power sources (AC and DC) are turned off. Step 2. Make sure the AC IN and AC OUT breakers are open. -
Page 50: Masteradjust
CombiMaster 120V Series – User and Installation Manual 7.7.2 MasterAdjust Step 1. Make sure that all power sources (AC and DC) are turned off. Step 2. Make sure the AC IN and AC OUT breakers are open. Step 3. Make sure the "On/Charge only"-switch position is "Charge only" () on all units. -
Page 51: Czone Configuration Tool
CombiMaster 120V Series – User and Installation Manual Step 18. Configure battery type settings on the configuration page. Although, battery settings must be configured for all units separately, they must be the same for each unit! Step 19. Switch all units off ("On/Charge only"-switch position is "Charge only" ()). - Page 52 CombiMaster 120V Series – User and Installation Manual Step 15. Enter the Number of devices (or Devices per Phase in case of a split phase configuration). In case of a split-phase configuration, this is the number of units per phase! Step 16.
-
Page 53: Breaking Down A Cluster
CombiMaster 120V Series – User and Installation Manual Breaking down a cluster If a unit has to be removed from an existing cluster, use one of the following 3 procedures. Using DIP switches: a) Make sure the AC IN and AC OUT breakers are open. -
Page 54: Troubleshooting
CombiMaster 120V Series – User and Installation Manual 8 TROUBLESHOOTING If you cannot solve a problem using the fault-finding table, contact your Mastervolt dealer. Make sure you have the part and serial number at hand. Malfunction Possible cause What to do... - Page 55 CombiMaster 120V Series – User and Installation Manual Malfunction Possible cause What to do Battery low causing Discharged battery Connect AC input to recharge battery CombiMaster Note: when charging an empty battery Inverter/Charger from a different power source, like an...
-
Page 56: Technical Data
CombiMaster 120V Series – User and Installation Manual 9 TECHNICAL DATA Specifications are subject to change without prior notice. Inverter specifications Model 12V/ 12V/ 12V/ 24V/ 24V/ 12V/ 24V/ 24V/ 48V/ 1500W- 2000W- 3000W- 2000W- 3000W- 3500W- 3500W- 4500W- 5000W-... -
Page 57: Charger Specifications
CombiMaster 120V Series – User and Installation Manual Model 12V/ 12V/ 12V/ 24V/ 24V/ 12V/ 24V/ 24V/ 48V/ 1500W- 2000W- 3000W- 2000W- 3000W- 3500W- 3500W- 4500W- 5000W- 100A 160A 200A 100A 120A Max. ripple on DC @ full load Nominal DC... - Page 58 CombiMaster 120V Series – User and Installation Manual Note: the following charge specifications are based on Mastervolt batteries. Specifications for a given chemistry of a different manufacturer may vary. If connecting batteries of a different manufacturer, make sure the manufacturer's recommendations are met. Individual adjustments are possible if in the configuration the battery type "User defined"...
-
Page 59: Transfer System Specifications
CombiMaster 120V Series – User and Installation Manual Transfer system specifications 12V/ 12V/ 12V/ 24V/ 24V/ 12V/ 24V/ 24V/ 48V/ Model 1500W- 2000W- 3000W- 2000W- 3000W- 3500W- 3500W- 4500W- 5000W- 100A 160A 200A 100A 120A Product code 35511500 35512000 35513000 35522000 35523000 35513500 35523500 35524500 35545000... -
Page 60: Miscellaneous
CombiMaster 120V Series – User and Installation Manual Miscellaneous Model All models Protection degree IP 23 vertical wall mounted, IP 21 horizontal tabletop mounted Safety class IEC protection class I Operating temperature -13°F to 140°F, derating above 104°F, shutdown above 140°F [-25°C to 60°C, derating above 40°C, shutdown above 60°C]... -
Page 61: Characteristics
CombiMaster 120V Series – User and Installation Manual Characteristics Temperature °F Figure 22. Output power vs temperature for models 1500W, 2000W and 3500W Temperature °F Figure 23. Output power vs temperature for models 3000W Temperature °F Figure 24. Output power vs temperature for models 4500W and 5000W... -
Page 62: Dimensions
CombiMaster 120V Series – User and Installation Manual Dimensions Model Product code h×w×d in inches [mm] weight in lb [kg] CombiMaster 12V/1500W-60A 120V 35511500 14.9 × 11.2 × 6.0 15 [7] [378 × 284 × 153] CombiMaster 12V/2000W-100A 120V 35512000... - Page 63 CombiMaster 120V Series – User and Installation Manual Figure 26. Dimensions in inches [mm] of models 2000W, 3000W strain relief for parallel stacking Figure 27. Dimensions in inches [mm] of models 3500W, 4500W, 5000W...
- Page 64 Technical Support T: +31 (0) 20 34 22 100 T: +1 262 293 0600 / 800 307 6702 T: +64 9 415 7261 E: ts.emea@OneASG.com E: tech.mastervolt@OneASG.com E: technical.apac@OneASG.com Location & Shipping Location & Shipping Location & Shipping Advanced Systems Group EMEA...
Need help?
Do you have a question about the COMBIMASTER 120V Series and is the answer not in the manual?
Questions and answers