
Related Manuals for Mastervolt PowerCombi 12V/1200W-50A 120V


Summary of Contents for Mastervolt PowerCombi 12V/1200W-50A 120V
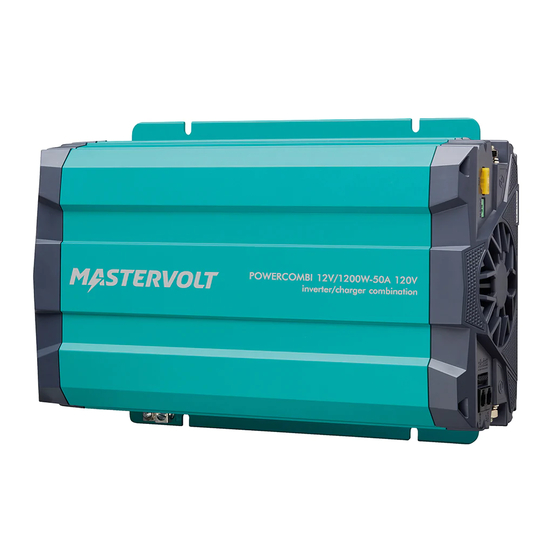
- Page 1 PowerCombi 12V/1200W 50A 120V, 12V/2000W 100A 120V PURE SINE WAVE INVERTER/CHARGER USER AND INSTALLATION MANUAL 10000015114/05...
-
Page 2: Table Of Contents
PowerCombi Inverter/Charger TABLE OF CONTENTS SAFETY INSTRUCTIONS SETTINGS General ......... 3 DIP switch setting ....... 16 Warnings regarding the use of MasterBus settings...... 17 batteries ........4 OPERATING INSTRUCTIONS Location ........5 General ........18 Connections ........5 Main switch ......... 18 Warning regarding life support Status LEDs ........ -
Page 3: Safety Instructions
Use of an attachment not recommended or sold by Mastervolt may result in a risk of fire, electric shock, or injury to persons. Except for making the electrical connections, the PowerCombi Inverter/Charger may not be opened. -
Page 4: Warnings Regarding The Use Of Batteries
PowerCombi Inverter/Charger Warnings regarding the use of batteries WARNING – RISK OF EXPLOSIVE GASES i. WORKING IN VICINITY OF A LEAD-ACID BATTERY IS DANGEROUS. BATTERIES GENERATE EXPLOSIVE GASES DURING NORMAL BATTERY OPERATION. FOR THIS REASON, IT IS OF UTMOST IMPORTANCE THAT EACH TIME BEFORE SERVICING THE POWERCOMBI INVERTER/CHARGER IN THE VICINITY OF THE BATTERY, YOU READ THIS MANUAL AND FOLLOW THE INSTRUCTIONS EXACTLY. -
Page 5: Location
Mastervolt parts and/or to commit to undertake such testing as a part of the manufacturing process. In addition the manufacturer must agree to indemnify and not hold Mastervolt responsible for any claims arising from the use of the Mastervolt parts in the life support equipment. -
Page 6: General Information Intended Use
& Conditions of Sale. Warranty Mastervolt assures the product warranty of the PowerCombi Inverter/Charger during two years after purchase, on the condition that the product is installed and used according to the instructions in this manual. Installation or use not according to these instructions may result in under performance, damage or failure of the product and may void this warranty. -
Page 7: Product Description
PowerCombi Inverter/Charger PRODUCT DESCRIPTION Dimensions Figure 2: Dimensions PowerCombi in mm [inch] Overview of AC side AC Output AC Input Chassis ground Main switch DIP switches Status LEDs See section 6.3. AC input breaker Figure 3: AC side – exterior... -
Page 8: Overview Of Dc Side
PowerCombi Inverter/Charger AC Output terminal (L/N) AC Input terminal (L/N) AC Input / Output ground terminal Figure 4: AC side – interior Overview of DC side DC input connector Auxiliary DC output Fuse (20A) Auxiliary DC output RJ11 Battery Temp. sensor port (optional, 41500700) Remote port (RJ11) Dry contacts;... -
Page 9: Remote Control
Mastervolt offers several possibilities for remote monitoring and control of the PowerCombi Inverter/Charger. See www.mastervolt.com for all available options. • PowerCombi Remote Control (77010700). • MasterBus PowerCombi Interface (77032900); enables configuration (of voltage levels for example) from a notebook/laptop which is obligatory if the installation comprises the Mastervolt MLI battery. -
Page 10: Installation Instructions
Inverter/Charger if it has received a sharp blow, been dropped, or otherwise damaged in any way. If in doubt, Contact your supplier or Mastervolt. Check from the identification label (see section 2.4) whether the battery voltage is the same as the nominal output voltage of the PowerCombi Inverter/Charger (e.g. -
Page 11: Wiring
PowerCombi Inverter/Charger Wiring WARNING! Make sure that all wiring is properly installed, in good condition and correctly sized to match the current ratings of the PowerCombi Inverter/Charger. The wire sizes stated in this manual are only guidelines. Always comply with all local rules and regulations. 4.4.1 AC Safety grounding The ground connection (item C in Figure 3) accepts CU/AL conductors from #14 to #2 AWG (2.5 to... -
Page 12: Auxiliary Dc Output Wiring
Do not use the chassis frame as the negative conductor. The positive battery cable must be fused and connected to the positive post of the battery bank. Use a fuse that matches the applied wire size. The fuse with fuse-holder is available from your local Mastervolt distributor. 4.4.4 Auxiliary DC output wiring The Auxiliary DC output can be used for charging a small second battery set like a starter battery. -
Page 13: Connection Example
PowerCombi Inverter/Charger We recommend as a minimum tool kit: • Socket wrench to fix the main DC cables (½” / 13mm). • ” / 10mm). Socket wrench to fix the Safety ground connection ( • Flat blade screw driver to fix the screw terminals of the AC wiring. •... - Page 14 PowerCombi Inverter/Charger Wall Mount 1. Use the screws to mount the Drip shield and the product on the wall. 2. Please make sure the height from the ground to product at least 70 cm (28”). The bulkhead size requires at least 4" (100mm) clearance each side of the inverter. 100mm [4 ] 100mm [4 ] Step 3.
-
Page 15: Powercombi Remote Panel (Optional)
PowerCombi Inverter/Charger Step 7. Optional: Attach the battery temperature sensor to the casing of the battery bank. Then plug the RJ11 temperature sensor cable into the Battery Temp. sensor port (item D in Figure 5). Step 8. Use a small screw driver to change DIP switch settings. See section 5.1. Step 9. -
Page 16: Settings
PowerCombi Inverter/Charger SETTINGS Adjustment of the settings of the PowerCombi Inverter/Charger can be made in three different ways: • By means of DIP switches. • From the PowerCombi Remote Panel, see the PowerCombi Remote Panel user manual. • From a laptop/notebook connected via the MasterBus PowerCombi Interface. CAUTION! Invalid settings of the PowerCombi Inverter/Charger can cause serious damage to your batteries and/or the connected load! Adjustment of settings must be carried out by... -
Page 17: Masterbus Settings
OFF (default) MasterBus settings MasterBus is a CAN based data network for communication between Mastervolt devices. When the PowerCombi Inverter/Charger is connected, open MasterAdjust on a Windows laptop or notebook connected to the MasterBus network. MasterAdjust software is available as free to download software on the Mastervolt website: www.mastervolt.com. -
Page 18: Operating Instructions
PowerCombi Inverter/Charger OPERATING INSTRUCTIONS General WARNING! The PowerCombi Inverter/Charger must be properly assembled in accordance with the Installation Instructions before it is used. Main switch The main switch on the PowerCombi Inverter/Charger has three positions: On (▬), Off () and Remote (═). - Page 19 PowerCombi Inverter/Charger Charger State indicator Led status Meaning Inverter mode Float Mode Green Absorption Mode Orange Bulk mode Orange, slow blinking Alarm indicator Led status Meaning What to do? Power OK Normal operation Green Internal temp. 1. Improve ventilation. Make sure Green, slow blinking too high ventilation openings in the unit are...
-
Page 20: 3-Step Charge Process
PowerCombi Inverter/Charger Grid over 1. Turn off the load and make sure current there is no short circuit at AC OUT. Orange, fast blinking protection 2. Check the AC input current limit (DIP switches S4, S5 and S6). 3. Reset the unit manually with the main switch. -
Page 21: Protections
PowerCombi Inverter/Charger : Figure 9 Temperature compensation using battery temperature sensor Protections • Overload or short circuit; while in the inverter mode, the PowerCombi Inverter/Charger will shut down automatically if the overload or short circuit lasts over 3 seconds. The PowerCombi Inverter/Charger will automatically restart. -
Page 22: Maintenance
PowerCombi Inverter/Charger CAUTION! The unit is not protected against serious over voltage on the AC input. Make sure AC inut is within the range of 90 - 135V Maintenance No specific maintenance to the PowerCombi Inverter/Charger is required. Examine your electrical installation on a regular basis, at least once a year. -
Page 23: Troubleshooting
For a detailed description of the the status LEDs, please refer to section 6.3 on page 18. If you cannot solve a problem using the fault finding tables, contact your supplier or Mastervolt. Make sure you have the part and serial number at hand. - Page 24 PowerCombi Inverter/Charger Malfunction Possible cause What to do charged Current to load is too Reduce load taken from the batteries. high Battery temperature too Use the battery temperature sensor. Defective or old battery Check battery and replace if necessary. Wrong setting of the Check settings (see chapter 5).
-
Page 25: Technical Data
PowerCombi Inverter/Charger TECHNICAL DATA Specifications PowerCombi PowerCombi 12V/1200W-50A 12V/2000W-100A Product code 36211200 36212000 Specification Inverter Nom. battery voltage 12 V Input voltage Range 10.5-16.5 V Input Over-Voltage Protection 15.5 V (1 sec. delay) Input Over-Voltage Recovery 15.0 V (5 sec. delay) Input Under-Voltage Protection 10.0 V (3 sec. - Page 26 PowerCombi Inverter/Charger PowerCombi PowerCombi 12V/1200W-50A 12V/2000W-100A Battery Temp. compensation 14mV per °F [-25 mV per °C] (if battery temperature sensor is applied) Battery Control (3-stage Battery Battery type Chargers); DIP switch adjustable Flooded Custom Stage default Bulk 14.40V 14.40V 14.40V 14.40V* Absorption 14.25V...
-
Page 27: De-Rating Curve
PowerCombi Inverter/Charger De-rating Curve : Figure 10 PowerCombi 1200W (left) and PowerCombi 2000W (right) De-rating Curve... - Page 28 N86 W12500 Westbrook Crossing 42 Apollo Drive, Rosedale 1105 AN AMSTERDAM Menomonee Falls, WISCONSIN 53051 AUCKLAND 0632 The Netherlands New Zealand +31 (0)20 34 22 100 +1 800 307 6702, Option 1 + 64 9 415 7261 info@mastervolt.com technical@marinco.com enquiries@bepmarine.com...
Need help?
Do you have a question about the PowerCombi 12V/1200W-50A 120V and is the answer not in the manual?
Questions and answers