Table of Contents
Advertisement
Quick Links
Advertisement
Table of Contents

Related Manuals for PR Lighting ARC LED 1054


Summary of Contents for PR Lighting ARC LED 1054
- Page 1 ARC LED 1054 PR-8808 The user manual contains important information about the safe installation and use of a projector. Please read and follow these instructions carefully and keep the manual in a safe place for future reference. PR LIGHTING LTD.
-
Page 2: Table Of Contents
INDEX 1. SAFETY AND WARNINGS 2. INSTUCTIONS CLEANING AND MAINTENANCE ● TROUBLESHOOTING ● 3. APPEARANCE 4. INSTALLATION RIGGING ● POWER CONNECTIONS ● DMX CONTROL CONNECTION ● DMX TERMINATOR ● 5. SETUP AND CONFIGURATION FRONT PANEL OPERATION ● DMX START ADDRESS ●... -
Page 3: Safety And Warnings
1. SAFETY AND WARNINGS NOTE Before a projector’s installation, power-on, operation and maintenance, please carefully read the safety information hereinafter! The following safety signs are used in the user manual. Warning User Electrical Protective Flames High Goggles Manual shock Gloves Temperature When unpacking , check if there is transportation damage before using the projector. -
Page 4: Cleaning And Maintenance
cord supplied through the safety cord holes for safety support. Before any installation, maintenance and cleaning work, please ensure the projector is disconnected from ● power mains. After running for 5minutes at constant temperature environment, the temperature of the housing of the ●... -
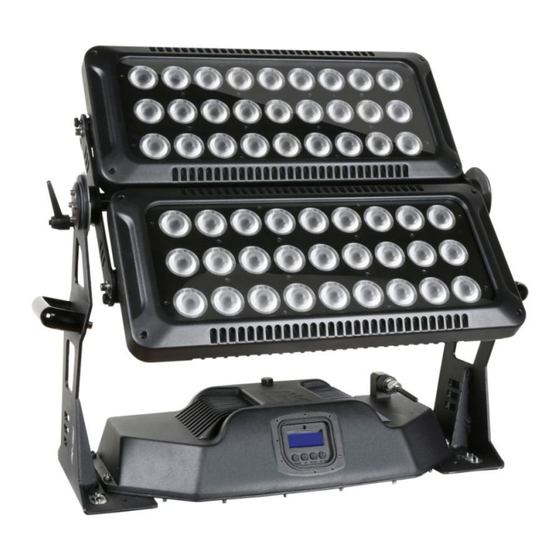
Page 5: Appearance
3. APPEARANCE Name Remarks Head Power Supply Arm Support Adjustable knob Transparent waterproof panel for harsh environment and Front Panel installation underwater or dusty area Wireless Antenna Optical Sensor Lamp Driver Board cable Power Cord XLR cable in Small XLR cable out Small 5 / 20... -
Page 6: Installation
4. INSTALLATION RIGGING ● Clamp Clamp Safety Cord Warning: please run the safety cord through the arm for safety. Handle Adjusting Knob Before moving the unit, lock the adjusting knob. Take 2 clamps and the safety cord out from the package and mount 2 clamps on the underside of fixture with 2 retainers attached to each clamp. -
Page 7: Dmx Control Connection
accordance with the standards concerned. If any questions about the electrical installation, do not continue but consult a qualified electrician. ● DMX CONTROL CONNECTION: ● Connection between controller and projector and between one projector and another must be made with a twin-screened cable, with each wire having at least a 0.5mm in diameter. -
Page 8: Setup And Configuration
5. SETUP AND CONFIGURATION FRONT PANEL OPERATION ● Projector configuration can be set conveniently via push button and LCD display. Launch the projector and press button ENTER for more than 2 seconds to unlock the panel, the LCD will show the function menu of the projector, each main menu has its submenus and each submenu has a specific function. -
Page 9: Stand-Alone Mode
STAND-ALONE MODE ● Operate the projector without connecting with a controller, enable the master mode through the operation panel, the projector will run in Stand-Alone mode automatically. DMX address can be set at any number within 512. MASTER/SLAVE MODE ● Many projectors can run synchronously in the Master/Slave mode by linking them with each other. -
Page 10: Operation Menu
6. OPERATION MENU level menu level menu level menu level menu DMX Address Standard : 001 – 507 Extended : 001 – 502 Standard 6 Default:Standard 6 DMX Channel Mode Extended 11 XLR Only Wireless Only DMX Mode Default:XLR Firs XLR First Wireless First Wireless To XLR... - Page 11 Green Blue Test Mode White RGBW DMX Mode User Memory Preset Memory Dimmer 000 - 255 Strobe 000 - 255 Operation Mode 000 - 255 User Progra Edit Green 000 - 255 (ET01~ET16) Blue 000 - 255 000 - 255 White Keep Time 000 –...
-
Page 12: Dmx Protocol
7. DMX PROTOCOL Standard Extended Function Description mode mode 000-255 Dimmer Linear Dimming 0%-100% Color Temperature 001-255 Color Temperature linear adjustment 000-016 017-024 White(10000K) 025-032 White(7200K) 033-040 White(5600K) 041-048 White(3200K) 049-056 Cyan 057-064 Yellow 065-072 Magenta Macro 073-080 081-088 Green 089-096 Blue 097-104... - Page 13 240-255 Preset memory 16 001-015 User Memory1 016-031 User Memory2 032-047 User Memory3 048-063 User Memory4 064-079 User Memory5 080-095 User Memory6 096-111 User Memory7 112-127 User Memory User Memory8 128-143 User Memory9 144-159 User Memory10 160-175 User Memory11 176-191 User Memory12 192-207 User Memory13...
-
Page 14: Led Indication
8. LED INDICATION DMX signal OK Red LED indication No DMX signal Linked with a transmitter Not linked with any transmitter Blue LED indication Being linked with a transmitter or losing link with it or without Flash any wireless signal Note: Because Red and Blue LED indications are in one, it becomes purple if both are on, 9. - Page 15 OTHER FUNCTIONS: LED lamp board temperature and fixture time available in the menus DMX channel mode and settings displayed LCD and invertible display Display backlight automatically shut off after delay Parameters like operation mode and etc. transmitted under synchronization Environment brightness and timer controllable HOUSING: High tensile cast Aluminum alloy , IP65 NET WEIGHT: 30Kg OPERATION TEMPERATURE:...
-
Page 16: Circuit Diagram And Pcb Connections
10. CIRCUIT DIAGRAM AND PCB CONNECTIONS CIRCUIT DIAGRAM ● 16 / 20... -
Page 17: Pcb Connections
PCB CONNECTIONS ● PR-8806-MASTERBOARD :P/N:220020250 ● Optical sensor Power supply Signal input PWM signal Wireless board Thermal switch PR-8806-DRIVER BOARD : P/N:220020269 ● LED Diver for Group 1 LED Diver for Group 2 LED Diver for Group 3 Power supply PWM signal 2 PWM signal 1 PR-8806-LED LAMP BOARD :... -
Page 18: Component Order Codes
11.COMPONENT ORDER CODES NAME CODE NO. REMARKS 25°LENS(OPTIONAL ) PR-8806-LENS 071100100 15°LENS(OPTIONAL ) PR-8806-LENS 071100101 11°LENS(OPTIONAL ) PR-8806-LENS 071100102 PR-8806 Lens holder 016083422 used for 11°,15°,25° lens LED PAR LIGHT SIGNAL CABLE 120080030B 1.7M ,MALE LED PAR LIGHT SIGNAL CABLE 120080031B 1.7M. - Page 19 19 / 20...
- Page 20 1582 Xingye Avenue, Nancun Panyu Guangzhou, 511442 China TEL: +86-20-3995 2888 PR lighting will try its best to offer accurate and overall information about a product’s technical data. Any changes won’t be notified if necessary. Patented Products. Counterfeiting Will be Prosecuted! P/N: 320020389...
Need help?
Do you have a question about the ARC LED 1054 and is the answer not in the manual?
Questions and answers