
Subscribe to Our Youtube Channel
Related Manuals for Fimap BMg Series


Summary of Contents for Fimap BMg Series
- Page 1 PROFESSIONAL SCRUBBING MACHINES USE AND MAINTENANCE MANUAL ORIGINAL INSTRUCTION DOC. 10082488 - Ver. AB - 02-2019...
-
Page 3: Table Of Contents
CONTENTS CONTENTS ...........................3 GENERAL DESCRIPTION ......................5 GENERAL SAFETY REGULATIONS ........................5 SYMBOLS USED IN THE MANUAL ........................5 MAIN MACHINE COMPONENTS ..........................6 PURPOSE AND CONTENT OF THE MANUAL ....................... 7 TARGET GROUP ..............................7 PRESERVATION OF THE USER ..........................7 ON CONSIGNMENT OF THE MACHINE ........................ - Page 4 ECO MODE (PLUS VERSION) ..........................27 MANUAL MODE (PRO VERSION) ........................28 MANUAL MODE (PLUS VERSION) ........................28 PROGRAM ZONE MODE (PRO VERSION) ......................29 PROGRAM ZONE MODE (PLUS VERSION) ......................29 INTELLIGENT DRYING MODE (PLUS VERSIONS) ..................... 29 REVERSE FUNCTION ............................30 REAR VIDEO CAMERA (PLUS VERSION, OPTIONAL) ..................
-
Page 5: General Description
GENERAL DESCRIPTION The descriptions contained in this document are not binding. The company therefore reserves the right to make any modifications at any time to elements, details, or accessory supply, as considered necessary for reasons of improvement or manufacturing/commercial requirements. The reproduction, even partial, of the text and drawings contained in this document is prohibited by law. -
Page 6: Main Machine Components
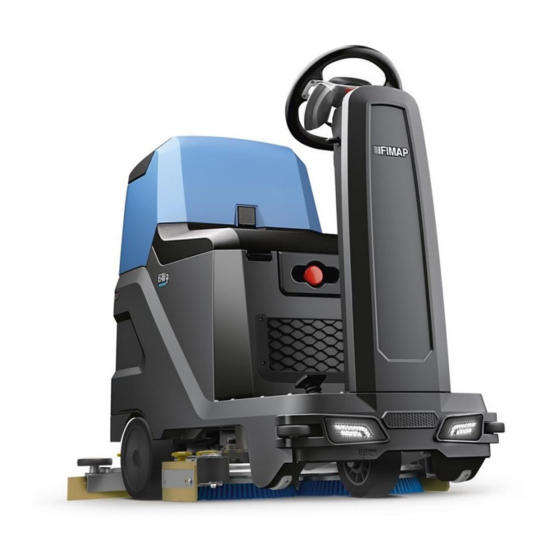
MAIN MACHINE COMPONENTS The machine's main components are the following: 20. Horn button. 21. Optional automatic detergent dispenser kit control button (FSS 1. Front working lights. version) or optional detergent solution recycling kit (FLR version). 2. Blinking light. 22. Optional spray gun kit control button. 3. -
Page 7: Purpose And Content Of The Manual
The operators and qualified technicians must carefully read the instructions in this manual before carrying out any operations on the machine. If in doubt about the correct interpretation of instructions, contact your nearest FIMAP Customer Service Centre to obtain the necessary clarifications. -
Page 8: Serial Number Plate
The serial number plate contains the following: Design by FIMAP Verona (Italy) Assembled in FIMAP Verona (Italy) Via Invalidi del Lavoro, 1 S. Maria di Zevio - Verona - Italy 1. -
Page 9: Technical Data
TECHNICAL DATA Remarks: (1) The working capacity is calculated with a forward speed of 2,8 km/h. (2) The electrical properties refer to the information which appears on the motor data plate. (3) Refers to the gradeability with the transfer working program active, both of the machine's tanks empty, the batteries on board and the operator in the driver's seat. -
Page 10: Symbols Used On The Machine
SYMBOLS USED ON THE MACHINE Filter body position symbol: Applied to the front of the machine to indicate the position of the solution tank filter. Extra pressure activation/deactivation lever position symbol: Applied to the central brush head's extra pressure activation/deactivation lever. Reverse gear activation/deactivation lever position symbol: Applied to the reverse gear activation/deactivation lever. - Page 11 Visible daily maintenance label: Applied near the steering column, indicating to tighten the machine's water tap after every work cycle and to clean the filters and the squeegee. Warning label during battery charging: Located near the steering column, listing the warnings to perform when recharging the batteries. Water system filter maintenance label: Applied near the water system filter to remind the user to clean it after each work cycle.
-
Page 12: Control Screen (Pro Versions)
DRIVE INFORMATION FIELD The information field is divided into: 1. Fimap Fleet Management active symbol. 2. Fimap Solution Saver active or Fimap Long Range active symbol. 3. Working headlights active symbol. 4. Hour meter. 5. Battery charge level. 6. Error symbol. -
Page 13: Handling The Packaged Machine
HANDLING THE PACKAGED MACHINE 1385mm The machine's overall weight including packaging is 205Kg. 750mm N.B.: it is recommended that all the packaging components be kept for any future 1460mm machine transportation. DANGER: Move the packaged product with handling equipment that complies with legal requirements regarding size and mass of the packaging. -
Page 14: Preparation Of Machine
N.B.: the ramp gradient must not be such as to cause damage to the machine as it goes up. 8. Once the machine is on the means of transport, set the main switch to “0” by turning the key (1) to the left (Fig. 5). Remove the key from the instrument panel. -
Page 15: Inserting The Batteries In The Machine
For battery maintenance and recharging, respect the instructions provided by the battery manufacturer. When the batteries reach the end of their service life, they must be disconnected by a FIMAP assistance centre technician or by a specialised and properly trained worker, and must be subsequently removed from the battery compartment using suitable lifting devices. -
Page 16: Filling The Solution Tank
CAUTION: the following operations must be carried out by qualified personnel. An incorrect connection of the connector may cause problems with machine functioning. N.B.: Carefully read the use and maintenance instructions of the battery charger that is used for charging, this document is delivered along with the machine. -
Page 17: Detergent Solution
DETERGENT SOLUTION For the versions without automatic detergent dosing system, after filling the solution tank with clean water, add the liquid detergent to the tank in the concentration and manner indicated on the detergent manufacturer's label. To prevent the formation of an excessive amount of foam that could damage the vacuum motor, use the minimum percentage of detergent required. -
Page 18: Inserting Water System Filter
INSERTING WATER SYSTEM FILTER Before using the machine for the first time the water system filter needs to be reset, for shipping reasons the filter cartridge and the cap have been removed. To insert the filter cartridge in the water system filter body proceed as follows: 1. -
Page 19: Assembling The Abrasive Pad (Orbital Version)
ASSEMBLING THE ABRASIVE PAD (ORBITAL VERSION) To fit the abrasive pad on the brush head body, proceed as follows: 1. Take the machine to the maintenance area. 2. Make sure the machine has been secured (see the section titled “SECURING THE MACHINE”). -
Page 20: Starting Work (Pro Version)
13. Make sure the vacuum tube (7) is correctly connected to the sleeve in the squeegee body. If this is not the case, connect it (Fig.9). 14. Remove the recovery tank cover (8) (Fig.10). 15. Remove the floating guard (9) by turning it clockwise (Fig.11). Make sure the filter-float (10) is correctly connected and is clean, if not, clean it (see “CLEANING THE RECOVERY TANK FILTERS”). -
Page 21: Scrubbing With Drying
SCRUBBING WITH DRYING To perform a scrubbing and drying program, proceed as follows: 1. Make all the checks listed in “PREPARING TO WORK”. 2. Sit on the driver’s seat. 3. Move the main switch (1) to position "I" and turn the key a quarter turn clockwise (Fig.1). 4. -
Page 22: Starting Work (Plus Versions)
5. Press the drive pedal (4) to begin moving the machine (Fig. 3). ATTENTION: The drying without scrubbing operation should only be carried out if the device was used beforehand to carry out a scrubbing without drying operation. STARTING WORK (PLUS VERSIONS) The machine can be used in the following work modes: •... -
Page 23: Ds Selector (Drive Select)
DS SELECTOR (DRIVE SELECT) Using the DS selector it is possible to select one of the following working programs: A. Transfer: movement of the machine without working. B. Scrubbing only : using only the brushes in the brush head. C. Drying: using the squeegee only. D. -
Page 24: Scrubbing Without Drying
5. Eco-Mode button. N.B.: if the Eco-Mode button (8) is pressed in the transfer mode the scrubbing with drying program is started in economic mode. 6. Menu button. 7. Rear view camera button. N.B.: when the rear view camera button (7) is pressed (if present), the camera located at the back of the machine will be activated, see “REAR VIDEO CAMERA (PLUS VERSION, OPTIONAL)”... -
Page 25: Drying
8. Zone button N.B.: if it is necessary to change the program being used while working, press the Zone button (8) (see “PROGRAM ZONE MODE (PLUS VERSION)”). 9. Text indicator. N.B.: in the text indicator (9) it is possible to see that the zone program has been selected or whether you are in transport mode if there is the word “DRIVE”. -
Page 26: Scrubbing With Drying
N.B.: If it is necessary to turn on the low beam headlights while working, see “WORKING HEADLIGHTS (PLUS VERSION)”. ATTENTION: The drying without scrubbing operation should only be carried out if the device was used beforehand to carry out a scrubbing without drying operation. ATTENTION: never switch off the machine with the squeegee in contact with the floor SCRUBBING WITH DRYING By selecting the "SCRUBBING WITH DRYING”... -
Page 27: Additional Functions
N.B.: If it is necessary to turn on the low beam headlights while working, see “WORKING HEADLIGHTS (PLUS VERSION)”. ATTENTION: never switch off the machine while the squeegee and/or brush head is in contact with the floor ADDITIONAL FUNCTIONS ECO MODE (PRO VERSION) At the centre of the control panel is the ECO MODE button;... -
Page 28: Manual Mode (Pro Version)
MANUAL MODE (PRO VERSION) To change from the "ECO MODE" or from the "PROGRAM ZONE" mode to the "MANUAL MODE", simply change one of the following parameters: 1. Quantity of detergent solution present in the machine's water system (see “ADJUSTING THE DETERGENT SOLUTION FLOW (PRO VERSION)”). -
Page 29: Program Zone Mode (Pro Version)
PROGRAM ZONE MODE (PRO VERSION) The "PROGRAM ZONE" modes foresees the use of three functions already stored in the machine's internal memory, levels: • Forward speed • Adjustment of the detergent solution flow • Suction motor efficiency are pre-set and have been created on the basis of the type of environment where you want to work. To select an area program, just press the relative button (1) on the control panel (Fig.1). -
Page 30: Reverse Function
REVERSE FUNCTION This machine is equipped with electronic traction control. To reverse, proceed as follows: 1. Engage the “REVERSE GEAR ACTIVATION/DEACTIVATION” lever (1) underneath the steering wheel (Fig.1). 2. Press the drive pedal (2) (Fig.2); in this manner the machine will begin to move in reverse. CAUTION: the reverse speed is lower than the forward speed to comply with current health and safety standards. -
Page 31: Extra Brush Head Brush Pressure (Plus Version)
N.B.: To deactivate the function, move the lever (3) again, the symbol (4) in the control display panel will disappear. EXTRA BRUSH HEAD BRUSH PRESSURE (PLUS VERSION) This machine is capable of increasing the pressure exerted upon the brushes during the work cycle. This can be done in the following manner: 1. -
Page 32: Detergent Solution Recycling System (Flr Versions, Plus Versions)
N.B.: in order to activate this urgent technical assistance request the machine needs to be equipped with the FIMAP FLEET MANAGEMENT kit. N.B.: in order to send a technical assistance request the machine needs to be on and should be in a zone with... -
Page 33: Automatic Detergent Dosing System (Fss Pro Versions)
AUTOMATIC DETERGENT DOSING SYSTEM (FSS PRO VERSIONS) Upon request, the machine can be fitted with a system that measures out the detergent separately from the water in the solution tank. To activate it, with the machine running, press the FSS SYSTEM ACTIVATION/DEACTIVATION button (1) (Fig.1). -
Page 34: Adjusting The Forward Movement Speed (Pro Version)
ADJUSTING THE FORWARD MOVEMENT SPEED (PRO VERSION) To adjust the flow of detergent solution during work, proceed as follows: 1. During the first few metres, check that the forward speed is adequate to the grip conditions. 2. If the forward speed does not suit you, you can control it using the “+” and “-” buttons (1) on the control panel (Fig.1). -
Page 35: Battery Disconnect Button
N.B.: to return to the working screen press on any point of the screen, except the edges of the display or else wait three seconds without touching anything. 3. On the tutorial screen (Fig.3) select the topics you want to study: •... -
Page 36: Spray Gun Kit (Optional)
5. Insert the vacuum brush (7) into the extension tube (6) (Fig.5). 0000.00 100% Back 6. Connect the vacuum tube (8) to the extension tube (6) (Fig.6). 7. Remove the vacuum tube (10) from the sleeve (9) in the squeegee body (Fig.7). 8. -
Page 37: Overflow Device
N.B.: As soon as the button (6) is pressed, the symbol (7) for the spray gun kit will appear on the control display (PRO version Fig.4 PLUS version Fig.5). 0000.00 100% 0000.00 100% Back N.B.: With the spray gun kit active, the traction and work functions are deactivated. CAUTION: When using the optional tank cleaning kit, you are advised to always wear goggles to avoid any risk of serious injury to your eyes. -
Page 38: Routine Maintenance
7. Once the routine maintenance operations have been completed, take the machine to the area designated for storage. ATTENTION: Park the machine in an enclosed place, on a flat surface, and at a safe distance from any objects that could either damage it or be damaged due to contact with the machine itself. -
Page 39: Cleaning The Brush Head Brushes (Single-Brush Version, Pro Versions)
6. Thoroughly clean the squeegee body front rubber blade (6) with a jet of water, and then with a damp cloth (Fig.6). 7. Thoroughly clean the vacuum nozzle with a jet of water, and then with a damp cloth. 8. Proceed in the opposite order to reassemble all the parts. CLEANING THE BRUSH HEAD BRUSHES (SINGLE-BRUSH VERSION, PRO VERSIONS) Careful cleaning of the brush guarantees better cleaning of the floor as well as a longer brush head gearmotor lifespan. -
Page 40: Cleaning The Brush Head Brushes (Dual-Brush Version)
CLEANING THE BRUSH HEAD BRUSHES (DUAL-BRUSH VERSION) Careful cleaning of the brush guarantees better cleaning of the floor as well as a longer brush head gearmotor lifespan. To clean the brush, proceed as follows: 1. Move to the left side of the machine and remove the left splash guard (1), first remember to completely unscrew the knobs (2) present on the brush head body (Fig.1). -
Page 41: Emptying The Solution Tank
6. Rinse the inside of the recovery tank with a jet of water. If necessary, use a spatula to remove any sludge that may have accumulated at the bottom of the tank. WARNING: Be sure to also clean the electro-mechanical float (6) inside the tank (Fig.5). 7. -
Page 42: Cleaning The Detergent Tank (Fss Versions)
CLEANING THE DETERGENT TANK (FSS VERSIONS) Clean the detergent tank before a long period of non-use of the machine: 1. Press the recovery tank release lever (1) and turn the recovery tank into the maintenance position (Fig. 1). 2. Disconnect the male insert (2) from the female insert (3) on the cap of the detergent canister (Fig.2). N.B.: before pulling on the male insert, push the lever on the female insert. -
Page 43: Replacing The Brush Head Splash Guard
REPLACING THE BRUSH HEAD SPLASH GUARD If the splash guard rubber blades of the brush head side casing are damaged they cannot work properly, namely they cannot convey the dirty detergent solution towards the squeegee, therefore the splash guard rubber blades need to be checked. To replace the brush head splash guards, proceed as follows: 1. -
Page 44: Adjusting Brush Head Body Side Splash Guards
N.B.: the right-hand and left-hand knobs must be rotated the same number of times, so that the squeegee is parallel to the floor when it is working. N.B.: Check for proper adjustment by looking at the instrument (8) positioned on the squeegee body (Fig.5). Adjusting the tilt of the squeegee body: •... -
Page 45: Choosing And Using Brushes
CHOOSING AND USING BRUSHES POLYPROPYLENE BRUSH (PPL) Used on all types of floors. Good resistance to wear and tear, and hot water (no greater than 50°C.). PPL is non-hygroscopic and therefore retains its characteristics even when working in wet conditions. ABRASIVE BRUSH The bristles of this type of brush are charged with highly aggressive abrasives. -
Page 46: Troubleshooting
Make sure that the batteries are correctly connected to DOES NOT START each other and that the battery connector is connected to Contact a Fimap assistance centre or qualified technician. the electrical system connector. If the battery charge level is critical, perform a complete Check the charge level of the batteries. - Page 47 PROBLEM POSSIBLE CAUSE SOLUTION Check that a low foam detergent has been used. If The detergent being used is not suitable. necessary, add a small quantity of antifoam liquid to the EXCESSIVE FOAM recovery tank. PRODUCTION The floor is not very dirty. Dilute the detergent more.
-
Page 48: Ec Declaration Of Conformity
EC DECLARATION OF CONFORMITY FIMAP S.p.A. Via Invalidi del Lavoro, 1 37059 Santa Maria di Zevio (VR) declares under its sole responsibility that the products SCRUBBING MACHINES - mod. BMg 56 Pro CB - BMg 65 Pro CB - BMg 50 Orbital Pro CB... - Page 49 The undersigned manufacturer: FIMAP S.p.A. Via Invalidi del Lavoro, 1 37059 Santa Maria di Zevio (VR) declares under its sole responsibility that the products SCRUBBING MACHINES - mod. BMg 56 Pro - BMg 65 Pro - BMg 50 Orbital Pro...
- Page 52 FIMAP S.p.A. - Via Invalidi del Lavoro, 1 - 37059 S. Maria di Zevio - Verona - Italy Tel. +39 045 6060411 – Fax +39 045 6060417 – E-mail: fimap@fimap.com www.fimap.com...
Need help?
Do you have a question about the BMg Series and is the answer not in the manual?
Questions and answers