Table of Contents
Advertisement
Advertisement
Table of Contents

Subscribe to Our Youtube Channel
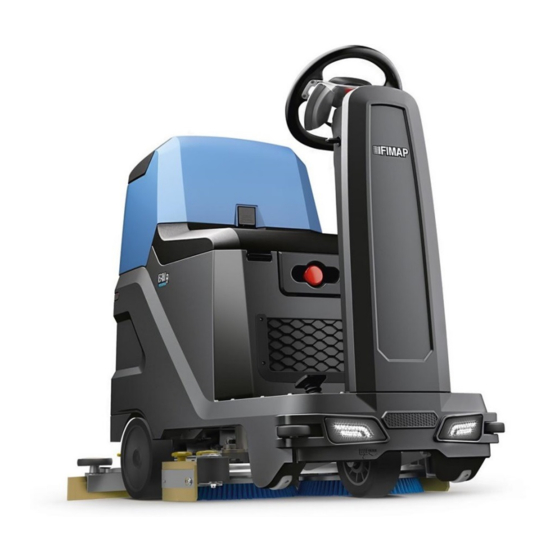
Related Manuals for Fimap BMG Series


Summary of Contents for Fimap BMG Series
- Page 1 SERVICE MANUAL Version: AA Date: May 9, 2019 Document Number:10088000...
-
Page 2: Table Of Contents
Contents Product Introduction 1 General Info 1.1 Service Manual Purpose ......... 1.2 Configurations . - Page 3 5 65 Washing Unit 5.1 Location on machine ......... . . 65 5.2 Main Components .
-
Page 4: Product Introduction
Part I Product Introduction... -
Page 5: General Info
Chapter 1 General Info Service Manual Purpose Good customer service requires in-depth training and well-structured training materials. This service manual has been created to assist certified service technicians through instructions and reference guide. It is recommended to read it thoroughly before servicing your machine. 1.1.1 Other reference manuals DOCUMENT... -
Page 6: The Serial Number Plate
50 BTO PLUS - Advanced version with integrated touch screen display. The brushdeck of the BTO version is equipped with a central oscillating rectangular pad consisting of a base on which a motor is fixed connected to an eccentric orbital flange, which in turn transmits the motion to a plate on which the pad is applied. 1.2.1 Products related to this Manual 109070... -
Page 7: General Safety Instructions
General Safety Instructions Always wear the appropriate personal protective equipment at each intervention. To avoid short-circuits when working in the vicinity of electrical components: avoid the use of non-insulated tools; do not place or allow metallic objects to fall upon the electrically powered components; remove rings, watches and/or clothing with metallic parts that might come into contact with the electrically powered compo- nents. -
Page 8: Technical Data
Technical Data BMG Technical Data TECHNICAL DESCRIPTION 50 BTO Working capacity, up to 5400/58125 5400/58125 5400/58125 Total Power 3050 3250 3250 Disc Brushes Nr - mm/in 2-460/18.1 2-460/18.1 (Number - Ø External) Nr - mm-mm 1-508-355 (Number - Length - Width) Nr - in-in 1-20-14 Brush Motor... - Page 9 BMG Weights and Pressures TECHNICAL DESCRIPTION 50 BTO Machine Weight kg/lb 450/992 460/1003 460/1003 (empty and without batteries) Maximum weight of the battery box (recommended) kg/lb 120/200 120/200 120/200 Machine Weight in transport kg/lb 865/1907 875/1929 875/1929 (machine + batteries) Machine Weight in work conditions kg/lb 1055/2326...
- Page 10 1.7.1 BMG 56...
- Page 11 1.7.2 BMG 65...
- Page 12 1.7.3 BMG 50 BTO...
-
Page 13: Diagnostic And Necessary Service Tools
Diagnostic and necessary Service Tools In addition to a full set of metric and standard tools, the following items are required in order to successfully and quickly perform troubleshooting and repair. ˆ Digital voltmeter ˆ DC Current Probe with Full Scale 40-200A ˆ... -
Page 14: Main Components
1.11 Main Components Recovery Tank Vacuum Group Brush Deck Control Solution Tank Brush Deck Squeegee Control Front Carter Group Squeegee Electrical Harness Braking Group Display Card Water Group Traction and Frame Group... -
Page 15: Pdi
1.12 1.12.1 Before delivering the machine, carry out all the operations described below: ˆ Install the batteries and perform a complete recharge cycle (check the setting of the machine and of the battery charger) ˆ Install the clean water filter ˆ... -
Page 16: Anomalies Resolution Guide
Part II Anomalies Resolution Guide... -
Page 17: Trouble-Shooting
Chapter 2 Trouble-shooting Electrical system: what to do if. . . The machine doesn’t switch on The emergency button is pressed Release the emergency button. The key is in position 0 Rotate the key in position I. The key switch is not properly connected Restore the proper connections. - Page 18 The batteries don’t work properly The batteries are not properly connected Connect the loop wire and the output cables cor- rectly. The batteries are discharged Perform a complete charge cycle. Battery terminal are oxidized Disconnect the batteries, clean the batteries ter- minals and reconnect properly the batteries, pro- tecting the connections with grease.
-
Page 19: Mechanical Scrubbing System: What To Do If
Mechanical scrubbing system: what to do if. . . The machine doesn’t clean well The machine is switched off Switch on the machine. The machine doesn’t switch on Refer to the proper section (see section at page The machine is in ”Standard” mode Set the machine in Extrapressure mode. -
Page 20: Drying System: What To Do If
The Brushdeck doesn’t move The display shows an alarm message Check what alarm message is shown and solve the related issue by following the proper instruc- tions (see section 3.4.1 at page 34) The brush deck is lowered but it doesn’t touch Check the settings of the actuator (see section 4.7.2... - Page 21 The vacuum motor doesn’t work properly The vacuum motor is Off Activate the brush motor with the Drying mode. The vacuum motor is not powered properly Check the power connections of the vacuum mo- tor and the correct functioning of the Main card and, if necessary, replace it (see section at page...
-
Page 22: Frame And Traction System: What To Do If
Frame and traction system: what to do if. . . The traction motor doesn’t work properly The machine is switched off Switch on the machine. The machine doesn’t switch on Check the proper section (see section at page 17) The display shows an alarm message Check what alarm message is shown and solve the related issue by following the proper instruc- tions... -
Page 23: Solution Delivery System: What To Do If
Solution delivery system: what to do if. . . The delivered solution is not correct or not enough The machine is switched off Switch on the machine. The machine doesn’t switch on Refer to the proper section (see section at page The solution tank is empty Fill up the solution tank. -
Page 24: Functional Groups
Part III Functional Groups... -
Page 25: Electrical System
Chapter 3 Electrical System Description A main card runs all the functions of the machine, traction, braking, washing and drying. The main card receive as input, all the information from the micro switches and all the electronic devices of the machine. These signals are translated from the main card to run correctly the scrubber dryer and to prevent any safety problem to the operator. -
Page 26: Location Of Electrical Components
Location of Electrical Components... -
Page 27: List Of Components
List of Components 1 Emergency button 34 Electrobrake 3 Main Control Card 35 Traction Pedal 9 Max Pressure microswitch 38 Battery charger 12 Key switch 40 Rear Camera 13 Blinking Light 41 FFM card 14 Touchscreen Display 42 GSM-GPS Aerial 17 Extrapressure Switch 43 RFID Card 18 Horn button... - Page 28 3.3.1 Main Card The Main Card is the heart of the machine and, depending of the input information, (see section at page 27) decides how to use the devices of the machine during normal work. On the table here below, is possible to identify the input/output signals of the card.
- Page 29 Key OUT / Charger Pink Display (Rx) Yellow Receiving Displ/Blink/Chemical switch (Tx) Brown Negative Key IN / Charger Orange Display (Tx) Green Transmitting Display / SprayGun/Wand activation Switch Gray Positive / FSS switch /Recycle (PRO) Electrobrake Violet Negative Electrobrake Micro Orange Positive FFM (Rx)
- Page 30 Water Pump Black Positive Gun Pump Blue Common Positive Water Pump Negative Gun Pump Orange Negative Anticollision (Vcc) Brown Positive Anticollision (In) Yellow Input Anticollision (trigger) Green Anticollision (Gnd) Black Negative Horn Yellow Negative Position Lights Yellow Negative Recovery Recycle Solenoid Valve Pink Negative Backward Light...
- Page 31 Power Contacts Traction Motor Vacuum Motor Brush Motor Main Fuse Battery Positive Battery Negative 3.3.2 Emergency button The machine is equipped with an emergency button near the seat , aimed at the protection (see section at page 27) of the operator in case of sudden critical conditions. A press of the button switches off the power to the Main card and the machine stops immediately.
- Page 32 3.3.12 Traction Encoder The Encoder is located inside the traction motor and transfers information on the speed of the machine to the Main card. 3.3.13 Electrobrake The Electrobrake is assembled on the traction motor. With the machine off it is always (see section at page 27) activated, is unlocked only when the machine is running and pedal pressed.
- Page 33 3.3.19 Batteries The power supply is 24V with two batteries 12V each, in series. Below is the list of available batteries. Number Model Type Voltage [V] Capacity [Ah] 12 TP 110 12 MFP 105 The function board transforms the voltage value of the batteries into percentage. This value is then used for operation as a percentage of charge with respect to the maximum capacity.
-
Page 34: Alarms Table
Alarms Table 3.4.1 General Alarms Id Alarm Meaning Solution AL 1 EEPROM failure Detected an Error in the internal memory of the card. Turn off General and on again. If the error persists, replace the card. AL 2 Key-off failure Return on the key signal. - Page 35 3.4.2 Function Alarms Id Alarm Meaning Solution The temperature of the functions power mosfets exceeds 90 ° C. AL 41 Overtemperature Function Switch off the machine, wait for the cooling and then switch on again. AL 42 Powerstage failure Verify the machine model setting, turn it off and on again. If the Function problem persists, replace the main card.
- Page 36 3.4.3 Function Alarms Id Alarm Meaning Solution AL 60 Brush Actuator Only with external limit switches, if the actuator does not come Function timeout into position within a preset time (disabled for this machine). AL 61 Brush Actuator Overcurrent of the Central brushdeck Actuator. Function Ammeter AL 62...
- Page 37 3.4.4 Traction Alarms Id Alarm Meaning Solution The temperature of the traction power mosfets exceeds 90 ° C. AL 80 Overtemperature Traction Switch off the machine, wait for the cooling and then switch on again. AL 81 Powerstage failure Turn it off and on again. If the problem persists, replace the main Traction card.
-
Page 38: Adjustments
Adjustments 3.5.1 Microswitches Check functionality and conditions of the microswitches. Check that with microswitch pressed, remains about 0.5 mm clearance between the lever and the body of the microswitch. Make sure the lever of the micro is working properly. Otherwise, proceed as follows: ˆ... - Page 39 3.5.2 Battery Charger (CB) The battery charger is mounted on the recovery tank behind the operator seat. At the start of the charging cycle, the charger indicates the selected charging algorithm by the LED flashing. A Proper Charging cycle follows the below phases order. Charging cycle Phase Description...
- Page 40 Error Codes of Charger The charger have an alarm system through successive flashes of the yellow LED. Error code Flash Description Battery not connected or reverse polarity or output short circuit. Verify the battery connection. Alarm time-out: damaged battery or battery capacity is too high The alarm is reset disconnecting the main supply.
-
Page 41: Programming
Programming 3.6.1 BMG PRO The Display allows the access to basic settings with free access and to the parameter list protected by Password (3222). The structure of the menu can be shown in the following image. The menu structure can be schematically summarized in the following image. Turn on the machine and access the menus by following the icons in the diagram. - Page 42 3.6.2 Buttons Overview Function of the buttons in Programming Mode SCROLL UP (Scroll up) SCROLL DOWN (Scroll down) SCROLL UP (Increase the Value) SCROLL DOWN (Decrease the Value) ENTER (Confirm/Exit) 3.6.3 How to access the Menu To entry the Menu proceed as follows: ˆ...
- Page 43 3.6.5 Use of the Monitor Mode Function The Check / Monitor function allows to check - The battery status - The motors absorption The motors absorption can be viewed while the machine is in working condition. To view the values, following the instruction: ˆ...
- Page 44 3.6.6 BMG PLUS The Display allows the access to basic settings with free access and to the parameter list protected by Password (3222). The structure of the menu can be shown in the following image. Turn on the machine and access the menus by following the icons in the diagram...
- Page 45 3.6.7 Parameters Parameters Menu MENU’ DESCRIPTION GENERAL SETTINGS Access to the general parameters (main, battery, hourmeter, accessibility, setting). BRUSHES MOTOR Access to the parameters of the brushdeck function. PUMPS Access to the parameters of the water pump and chemical pump function. VACUUM MOTOR Access to the parameters of the vacuum function.
- Page 46 General Battery Parameters Parameter Default Description General - Battery Gel60 Battery Type (Pb60; Gel60; Pure Lead; Pb80; Gel80; Battery Type Custom). General - Battery Battery status refresh rate. Delay Time #sec General - Battery The charge level necessary to reset the hourmeter. Reset Level #% General - Battery Charge threshold beyond which the Brush Motor is in-...
- Page 47 General Hourmeter Parameters Parameter Default Description General - Hourmeter Available hourmeters (Key; Tr; Br; Vac). Partial Hourmeter display General - Hourmeter Reset of the single hourmeters (No; Key; Tr; Br; Vac; Reset Partial Hourmeter All). General Access Parameters Parameter Default Description General - Access Mode 3222...
- Page 48 General Setting Parameters Parameter Default Description General - Config Plus Machine Model; (PRO; PLUS). Model General - Config 2Brush Machine Version (2BRUSH; BRUSH; ORBITAL). Base version General - Config No Logo Model; NO=OFF; YES=ON No Logo Model General - Config Work Light enable;...
- Page 49 Brushes Parameters Parameter Default Description Brush - Brush Motor Brush Motor Rated current; with T Nom manages the Nominal Current # Amp. amperometric protection (alarm + stop brush motor). Brush - Brush Motor Brush Motor Rated Timer; with I Nom manages the Overload Time # sec.
- Page 50 Water Pump Parameters Parameter Default Description Pump - Water Solenoid Valve activation Delay. EV Switch-On Delay # sec. Pump - Water Solenoid Valve deactivation Delay. EV Switch-Off Delay # sec. Pump - Water Water Pump activation delay when the traction pedal Pump Sw-On Delay # sec.
- Page 51 Vacuum Parameters Parameter Default Description Vacuum - Vac.Motor Vacuum Motor Rated current; with T Nom manages Nominal Current # Amp. the amperometric protection (alarm + stop brush mo- tor). Vacuum - Vac.Motor Vacuum Motor Rated Timer; with I Nom manages the Overload Time # sec.
- Page 52 Actuators Parameters Parameter Default Description Actuator - Brushes Max working time of the brushdeck Actuator. Timeout # sec. Actuator - Brushes 10.0 Brushdeck Actuator Rated current; with T Nom man- Overload Level # Amp. ages the amperometric protection (alarm + stop Actu- ator).
- Page 53 Traction Parameters Parameter Default Description Traction - Speed Sets In Transfer Mode, Time to reach the max speed. Acceleration Ramp 1 - # sec. Traction - Speed Sets In Working Mode, Time to reach the max speed. Acceleration Ramp 2 - # sec.
-
Page 54: Maintenance And Checks
Parametro Default Descrizione Traction - Speed Ref (0=”0-5”; 1=”0-15”) Pedal type setup. Signal Range Traction - Speed Ref 10.0 Minimum voltage of the released potentiometer. Signal Min Position # V Traction - Speed Ref 15.0 Max voltage of the active potentiometer. Signal Max Position # V Traction - Speed Ref Potentiometer dead band... - Page 55 3.7.3 Checking the acid batteries TEST OF DENSITY OF ELECTROLYTE 1. Do not add water 2. Using the electrolyte, rinse the density meter at least 3 times before taking a sample 3. Fill the densimeter so that the oscillating part of it is completely supported by the liquid 4.
- Page 56 OPEN CIRCUIT VOLTAGE TEST For a correct verification by voltage measurement the batteries must remain unused (ie not be charged or used) for at least 6 hours, it is preferable however that the hours are 24. 1. Disconnect all loads from the battery 2.
-
Page 57: 56 Washing Unit
Chapter 4 56 Washing Unit Location on machine The washing unit is located under the machine body in a central position. The washing unit control is assembled above it Main Components Brush Gearmotor Bumper Wheel Brush coupling Spring Brush Water Hose Water Distributor Brush Deck Body Brush coupling Flange... -
Page 58: Lubrication Points
Max Pressure Microswitch Microswitch activation Rod Brush Deck Arm compression Spring Upper Lifting Arm Lower Right Lifting Arm Left Lifting Arm Lifting Arm Bushings Brush Deck lifting Pin Guide Brushdeck Actuator Brush Deck compensating Spring Brush Deck lifting Pin Lubrication Points For lubrication use standard grease. -
Page 59: Operating Mode
Operating mode WASHING Operator Seat Action Result Microsw. Sitting Closed Washing Enabled Brushdeck Actuator goes down (+24V to M4) Forward pedal pressed Brush Motor ON after 1,5 seconds (+24V to M2) Solution Pump ON if water level is different than 0 (+24V to Pa) Solenoid Valve ON if water level is different than 0 (+24V to J11-13 to J11-5) -
Page 60: Related Electrical Circuit
Related electrical circuit 4.6.1 BMG 56... - Page 61 Functionality Check - 56 Disc Brush Deck Conventions: ˆ + : Positive voltage of the battery. ˆ : Negative voltage of the battery. ˆ The emergency button is not pressed, the key contact is closed and the charger is not connected to the mains.
-
Page 62: Adjustments
Pressure Control Microswitch The pressure control microswitch is mounted on a bracket. It intervenes if the motors have a too low absorption to prevent the scrubdeck actuator from continuing to push. If the pin falls below its limit, the micro opens and stops the actuator. -
Page 63: Disassembly
Disassembly 4.8.1 Brush Flange Remove the brush. Insert the Allen key and unscrew it in the opposite direction of the working brush. Then proceed with the removal of the flange 4.8.2 56 Brush Deck Remove the brush, close the water, lower the brushdeck and turn the machine Off. - Page 64 Disconnect the actuator connector and remove the batteries. Then remove the seegers and the upper pin of the actuator (B). Then remove the seegers and the lower pin of the actuator (C) and remove it.
-
Page 65: 65 Washing Unit
Chapter 5 65 Washing Unit Location on machine The washing unit is located under the machine body in a central position. The washing unit control is assembled above it. Main Components Right Brush Gearmotor Right Splashguard Rubber Right Splashguard Body Right Brush uncoupling Pin Adjustment Bushing Brush Deck Body... -
Page 66: Lubrication Points
Max Pressure Microswitch Microswitch activation Rod Upper Lifting Arm Lower Right Lifting Arm Brush Deck Arm compression Spring Brush Deck Left Lifting Arm Brush Deck Lifting Arm Lifting Arm Bushings Brush Deck lifting Pin Guide Brushdeck Actuator Brush Deck compensating Spring Brush Deck lifting Pin Lubrication Points For lubrication use standard grease. -
Page 67: Operating Mode
Operating mode WASHING Operator Seat Action Result Microsw. Sitting Closed Washing Enabled Brushdeck Actuator goes down (+24V to M4) Forward pedal pressed Brush Motors ON after 1,5 seconds (+24V to M2a-M2) Solution Pump ON if water level is different than 0 (+24V to Pa) Solenoid Valve ON if water level is different than 0 (+24V to J11-13 to J11-5) -
Page 68: Related Electrical Circuit
Related electrical circuit 5.6.1 BMG 65... - Page 69 Functionality Check - 65 Disc Brush Deck Conventions: ˆ + : Positive voltage of the battery. ˆ : Negative voltage of the battery. ˆ The emergency button is not pressed, the key contact is closed and the charger is not connected to the mains.
-
Page 70: Adjustments
Adjustments 5.7.1 65 Brush Deck The scrub deck is tilted in the transverse direction and should be adjusted longitudinally inclined to the machine so that the brushes have a distance of about 3-5 mm from the floor, larger on the front than on the rear side. This allows the brush to evenly lean to the ground and perform its function properly. -
Page 71: Disassembly
5.7.3 65 Brush Deck Actuator (see section 4.7.2 at page 62) Disassembly 5.8.1 Brush Flange Remove the splash guards by unscrewing the wing nuts and re- move the brush. Press flange stop rod (A) to lock the flange. With the rod low- ered, insert the Allen key (B) and unscrew it in the opposite direction of the working brush. - Page 72 5.8.3 Brush Deck Actuator (see section 4.8.3 at page 63)
-
Page 73: 50 Bto Washing Unit
Chapter 6 50 BTO Washing Unit Location on machine The orbital unit is located under the machine body in a central position. The orbital unit control is assembled above it Main Components Right Bumping wheel Brush deck upper Body Brush Motor Brush deck lower Body Left Bumping wheel Antivibration... -
Page 74: Lubrication Points
Pressure Microswitch 1 Max Pressure Microswitch 2 Microswitch activation Rod Max Pressure Microswitch 3 Upper Lifting Arm Lower Right Lifting Arm Brush Deck Left Lifting Arm Lifting Arm Lifting Arm Bushings Brush Deck lifting Pin Guide Brushdeck Actuator Brush Deck compensating Spring Brush Deck lifting Pin Lubrication Points For lubrication use standard grease. -
Page 75: Operating Mode
Operating mode WASHING Operator Seat Action Result Microsw. Sitting Closed Washing Enabled Brushdeck Actuator goes down (+24V to M4) Forward pedal pressed Pressure Lev. J12(2) J12(3) J12(5) * = Not available on BMG PRO Brush Motors ON after 1,5 seconds (+24V to M2) Solution Pump ON if water level is different than 0 (+24V to Pa) Solenoid Valve ON if water level is different than... -
Page 76: Related Electrical Circuit
Related electrical circuit 6.6.1 BMG 50 BTO... - Page 77 Functionality Check - 50 BTO Brush Deck Conventions: ˆ + : Positive voltage of the battery. ˆ : Negative voltage of the battery. ˆ The emergency button is not pressed, the key contact is closed and the charger is not connected to the mains.
-
Page 78: Adjustments
Pressure Control Microswitch The pressure control microswitch is mounted on a bracket. It intervenes if the motors have a too low absorption to prevent the scrubdeck actuator from continuing to push. If the pin falls below its limit, the micro opens and stops the actuator. - Page 79 Lift the front of the machine with a suitable lifting system. At this point remove the deck from the left side (D). 6.8.2 Brush Deck Actuator (see section 4.8.3 at page 63)
-
Page 80: Vacuum Unit
Chapter 7 Vacuum Unit Location on machine The vacuum unit is located in central rear position. -
Page 81: Main Components
Main Components Vacuum Cover Suction tray conveyor Suction tray Blinking Light Rear view camera (PLUS) Floater Protection Floater Recovery tank Recovery tank support Rod Vacuum motor hood Vacuum motor Vacuum motor Carter Drain Hose Tank Hinges Squeegee Vacuum Hose Bumping wheel Squeegee rear coupling Wheel height adjustment knobs Actuator... -
Page 82: Lubrication Points
Lubrication Points For lubrication use standard grease. ˆ Lifting Lever ˆ Bushings and Pins Work requirements The Vacuum unit only works if the following conditions are met: 1. The batteries are not discharged. 2. The operator is seated on the machine so as to press the seat safety switch (1). -
Page 83: Operating Mode
Operating mode VACUUM Operator Seat Action Result Microsw. Sitting Closed Vacuum Enabled Squeegee Actuator goes down (+24V to M5) Forward pedal pressed Vacuum motor ON (+24V to M3) Sitting Closed Backward function enabled Squeegee Actuator rises (-24V to M5). during work Sitting Closed Traction Pedal not pressed... -
Page 84: Related Electrical Circuit
Related electrical circuit... - Page 85 Functionality Check - Vacuum Unit Conventions: ˆ + : Positive voltage of the battery. ˆ : Negative voltage of the battery. ˆ The emergency button is not pressed, the key contact is closed and the charger is not connected to the mains.
-
Page 86: Adjustments
Floater microswitch (FLR) The Floater microswitch by means of the lever, indicates when the water level is at critical level of overflow or empty in the case of recycling system (optional). Flashing light The flashing light always active when the machine is on, has the function of facilitating its visibility. Adjustments 7.7.1 Squeegee... - Page 87 Loosen the locknut (C) and unscrew the knob completely (D). Remove the rear support. Unscrew the nut and release the pressure spring (E). Remove the seeger to remove the pin and remove the front support. 7.8.2 Squeegee Actuator Lower the squeegee and turn off the machine. Remove the batteries and the battery tray.
-
Page 88: Frame And Traction Unit
Chapter 8 Frame and Traction Unit Location on machine The frame and traction unit is located under the machine body. Main Components Backward switch Key Switch Horn Steering Chain Front Wheel Max Pressure Switch Handle Joint Horn Relay Battery Tray Rear Wheel Horn Button Wand activation switch (optional) -
Page 89: Work Requirements
Work requirements The traction unit only works if the following conditions are met: 1. The batteries are not discharged. 2. The operator is seated on the machine so as to press the seat safety switch (1). 3. The machine is on (2). 4. -
Page 90: Related Electrical Circuit
Related electrical circuit... - Page 91 Functionality Check - Traction Unit Conventions: ˆ + : Positive voltage of the battery. ˆ : Negative voltage of the battery. ˆ The emergency button is not pressed, the key contact is closed and the charger is not connected to the mains.
-
Page 92: Adjustments
Batteries The batteries must have a voltage of 24V. Two 12V monoblock elements can be installed (see section 3.3.19 at page Adjustments 8.6.1 Steering Chain Remove the front carter. Loosen the 2 lower screws (A). Loosen the lock nuts of the upper headless screws (B) and adjust the distance from the steering column until a medium tension of the chain is obtained, which must not have any slack. - Page 93 Slide out the display and remove the 4 screws on the back. Open the display and remove connectors (B,C). 8.7.2 Front Wheel Raise the machine with a hydraulic actuator (A). Unscrew the screws also on the other side. If necessary, use an instrument (B) to push the pin (C) out of the seat.
- Page 94 Release the gearmotor wiring and disconnect the two connectors (E). Remove the left wheel and the lower part of the relative bearing support (F). Unscrew the four screws (G) that fix the gearmotor to the ma- chine frame, extract the left axle shaft and remove the gearmo- tor.
-
Page 95: Water Unit
Chapter 9 Water Unit Location on machine The Water unit is located under the machine body in central position. Main Components Solution Tank Chemical dosing Cap Water fill Cap Water Pump Water Valve Knob Water Filter Pump group Connector Solenoid Water Valve... -
Page 96: Work Requirements
Work requirements The Water unit only works if the following conditions are met: 1. The batteries are not discharged. 2. The operator is seated on the machine so as to press the seat safety switch (1). 3. The machine is on (2). 4. - Page 97 RECYCLE SYSTEM Operator Seat Action Result Microsw. Sitting Closed Recycled button enabled Recycle Pump ON (+24v ref to j7-2/j7-4). Solution tank reserve floater enabled Recovery tank reserve floater disabled Forward pedal pressed Sitting Closed Recovery tank reserve floater Recycle Pump OFF (+0V ref to J7-1/J7-3). enabled Sitting Closed...
-
Page 98: Related Electrical Circuit
Related electrical circuit... - Page 99 Functionality Check - Water Unit Conventions: ˆ + : Positive voltage of the battery. ˆ : Negative voltage of the battery. ˆ The emergency button is not pressed, the key contact is closed and the charger is not connected to the mains.
-
Page 100: Consumable And Recommended Spare Parts
Chapter 10 Consumable and Recommended Spare Parts 10.1 Consumable 10.1.1 Washing Unit BMG 56 Description Width Bristle Bristle Color 436232 BRUSH PPL 0,3 560 mm 0,3 mm Light Blue 22 in 0,3 in 436233 BRUSH PPL 0,6 560 mm 0,6 mm White 22 in 0,023 in... - Page 101 BMG 50 BTO Description Measures 443711 WHITE PAD 508 x 355 mm 20 x 14 in 442661 GREEN PAD 508 x 355 mm 20 x 14 in 442005 RED PAD 508 x 355 mm 20 x 14 in 443712 BROWN PAD 508 x 355 mm 20 x 14 in 442662...
-
Page 102: Recommended Spare Parts
10.2 Recommended Spare Parts The following table refers to the Recommended Spare Parts, and reports the amount suggested by the number of purchased machines. Machines Parts 10.2.1 Electrical System Description Plus 436144 EMERGENCY BUTTON 449177 MAIN CARD 7CFX2010 228373 MEMBRANE DASHBOARD BMG PRO 228368 TOUCH SCREEN DASHBOARD BMG PLUS 228372... - Page 103 10.2.3 Vacuum Unit Description 222453 VACUUM MOTOR 24V 450W 2ST 225686 VACUUM MOTOR 36V 650W 3ST (OPTIONAL) 446963 VACUUM HOSE D=35 L=650 449128 DRAIN HOSE D=38 L=1534 W/CAP 448860 INTAKE MANIFOLD 412363 VACUUM AIR FILTER 227204 RECYCLE FILTER (OPTIONAL) 228377 RECYCLE FLOATER SWITCH (OPTIONAL) 10.2.4 Cleaning Solution Supply Unit...
- Page 104 Fimap S.p.A. Service Manual BMG Fimap S.p.A. Via Invalidi del Lavoro, 1 - 37050 S.Maria di Zevio Verona - ITALY Tel. +39 045 6060411 - Fax +39 045 6060417 Edizione: May 9, 2019...
Need help?
Do you have a question about the BMG Series and is the answer not in the manual?
Questions and answers