
Subscribe to Our Youtube Channel
Related Manuals for Fimap GL Pro


Summary of Contents for Fimap GL Pro
- Page 1 GL Pro PROFESSIONAL SCRUBBING MACHINES USE AND MAINTENANCE MANUAL ORIGINAL INSTRUCTION DOC. 10095239 - Ver. AA - 02-2020...
-
Page 3: Table Of Contents
CONTENTS CONTENTS ......................3 LOCATION OF THE MAIN MACHINE COMPONENTS .........5 GENERAL DESCRIPTION ..................5 GENERAL SAFETY REGULATIONS ..................5 DEFINITION OF LEVELS OF WARNING ...................5 SYMBOLS USED IN THE MANUAL ...................6 PURPOSE AND CONTENT OF THE MANUAL .................6 TARGET GROUP ........................6 PRESERVATION OF THE USER ....................7 ON CONSIGNMENT OF THE MACHINE ...................7 INTRODUCTORY COMMENT ....................7 IDENTIFICATION DATA ......................7... - Page 4 INSERTING WATER SYSTEM FILTER ..................14 FILLING THE SOLUTION TANK ....................15 DETERGENT SOLUTION ......................15 ASSEMBLING THE BRUSH HEAD BRUSH ................15 PREPARING TO WORK ..................16 STARTING WORK ....................17 HOUR METER ..........................17 BATTERY CHARGE LEVEL INDICATOR .................17 OVERFLOW DEVICE .......................17 WORKING PROGRAMS ..................18 SCRUBBING WITH DRYING....................18 SCRUBBING WITHOUT DRYING ....................18 DRYING WITHOUT SCRUBBING ....................18...
-
Page 5: Location Of The Main Machine Components
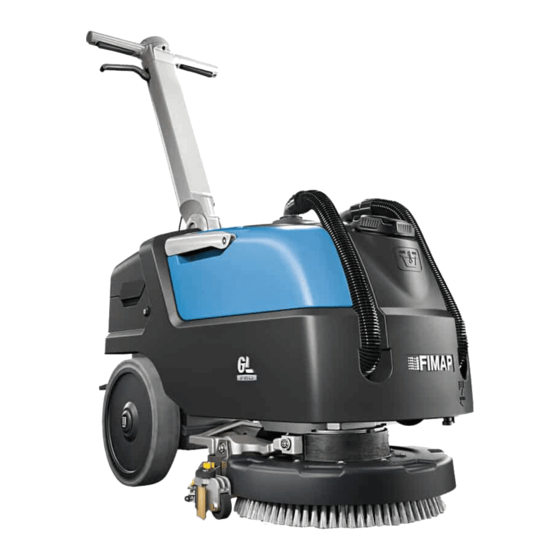
LOCATION OF THE MAIN MACHINE COMPONENTS The machine's main components are the following: 1. Solution tank cap. 2. Solution tank. 3. Detergent solution filter. 4. Brush head body. 5. Solution tank dumping system. 6. Detergent solution tap. 7. Squeegee body. 8. -
Page 6: Symbols Used In The Manual
The operators and qualified technicians must carefully read the instructions in this manual before carrying out any operations on the machine. If in doubt about the correct interpretation of instructions, contact your nearest FIMAP Customer Service Centre to obtain the necessary clarifications. -
Page 7: Preservation Of The User
TECHNICAL DESCRIPTION The GL Pro is a floor scrubbing machine that, together with the mechanical action of a brush with the addition of the chemical action of a water-detergent solution, is able to clean a wide range of floors and types of dirt, using its forward movement to collect the removed dirt and the detergent solution not absorbed by the floor. -
Page 8: Technical Data
TECHNICAL DATA GENERAL MACHINE DATA DESCRIPTION GL Pro [KMS] Nominal input power [IEC 60335-2-72; IEC 62885-9] Solution tank capacity [IEC 62885-9] Solution tank volume Recovery tank capacity [IEC 62885-9] Recovery tank volume Minimum inversion corridor [IEC 62885-9] Machine dimensions during work (length x height x width) -
Page 9: Scrubbing System Performance
SCRUBBING SYSTEM PERFORMANCE DESCRIPTION GL Pro [KMS] Working width [IEC 62885-9] Nominal power of brush motor/s [IEC 62885-9] Total width of brushes [IEC 62885-9] 1x355 Maximum free brush rotations Maximum force of the brush head on the floor Maximum pressure exerted by the brush head on the floor... -
Page 10: Control Panel
Battery gas emissions warning label: Used on the back of the machine. The label indicates that while the battery is charging, highly flammable hydrogen vapours could escape. The label indicates that before performing maintenance on the machine, disconnect battery power supply cable from the machine's main cable. -
Page 11: Preparation Of Machine
PREPARATION OF MACHINE HANDLING THE PACKAGED MACHINE The machine's overall weight including packaging is 65Kg. The external dimensions of the package are: width 58cm; length 88cm and height 76cm. N.B.: it is recommended that all the packaging components be kept for any future machine transportation. DANGER: Move the packaged product with handling equipment that complies with legal requirements regarding size and mass of the packaging. -
Page 12: How To Move The Machine
HOW TO MOVE THE MACHINE To transport the machine safely, proceed as follows: DANGER: before starting any task, make sure the current regulations concerning the safe transport of dangerous substances are scrupulously observed. 1. Check to make sure that the solution tank and the recovery tank are empty. If this is not the case, empty them (see the sections titled “EMPTYING THE SOLUTION TANK”... -
Page 13: Connecting The Batteries To The Machine's Electrical System
The batteries must be charged prior to first use, and whenever they no longer provide sufficient power to perform the desired work. ATTENTION: The control board and the battery charger, if present on-board, are set for AGM batteries, contact the nearest FIMAP service centre to modify the setting if you want to use another type of battery. -
Page 14: Inserting Water System Filter
To recharge the batteries without the built-in battery charger, proceed as follows: ATTENTION: the following operations must be carried out by qualified personnel. An incorrect connection of the connector may cause a malfunction of the device. 3. Press the uncoupling lever (4) (Fig.5) and open the battery compartment closing carter, using the handle (5) (Fig.6). •... -
Page 15: Filling The Solution Tank
FILLING THE SOLUTION TANK Before filling the solution tank, carry out the following steps: 1. Take the machine to the usual place for filling the solution tank. 2. Perform the procedure for securing the machine ( see the section titled “SECURING THE MACHINE”). -
Page 16: Preparing To Work
PREPARING TO WORK Before beginning to work, it is necessary to: 1. Move to the rear of the machine, press the uncoupling lever (1) (Fig.1) and open the battery compartment closing carter, using the handle (2) (Fig.2). ATTENTION: the following operations must be carried out by qualified personnel. An incorrect connection of the connector may cause a malfunction of the device. -
Page 17: Starting Work
STARTING WORK The machine can be used in the following work modes: • ECO MODE, see “ECO MODE”. • MANUAL MODE, see “MANUAL MODE”. The working program “SCRUBBING WITH DRYING" in “ECO MODE” will be taken as an example. To start working in this mode, proceed as follows: 1. -
Page 18: Working Programs
WORKING PROGRAMS H2o 1 SCRUBBING WITH DRYING To perform a scrubbing and drying program, proceed as follows: 1. Make all the checks listed in “PREPARING TO WORK”. 2. Sit on the driver’s seat. 1. Release the control column from the vertical position, press the stop lever (1) (Fig.1) and turn the control column towards yourself (Fig.2). 2. -
Page 19: Additional Functions
N.B.: The first time one of the two symbols shown above in the control display are pressed, the current level of detergent solution will be shown for two seconds (Fig.7). 5. Lower the squeegee, activate the pedal (3) located at the rear right of the machine (Fig.4). 6. -
Page 20: Adjustment Of The Detergent Solution Flow
ADJUSTMENT OF THE DETERGENT SOLUTION FLOW To adjust the flow of detergent solution during work, proceed as follows: 1. During the first few working meters check that the amount of solution is sufficient to wet the floor, but not enough to be collected by the squeegee. -
Page 21: At The End Of The Work
AT THE END OF THE WORK At the end of the work, and before carrying out any type of maintenance, perform the following operations: 1. If active, turn off the suction motor, press the “SUCTION MOTOR ACTIVATION DEACTIVATION” (1) switch on the control panel (Fig.1). 2. -
Page 22: Draining The Recovery Tank
2. Make sure the machine is in a safe condition (see chapter “MACHINE SAFETY MEASURES”). ATTENTION: It is recommended to wear the appropriate PPE (Personal Protective Equipment), suitable for the work to be carried out. TYPE OF MAINTENANCE DRAINING THE RECOVERY TANK CLEANING THE SQUEEGEE BODY CLEANING THE BRUSH HEAD BRUSH CLEANING THE RECOVERY TANK FILTERS... -
Page 23: Cleaning The Recovery Tank Filters
4. Activate the machine by pressing the button (9) located on the control panel (Fig.9). 5. Lift the front of the machine from the control panel (Fig.10). 6. Pressing the operator presence lever (10) (Fig.11) three times activates the brush uncoupling function. N.B.: Once the brush uncoupling sequence has started, the symbol “S”... -
Page 24: Extraordinary Maintenance
EXTRAORDINARY MAINTENANCE Before carrying out any extraordinary maintenance operations, proceed as follows: 1. Take the machine to the maintenance area. WARNING: the place designated for this operation must comply with current regulations concerning safety at work and current environmental protection regulations. 2. -
Page 25: Choosing And Using Brushes
Suitable for wet or dry scraping with wax removers. Prepare the floor for new waxing. Resistant to acids. TYPE OF MACHINE CODE COLOUR NOTES BRISTLE 451751 PPL Ø0,35 GREEN 451752 PPL Ø0,6 WHITE BRUSH Ø =340mm Ø =356mm GL Pro 451753 PPL Ø0,9 BLACK 451754 ABRASIVE Ø1 GREY 451755 PAD HOLDER Ø =340mm Ø =356mm... -
Page 26: Troubleshooting
TROUBLESHOOTING This chapter lists the most common problems linked with the use of the machine. If you are unable to resolve the problems with the information given here, please contact your nearest service centre. PROBLEM POSSIBLE CAUSE SOLUTION Press the machine's stand-by state activation - The machine is in stand-by. - Page 27 PROBLEM POSSIBLE CAUSE SOLUTION Make sure the squeegee is free of obstructions (read “CLEANING THE SQUEEGEE BODY”). Make sure the vacuum tube is free of obstructions (see The vacuum unit is obstructed. “CLEANING THE VACUUM TUBE”). THE SQUEEGEE Check that the filters in the recovery tank are not clogged DOES NOT DRY (see paragraph “CLEANING THE RECOVERY TANK...
-
Page 28: Ec Declaration Of Conformity
Via Invalidi del Lavoro, 1 37059 Santa Maria di Zevio (VR) declares under its sole responsibility that the products SCRUBBING MACHINES - mod. GL Pro CB comply with the requirements of the following Directives: • 2006/42/EC: Machinery Directive. • 2014/35/EC: Low Voltage Directive. - Page 29 Via Invalidi del Lavoro, 1 37059 Santa Maria di Zevio (VR) declares under its sole responsibility that the products SCRUBBING MACHINES - mod. GL Pro comply with the provisions of Directives: • 2006/42/EC: Machinery Directive. • 2014/30/EC: Electromagnetic compatibility directive.
- Page 32 FIMAP S.p.A. - Via Invalidi del Lavoro, 1 - 37059 S. Maria di Zevio - Verona - Italy Tel. +39 045 6060411 – Fax +39 045 6060417 – E-mail:fimap@fimap.com www.fimap.com...
Need help?
Do you have a question about the GL Pro and is the answer not in the manual?
Questions and answers