
Subscribe to Our Youtube Channel
Related Manuals for SKC Quick Take 15


Summary of Contents for SKC Quick Take 15
-
Page 1: Operating Instructions
Operating Instructions Catalog No. 228-9515 SKC Inc. 863 Valley View Road Eighty Four, PA 15330 USA Form #40076—Rev 0710... -
Page 3: Table Of Contents
Table of Contents Quick Guide ................1 Description.................. 2 Performance Profile ..............3 Operation ..................5 Mounting Sampling Media ............7 Calibration and Setting Flow............8 Setup ..................9 Sampling................... 11 Advanced Setup ............... 13 Maintenance ................17 Battery Operation ..............19 Cautions and Warnings ............ -
Page 5: Quick Guide
• To interrupt run, terminate a sample, or reset pump: While in Hold, press . Sample reset (rSEt) will display. Press [] to reset pump or to ignore reset and return to Hold. www.skcinc.com SKC Inc., 863 Valley View Road, Eighty Four, PA 15330... -
Page 7: Description
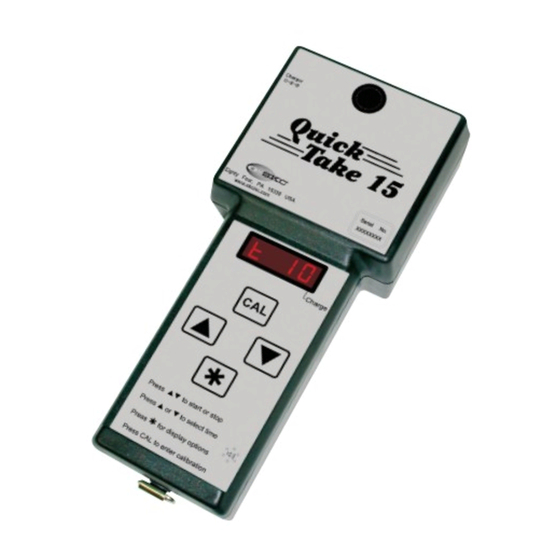
Description The QuickTake 15 is a portable, battery-powered air sampling pump designed ® specifically to provide constant airflow for the short sampling times required for mold screening. QuickTake 15 allows timed samples to be taken within the flow range of 5 to 15 L/min. -
Page 8: Performance Profile
QuickTake 15 Performance Profile Flow range: 5 to 15 L/min Flow compensation accuracy: ± 5% of set flow Compensating flow back pressure range: 15 L/min at 8 inches water back pressure 10 L/min at 15 inches water back pressure 5 L/min at 20 inches water back pressure Typical Back Pressure of Sampling Media (inches water) Flow Rate (L/min) 10.0... - Page 9 UN3091. For air shipments: Rechargeable lithium-ion batteries in SKC pumps are subject to the A-45 exemption to the IATA regulations and are not regulated for air shipments. This information must be written on the shipping document when shipping by air.
-
Page 10: Operation
Operation Button Sequence Buttons must be pressed in the sequence shown. or = Press individually [] = Press both simultaneously = Security code, press in sequence Operating the Pump • To activate LED: Press and hold for 2 seconds. ... - Page 11 • To navigate presets and displays: or Press to scroll through presets or displays. • To select a run time preset and run the pump: Scroll to desired run time preset. Select preset by pressing []. The pump will start to run. ...
-
Page 12: Mounting Sampling Media
Mounting Sampling Media Sampling with a Filter Cassette or BioStage 200 Impactor Use the tubing adapter supplied with the pump (see right). Insert the smooth end of the tubing adapter into the pump inlet up to the flange. Attach 3/8-inch ID tubing to the barbed section of the adapter. -
Page 13: Calibration And Setting Flow
Calibration and Setting Flow Reducing adapter Tubing Tubing Note: Use a second cassette adapter to attach calibrator to sampling medium. Spore trap cassette Cassette adapter Calibrator outlet Calibration with a spore trap cassette Use a primary standard calibrator to calibrate pump flow rate. Calibrate flow rate with representative sampling medium in line. -
Page 14: Setup
Setup Press or to scroll through the run time presets on the LED. Run Time Mode LED Display Timed Run (defaults: 15, 10, 5, 2, and 1 min) t xx Intermittent Sampling Intt Continuous Run Cont The user may change run time presets. See Advanced Setup, Programming Your Own Run Time Presets. - Page 15 Continuous Run with Manual Stop Run time accumulates only while pump is running. Continuous Run mode performs one sample from 1 to 999 minutes, then automatically resets to zero and counts up to 999 again until the user manually stops the pump. Digital display: Continuous run 1.
-
Page 16: Sampling
Sampling 1. Ensure that the battery has sufficient capacity for the desired sampling time (see Operation, Battery Status Indicators). 2. Calibrate the QuickTake 15 for the desired flow rate (see Calibration and Setting Flow). QuickTake 15 with 3. Place the pump in the sampling location. cassette adapter and spore trap cassette Protect sample pump from weather when in use outdoors. - Page 17 8. Remove and seal the sample medium. 9. Re-assemble the calibration train (see Calibration and Setting Flow) and verify flow. 10. Send sample, blanks, and pertinent sampling information to a laboratory for analysis. Terminating a Sample and Resetting the Pump For timed and continuous runs: from a running pump, press [].
-
Page 18: Advanced Setup
Advanced Setup Intermittent Sampling Intermittent Sampling allows the pump to be programmed to run for a specific number of minutes up to 999, to shut off for a programmed length of time, and to continue sampling on and off for a predetermined number of cycles (e.g., program Digital display: the pump to run three cycles (n) of 15 minutes each (r) with Intermittent Sampling... - Page 19 Setting the Number of Cycles (n) 1. Press or to increase or decrease number of cycles. The display will flash. If no change to number of cycles is desired, press to return to Intt. Digital display: Set number of cycles 2.
- Page 20 Programming Your Own Run Time Presets 1. Press . 2. Pt: 1 will alternately display with T xx. This corresponds to the first stored preset time. 3. Press to scroll to the number of minutes (1 to 999). Digital display: Press ...
- Page 21 Enabling/Disabling Alarm and Fault Features 1. Press the security code to enter setup mode. 2. Press CAL. The pump serial number will display briefly. 3. Press or to turn feature on or off (see below). Press to advance to next feature.
-
Page 22: Maintenance
Maintenance 1. Keep the pump clean and free of dust and dirt. It may be wiped with a dry cloth. 2. Keep the battery charged (see Battery Operation). Charge periodically when pump is not used for prolonged periods. Changing the Inlet Filter This requires a Phillip’s head screwdriver. - Page 23 Remove filter from inlet. Remove O-ring from inlet only. Put new filter into place. Press the O-ring back into place on top of the filter. Ensure both O-rings are in place before proceeding (see Step 7 for position). Align the holes in the housing plate, set it back into place, and replace 6 screws. Tighten screws alternately to provide a tight and even seal on O-rings. Replace the back plate. Check that the stack tubing and control board wiring inside the case are in place and will not be pinched. The back plate should seat evenly without pressure. Ensure battery pack is positioned horizontally and is seated in the foam on top of the back plate. (See photo in Step 3 for placement.) Replace 8 screws in the back plate. Tighten screws alternately.
-
Page 24: Battery Operation
Battery Operation Charging the battery To charge the battery, insert the charger plug into the jack on the pump and the charger into a wall outlet. A red LED will flash on the pump display to indicate the unit is charging. When charging is complete, the LED will stop flash- ing and the pump will go to sleep. -
Page 25: Service Policy
UN3091. For air shipments: Rechargeable lithium-ion batteries in SKC pumps are subject to the A-45 exemption to the IATA regulations and are not regulated for air shipments. This information must be written on the shipping document when shipping by air. -
Page 26: Warranty
SKC INC. LIMITED ONE YEAR WARRANTY 1. SKC warrants that its instruments provided for industrial hygiene, environmental, gas analysis, and safety and health applications are free from defects in workmanship and materials under normal and proper use in accordance with operating instructions provided with said instruments. The term of this warranty begins on the date the instrument is delivered to the buyer and continues for a period of one (1) year. This warranty does not cover claims due to abuse, misuse, neglect, alteration, accident, or use in application for which the instrument was neither designed nor approved by SKC Inc. This warranty does not cover the buyer’s failure to provide for normal maintenance, or improper selection or misapplication. This warranty shall further be void if changes or adjustments to the instrument are made by other than an employee of the seller, or if the operating instructions furnished at the time of installation are not complied with. 2. SKC Inc. hereby disclaims all warranties either expressed or implied, including any implied warranties of merchantability or fitness for a particular purpose, and neither assumes nor authorizes any other person to assume for it any liability in connection with the sale of these instruments. No description of the goods being sold has been made a part... -
Page 27: Ordering Information
UN3091. For air shipments: Rechargeable lithium-ion batteries in SKC pumps are subject to the A-45 exemption to the IATA regulations and are not regulated for air shipments. This information must be written on the shipping document when shipping by air.
Need help?
Do you have a question about the Quick Take 15 and is the answer not in the manual?
Questions and answers