SKC 220 Series Operating Instructions Manual

SKC 220 Series Operating Instructions Manual

Sample pump

Advertisement

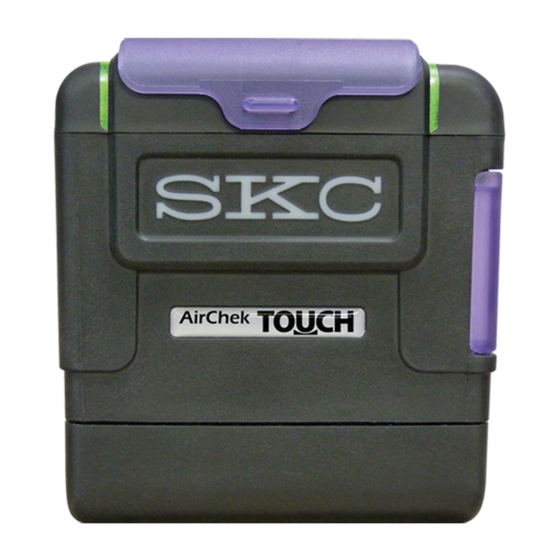
Color resistive touch
Protective
screen/display
screen cover
Top view
Introduction
Checking Pump/Kit Contents
Use the table below to verify that you received all items associated with the Cat. No. ordered. If you are missing items, contact SKC
at 800-752-8472 (U.S. only) or 724-941-9701.
If you ordered Cat. No.
Your Package Should Contain
220-5000TC
Pump with lithium-ion (Li-Ion) battery pack and screwdriver set
220-5000TC-S
Pump with Li-Ion battery pack, screwdriver set, Standard Charging Cradle, power supply with cord, 3 feet (0.9 meter)
Tygon tubing, and collar clip with cable tie
220-5000TC-K
Pump with Li-Ion battery pack, screwdriver set, Standard Charging Cradle, power supply with cord, fi lter cassette holder,
in a soft-sided nylon carry case
220-5000TC-KD
Pump with Li-Ion battery pack, screwdriver set, Standard Charging Cradle, power supply with cord, fi lter cassette holder,
All-in-One adjustable tube holder, and Type A protective tube cover, in a soft-sided nylon carry case
220-5000TC-KDE
Single High/Low Flow Enhanced Pump Kit includes pump with Li-Ion battery pack, Enhanced Charging Cradle (e-Cradle),
power supply with cord, USB cable, fi lter cassette holder, All-in-One adjustable tube holder, and Type A protective tube
cover, in a soft-sided nylon carry case
220-5000TC-K3D
3-pack High/Low Flow Pump Kit includes 3 pumps with Li-Ion battery packs, 2 Standard Charging Cradles,
1 e-Cradle, power supply with cord, and USB cable, 3 each: fi lter cassette holders, All-in-One adjustable tube holders,
and Type A protective tube covers, in a Pelican case
220-5000TC-K5
5-pack High Flow Pump Kit includes 5 pumps with Li-Ion battery packs, screwdriver set, 4 Standard Charging Cradles,
1 e-Cradle, power supply with cord, and 5 fi lter cassette holders, in a Pelican case
220-5000TC-K5D
5-pack High/Low Flow Pump Kit includes 5 pumps with Li-Ion battery packs, screwdriver set, 4 Standard Charging Cradles,
1 e-Cradle, power supply with cord, 5 each: fi lter cassette holders, All-in-One adjustable tube holders, and Type A protective
tube covers, in a Pelican case
863 Valley View Road, Eighty Four, PA 15330 USA • Tel: 724-941-9701 • www.skcinc.com
Pump inlet
Side view
Pump status
LED indicators
Charging cradle
Figure 1. AirChek TOUCH Parts Overview
www.skcinc.com
AirChek
TOUCH Sample Pump
®

Operating Instructions

Inlet housing/fi lter
Belt clip
(back of pump)
Battery pack
100-240 V
100-240 V
100-240 V
100-240 V
100-240 V
100-240 V
100-240 V
Cat. No. 220-Series
On/Off
button
Side view
Screws securing
Charging
battery (2)
contacts
Form 38054 Rev 1902
Page 1 of 32

Advertisement

Table of Contents
loading
Need help?

Need help?

Do you have a question about the 220 Series and is the answer not in the manual?

Questions and answers

Summary of Contents for SKC 220 Series

  • Page 1: Operating Instructions

    Figure 1. AirChek TOUCH Parts Overview Introduction Checking Pump/Kit Contents Use the table below to verify that you received all items associated with the Cat. No. ordered. If you are missing items, contact SKC at 800-752-8472 (U.S. only) or 724-941-9701. If you ordered Cat. No.
  • Page 2: Getting Started

    Getting Started Charging the Battery Pack Set up charging train (Figure 2) and completely charge batt ery pack(s) before operating the pump. Prepare charging cradle(s). a. Single cradle: Insert connector on Single Cradle Power Pump Supply (Cat. No. 220-600) into power port on side of Standard Charging Cradle (Cat.
  • Page 3: Notes And Cautions

    • Power off pump before removing battery to avoid loss of time, date, and other settings. • Use only the SKC-approved battery pack (Cat. No. P75718) and charging cradle (Cat. No. 220-800 or 220-900) for pump. Use of an unapproved battery and/or charging cradle could damage the pump and will void any warranty.
  • Page 4 Using the Touch Screen (Figure 1) Access the touch screen by unlatching and lifting the protective screen cover (Figure 1). Use a fi ngertip or fi ngernail tip to gently tap soft keys on the screen to set up and operate the pump. Learning the Home Screen The Home screen displays when the pump is powered on.
  • Page 5 Navigating Screens and Menus Soft keys on the touch screen allow the user to move between screens/menus and to view, select, edit, and enter values (see below). Navigational Soft Keys Up/down arrows increase/decrease values or Checkmark accepts selections/settings and scroll through data moves to next menu/screen or Home screen Back moves to previous menu/screen Erase removes values from fi...
  • Page 6 Modifying Device Settings (Date and Time, Security, and Units) Changing Date/Time and Display Touch Sett ings soft key. Touch Device. Touch Date and Time to access Date and Time screen. Touch Date Fmt. to toggle M/D/Y, Touch 24-Hour Time to toggle Touch date and time display to D/M/Y, and Y/M/D (displayed sett ing ON and OFF (displayed sett ing in...
  • Page 7 Changing Security (Lock Out) and Auto-Dim Touch Sett ings soft key. Touch Device. Touch Security to access security screen. Auto-Lock Auto-Lock prevents accidental changes to pump status during sampling by requiring a simple 1 2 3 4 unlock code to be entered to unlock the touch screen and power butt on.
  • Page 8 Secure Lock Secure Lock prevents tampering during sampling by requiring a user-set passcode to be entered to unlock the touch screen and power butt on. Changing Secure Lock from OFF to ON: Secure Lock displays OFF. Enter your own four-digit passcode. Re-enter the same four-digit Touch Secure Lock to turn ON passcode to confi...
  • Page 9 Changing Display Units Touch Device. Touch Sett ings soft key. Touch Units to access Units screen. Select option: Back moves to Device screen; changes accepted. H o m e m o v e s t o H o m e screen, changes accepted.
  • Page 10: Operation

    Operation Setting Flow Rate Select option: Checkmark accepts set fl ow and returns to Home screen. Back moves to Home screen without accepting set fl ow. Manual Cal (flow rate display/Manual Cal soft key) accesses Manual Cal screen (see Calibrating Flow Rate from 1 to 5 L/min, Manual Calibration to set up Touch flow rate display (Set...
  • Page 11 Tubing Tubing Pump inlet 0. 000 Representative chek-mate sample medium L/minute calibrator On/off button Figure 7. Calibration Train (1 to 5 L/min) 3. Set up a calibration train. See Figure 7. Alternative Manual Calibration Access   Touch up and down arrow keys to adjust calibration based on fl ow displayed on Home Settings Calibrate...
  • Page 12 FLOW CALIBRATOR sample medium FOR AIR SAMPLING PUMPS 0.5 - 5.0 litre/min S/No18544134 CALIBRATE UNDER VACUUM Single cradle MANUFACTURED BY SKC LIMITED UNDER A SOLE LICENSE FROM GRAHAM BLATCHFORD www.skcltd.com power supply Power port Cradle CalChek CalChek port communication...
  • Page 13 Preparing the chek-mate Calibrator Press and hold on/off butt on on the front of the chek-mate (see Figure 7) to turn on power. The LCD screen will cycle through the startup messages, “On” followed by the upper limit of the fl owmeter range, “5.0 L,” and will then indicate the current fl ow rate or “_ _ _ _” if there is no airfl...
  • Page 14 Initiating CalChek Single Automatic Flow Calibration See pages 26-28 for CalChek Full Calibration to be used following pump maintenance or repair. Touch Sett ings soft key. Touch Calibrate. Touch CalChek Single. Ensure calibration train is in place Enter desired flow rate. Touch (see Figure 8).
  • Page 15 Calibrating Flow Rate from 5 to 500 ml/min • Allow pump to equilibrate after moving it from one temperature extreme to another. • Charge pump battery completely before calibration and sampling. • Use Manual calibration only. • Single-tube sampling requires All-in-One adjustable tube holder; see All-in-One operating instructions for details on operation. •...
  • Page 16 Preparing the All-in-One (single-tube sampling) On the All-in-One adjustable tube holder, insert an opened representative tube (arrow on tube pointing toward the pump) into the rubber sleeve on the port. See Figure 9. Use a small fl at-head screwdriver to turn counterclockwise the brass fl ow adjust screw directly beneath the port.
  • Page 17 Calibrating Pump Flow Rate with the All-in-One (single tube) Using a small fl at-head screwdriver, turn the fl ow adjust screw on the port clockwise to decrease fl ow or counterclockwise to increase fl ow until the method-specifi ed fl ow rate is indicated on the calibrator. Note: This adjustment will change the fl ow rate displayed on the calibrator, not on the pump.
  • Page 18 Sampling Sett ing Up a Sampling Train • Allow pump to equilibrate after moving it from one temperature extreme to another. • Charge pump battery completely before calibration and sampling. • Use of any device (including charging cradle) or battery pack other than P75718 to power the pump voids intrinsic safety certifi cations and any warranty.
  • Page 19 Options/Modes During Sampling Pause/Resume Information To pause sample: To resume sample: Touch i soft key to access current run time data. Touch Flow Rate Touch Flow Rate In addition to accumulated volume, STP volume is displayed. display/Pause soft key. display/Resume soft STP or other standard criteria can be selected in DataTrac Pump stops;...
  • Page 20 Touch Stop soft key to stop sample. Accumulated time and volume will reset. Record sample stop time, remove sample medium, and cap. Reinstall representative sample medium and perform post-sampling calibration (see Calibrating Flow Rate). Setting Up and Running a Timed Sample Calibrate pump fl...
  • Page 21 Setting Up Timed Sample Presets (Includes Continuous and Intermitt ent Sampling) An alternative to programming a quick timed sample before each run is to save sample runs that are performed on a regular basis as timed sample presets (P1, P2, P3, or P4). Presets that are already programmed will display with a white background and can be edited in touch screen menus or DataTrac Pro Software.
  • Page 22 Timed Sample Preset Options Continuous Sample Enter the total duration of the sample run and specify a start date, if desired. Touch Continuous soft key. Enter total sample time in minutes. Touch checkmark to accept. P1 Start Time screen displays. Select option: Date touch to edit start date.
  • Page 23 Timed Sample Preset Options - continued Intermitt ent Sample Enter the total duration of the sample run, and then specify number of minutes the pump is to run and number of minutes the pump is to pause during a single cycle. The AirChek TOUCH will calculate the number of run/pause cycles and the estimated volume.
  • Page 24 Accessing History Touch Menu soft key. Touch History. A short history of Touch up/down arrows to scroll the latest sample run displays. through a maximum of 1042 history records. Once the maximum number of records is reached, old records will be overwritten without warning. To avoid loss of data, upload sampling history to PC using DataTrac Pro Software on a weekly basis.
  • Page 25 Using Pump with PC and DataTrac Pro Software The AirChek TOUCH Sample Pump communicates with a PC via e-Cradle and DataTrac Pro Software. DataTrac Pro Software is available as a download (requires Internet connection). A DataTrac Pro Hardware Accessory Kit (Cat. No. 877-93) is available that contains an e-Cradle, single power supply, and USB 2.0A to Mini-B cable for connection to PC.
  • Page 26: Maintenance

    Maintenance Replacing the Battery Pack Review Notes and Cautions on page 3 before proceeding. Turn pump off before removing battery pack. Turn the pump off by pressing and holding briefl y the recessed power butt on on the side (screen turns off ). Remove the existing batt ery pack.
  • Page 27: Replacing The Belt Clip

    Replacing the Belt Clip Remove the screen cover. a. Remove the two screws from the top of the screen cover mounting block. b. Lift off the screen cover and mounting block. Note: Do not remove the two lower hex nuts from the main case. Remove the screw from the bott om of the belt clip and pull the screw through the opening in the clip.
  • Page 28 Performing a Full Calibration (Reset Compensation System) CalChek Full Calibration, also known as CalChek Full or Multiple-point Calibration, is used to calibrate the pump compensation system across the range of operational fl ows following maintenance/repair. Full Calibration requires a chek-mate Calibrator with CalChek (Cat.
  • Page 29 Preparing the CalChek Communication Cable Connect CalChek Communication Cable to the chek-mate calibrator and pump charging cradle (see below). Install one connector end of cable into CalChek Insert other connector end into CalChek interface socket on chek-mate. port on back of charging cradle (e-Cradle shown).
  • Page 30: Troubleshooting Guide

    Reinstall batt ery pack immediately (see Replacing the Batt ery Pack); check pump responsiveness. Note: Ensure that batt ery is charged at least 25% (batt ery status icon on Home screen should show two bars). An SKC logo screen with fi rmware version number displays when pump is powered on initially after a manual reset or fi rmware upgrade.
  • Page 31: Accessories/Replacement Parts

    * Li-Ion Battery Testing and Shipment Rechargeable lithium-ion batteries for use with SKC sample pumps have been tested in accordance with the UN Manual and are proven to meet requirements of each test in the UN Manual of Tests and Criteria, Part III, subsection 38.3. The batteries are rated below 100 watt-hours (Wh).
  • Page 32 • Intrinsic safety: UL Class I, Div. 1, Groups A,B,C, and D; Class II, Div. 1, Groups E,F, and G; Class III, Div. 1 hazardous locations when used with SKC battery pack model P75718; T-Code T3C. Exia; Class I, Zone 0, Gp IIC (SKC Cat. No. 220-5000TC) •...

Table of Contents