
Related Manuals for Laguna Tools Fusion F1


Summary of Contents for Laguna Tools Fusion F1
- Page 1 Fusion F1 Table Saw | MTSF132110150-0130 Owner’s Manual KEEP THIS MANUAL WITH THE MACHINE REFER TO OFTEN USE IT TO INSTRUCT OTHERS...
- Page 2 Errors and omissions may be current. Laguna Tools, Inc. LAGUNA® and the LAGUNA Logo® are the registered trademarks of Laguna Tools, Inc. All rights reserved. 04/01/2019 2072 Alton Parkway Irvine, CA 92606 U.S.A.
-
Page 3: Table Of Contents
Parts..................................33 Table & Fence Rails ................................33 Blade Guard & Miter Gauge ............................... 34 Fence ....................................35 Base ..................................... 36 Motor & Trunnions ................................37 Cabinet & Arbor .................................. 38 Fusion F1 Table Saw Parts Table (MTSF132110150-0130) .................... 39... -
Page 4: Warranty & Support
Length of Warranty What Is Covered 2 Year – New purchases through authorized dealers. 1 Year – New purchases directly from Laguna Tools. Any part, determined by Laguna Tools®, to have 1 Year – Blades and Accessories Aside from being free of defects upon receiving,... -
Page 5: Safety
F1 Table Saw Safety Read and understand all warnings and operation instructions before using any tool or equipment. Always follow basic safety precautions to reduce the risk of personal injury. Improper operation, maintenance or modification of tools or equipment could result in serious injury and property damage. There are certain applications for which tools and equipment are designed. -
Page 6: Csa Required Safety Information
F1 Table Saw DISCONNECT UNIT before servicing. CHECK DAMAGED PARTS. Before further use of the unit, properly repair or replace any part that is damaged. CSA Required Safety Information WARNING! For Your Own Safety Read Instruction Manual before Operating Tablesaw. –... - Page 7 F1 Table Saw Never use the mitre gauge to feed the workpiece when ripping and do not use the rip fence as a length stop when cross cutting with the mitre gauge. Guiding the workpiece with the rip fence and the mitre gauge at the same time increases the likelihood of saw blade binding and kickback.
- Page 8 F1 Table Saw Align the fence to be parallel with the saw blade. A misaligned fence will pinch the workpiece against the saw blade and create kickback. Use a feather-board to guide the workpiece against the table and fence when making non-through cuts such as rabbeting, dadoing or resawing cuts.
- Page 9 F1 Table Saw Grounding Instructions Table A Ampere Rating Volts Total length of cord in feet More Than Not More Minimum gage for cord Than Not Recommended Grounding Methods Provided by CSA Group. (A) Receptacle with nominal rating less than 150 volts. (B) 150 volt receptacle without grounding pin fitted with adapter.
- Page 10 F1 Table Saw equipment-grounding conductor. If repair or replacement of the electric cord or plug is necessary, do not connect the equipment-grounding conductor to a live terminal. Check with a qualified electrician or service personnel if the grounding instructions are not completely understood, or if in doubt as to whether the tool is properly grounded.
- Page 11 F1 Table Saw (d) AVERTISSEMENT - Utiliser un bâton-poussoir ou un bloc-poussoir au besoin. (e) AVERTISSEMENT - N'effectuez aucune opération à main levée. (f) AVERTISSEMENT - Porter une attention particulière aux instructions sur la réduction du risque de rebond. (ou "Savoir comment réduire les risques de pots-de-vin.") (g) AVERTISSEMENT - Ne jamais tendre la main autour ou au-dessus de la lame de scie.
- Page 12 F1 Table Saw de la pièce en utilisant en même temps le guide longitudinal et le guide inclinable augmente le risque de blocage de la lame et de recul. Lors d'un sciage en long, toujours appliquer la force d'alimentation de la pièce entre le guide et la lame. Utiliser un poussoir lorsque la distance entre le guide et la lame est inférieure à...
- Page 13 F1 Table Saw Utiliser un peigne anti-recul pour guider la pièce contre la table et le guide lors des coupes non traversantes tels que le refeuillement, l'engravure ou la refente. Un peigne anti-recul aide à contrôler la pièce en cas de recul.
- Page 14 F1 Table Saw Veiller à ce que la scie circulaire à table soit installée de façon à tourner dans la bonne direction. Ne pas utiliser des meules, des brosses métalliques ou des disques abrasifs sur une scie circulaire à table. Une installation incorrecte de la lame ou l'utilisation d'accessoires non recommandés peut entraîner de graves blessures.
-
Page 15: Specifications
F1 Table Saw Specifications Fusion F1 Table Saw (MTSF132110150-0130) Condensed Spec Maximum Blade Diameter ............10 in. (254 mm) Max Rip Right of Blade w/Included Fence & Rails ....31 in. (787.4 mm) Fence Type................Camlock T-Shape w/Aluminum Face Table ..................Precision-Ground Cast Iron Wings.................. - Page 16 F1 Table Saw Blade Changing Tool Included Integrated Tool Storage Premium Handles Included 10 x 60T Carbide-Tipped Blade Premium Arbor and Motor Bearings Main Information Table Saw Type ................ Hybrid Cabinet Maximum Blade Diameter ............10 in. (254 mm) Arbor Size .................. 0.62 in. (15.87 mm) Arbor Speed ................
- Page 17 F1 Table Saw Table ..................Precision-Ground Cast Iron Wings..................Pre-Formed Steel Cabinet ..................Pre-Formed Steel Trunnions .................. Cast Alloy Body Assembly ................. Pre-Formed Steel Fence Assembly ............... Aluminum Extruded Body Rails ................... Steel Miter Guage Construction............Aluminum Body with Steel Bar Guard ..................
- Page 18 F1 Table Saw Power Cord Length ..............6 ft. Power Cord Gauge ..............14 AWG Plug Included ................Yes Included Plug Type ..............5-15 Switch Type ................ON/OFF Push Button Switch w/Large Shut-Off Paddle & Padlock MOTOR Use..................... Main Horsepower ................1.5HP Phase ..................
-
Page 19: Setup
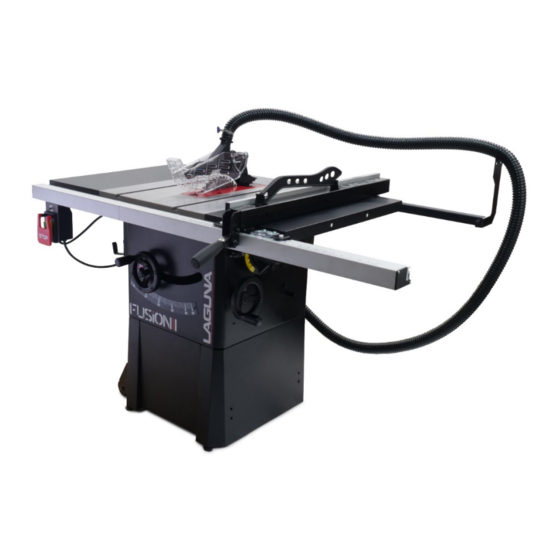
F1 Table Saw Setup Fusion F1 Table Saw (MTSF132110150-0130) A. Motor Reset B. ON C. OFF D. Arbor Tilt Wheel E. Blade Guard Storage F. Riving Knife Storage G. Miter Gauge Storage H. Blade Change Tool I. Arbor Height Wheel J. - Page 20 F1 Table Saw A. Motor Reset B. ON C. OFF D. Arbor Tilt Wheel E. Blade Guard Storage F. Riving Knife Storage G. Miter Gauge Storage H. Blade Change Tool I. Arbor Height Wheel J. Arbor Tilt Gauge K. 4” Dust Outlet L.
- Page 21 F1 Table Saw A. Motor Reset B. ON C. OFF D. Arbor Tilt Wheel E. Blade Guard Storage F. Riving Knife Storage G. Miter Gauge Storage H. Blade Change Tool I. Arbor Height Wheel J. Arbor Tilt Gauge K. 4” Dust Outlet L.
-
Page 22: Setup Help Sections
F1 Table Saw Setup Help Sections Receiving It is likely that your machine will be delivered by a third party. Before unboxing, be sure to inspect the packaging and shipping documents supplied by the driver. Ensure that there is no visible damage to the shipment. -
Page 23: Base & Cabinet
F1 Table Saw Base & Cabinet Setup the base according to the following diagram. If you purchased the wheels, now is a great time to install them. They can go on the left or the right side, but it makes a lot more sense to put them on the left. With the base put together, remove the motor cover of the saw body. - Page 24 F1 Table Saw Proceed to bolt the stand onto the cabinet. Careful put the saw back on its feet when finished. Now bolt on the motor cover, dust port, fence storage hangers, and dust port.
-
Page 25: Wings, Rails, & Fence
F1 Table Saw Wings, Rails, & Fence Attached the wings. Use a flat material to level and then bolt down. Allign the front fence to the blade using the notch on the scale. Use a flat material to level and attatch the fence guides. Make sure to install the switch. - Page 26 F1 Table Saw Put on the fence and calibrate it by loosening and moving the scale.
-
Page 27: Maintenance & Troubleshooting
F1 Table Saw Maintenance & Troubleshooting Never perform and setup, maintenance or adjustment procedures with the machine connected to the power source! If you have any doubt about the described procedure, seek professional assistance. Do not attempt any procedure that you feel is unsafe, or that you do not have the physical capability of achieving. When removing banding, extreme caution must be used as the banding will spring when cut. -
Page 28: Safety Device Alignment
F1 Table Saw Safety Device Alignment Fig T013: Safety Device adjustments. (1) locking bolts. (2) adjustment set screws. The riving knife, blade guard, or splitter must be aligned with the blade to be used effectively. The riving knife should only be used with blades specified on the riving knife (or vice versa). To adjust the position of the blade safety attachments, relative to the saw blade: Loosen the two locking bolts. -
Page 29: Troubleshooting
F1 Table Saw The fusion 1 should not come out of square as the trunnion is bolted to the table. If the procedure results in false measurement, please check the blade and arbor nut prior to any further adjustments. Troubleshooting Behavior Possible Causes Solutions... - Page 30 F1 Table Saw 13. Motor at fault. 11. Adjust tension of/replace belt. 12. Wire motor correctly. 13. Test/repair/replace. Dust Collection 1. Inadequate suction 1. The optional zero clearance throat 2. No suction plate will supply better dust collection than the standard die cast throat plate. 2.
-
Page 31: Wiring
F1 Table Saw Wiring VOLTAGE. Before connecting this tool to a power supply (receptacle, outlet, etc.) make sure that the voltage supplied is the same that is specified on the nameplate of the tool. IF IN DOUBT, DO NOT PLUG IN THE MACHINE. -
Page 32: Fusion F1 Table Saw (Mtsf132110150-0130)
F1 Table Saw Fusion F1 Table Saw (MTSF132110150-0130) In order to change from 110V to 220V, a new 220V switch must be purchased and installed (Part No. 937949-001). With then 220V switch, wire it to the motor using the following diagram. -
Page 33: Parts
F1 Table Saw Parts Table & Fence Rails... -
Page 34: Blade Guard & Miter Gauge
F1 Table Saw Blade Guard & Miter Gauge... -
Page 35: Fence
F1 Table Saw Fence... -
Page 36: Base
F1 Table Saw Base... -
Page 37: Motor & Trunnions
F1 Table Saw Motor & Trunnions... -
Page 38: Cabinet & Arbor
F1 Table Saw Cabinet & Arbor... -
Page 39: Fusion F1 Table Saw Parts Table (Mtsf132110150-0130)
F1 Table Saw Fusion F1 Table Saw Parts Table (MTSF132110150-0130) KEY ..... PART NO... DESCRIPTION ..........SPECIFICATION ......... Q'TY *1 ....937948-001 ..Magnetic Switch Assembly ......120V ............. 1 *1 ....937949-001 ..Magnetic Switch Assembly ......230V ............. 1 2 .... - Page 40 F1 Table Saw 8 ....174396-904 ..Riving Knife ..........................1 9 ....001902-110 ..Set nylock screw ..........M6*1.0P*8 ........... 4 10 ....000804-105 ..Round Head Screw .......... M5*0.8P*20 ..........2 11 ....361251-905 ..Pin ............................1 12 ....
- Page 41 F1 Table Saw 32 ....006001-020 ..Flat Washer ............6.2*20*3.0t ........... 1 33 ....924631-001 ..Rear Rail (L) ..........................1 34 ....924632-001 ..Rear Rail (R)..........................1 35 ....110020-000 ..Trunnion Support ........................2 36 ....
- Page 42 F1 Table Saw 72 ....008316-200 ..Lock Nut ............M10*1.5P(17B*8H) ........1 73 ....006001-075 ..Flat Washer ............10.3*22*2.0t ..........1 74 ....048701-101 ..Square Bolt ............M8*1.25P*20 ..........6 75 ....030211-002 ..Ball Bearing ............6003 ............. 2 76 ....
- Page 43 F1 Table Saw 118 ....170965-904 ..Fix Plate ..........................1 119 ....251362-615 ..Push Sticks..........................1 120 ....006001-033 ..Flat Washer ............6.7*16*1.0t ........... 2 121 ....008603-100 ..Nut ..............M6*1.0P(10B*5H) ........2 122 ....006504-100 ..Tooth washer ........... 8.4*15(BW-8) ..........10 136 ....
- Page 44 No part of this publication may be reproduced, transmitted, or translated into any language in any form by any means without our written permission. Errors and omissions may be current. Laguna Tools, Inc. LAGUNA® and the LAGUNA Logo® are the registered trademarks of Laguna Tools, Inc. All rights reserved. 04/01/2019...
Need help?
Do you have a question about the Fusion F1 and is the answer not in the manual?
Questions and answers