Table of Contents
Advertisement
Quick Links
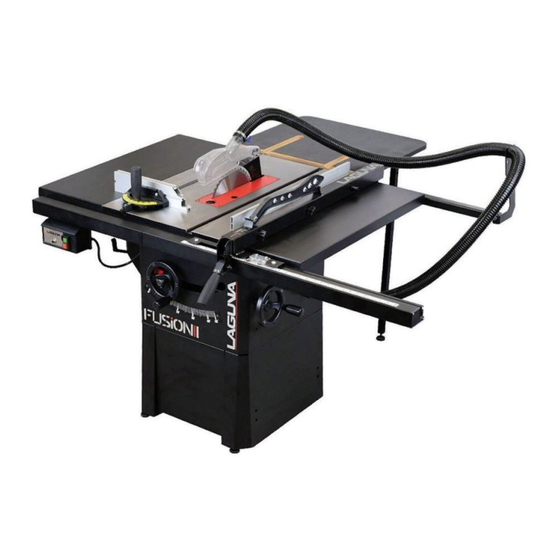
Fusion1
Table Saw
Operating Instructions
Producer:
Laguna Tools Inc
744 Refuge Way, Suite 200
Grand Prairie, Texas 75050
USA
Phone: +1 800-234-1976
Website: www.lagunatools.com
Distributor:
IGM nástroje a stroje s.r.o.
Ke Kopanině 560, 252 67, Tuchoměřice
Czech Republic, EU
Phone: +420 220 950 910
PDF ONLINE
E-mail: sales@igmtools.com
www.igmtools.info
Website: www.igmtools.com
2022-02-21
151-Fusion1 LAGUNA Table Saw Manual EN v2 A4ob
Advertisement
Table of Contents

Related Manuals for Laguna Tools Fusion 1


Summary of Contents for Laguna Tools Fusion 1
- Page 1 Fusion1 Table Saw Operating Instructions Producer: Laguna Tools Inc 744 Refuge Way, Suite 200 Grand Prairie, Texas 75050 Phone: +1 800-234-1976 Website: www.lagunatools.com Distributor: IGM nástroje a stroje s.r.o. Ke Kopanině 560, 252 67, Tuchoměřice Czech Republic, EU Phone: +420 220 950 910 PDF ONLINE E-mail: sales@igmtools.com...
- Page 2 www.igmtools.com...
- Page 3 www.igmtools.com...
-
Page 4: Table Of Contents
Dear Woodworker, Thank you for your purchase and welcome to the Laguna Tools group of discerning woodworkers. We understand that you have a choice of where to purchase your machines and appreciate the confidence you have in the Laguna Tools brand. -
Page 5: Work Area
• The chosen saw blade must be suitable both • Stay alert, watch what you are doing and use components of the machine are not damaged for the specific work cycle and for the specific common sense when operating a power tool. do or at the risk of being damaged. -
Page 6: Guarding Related Warnings
feed direction. increases the likelihood of saw blade binding workpiece against the saw blade and create and kickback. kickback. • Never leave tool running unattended. Do not leave the tool until it comes to a complete stop. • When cutting longitudinally, move the •... -
Page 7: Electrical
The operating conditions for noise with the CE norms, standards and regulations measurement comply with Annex A of ISO for safe use. Laguna Tools or IGM is in no 7960:1995. way responsible for injury or death that occurs while using this product. Your personal safety is •... -
Page 8: Setup
– long 4. Wipe off protective oils. and short. Use Caution: Your new Laguna Tools machine is heavy. Use a minimum of two people when Note.: For safety reasons, this machine is not... -
Page 9: Loose Parts & Overview
6.3 Loose Parts & Overview 6.4 General Setup entire rail assembly is in place to properly level the rail. Your new machine has been mostly assembled 1. Attach the short rear fence support at the certified ISO 91001 factory where it was 2. -
Page 10: Installing/Removing The Throat Plate
6.5 Installing/removing the throat plate 4. Position to the left of the casing 1. Unplug the table saw! 2. Insert the throat plate back end first. 3. Lower the throat plate to the table. 4. Lock the throat plate with the thumb-lock. 5. -
Page 11: Adjustments
7. Adjustments paper between the blade and the fence to Your Laguna Tools machine comes fully ensure good distance. 1. Unplug the table saw! adjusted from the factory, but it is good practice 2. -
Page 12: Arbor And Tilt Adjustments
adjustments to make the fence parallel to the A dial indicator on a mitre gauge. Loosen Table Bolts saw blade prior to operation. Best Position fence to access adj. screws Locate and loosen left side table to cabinet bolt (above the motor cover). Loosen Table Bolts WARNING: MAKE SURE SAW IS A dedicated saw dial indicator. -
Page 13: Accessory Adjustments
3. Remove tool storage cover Remove the motor cover Accessing the Belt To access the right-side tilt adjustment screw, WARNING: MAKE SURE SAW IS remove the tool storage using a #2 Philips head UNPLUGGED. driver. There are 4 screws in total holding on To access the motor, remove the motor housing the tool storage box. -
Page 14: Push Block And Push Stick
at least 2mm beneath the topmost tooth. pushing it into the blade as well as firmly The riving knife must be at least 0.2 mm thicker against the rip fence so that it is cut straight. than the main saw blade. •... -
Page 15: Ripping Small Workpieces
Do not attempt rip cuts if the work piece is is necessary to secure the workpiece against To keep you Laguna Tools machine in top too small, as this will oblige you to place your rotation by using a suitable jig. -
Page 16: Trouble-Shooting
10. Trouble-Shooting Machine will not start or continues to trip the breaker. Possible Causes Possible Solution 1. Start capacitor at fault. 1. Test/replace if faulty. 2. Motor connection wired wrong. 2. Correct motor wiring connections. 3. Wiring at fault. 3. Check/fix broken, disconnected, or corroded wires. 4. - Page 17 www.igm.cz -17-...
-
Page 18: Arbor Wrench
Parts list 008316-200 Lock Nut M10*1.5P(17B*8H) Part No. Descriptions Specification Q'ty 006001-075 Flat Washer 10.3*22*2.0t 938128-001 Magnetic Switch Assembly KJD-17-230V 048701-101 Square Screw M8*1.25P*20 924708-001 Blade Guard Assembly 920703-001 Fixing Knob 924710-001 Miter Gauge Assembly 250406-615 Bushing 006001-045 Flat Washer 8.5*16*1.0t M5*0.8P*- 924793-001...
Need help?
Do you have a question about the Fusion 1 and is the answer not in the manual?
Questions and answers