Table of Contents
Advertisement
Quick Links
Advertisement
Table of Contents

Related Manuals for Insportline Mendoz 4v1


Summary of Contents for Insportline Mendoz 4v1
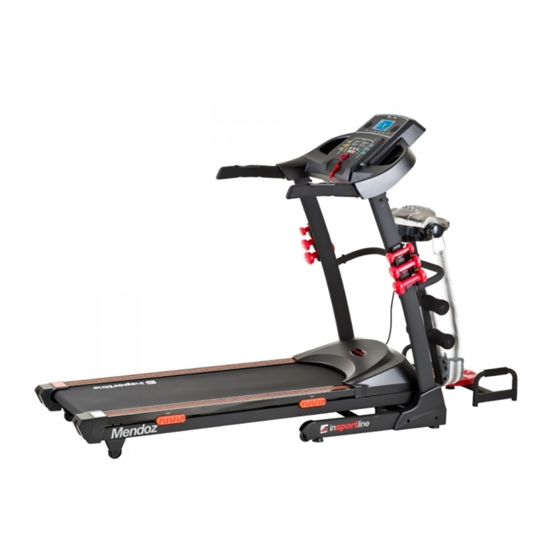
- Page 1 USER MANUAL – EN IN 7565 Treadmill inSPORTline Mendoz 4v1...
-
Page 2: Table Of Contents
CONTENTS SAFETY INSTRUCTIONS ........................3 PACKING DETAILS ..........................4 EXPLODED DIAGRAM ........................... 6 PARTS LIST ............................7 TREADMILL STRUCTURE ........................9 ASSEMBLY ............................. 9 Step 1 ..............................9 Step 2 ..............................10 Step 3 ..............................10 Step 4 ..............................11 Step 5 .............................. -
Page 3: Safety Instructions
SAFETY INSTRUCTIONS • Always clip the safety key to your clothes or belt before starting exercising. • Move naturally, forward. Do not look on your feet. Only for one person can use the product on the same time. • Speed increase regularly, not immediately. •... -
Page 4: Packing Details
• Do not please in areas with high humidity (pools, sauna etc.) • Max user weight: 150 kg • Category: HA according to EN 957 • WARNING: The heart rate monitoring system may not be accurate. Overloading during training can cause serious injury or death. If you experience nausea, stop the exercise immediately! PACKING DETAILS Warning: Carefully install the product, avoid making any damage. - Page 5 Umbrella-type cross tapping Washer 21PCS Nut 9pcs screw M4.2*15 8pcs Lubricant Safety key MP3 connector 1pcs...
-
Page 6: Exploded Diagram
EXPLODED DIAGRAM... -
Page 7: Parts List
PARTS LIST Component Quantity Base frame Frame Left pillar accessory Right pillar accessory Dashboard frame Incline frame Pressure stick Motor stator Front roller Back roller Motor Incline motor Running belt Running board Multislot belt Motor cover Side rail Left back cover Right back cover Connector part for base frame Adjusting foot pad... - Page 8 Reed pipe for safety key Safety key Sponge sheath Heart rate and speed +- key Heart rate and incline +- key PCB for console Push-key board Sensor wire Upper communication line Lower communication line Red connecting line Red connecting line Green connecting line Power wire Speaker...
-
Page 9: Treadmill Structure
TREADMILL STRUCTURE ASSEMBLY Step 1 • Make the communication line through the right meter tube. • Set meter tube on the base frame. Use 2 pcs of Screw M8*15 with 2 pcs of washer and 4pcs of Screw M8*50 with 4 pcs of washer, 4 pcs of nut to solid the meter tube. (Don’t fasten screw at first) -
Page 10: Step 2
Step 2 • Make sure that communication lines are connected correctly, in case they are connected in reverse. • Put meter on the meter tube. Use 6 pcs of Screw M8*15 with 6 pcs of washer to solid the meter. (Don’t fasten screw at first) •... -
Page 11: Step 4
Step 4 • Use 2 pcs of Screw M8*35 with 2 pcs of washer, 2 pcs of nut to solid multifunction frame on base frame. (Don’t fasten screw at first) • Use Screw M8*80 with washer, nut to solid multifunction frame on solid tube, then fasten screws mentioned in front steps. -
Page 12: Step 6
Step 6 • Secure the covers with screws ST4.2x15 Step 7 Step 8... -
Page 13: Step 9
• Use 2 pcs of M8*35 screw, 2 pcs of washer and 2 pcs of nut to solid twister frame on base frame. Step 9 • Use 4 pcs of Screw ST4.2*15 to solid the dumbbell frame. • Put the dumbbell on the dumbbell frame and put the push-up handlebar on twister frame. Insert the power plug into the socket and switch on the machine. -
Page 14: Instruction For Console
INSTRUCTION FOR CONSOLE Tech info: Time 00:00-99:59 Min Speed 1.0-16.0 km/h Incline 0-15% Distance 0.00-99.9 km Calorie 0-999 KCAL Heart rate 50-200 / Min... -
Page 15: Panel Keys And Functions
Preset program P1-P99 User-defined program U1-U2 Program Sexuality 01/02 (men/women) PANEL KEYS AND FUNCTIONS Fan Key Use this key, you could turn on/off the fan. START/STOP Key: Press “start” /“stop keys for starting/stopping the running belt. Reset: Press "Stop" Key twice continuously, the machine will be reset and start for new exercise record when you press "Start ". - Page 16 MODE Key Under ready condition, Press "MODE.", you could select 30:00, 1.0 or 50. 30:00 is time countdown, 1.0 is distance countdown, 50 is calorie countdown. When you have selected, you have to press “start” to start it! SPEED △▽Key Under ready condition, it is used for setting some data.
-
Page 17: Displayed Window
DISPLAYED WINDOW TIME: Display the data of time or heart rate HIGHT: Display the data of height CALORIES: Display the data of calorie WIGHT: Display the data of weight INCLINE: Display the data of incline PULSE: Display the data of pulse DISTANCE: Display the data of distance FAT: Display the data of body fat SPEED: Display the data of speed... - Page 18 • Under ready condition, press “MODE” to come into time countdown mode. Window “Time” displays “30:00” and shining, you could press “SPEED+”, “SPEED-” to set exercise time from 5:00—99:00. • When on distance countdown mode, press “MODE” to enter. Window “ DIST” displays “1.0” and shining, you could press “INCLINE△”, “INCLINE▽”, “SPEED+”, “SPEED-”...
-
Page 19: Getting Started
BODY FAT TEST Under ready condition, press “PROG.” Key continuously to come into FAT. Press “MODE” key, you could find “HEIGHT”, “WEIGHT”, “AGE”, “SEX”, “FAT” displayed on the window. Press “INCLINE△”, “INCLINE▽” “SPEED+”, “SPEED-” to set. After setting, press “MODE” to come into “FAT”. At this time, put your hand on the heart pulse for 5-8 seconds, there will be body fat date displayed on the window. -
Page 20: Exercise Instructions
breathing, reduce the speed again by 0.3 km / h. Finally, allow yourself 4 minutes to cool down. If you do not want to increase your difficulty with speed, you can increase the difficulty by setting the incline. A gradual increase in the angle of inclination can significantly affect the difficulty of the exercises. CALOREIS BURNING - This exercise helps to burn calories faster. -
Page 21: The Cool Down Phase
Head rolls Slowly tilt your head to the right, stretching out the left side of your neck. Hold for 20 seconds. Then tilt it back again to the left and continue until the right side of your neck is stretched out. Hold for 20 seconds. - Page 22 Frequent use (more than 5 hours per week) – every 2 months • Always use silicon oil inSPORTline. The steps are as follows: Step 1. Please unplug power supply for the treadmill and loosen the belt (Belt tension screw located at...
-
Page 23: Cleaning
Step 2. After loosening the screw, lift up the running belt and clean in-between the running board. Squeeze the small white bottle of SILICONE oil which was supplied with your purchase and wipe it evenly across the board. Step 3. After lubricating the board, screw the belt tension back to its correct tension. Tighten evenly on both sides. - Page 24 The pole of heart rate Wet the pole with water or liquor for hard sensor is not wet enough contact lenses Heart rate can’t be displayed Disturbed by Stay away from electromagnetism electromagnetism The motor wire is not well Incline doesn’t work Open the motor cover and reconnect it connected Running belt runs...
-
Page 25: Important Notice
Check the VR wire, AC wire, connecting Displayed E12 on the wire of incline motor, incline motor and Incline alarm screen PCB, whether they are connected well or broken. After checking, restart the PCB. If you still can’t solve the problems after taking the solutions above, we hope that you can contact our dealer or company as soon as possible. - Page 26 These Conditions of Warranty and Warranty Claims are an integral part of every Purchase Agreement made between the Seller and the Buyer. All Warranty Conditions are valid and binding, unless otherwise specified in the Purchase Agreement, in the Amendment to this Contract or in another written agreement.
Need help?
Do you have a question about the Mendoz 4v1 and is the answer not in the manual?
Questions and answers