Table of Contents
Advertisement
Advertisement
Table of Contents

Subscribe to Our Youtube Channel
Related Manuals for Dentsply Sirona inEos X5


Summary of Contents for Dentsply Sirona inEos X5
- Page 1 07.2018 New as of: inEos X5 Operating Instructions English...
-
Page 2: Table Of Contents
To be taken into account during automatic operation ........Intended use ....................Certification ....................Technical description ....................Design and function ..................System components ..................4.2.1 Components of the inEos X5 ............Technical data....................System requirements ................... Electromagnetic compatibility ..............4.5.1 Electromagnetic emission .............. 4.5.2 Interference immunity .............. - Page 3 Connecting the foot switch (optional)..........6.3.4 Switching the unit on and starting the software ......Calibrating the motor arm ................Calibrating the inEos X5 camera ..............Updating the firmware.................. Controls and displays ..................... Controls on the inEos X5 ................Operating state LED ..................
- Page 4 Table of contents Dentsply Sirona Operating Instructions inEos X5 Free scans ....................9.4.1 Preparing the optical impression............ 9.4.2 Automatic and manual release in the "free scan" mode ....9.4.3 Taking a free scan (without previous automatic scans) ....9.4.4 Taking a free detail scan..............
-
Page 5: Dear Customer
1 Dear Customer, Operating Instructions inEos X5 Dear Customer, ® Thank you for purchasing your inEos X5 from Sirona. Improper use and handling can create hazards and cause damage. Please read and follow these operating instructions carefully and Always keep them within easy reach. -
Page 6: General Data
2 General data Dentsply Sirona 2.1 Structure of the document Operating Instructions inEos X5 General data Please read this document completely and follow the instructions exactly. You should always keep it within reach. Original language of the present document: German. -
Page 7: Formats And Symbols Used
Dentsply Sirona 2 General data Operating Instructions inEos X5 2.2 Legend 2.1.2 Formats and symbols used The formats and symbols used in this document have the following meaning: Prerequisite Prompts you to do something. 1. First action step 2. Second action step ➢... -
Page 8: Dentsply Sirona
2 General data Dentsply Sirona 2.2 Legend Operating Instructions inEos X5 Symbols on the packaging Take note of the following symbols on the packaging: Protect from moisture Fragile; handle with care Do not stack Temperature during storage and transport Relative humidity during storage and transport... -
Page 9: Safety
Maintenance and repair ● The maintenance and repair of this unit may be performed only by Dentsply Sirona or by agencies authorized by Dentsply Sirona. ● Components which have failed and influence the safety of the unit must be replaced with original (OEM) spare parts. -
Page 10: Accessories
In order to ensure product safety, this device may be operated only with original Dentsply Sirona accessories or third-party accessories expressly approved by Dentsply Sirona. In particular, only the power cable also supplied or the corresponding original spare part may be used with the unit. -
Page 11: Blue Light Radiation (Uv)
Risk of injury for those diagnosed with epilepsy For persons who have been diagnosed with epilepsy, there is a risk of epileptic shock through the flashing light of the inEos X5. ➢ Patients who have been diagnosed with epilepsy must not work with the inEos X5. -
Page 12: To Be Taken Into Account During Automatic Operation
3 Safety Dentsply Sirona 3.3 To be taken into account during automatic operation Operating Instructions inEos X5 To be taken into account during automatic operation CAUTION Risk of injury! / collision hazard! During automatic operation there is a risk of injury/collision hazard as a result of the swiveling movement of the articulated arm. -
Page 13: Certification
Dentsply Sirona 3 Safety Operating Instructions inEos X5 3.5 Certification Certification CE mark This product bears the CE mark in accordance with the provisions of Council Directive 2006/42/EC (machinery directive). As such, the following standards apply: DIN EN ISO 12100:2011-03, DIN EN 61010-1:2011-07 and DIN EN 61326-1:2013-07. -
Page 14: Technical Description
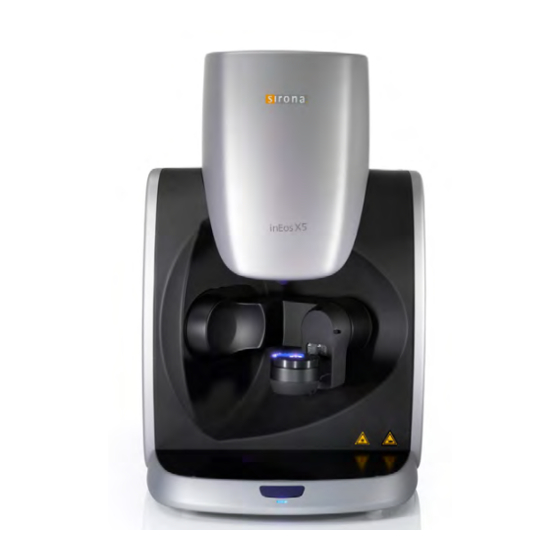
Operating Instructions inEos X5 Technical description Design and function The inEos X5 is designed as a desktop unit and consists of several components (see Chapter "System components [→ 14]“). It is powered from the standard local power network via an external power supply unit. -
Page 15: Dentsply Sirona
Dentsply Sirona 4 Technical description Operating Instructions inEos X5 4.2 System components Rear side 24 V M6324649 S00106 Model-No. D3586 Merial-No. 00106 6324649 2013 24 V / 120 W Sirona Dental Systems GmbH Fabrikstr. 31 D-64625 Bensheim Made in Germany... -
Page 16: Technical Data
4 Technical description Dentsply Sirona 4.3 Technical data Operating Instructions inEos X5 Technical data Model designation inEos X5 Power supply line via power supply unit: INPUT: 100 - 240 V AC / 47- 63 Hz / 2.0 A max. permissible line voltage fluctuations: ±... -
Page 17: System Requirements
Electromagnetic compatibility Observance of the following information is necessary to ensure safe operation regarding EMC aspects. inEos X5 complies with the requirements for electromagnetic compatibility (EMC) according to DIN EN 61326-1:2006-10. inEos X5 is hereinafter referred to as "UNIT". 4.5.1... -
Page 18: Interference Immunity
4 Technical description Dentsply Sirona 4.5 Electromagnetic compatibility Operating Instructions inEos X5 4.5.2 Interference immunity The UNIT is intended for operation in the electromagnetic environment specified below. The customer or user of the UNIT should make sure that it is used in such an environment. -
Page 19: Dentsply Sirona
Dentsply Sirona 4 Technical description Operating Instructions inEos X5 4.5 Electromagnetic compatibility Interference immu- DIN EN 61326-1 Test Compliance level Electromagnetic environment – nity tests level guidelines Conducted RF in- d= [1.2] √P terference 150 kHz to 80 MHz IEC 61000-4-6... -
Page 20: Working Clearances
4 Technical description Dentsply Sirona 4.5 Electromagnetic compatibility Operating Instructions inEos X5 4.5.3 Working clearances Recommended working clearances The UNIT is intended for operation in an electromagnetic environment, between portable and mobile RF where radiated RF interference is checked. The customer or the user of... -
Page 21: Transport To The Installation Site
5.1 Transport and unpacking Transport to the installation site Transport and unpacking All products from Dentsply Sirona are carefully checked prior to shipment. Please perform an incoming inspection immediately after delivery. 1. Check the delivery note to ensure that the consignment is complete. -
Page 22: Installation Site
Install inEos X5 in a protected area 3D image acquisition may be adversely affected by bright light. Set the inEos X5 up so that it is not located directly in the beam path of an extreme light source and not exposed to direct sunlight. -
Page 23: Initial Startup
Dentsply Sirona 6 Initial startup Operating Instructions inEos X5 6.1 Putting the inLab 4 PC into operation Initial startup Putting the inLab 4 PC into operation 6.1.1 Startup prerequisites 6.1.1.1 Required accessories Supplied parts: ● inLab PC with power cable ●... -
Page 24: Dentsply Sirona
6 Initial startup Dentsply Sirona 6.1 Putting the inLab 4 PC into operation Operating Instructions inEos X5 Also required: ● VGA/DVI monitor including VGA/DVI cable (not included in scope of supply) CAUTION Image may not display Please note the required minimum monitor resolution of 1280 x 1024 at 70Hz. -
Page 25: Making Connections
6.1.1.2 Making connections NOTE Do not connect or switch on the inEos X5 yet! First, connect the PC to the monitor, keyboard, and mouse. Follow the instructions in this document exactly in order to successfully perform start-up of your device. -
Page 26: Safety
6 Initial startup Dentsply Sirona 6.1 Putting the inLab 4 PC into operation Operating Instructions inEos X5 6.1.2 Safety inLab 4-PC is equipped with Windows 7 Professional (64 bit). The Windows Firewall is activated. The software Microsoft Security Essentials is also pre-installed by default. Please activate the automatic update function in the settings of this software for optimal protection. -
Page 27: Installing The Software
6.2 Installing the software Installing the software NOTE Initial installation without inEos X5 Perform the initial installation of the software without connecting inEos The software requires the 2.00 firmware version of the license stick. Update the firmware version if necessary. For additional information, refer to the "License manager"... -
Page 28: Connecting The Unit
Fabrikstr. 31 D-64625 Bensheim Made in Germany Socket for power supply ➢ Connect the socket (A) of the inEos X5 to the power supply via the power supply unit included in the scope of supply. NOTE Use a grounded power outlet The power supply unit must be connected to a grounded power outlet. -
Page 29: Switching The Unit On And Starting The Software
Calibrating the motor arm IMPORTANT Calibrating the system Following installation of the inEos X5, it is recommended that you perform an axis calibration with the inLab SW software. ü The inEos X5 is switched on. ü The jaw model supplied for calibration is ready. -
Page 30: Calibrating The Ineos X5 Camera
Calibrating the inEos X5 camera IMPORTANT Calibrating the system The calibration of the inEos X5 camera is only required if you use ATLANTIS-FLO-S scanbodies in order to design single-piece directly screwed suprastructures and which can be manufactured at infiniDent or to transmit the scanned models to Dentsply-Sirona-ATLANTIS central manufacturing for design and manufacturing purposes. -
Page 31: Updating The Firmware
Operating Instructions inEos X5 6.6 Updating the firmware Updating the firmware In order to update the inEos X5 firmware, proceed as follows: 1. Click the "Devices" icon in the system menu. 2. Click on the icon of inEos X5. 3. Click on "Update Firmware" . -
Page 32: Controls And Displays
7 Controls and displays Dentsply Sirona 7.1 Controls on the inEos X5 Operating Instructions inEos X5 Controls and displays Controls on the inEos X5 inEos X5 features the following controls: Start key CAUTION Stopping motor movements By pressing and holding the Start key (A), all movements of the motor are immediately stopped and the motors are switched to a voltage- free state. -
Page 33: Operating State Led
Dentsply Sirona 7 Controls and displays Operating Instructions inEos X5 7.2 Operating state LED Operating state LED The LED shows the operating status of the unit: NOTE Once the unit is switched on, the LED must light up in one of the following colors. -
Page 34: Switching The System On
ð The unit is dry and can be put into operation. Switching the inEos X5 on 1. Switch on the PC. 2. Switch the inEos X5 on at the main switch. Starting the software ➢ Start the software at the PC via the Windows start menu. -
Page 35: Performing 3D Acquisition
9.1 General Performing 3D acquisition General 9.1.1 Acquisition methods Four methods are available for acquiring scans with the inEos X5: ● Automatic jaw scan – For all tasks – Especially for large, complex tasks or tasks with high accuracy requirements ●... -
Page 36: Scan Modes
● When measuring scanbodies ● When capturing silicon impression trays with several multi-colored impression materials inEos X5 captures these situations using multiple exposure, so that every part of the surface is measured with the optimal exposure setting. Accordingly, the scan takes longer. -
Page 37: Model Options
Dentsply Sirona 9 Performing 3D acquisition Operating Instructions inEos X5 9.1 General 3. Position the impression tray as per the illustrations in the software. 4. Select the image catalog for the jaw section which is initially aligned with the camera. -
Page 38: Scan Models And Impressions
9 Performing 3D acquisition Dentsply Sirona 9.1 General Operating Instructions inEos X5 Complete Reconstruction For this option, the complete model is calculated with the palate/model plate area. This option increases the calculation time for the model. Reduced Reconstruction For this option, the model is calculated as a dental arch without the palate/model plate area. -
Page 39: Autofocus
Set the inEos X5 to standby mode Activate the inEos X5 Tip: Switch off the inEos X5 via the main switch only if the inEos X5 is in standby mode (projection lamp switched off and articulated arm in parking position) or if no scan process has been started. -
Page 40: Preparing The Optical Impression
9 Performing 3D acquisition Dentsply Sirona 9.3 Automatic jaw scan Operating Instructions inEos X5 9.3.1 Preparing the optical impression In the automatic scan, you can select from the options "Capture Reduced" or "Capture Area" . "Capture Reduced" : The entire jaw is scanned based on a standard sequence with a lower level of detail. -
Page 41: Taking The Scan
9.3.2 Taking the scan 1. Start the scan by pressing the Start button on the inEos X5 once. ➢ Alternatively, you can start the scan by pressing the return key on your keyboard once, by actuating the foot switch (optional) once, or by actuating the "Ok"... -
Page 42: Starting The Automatic Detail Scan
2. Start the automatic detail scan by double-clicking on the area of interest. Ä The inEos X5 positions the model in the scanning position with the rotation arm and automatically starts the scan. The image is automatically registered in the virtual model. -
Page 43: Free Scans
Dentsply Sirona 9 Performing 3D acquisition Operating Instructions inEos X5 9.4 Free scans Free scans In the "Capture Free" mode, you can capture the model situation fast, manually and in a controlled manner for simple tasks. Moreover, you can scan e.g. areas that may not be sufficiently captured in the automatic mode with detail scans. -
Page 44: Automatic And Manual Release In The "Free Scan" Mode
Ä The crosshairs in the live image turn green. 2. Start the scans by clicking the "Ok" button in the software. ➢ Alternatively, you can click the Start button of the inEos X5 or press the Return key on your keyboard. -
Page 45: Taking A Free Scan (Without Previous Automatic Scans)
Dentsply Sirona 9 Performing 3D acquisition Operating Instructions inEos X5 9.4 Free scans 9.4.3 Taking a free scan (without previous automatic scans) 1. Align the model. Ä The model is aligned horizontally. Ä As many teeth as possible are visible in the live image. -
Page 46: Rotational Scans
9 Performing 3D acquisition Dentsply Sirona 9.5 Rotational scans Operating Instructions inEos X5 Rotational scans Use the rotational scan mode to acquire single tooth stumps from all sides. ● For the surveying of single tooth stumps ● For single restorations without consideration of the proximal contacts... -
Page 47: Preparing The Optical Impression
For this, only position the same number of magnetic pots on the model plate as the number of stumps to be scanned. 2. Click the Start button of the inEos X5. ➢ Alternatively, you can start the scan process by clicking the "Ok"... -
Page 48: Acquiring A Buccal Registration
9 Performing 3D acquisition Dentsply Sirona 9.6 Acquiring a buccal registration Operating Instructions inEos X5 Acquiring a buccal registration You can secure the model using the articulator plate which is available as an option (see “Using the articulator plate [→ 53]”). -
Page 49: Regular Function Test Of The Light Barrier And The Start Key
Dentsply Sirona 10 Regular function test of the light barrier and the Start key Operating Instructions inEos X5 Regular function test of the light barrier and the Start key The light barrier and Start key function test must be performed by a fully qualified specialist every 12 months and the results of which must be documented. -
Page 50: Dentsply Sirona
Stop function guaranteed. The operating state LED stays Error state green or switches to yellow. Call customer service. No maintenance other than the light barrier function tests described above must be performed on the inEos X5 . 64 17 096 D3586 D3586.201.01.11.02 07.2018... -
Page 51: Cleaning And Care
7. If further cleaning is required, clean the optical surfaces using a dust and lint-free soft cotton swab and a little ethanol (standard alcohol for cleaning) or acetone. 8. Switch on the inEos X5 at the main switch and restart the software. 64 17 096 D3586 D3586.201.01.11.02 07.2018... -
Page 52: Accessories
● Parallel vise magnetic coupling for attaching models or impressions to the ball joint model holder or the articulated arm of the inEos X5 during free or automatic scans. ● Magnetic pot D30 (8x) for scanning individual stumps. Please use Blue filling material. -
Page 53: Using The Articulator Plate
2. Place the articulator plate in the working area of the inEos X5 in such a way that the buccal scan can be taken. 64 17 096 D3586... -
Page 54: Disposal
13 Disposal Dentsply Sirona Operating Instructions inEos X5 Disposal In accordance with Directive 2012/19/EU and national disposal regulations regarding old electrical and electronic devices, please be advised that such items must be disposed of in a special way within the European Union (EU). -
Page 56: D3586
We reserve the right to make any alterations which may be required due to technical improvements. © Sirona Dental Systems GmbH Sprache: englisch Printed in Germany D3586.201.01.11.02 07.2018 Ä.-Nr.: 125 746 Sirona Dental Systems GmbH 64 17 096 D3586 Fabrikstr. 31 Order No ...
Need help?
Do you have a question about the inEos X5 and is the answer not in the manual?
Questions and answers
the scanner is not showing the model sirona mx5
The context does not mention a model called "Sirona MX5," so there is no information explaining why the Dentsply Sirona X5 scanner is not showing that model. It is possible that "Sirona MX5" does not exist or is a mistaken reference.
This answer is automatically generated