Table of Contents

Related Manuals for icetro SSI-300T


Summary of Contents for icetro SSI-300T
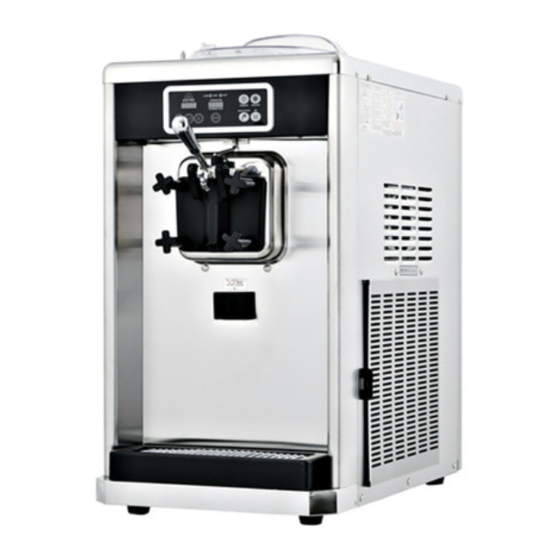
- Page 1 SOFT ICE CREAM FREEZER User s Manual SSI-151TG SSI/ISI-300T, TW This product is designed for indoor use . ● Make sure to install it indoors. ● The appearance, design, color, and parts of the product ● are subject to change without prior notice.
- Page 2 Yogurt & soft ice cream Self machine offers the following advantages 1. Minimum noise and refreshing cooling system With a high efficiency and low noise motor, we can achieve minimal noise from the refreshing cooling system 2. MICOM control method Use of an artificial intelligence control type achieves an optimal cooling system.
-
Page 3: Table Of Contents
Dear customers Thank you very much for purchasing a soft ice cream maker made by ICETRO. For correct use of the product and its maintenance, please read this manual carefully. If a problem occurs while using the product, you can refer to this manual for troubleshooting. This manual contains a product warranty, so keep it safely for future reference. -
Page 4: Cautions For Your Safety
Cautions for your safety The caution/warning details for safety are intended to prevent accident or danger through safe and proper use. Therefore please follow the details accordingly. The precaution details are categorized into warning and caution, and the respective meanings are as follows. If you neglect this symbol and wrongly use the product, Danger it may cause a fire, serious injury or death. - Page 5 Cautions for your safety For relocation of the product, call an expert. Keep your warning and caution The product may cause such hazards as labels clean for easy legibility. Label falling down unless properly installed. If the user misunderstands Warning It should be installed in accordance with related the content of such a label, Caution...
- Page 6 Cautions for your safety Do not install it on a tilt. This product shows the Optimal performance It can cause physical injury or product damages. at temperature of 10~30°C. Caution Caution Do not apply excessive force Do not install it near dust, orimpact to the product.
- Page 7 Cautions for your safety Stop using the machine, If the earth leakage breaker is in the ‘OFF’ position, if you find the power cable, do not turn it to the ‘ON’ or any other cable to be position by force. defective.
-
Page 8: Unpacking Method
Unpacking method The Ice Cream Dispenser has been fully inspected and tested at the factory prior to shipping. If you detect damage to the wooden package or apparent distortion of the shape of the system after unpacking the product, immediately inform your distributor or manufacturer. Find the serial number marked on the packing and the machine before starting installation. -
Page 9: Installation Method
Installation method SSI-300 Electrical connection ● - Consult with the engineers of the company for the details of installation of the system to ensure optimal performance of the system (change of the installation site of the system also requires consultation with the engineer of the company). - Page 10 ISI-300T W Water Supply Connection ● The raw water supply valve may vary depending on the installation environment of the system. Water 1. Coil teflon tape 5~10 times around the thread of connection water supply connector. 2. Fir rubber packing in the corrugated tube nut of the feed water line and join it to the water inlet of the product.
- Page 11 SSI-151TG - Consult with the engineers of the company for the details of installation of the system to ensure optimal performance of the system (change of the installation site of the system also requires consultation with the engineer of the company). - Do not install the system on a place with adverse conditions such as uneven floor, place exposed to direct light, or place with too much dusts or direct splashing of water.
-
Page 12: For Long-Term Storage
For long-term storage ● The machine will be out of order if water gets frozen due to sub-zero temperature in winter. Be sure to drain water before storing the machine. ● The manufacturer will not be responsible for the freezing and bursting of the machine without Waring draining water. -
Page 13: Name Of Each Part
Name of each part SSI-300T FRONT RIGHT SIDE COVER FOOD FAN BUTTON DISPLAY LEVER POWER SWITCH POWER SWITCH DRAIN SLUG FRONT PANEL FILTER COVER DRAIN BOX BACK LEFT SIDE BACK PANEL SIDE COVER SIDE PANEL POWER FOOT RUBBER... - Page 14 Name of each part SSI-300TW FRONT RIGHT SIDE COVER FOOD FAN BUTTON DISPLAY LEVER POWER SWITCH SIDE PANEL DASHER COVER BOLT WATER DRAIN SLUG PRESSURE GUAGE VALVE COVER FRONT PANEL VALVE COVER DRAIN BOX DRAIN WATER BACK LEFT SIDE BASKET COVER STUD BACK PANEL SIDE COVER SIDE PANEL...
- Page 15 Name of each part SSI-151TG FRONT BUTTON DISPLAY COVER FOOD FAN LEVER SIDE PANEL POWER DRAIN SLUG DRAIN COVER DRAIN BOX DRAIN SLUG DASHER COVER BOLT BACK LEFT SIDE BRACKET BACK PANEL POWER FILTER COVER...
- Page 16 Name of each part PART MANUAL DRAIN BOX UP DRAIN BOX BRUSH DRUM BRUSH 3 WHITE - 1 EA 1 EA 1 EA 1 EA 1 EA BLACK - 1 EA DASHER BEARING ORIFFICE PACKING JAVARA 1 EA 1 EA 1 EA DASHER LUG POM 300TW...
-
Page 17: Product Specification
Product specification CLASSIFICATION SPECIFICATION Product name Soft Ice Cream Freezer Model name SSI-300T ISI-300TW SSI-151TG Rated voltage and frequency 1PH, 220V, 60Hz / 230V, 50Hz Power consumption 3000 W 2170 W 1400 W WIDTH 460mm 460mm 395mm (Filter and coolant supply pipe excluded) -
Page 18: Check Prior To Use
Check prior to use Make sure to check them prior to use 【 】 This product is for 220V, 60Hz Install it independently in an earth leakage circuit breaker with more than 20A and provide an external grounding. (Ask a qualified electrical technician for the installation.) The power cable should be connected before the product can be operated normally. -
Page 19: Button Display Names And Functions
Button display names and functions Button display names and functions "Insufficient Ingredients" lamp "Left Status Display Window" It blinks when there are insufficient AUTO: Displays the operational status. ingredients. Defrost: Display the defrost condition. Revive: Displays the revival condition. "No Ingredient" lamp Sterilization: Displays the sterilization status. -
Page 20: Functional Description Of The Buttons
Functional description of the buttons Functional description of the buttons Change the setting If you press the "Set" button lightly, you can enter the mode to check the setting as below. Use the " " and " " buttons to see the settings. -
Page 21: Category
Functional description of the buttons Functional description of the buttons Check the temperature and the record Press the "Select" button to check the different temperature settings mentioned below. The item number and the temperature will be displayed in turns. 2-1: Temperature of the mixing tank 2-2: Temperature of the mixing tank sensor 2-3: Condenser suction temperature (neighboring temperature) 2-1: Temperature of the mixing tank... -
Page 22: Category
Functional description of the buttons Functional description of the buttons Change the setting Press the "Set" button for three seconds to enter the setting change mode as follows. Use the " " and " " to enter the password and use the "Set" button to move to each item. -
Page 23: Category
Functional description of the buttons Explanation of the function button (set by an expert) Model selection: Only experts that have been designated by the main office or by those who received professional education and received approval from the main office shall adjust this category. A service charge will be applied if problems occur due to unapproved alterations. - Page 24 Functional description of the buttons Explanation of the function button (set by an expert) 4-4: Standby off temperature setting This sets the cylinder’s raw material storage temperature in the standby mode. When the temperature of this category is too low, the raw material inside the cylinder freezer and soft freezer can become like porridge 4-5: Standby management temperature setting...
- Page 25 Functional description of the buttons Explanation of the function button (set by an expert) 4-11: Environmental temperature detect function setting The function to detect the environmental temperature can be turned ON/OFF. Environmental temperature is the temperature of the air coming into the compressor. Therefore, the temperature for this category can be high and a warning message can be given if the place of installation is small and has no ventilation.
- Page 26 Functional description of the buttons Explanation of the function button (set by an expert) 2: Operation time setting after sales Set the operation delay time of the air pump sales. After the motor operation is stopped, the air pump is additionally operated according to the time set for this category.
- Page 27 Functional description of the buttons Explanation of the function button (set by an expert) compensation will be used This category is used to compensate for the surrounding temperature (located at the suction side of the compressor) 1: Temperature compensation value setting for 10 or lower This sets the temperature compensation value of the ambient temperature to the environmental temperature of 10...
- Page 28 Functional description of the buttons Explanation of the function button (set by an expert) 4-30: MIX OUT function selection When this category is activated, all operations are stopped in case there is no raw material. 4-31: MIX LOW function selection 4-32: Frequency standard value setting Setthe frequency standard of the supply power.
-
Page 29: Making Soft Ice Cream
Making soft ice cream 1. Pour 2.0 ℓ (151TG : 1 ℓ ) of ingredients in the mixing tank. The raw material must has been stored in a cooler at a temperature 10 or below. ℃ 2. Plug in the caburator and block the hole. 3. -
Page 30: Soft Ice Cream Out-Speed Controlfor
Soft ice cream out-speed controlFor 1. By adjusting 'Screw Adjust' at the bottom of the lever (out lever), you can adjust the out-speed of the soft ice cream. As shown in the figure on the left, release the 'Screw Adjust' to increase the out-speed of the soft ice cream. Screw Adjust 2. -
Page 31: Caburator Control
Caburator control The caburator is made up of two parts. The part that is inserted into the hole of the mixing tank is called the Caburator tube body body and a tube is inserted into this. The tube has a hole at the top and at the bottom. -
Page 32: Cleaning Method
Cleaning method 1. Press the wash button on the control panel. (Wait until the soft cream in the cylinder is melted, About 10 minutes.) 2. Remove the mixing tank cover and Take out the caburator tube and caburator body. 3. Remove the soft cream liquid in the mixing tank and pour faucet water into it. - Page 33 Cleaning method 8. Brush the drain hole of the mixing tank thoroughly. 9. Use faucet water to clean off the inner area of the tank. 10. Press the wash button and finally discharge the water from the mixing tank. Use faucet water to rinse off the cleaning agent residuals.
- Page 34 Cleaning method 13. Separate the dasher from the cylinder. 14. Brush off the inner area of the cylinder and wipe it off with a soft cloth. Insert a brush into the dead end of the cylinder and turn the brush left and right to clean up the cylinder. 15.
- Page 35 Cleaning method 18. Take out the piston of the dasher cover and clean the edge of the piston with a soft towel. 19. Disassemble dasher assay first from dasher bearing and then from mixing shaft, then clean the assay. BEARING DASHER MIXING SHAFT...
- Page 36 Cleaning method Condenser and filter cleaning method 【 】 1. Pull out the condenser filter located on the right side of the machine. ※ I SI-300TW is water-cooled and does not require cleaning of condenser. 2. Remove dust from the filter element or use a vacuum cleaner, and wash it clean with water.
-
Page 37: Dasher And Dasher Cover Assembly Method
Dasher and dasher cover assembly method 1. Apply edible vegetable oil to the ring inserted into the piston. 2. Insert the piston in the middle of the dasher cover. 3. Insert the discharge lever into the piston and then insert the lever in line with the dasher cover and the discharge lever. -
Page 38: Before Requesting Service
Before requesting service The soft ice cream machine can operate abnormally because you are not familiar with the method for use or due to another insignificant reason. It does not necessarily mean a malfunction. In this case, check the following items to resolve a simple problem on your own without the help from the service center. -
Page 39: Replacement Cycle Of Consumable Parts
Replacement cycle of consumable parts PART NAME Replacement cycle Quantity SIZE DASHER COVER PACKING 6 months 1 EA RING CABURATOR 6 months 4 EA SHAFT POM PACKING Once a year 6 EA PACKING JAVARA Once a year 1 EA Replacement cycle Quantity SIZE PART NAME... -
Page 40: Error Codes And Corrective Actions
Error Codes and Corrective Actions The soft ice cream machine may malfunction due to incorrect operation procedure or a trivial cause other than machine defect or failure. If the following corrective actions fail to correct the problem, or the error code is not presented below, or the same error persists, contact the nearest After Service Center. -
Page 41: Circuit Diagram
Circuit diagram... - Page 42 Circuit diagram...
-
Page 43: Part List
Part list SSI-151 【 DASHER ASSY 】 BEARING DASHER DASHER LUG POM MIXING SHAFT SCREW ADJUST 【 COMPRESSOR & CONDENSER 】... - Page 44 Part list SSI-151 【 OUT SIDE 】...
- Page 45 Part list SSI-151 【 MOVE PART 】...
- Page 46 Part list SSI-151...
- Page 47 Part list SSI-300...
- Page 48 Part list SSI-300...
- Page 49 Part list SSI-300...
- Page 50 Part list SSI-300 【 DASHER ASSY 】...
- Page 51 Part list SSI-300 【 REFRIGERANT 】...
- Page 52 Part list SSI-300 【 ASSY CONTROL BOX 】...
- Page 53 MEMO...
- Page 54 MEMO...
- Page 55 MEMO...
- Page 56 Online Internet Service http://www.icetro.com 3 2 4 0 2 1 6 - 0 3...
Need help?
Do you have a question about the SSI-300T and is the answer not in the manual?
Questions and answers