Table of Contents
Advertisement
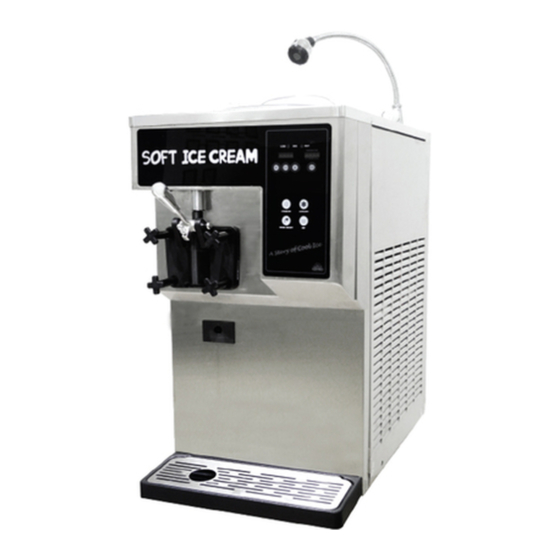
Soft Ice Cream Maker
User Manual
* Read this manual carefully before using the product.
Keep the booklet in a safe place after reading.
* The product is to be used indoors.
Be sure to install it inside a building.
* Appearances, design, color, or parts may be changed
without prior notice for the most effective manufacturing process.
ISI-321TA
ISI-300TA
Advertisement
Table of Contents

Subscribe to Our Youtube Channel
Related Manuals for icetro ISI-321TA


Summary of Contents for icetro ISI-321TA
- Page 1 Soft Ice Cream Maker User Manual ISI-321TA ISI-300TA * Read this manual carefully before using the product. Keep the booklet in a safe place after reading. * The product is to be used indoors. Be sure to install it inside a building.
- Page 2 This Soft Ice Cream Maker has the following benefits: 1. Minimum noise and refreshing cooling system With a high efficiency and low noise motor, we can achieve minimal noise from the refreshing cooling system 2. MICOM control method Use of an artificial intelligence control type achieves an optimal cooling system. 3.
-
Page 3: Table Of Contents
Dear customer, Thank you for purchasing this Soft & Yogurt Ice Cream Maker from Icetro Corp. Be sure to read this user manual for the correct usage and maintenance of the product. If you encounter any problem while using the product, refer to this manual for troubleshooting. -
Page 4: Safety Cautions
Safety Cautions The caution/warning details for safety are intended to prevent accident or danger through safe and proper use. Therefore please follow the details accordingly. The precaution details are categorized into warning and caution, and the respective meanings are as follows. If you neglect this symbol and wrongly use the product, Danger it may cause a fire, serious injury or death. - Page 5 Warning For relocation of the product, call an expert. Keep your warning and caution The product may cause such hazards as labels clean for easy legibility. Label falling down unless properly installed. If the user misunderstands Warning It should be installed in accordance with related the content of such a label, Caution regulations such as KS standards, the road and...
- Page 6 Warning Do not install it on a tilt. This product shows the Optimal performance It can cause physical injury or product damages. at temperature of 10~30°C. Caution Caution Do not apply excessive force Do not install it near dust, orimpact to the product. moisture or rainwater(water) popping.
- Page 7 Warning If the earth leakage breaker Stop using the machine, is in the ‘OFF’ position, if you find the power cable, do not turn it to the ‘ON’ or any other cable to be position by force. defective. If you turn it ‘on’ while the Fire or electric shock machine is defective, fire may occur.
-
Page 8: How To Unpack And Install The Ice Cream Maker
How to Unpack and Install the Ice Cream maker This soft & yogurt ice cream maker has been inspected at the factory prior to shipping out. Remove the wooden or other packaging; if the product is found to be damaged during transport, contact the local agent or manufacturer. -
Page 9: How To Install
How to Install Follow this process! ● The water supply valve may have different shapes depending ● on the installation condition. To guarantee the optimal operation of the product, please consult ● our technician on how to install the product. Water (Contact our authorized technician in case of moving the product Valve... -
Page 10: Description Of Parts And Dimensions
Description of Parts and Dimensions Front Water tap Ingredient inlet cover Upper cover Display Outlet lever Setup button Power switch Adjusting button Right control box Dasher cover Joint bolt Drain box Rubber feet Left side Back Power input Water supply part... -
Page 11: Description Of Parts And Dimensions
Description of Parts and Dimensions Included accessories Brush drum Dasher lug foam Packing dasher cover O-ring Brush cover Carburetor tube body, tube Packing down 141 1EA, 1EA Brush 3 Packing dasher shaft Union 1/2 Brush carburetor out Dasher bearing Hose Manual Hines... -
Page 12: Specifications
Specifications Category Specification Product Soft ice cream maker Model ISI-321TA ISI-300TA Voltage and frequency rating 1 Ph, 230 V, 50 Hz 1 Ph, 220 V, 60 Hz Power consumption 2070 W 2500 W Rated Current 10.1 A 12 A Horizontal(W) -
Page 13: What To Check Before Using The Product
What to check before using the product 【 The following must be checked before using the product! 】 Be sure to connect to a single-phase power outlet with 230V and 50Hz. Plug the power cord into an available outlet. (Consult a qualified electrical engineer regarding the installation of the product.) The power cord must be connected to operate the product. -
Page 14: Button Display Description And Functions
Button display description and functions Buttons sense the touch of people(electric capacity), so press them slightly. Also, buttons are placed narrowly each other. So when you press a button, the adjacent button can be pressed. For Your If you press the buttons hard, internal malfunction can occur, Information or the buttons won't function. -
Page 15: Detailed Description Of Each Mode
Detailed description of each mode Change the setting If you press the "Set" button lightly, you can enter the mode to check the setting as below. Use the“ ▼ ” and“ ▲ ” buttons to see the settings. 1-1: Check ice cream level settings You can check the current setting for the ice cream. - Page 16 Detailed description of each mode Check the temperature and the record Press the "Select" button to check the different temperaturesettings mentioned below. The item number and the temperature will be displayed in turns. 2-1 : Temperature of the mixing tank 2-2 : Temperature of the mixing tank sensor 2-3 : Condenser suction temperature (neighboring temperature) 2-1 : Temperature of the mixing tank...
- Page 17 Detailed description of each mode Change the setting Press the "Set" button for three seconds to enter the setting change mode as follows. Use the“ ▼ ” and“ ▲ ” to enter the password and use the "Set" button to move to each item. When the display blinks, use " ▼ ” and“...
- Page 18 Detailed description of each mode Model selection: Only experts that have been designated by the main office or by those who received professional education and received approval from the main office shall adjust this category. A service charge will be applied if problems occur due to unapproved alterations. Press "set"...
- Page 19 Detailed description of each mode 4-4 : Standby off temperature setting This sets the cylinder's raw material storage temperature in the standby mode. When the temperature of this category is too low, the raw material inside the cylinder freezer and soft freezer can become like porridge. 4-5 : Standby management temperature setting This sets the management temperature to refrigerate the raw material in the hopper.
- Page 20 Detailed description of each mode 4-11: Environmental temperature detect function setting The function to detect the environmental temperature can be turned ON/OFF. Environmental temperature is the temperature of the air coming into the compressor. Therefore, the temperature for this category can be high and a warning message can be given if the place of installation is small and has no ventilation.
- Page 21 Detailed description of each mode 2 : Operation time setting after sales Set the operation delay time of the air pump sales. After the motor operation is stopped, the air pump is additionally operated according to the time set for this category. 3 : Operation time set after button input Set the time that the air pump operates every time the button is pushed.
- Page 22 Detailed description of each mode 4-26: Specification of whether surrounding temperature compensation will be used This category is used to compensate for the surrounding temperature (located at the suction side of the compressor) 1 : Temperature compensation value setting for 10℃ or lower This sets the temperature compensation value of the ambient temperature to the environmental temperature of 10℃...
- Page 23 Detailed description of each mode 4-30 : MIX OUT function selection When this category is activated, all operations are stopped in case there is no raw material. 4-31 : MIX LOW function selection 4-32 : Frequency standard value setting Setthe frequency standard of the supply power. When the standard value of this category is wrongly selected, the present supply voltage of 1~3 can be displayed differently.
-
Page 24: Making Ice Cream
Making ice cream 1. With the carburetor removed, pour ingredient into the mix hopper until the "MIX-OUT" indicator goes off. 2. Put the carburetor back on when a sufficient amount of ingredient is poured. Adjust the carburetor hole according to the amount you want to sell. 3. -
Page 25: Controlling The Speed Of Making Ice Cream
Controlling the speed of making ice cream 1. By adjusting 'Screw Adjust' at the bottom of the lever (out lever), you can adjust the out-speed of the soft ice cream. As shown in the figure on the left, release the 'Screw Adjust' to increase the out-speed of the soft ice cream. Screw Adjust 2. -
Page 26: How To Adjust The Carburetor
How to adjust the carburetor The carburetor has two components. The one inserted into the hopper is "BODY," with a “TUBE" going Carburetor tube body into the body. The tube is open on both sides and cannot be inserted in the wrong direction. -
Page 27: How To Clean
How to clean 1. Press the wash button on the control panel. (Wait until the soft cream in the cylinder is melted, About 10 minutes.) 2. Open the cover of the mix hopper carburetor and remove the carburetor and impeller. impeller 3. - Page 28 How to clean 6. Brush the drain hole of the mixing tank thoroughly. 7. Use faucet water to clean off the inner area of the tank. 8. Press the wash button and finally discharge the water from the mixing tank. Use faucet water to rinse off the cleaning agent residuals.
- Page 29 How to clean 11. Separate the dasher from the cylinder. 12. Brush off the inner area of the cylinder and wipe it off with a soft cloth. Insert a brush into the dead end of the cylinder and turn the brush left and right to clean up the cylinder. 13.
- Page 30 How to clean 16. Take out the piston of the dasher cover and clean the edge of the piston with a soft towel. 17. Disassemble dasher assay first from dasher bearing and then from mixing shaft, then clean the assay. BEARING DASHER MIXING...
- Page 31 How to clean 【 How to clean the condenser and filter 】 1. Pull out the condenser filter located on the left side of the machine. 2. Remove dust from the filter element or use a vacuum cleaner, and wash it clean with water. 3.
-
Page 32: Assembling The Dasher And Dasher Cover
Assembling the dasher and dasher cover 1. Apply edible grease on the ring inserted into the piston. 2. Insert the piston into the dasher cover. 3. Insert the discharge lever into the piston and then insert the lever in line with the dasher cover and the discharge lever. -
Page 33: Before Requesting For Customer Service
Before requesting for customer service The soft ice cream machine can operate abnormally because you are not familiar with the method for use or due to another insignificant reason. It does not necessarily mean a malfunction. In this case, check the following items to resolve a simple problem on your own without the help from the service center. -
Page 34: Replacement Cycle Of Consumable Parts
Replacement cycle of consumable parts Replacement cycle Quantity SIZE PART NAME DASHER COVER PACKING 6 months 1 EA RING Carburetor 6 months 2 EA SHAFT POM PACKING Once a year 2 EA... -
Page 35: Error Code Type And Corrective Actions
Error Codes and Corrective Actions The soft ice cream machine may malfunction due to incorrect operation procedure or a trivial cause other than machine defect or failure. If the following corrective actions fail to correct the problem, or the error code is not presented below, or the same error persists, contact the nearest After Service Center. -
Page 36: Circuit Diagram
Circuit diagram... -
Page 37: What To Watch Out For
What to watch out for Overcooling may give rise to issues such as unintended stopping of operation, damage to the product itself or any part, or malfunction of the power delivery axis. There may be excessive noise or smell due to abrasion. Any issue inside the product may result in the formation of foreign object in the ice cream. -
Page 38: Warranty
Warranty If no receipt or warranty certificate is received, the receipt/warranty certificate is lost, or the date of purchase cannot be confirmed for reasons other than the foregoing, the warranty expires within 6 months of the manufacturing date. [ Free repair ] 1. - Page 39 MEMO...
- Page 40 Online Internet Service http://www.icetro.com 3 2 4 0 3 4 2 - 0 1...
Need help?
Do you have a question about the ISI-321TA and is the answer not in the manual?
Questions and answers