Advertisement
Quick Links
Advertisement

Subscribe to Our Youtube Channel
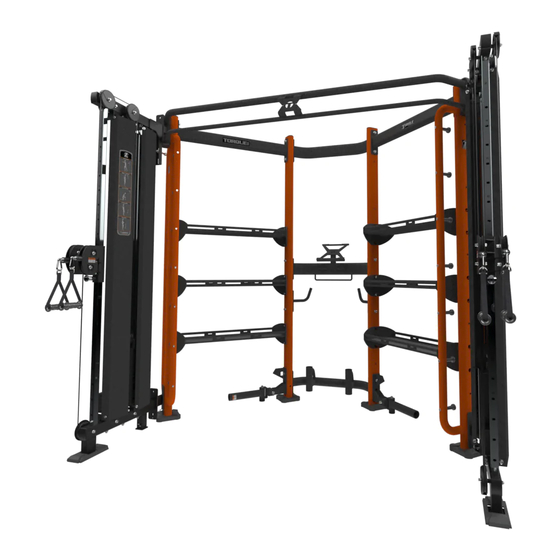
Summary of Contents for Torque X-LAB-EDGE Series
- Page 1 X-LAB-EDGE Assembly Guide VERSION: XLE-X4 PART #: 5582901-A...
- Page 2 STEP 1 XLAB BOOT XLAB BOOT XLAB-501 XLAB-501 PAGE 2...
-
Page 3: Loosely Assemble Bolt Connections In This Step
STEP 2 XLAB-501 XLAB-501 1/2" FLAT WASHER (8) 1/2 X 4" BOLT (4) 1/2" LOCK NUT (4) GRT-101 GRT-101 BATTLE ROPE CONNECTOR LOOSELY assemble bolt connections in this step. PAGE 3... - Page 4 STEP 3 TOP CONNECTOR 1/2" LOCK NUT (4) 1/2" FLAT WASHER (8) 1/2 X 3-1/2" BOLT (4) XLAB-401 XLAB-401 XLAB-501 XLAB-501 LOOSELY assemble bolt connections in this step. PAGE 4...
-
Page 5: Xlab
STEP 4 XLAB-301 XLAB-301 XLAB-BOOT XLAB-BOOT PAGE 5... - Page 6 STEP 5 XLAB-401 XLAB-401 1/2 X 3-3/4" BOLT (2) 1/2 X 3-3/4" BOLT (2) 1/2" FLAT WASHER (4) 1/2" FLAT WASHER (4) 1/2" LOCK NUT (2) 1/2" LOCK NUT (2) ANGLE CONNECTOR ANGLE CONNECTOR SUSPENSION CROSS XLAB-301 XLAB-301 LOOSELY assemble bolt connections in this step. PAGE 6...
- Page 7 STEP 6 XLAB-501 XLAB-501 XLAB-301 XLAB-301 AT-101 AT-101 1/2 X 3-1/2" BOLT (4) 1/2 X 3-1/2" BOLT (4) 1/2" FLAT WASHER (8) 1/2" FLAT WASHER (8) 1/2" LOCK NUT (4) 1/2" LOCK NUT (4) LOOSELY assemble bolt connections in this step. PAGE 7...
- Page 8 STEP 7 XLAB-501 XLAB-501 CONNECTOR 1/2 X 3-1/4" XLAB-301 1/2 X 3-1/4" BOLT (1) BOLT (1) AT-101 AT-101 1/2 X 3-1/2" BOLT (2) 1/2 X 3-1/2" BOLT (2) XLAB-301 1/2" FLAT WASHER (12) 1/2" FLAT WASHER (12) BATTLE ROPE 1/2" LOCK NUT (6) 1/2"...
- Page 9 STEP 8 AT-101 1/2 X 3-1/2" BOLT (4) AT-101 1/2 X 3-1/2" BOLT (4) 1/2" FLAT WASHER (8) 1/2" FLAT WASHER (8) XLAB-301 1/2" LOCK NUT (4) 1/2" LOCK NUT (4) XLAB-301 XLAB-501 XLAB-501 LOOSELY assemble bolt connections in this step. PAGE 9...
- Page 10 STEP 9 XLAB-301 XLAB-301 ANGLE CONNECTOR ANGLE 1/2 X 3-3/4" BOLT (2) 1/2 X 3-3/4" BOLT (2) CONNECTOR 1/2" FLAT WASHER (4) 1/2" FLAT WASHER (4) 1/2" LOCK NUT (2) 1/2" LOCK NUT (2) 1/4" SPACER (2) 1/4" SPACER (2) ATTENTION: AFTER THIS STEP HAS BEEN COMPLETED, SECURELY TIGHTEN THE BOLT CONNECTIONS IN THIS STEP AND ALL PREVIOUS STEPS.
- Page 11 STEP 10: XCC-101 ASSEMBLY ANGLE 1/2" LOCK NUT (4) CONNECTOR 1/2" FLAT WASHER (8) 1/2 X 1-1/4" BOLT (4) XCC-101 TOP FRAME REPEAT STEP XCC-101 ON THIS SIDE 1/2" LOCK NUT (4) XCC-101 BOTTOM FRAME ANGLE 1/2 X 1-1/4" BOLT (4) CONNECTOR (2) 1/2"...
- Page 12 ANCHOR STEPS: 1) Position machine in desired location. 2) Trace around the four base plates and the four holes in each base plate. 3) Move machine. 4) Drill anchor holes. Follow instructions on anchor bolt packaging. 5) Vacuum dust out of each anchor hole. 5) Move machine back over anchor holes.


Need help?
Do you have a question about the X-LAB-EDGE Series and is the answer not in the manual?
Questions and answers