Table of Contents
Advertisement
Quick Links
Advertisement
Table of Contents

Subscribe to Our Youtube Channel
Related Manuals for Torque TANK


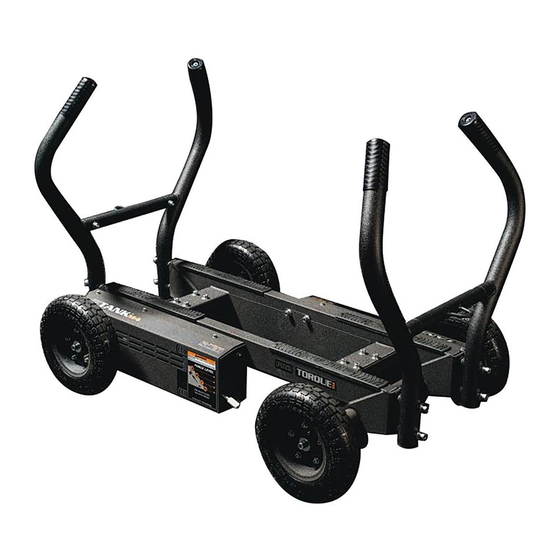
Summary of Contents for Torque TANK
-
Page 1: 5585401 Assy, Two Brake Frame
TANK Assembly Guide VERSION: XTTM4-PH & XTTM4GT-PH PART #: 5586101-C... -
Page 2: Table Of Contents
TABLE OF CONTENTS: TANK ASSEMBLY: PAGES 3 - 5 TANK CHAIN ADJUSTMENT: PAGES 6 - 9 & 11 - 13 TANK BELT ADJUSTMENT: PAGES 6 - 8 & 10 - 13 TANK WEIGHT HORN KIT (OPTIONAL): PAGES 14 - 15 TANK BUMPER KIT (OPTIONAL): PAGES 16 - 17 INSPECTION &... - Page 3 STEP 1 ALIGN GROOVE IN THE HUB WITH THE ROLL PIN IN THE AXEL (4) NOTE: SECURELY tighten all bolt connections in this step.
-
Page 4: 5619001 Wheel, 12" Dia X 3.5 Wide
STEP 2 NOTE DIRECTION OF TOW HOOK NOTE DIRECTION OF TOW HOOK NOTE: LOOSELY tighten bolt connections in this step. - Page 5 STEP 3 NOTE: After this step has been completed, SECURELY tighten all bolt connections in this step and previous step.
- Page 6 CHAIN AND BELT ADJUSTMENT REMOVE WHEEL...
- Page 7 CHAIN AND BELT ADJUSTMENT REMOVE HANDLE NOTE FEATURE FOR WRENCH...
-
Page 8: 2010801 Washer, Steel 12.7 Id-25 Od-2 Thk Clear Zinc
CHAIN AND BELT ADJUSTMENT REMOVE COVER... - Page 9 TURN BOLT COUNTER CLOCKWISE FOUR BOLTS TO LOOSEN CHAIN (CIRCLED) NOTE: The chain tension on TANK is pre-set at the factory. However, if the chain becomes too loose or is too tight, then please follow the steps in numbered numbered order to adjust.
-
Page 10: Tank Belt Adjustment: Pages 6 - 8
TO TENSION BELT, LOOSEN NUT SLIGHTLY AND PULL UP ON TENSIONER BRACKET. RETIGHTEN NUT SECURELY BELT TENSIONER NOTE: The belt tension on TANK is pre-set at the factory. However, if belt is too loose or starts to slip, then please follow this step. -
Page 11: Tank Chain Adjustment: Pages 6 - 9
CHAIN AND BELT ADJUSTMENT SECURELY REASSEMBLE COVER... -
Page 12: 2010901 Washer, M12 Split Lock
CHAIN AND BELT ADJUSTMENT SECURELY REASSEMBLE HANDLE NOTE FEATURE FOR WRENCH... - Page 13 CHAIN AND BELT ADJUSTMENTS SECURELY REASSEMBLE WHEEL...
-
Page 14: Tank Weight Horn Kit (Optional): Pages
XTWHK WEIGHT HORN KIT (OPTIONAL) LOOSEN AND REMOVE BOLTS, FLAT WASHERS AND NUTS LOOSEN SIDE BOLTS (4) BUT DO NOT REMOVE NOTE: Handles have been hidden for assembly clarity. - Page 15 XTWHK WEIGHT HORN KIT (OPTIONAL) SECURELY ASSEMBLE WEIGHT HORNS TO TANK USING THE BOLTS, FLAT WASHERS AND NUTS FROM PREVIOUS STEP. SECURELY TIGHT SIDE BOLTS (4) NOTE: SECURELY tighten all bolt connections in this step. Handles have been hidden for assembly clarity.
-
Page 16: Tank Bumper Kit (Optional): Pages
XTBK TANK BUMPER KIT (OPTIONAL) LOOSEN AND REMOVE BOLTS, LOCK WASHERS AND FLAT WASHERS DISCARD FLAT WASHERS LOOSEN BOLTS (2), ON THIS SIDE BUT DO NOT REMOVE... - Page 17 XTBK TANK BUMPER KIT (OPTIONAL) LOOSELY ASSEMBLE BUMPERS TO THE HANDLES AS SHOWN USING FLANGE SPACERS, BOLTS AND LOCK WASHERS FROM PREVIOUS STEP REPEAT THIS STEP, ONE AT A TIME FOR REMAINING 3 BUMPERS. KEEP BOLTS LOOSE UNTIL ALL BUMPERS...
-
Page 18: Inspection & Lubrication
RECOMMENDED LUBRICATION: Use a Dry lubrication for indoor use, and wet lubrication for outdoor use. Most bicycle shops carry a variety of different lubricants and can recommend a lubricant based on the conditions where the TANK will be used. BELT HANDLE BOLTS SPROCKET... -
Page 19: Notices
TANK PRODUCT LABELS - NOTICES...
Need help?
Do you have a question about the TANK and is the answer not in the manual?
Questions and answers