Table of Contents
Advertisement
Quick Links
Advertisement
Table of Contents

Related Manuals for TRENDnet TEW-841APBO


Summary of Contents for TRENDnet TEW-841APBO
- Page 1 Cover Page TRENDnet User’s Guide...
-
Page 2: Table Of Contents
Device Status ....................... 27 Quick Reference ................7 Connections ......................... 29 TEW-841APBO ....................... 7 Real-time ........................29 TEW-841APBO Basic Installation and Configuration (Basic Access Point Network ..................30 Setup) ..................... 8 Basic ..........................30 Hardware Setup ......................8 Wireless ........................31 Basic Access Point Configuration ................... - Page 3 Table of Contents TRENDnet User’s Guide Appendix ..................47 © Copyright 2019 TRENDnet. All Rights Reserved.
-
Page 4: Product Overview
TRENDnet User’s Guide Features Product Overview TRENDnet’s 5 dBi Wireless AC1300 Outdoor PoE+ Omni-Directional Access Point, model TEW-841APBO Overview TEW-841APBO, is designed for point-to-point and point-to-multi-point WiFi bridging applications. The wireless multi-point bridge can be powered with a PoE+ switch or PoE+ injector of your choosing. - Page 5 Additionally environmental factors such as weather conditions, physical obstacles, and other considerations may affect performance. For optimal results, we recommended consulting a professional installer for site survey, safety precautions, and proper installation. © Copyright 2019 TRENDnet. All Rights Reserved.
-
Page 6: Product Hardware Features
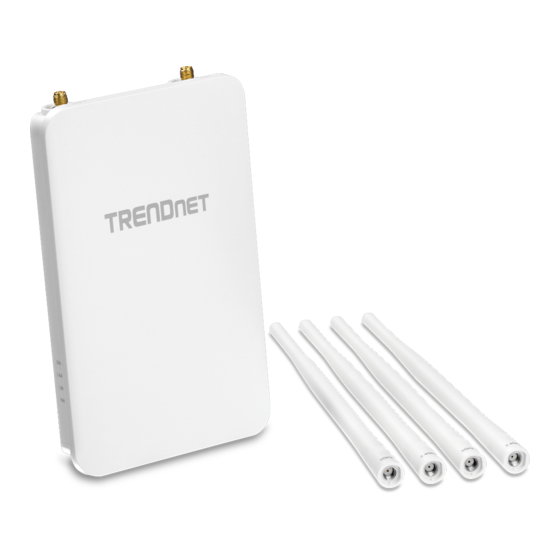
IP67 Weather Rated Housing with built-in directional sector antenna Bottom View (without weatherproof kit) PoE+ Gigabit LAN port (power input) Waterproof kit 4 x RP-SMA (female) Top View LED indicators antenna connectors Side View © Copyright 2019 TRENDnet. All Rights Reserved. - Page 7 It is recommended to use RJ-45 cables without any additional caps, molded caps, or boots specifically on the connector side that will be connected to the access point LAN1 (PoE) port to avoid any cable fitment issues. © Copyright 2019 TRENDnet. All Rights Reserved.
-
Page 8: Primary Product Application
Distribution System) Mode using AES encryption for security. The example application displays two TEW-841PBO access points establishing a wireless link between each other, both configured in WDS Bridge; allowing for network connectivity between two buildings over a point-to-point wireless link. © Copyright 2019 TRENDnet. All Rights Reserved. -
Page 9: Minimum Installation Requirements
RJ-45 Ethernet cables (not included) Additional TRENDnet TEW-841APBO or TEW-841APBO (optional for point-to- 1. Adjust your wireless devices so that the signal is traveling in a straight path, rather point bridging) than at an angle. The more material the signal has to pass through the more signal ... -
Page 10: Quick Reference
Default Settings http://tew-841apbo LAN IP Address: 192.168.10.100 (DHCP) LAN Subnet Mask: 255.255.255.0 Channel Access Method: CSMA/CA Mode: Access Point (AP) Mode WPA2 Encryption Key: <predefined> User: admin Password: admin © Copyright 2019 TRENDnet. All Rights Reserved. -
Page 11: Tew-841Apbo Basic Installation And Configuration (Basic Access Point Setup)
1. Using a RJ-45 network cable, connect the cable from the LAN (PoE) port of your access point, to an available LAN PoE+ port on your networked switch or PoE+ The following installation procedure is for setting up the TEW-841APBO as a basic injector. - Page 12 Enter. The default IP address of the access point is 192.168.10.100. IMPORTANT NOTE: This device does not have a hardware reset button. When changing the administrator password to the access point configuration page, please make sure to write down your new password. © Copyright 2019 TRENDnet. All Rights Reserved.
- Page 13 9. Upon clicking apply, you will return to the login screen. Please enter the newly configured credentials to log back in. © Copyright 2019 TRENDnet. All Rights Reserved.
- Page 14 & reboot of the device. sticker. If you are modifying the wireless settings, you will need to connect reconnect all clients to the access point using the new credentials. © Copyright 2019 TRENDnet. All Rights Reserved.
-
Page 15: Tew-841Apbo Basic Installation And Wds Configuration (5Ghz Wds Bridge & 2.4Ghz Ap)
Note the WiFi MAC Addresses TEW-841APBO Basic Installation and WDS 1. Write down the 5GHz MAC address (WiFi 5GHz) of both the TEW-841APBO #1 and Configuration (5GHz WDS Bridge & 2.4GHz AP) TEW-841APBO #2 access points. The MAC address can be found on the label on the back of the access point. -
Page 16: Hardware Setup
LAN PoE+ port on your networked switch or PoE+ performance. injector. 2. Using another RJ-45, connect your computer’s Ethernet port to the same PoE+ device chosen in step 1. © Copyright 2019 TRENDnet. All Rights Reserved. - Page 17 Enter. The default IP address of the access point is 192.168.10.100. IMPORTANT NOTE: This device does not have a hardware reset button. When changing the administrator password to the access point configuration page, please make sure to write down your new password. © Copyright 2019 TRENDnet. All Rights Reserved.
- Page 18 & reboot of the device. You may choose to configure and save first, then apply everything together at the end. © Copyright 2019 TRENDnet. All Rights Reserved.
- Page 19 TRENDnet User’s Guide 15. Click Configuration next to Channel. MAKE SURE THE CHANGES TO THE CONFIGURATIONS ARE Note: The channel for TEW-841APBO #1 and TEW-841APBO #2 must be the same. APPLIED 12. The page should now have two indicators regarding pending changes: ...
- Page 20 AES. Enter your chosen WDS encryption key in the AES Passphrase field (8-63 alphanumeric characters). Note: When configuring TEW-841APBO #2, the WDS AES Passphrase must be the same as TEW-841APBO #1. © Copyright 2019 TRENDnet. All Rights Reserved.
-
Page 21: Tew-841Apbo #2 Configuration
TEW-841APBO TRENDnet User’s Guide TEW-841APBO #2 Configuration When configuring TEW-841APBO #2, repeat all steps in TEW-841APBO #1 aside from the following: 11. In Step 11, under IPv4 Settings, select Static IP and enter the IP address MAKE SURE THE CHANGES TO THE CONFIGURATIONS ARE 192.168.10.51, Subnet Mask 255.255.255.0, Gateway 192.168.10.1, and Primary... -
Page 22: Confirm Connectivity
Confirm Connectivity Click on the Tools tab under Management category in the left hand menu. 1. Leave your computer connected to TEW-841APBO #2 and keep the access point management page open. 2. Make sure both TEW-841APBO #1 and TEW-841APBO #2 access point are powered on and approximately 15 ft. -
Page 23: Completed Installation Reference
TEW-841APBO TRENDnet User’s Guide Completed Installation Reference © Copyright 2019 TRENDnet. All Rights Reserved. -
Page 24: Hardware And Mounting Installation
4. Insert one end of an Ethernet cable into the sealing nut. 5. Insert the Ethernet cable into the seal. 8. Connect the Ethernet cable to the LAN (PoE) port on the bottom of the access point. © Copyright 2019 TRENDnet. All Rights Reserved. -
Page 25: Pole Mount Installation
2. Wrap the clamp around the pole where the access point will be installed and secure by turning the pole clamp screw clockwise at the desired height and position. 10. By hand, screw the seal nut clockwise to secure it to the main body. © Copyright 2019 TRENDnet. All Rights Reserved. -
Page 26: Application Modes
A remote base station is the end point to accept connections from wireless clients and pass data upstream to a network wirelessly. Example: Access Point It can be deployed as a traditional fixed wireless access point. © Copyright 2019 TRENDnet. All Rights Reserved. -
Page 27: Wds Access Point (Wifi Distribution System)
WDS Station connections as needed due to the WDS Stations not Note: Each TEW-841APBO in WDS Access Point mode can establish a WDS network with needing WDS Link Settings and are not limited by MAC addresses in WDS Link protocols. -
Page 28: Wds Bridge
WDS point-to-multipoint wireless bridges or links between multiple physical locations that are a great distance from one another. Note: Each TEW-841APBO in WDS Bridge mode can establish a WDS network with up to 8 other access points per radio. -
Page 29: Accessing Your Access Point Management Page
IP address settings in the same subnet as the as the access point in order present), or the IP address assigned by your DHCP server. The TEW-841APBO by default to access the management page. (Ex. Access Point IP address changed to 192.168.0.100 is configured with DHCP IP settings. -
Page 30: Overview
Uptime – Displays the time the access point has been powered on. Firmware Version – Displays the current firmware of the access point Management VLAN ID – Displays the currently VLAN ID status. © Copyright 2019 TRENDnet. All Rights Reserved. - Page 31 TX(Packets) – Displays the data usage when transmitting data (in Bytes) and Distance – Displays the distance (coverage/radius) in meters that the access number of packets. point is to cover. 3. Click Refresh at the bottom of the page to refresh the page. © Copyright 2019 TRENDnet. All Rights Reserved.
-
Page 32: Connections
Connection List – Display all other wireless connections. Note: The following images are sample images of a few different operation modes. For more information regarding operation modes, please see “Application Mode” on page © Copyright 2019 TRENDnet. All Rights Reserved. -
Page 33: Network
Forward Delay – Enter the desired forward delay (in seconds). Secondary DNS – Enter the desired secondary Domain Name Server (DNS). Priority – Enter the desired priority of this STP configuration. © Copyright 2019 TRENDnet. All Rights Reserved. -
Page 34: Wireless
Wireless Settings Apply Device Name – Enter the desired name for this device. If changing the name. Click Apply on the bottom right of any page: © Copyright 2019 TRENDnet. All Rights Reserved. - Page 35 Distance – Enter in the distance (0-30 in km), as in the coverage radius. The equivalent distance measured in miles is to the right of the field for your convenience. © Copyright 2019 TRENDnet. All Rights Reserved.
- Page 36 Force 5GHz – This option causes all 5GHz capable clients to connect to the 5GHz radio. Band Balance – Similar to the Prefer 5GHz option, but additionally allows configuration of percentage of new clients on the 5GHz. © Copyright 2019 TRENDnet. All Rights Reserved.
- Page 37 Save – Clicking Save will close the pop-up window and return to the previous page. Radius Accounting Secret – Enter the secret key for your radius server. Remember to save your advanced configurations! Interim Accounting Interval – Enter the interval (in seconds). © Copyright 2019 TRENDnet. All Rights Reserved.
- Page 38 Note: This access point can establish 8 WDS links per radio, for 16 WDS links total. Security – Select and enter the security settings used for the WDS link. MAC Address – Enter the MAC address for the WDS link and select Enable. © Copyright 2019 TRENDnet. All Rights Reserved.
- Page 39 VLAN ID. Status – Select Enable to enable this feature then enter in the VLAN ID. . 3. Click Save at the bottom of the page to save your settings. © Copyright 2019 TRENDnet. All Rights Reserved.
-
Page 40: Management
Authorized Key – Enter the key for the protocol specified above for SNMPv3. Private Protocol – Select the private protocol for the SNMPv3. Private Key – Enter the private key for the protocol specified above for SNMPv3. Engine ID – Enter the engine ID. © Copyright 2019 TRENDnet. All Rights Reserved. -
Page 41: Time Zone
Time Zone – Select your time zone from the drop down. Enable Daylight Saving – Check the box to enable automatic daylight savings time adjustment, then adjust the fields accordingly. 3. Click Apply to apply the settings. © Copyright 2019 TRENDnet. All Rights Reserved. -
Page 42: Wifi Scheduler
SSID Selection – Click the drop down and select which SSID to apply the schedule to. Schedule Templates – Click the drop down and select a template, or choose custom schedule and set the hours on the table below. © Copyright 2019 TRENDnet. All Rights Reserved. -
Page 43: Tools
Press Start to begin the test. Traceroute Target IP / Domain Name – Enter the IP address or domain name of the traceroute target. Press Start to begin the test. © Copyright 2019 TRENDnet. All Rights Reserved. - Page 44 Other – Select Enable to turn on the remaining LED’s. Default: Enable Device Discovery Scan – Click Scan to commence a device discovery. The device details will populate after the scan. © Copyright 2019 TRENDnet. All Rights Reserved.
-
Page 45: System Manager
TRENDnet may periodically release firmware upgrades that may add features or fix System Manager > Account problems associated with your TRENDnet device and date/version. To check if there is a firmware upgrade available for your device, please check your TRENDnet model and This section allows configurations of the account passwords. - Page 46 Restore to User Default – Click Restore to restore the configuration to with the firmware upgrade. Click Proceed to begin the firmware upgrade the User Defined Default. procedure. A similar menu can be found by clicking Reset at top right of all GUI screen. © Copyright 2019 TRENDnet. All Rights Reserved.
-
Page 47: System Log
Log Server IP Address – Enter the IP Address for the remote log server. Log Server Port – Enter the port number for the remote log server. 3. Click on Apply to apply the log settings. © Copyright 2019 TRENDnet. All Rights Reserved. -
Page 48: Technical Specifications
2.4GHz: 2.412 – 2.462GHz IPv6 support (Link-Local, Static IPv6) 5GHz: 5.180 – 5.240GHz, 5.745 – 5.825GHz LEDs on/off 802.11k intelligent radio resource management RSSI Threshold (client signal strength and connectivity control) © Copyright 2019 TRENDnet. All Rights Reserved. - Page 49 400Mbps, use with a 400Mbps 802.11n wireless adapter. Multi-User MIMO (MU-MIMO) requires the use of multiple MU-MIMO enabled -22° – 60° C (-7.6° – 140° F) wireless adapters. © Copyright 2019 TRENDnet. All Rights Reserved.
- Page 50 2. In the Network Preference window, next to "Show:", select Network Status. You'll see In MAC OS 10.5/10.6, in the left column, select Ethernet. your network status and your IP address settings displayed. e. Configure TCP/IP to use DHCP. © Copyright 2019 TRENDnet. All Rights Reserved.
- Page 51 IP address. Click OK Windows XP/2000 a. Go into the Control Panel, double-click the Network Connections icon b. Right-click the Local Area Connection icon and the click Properties. c. Click Internet Protocol (TCP/IP) and click Properties. © Copyright 2019 TRENDnet. All Rights Reserved.
- Page 52 3. You may be prompted to enter a security key in order to connect to the network. 4. Enter in the security key corresponding to the wireless network, and click Connect. © Copyright 2019 TRENDnet. All Rights Reserved.
- Page 53 (pour les dispositifs utilisant la bande de 5 725 à 5 850 MHz) doit être conforme à la minimum distance 20cm between the radiator & your body.one of the following limite de la p.i.r.e. spécifiée, selon le cas; measures: © Copyright 2019 TRENDnet. All Rights Reserved.
- Page 54 Please carefully select the installation position and make sure that the final output power does not exceed the limit set force in relevant rules. The External Omni- 5dBi MASTER WAVE MASTER WAVE violation of the rule could lead to serious federal penalty. Directional © Copyright 2019 TRENDnet. All Rights Reserved.
- Page 55 An RMA number is required in order to initiate warranty service support the event that the RMA unit needs to be replaced, TRENDnet may replace it with a for all TRENDnet products. Products that are sent to TRENDnet for RMA service must refurbished product of the same or comparable model.
- Page 56 OF SUCH DAMAGES, AND LIMITS ITS LIABILITY TO REPAIR, REPLACEMENT, OR REFUND evidence of the original purchaser's date of purchase. Replacement products may be OF THE PURCHASE PRICE PAID, AT TRENDNET'S OPTION. THIS DISCLAIMER OF LIABILITY refurbished or contain refurbished materials. If TRENDnet, by its sole determination, is...
Need help?
Do you have a question about the TEW-841APBO and is the answer not in the manual?
Questions and answers