Table of Contents
Advertisement
Advertisement
Table of Contents

Related Manuals for TRENDnet TEW-814DAP


Summary of Contents for TRENDnet TEW-814DAP
- Page 1 Cover Page TRENDnet User’s Guide...
-
Page 2: Table Of Contents
Bridging additional WDS supported devices ............26 Access Point Management Page Structure ........43 Client ..........................27 Troubleshooting ................44 Set the device to client bridge mode ..............28 Appendix ..................45 Configure Client mode ..................28 © Copyright 2015 TRENDnet. All Rights Reserved. -
Page 3: Product Overview
TEW-814DAP, supports Access Point (AP), Client, Repeater, Wireless Distribution System (WDS) Bridge, and WDS + AP modes. The TEW-814DAP generates concurrent 867 Mbps Wireless AC and 300 Mbps Wireless N networks. Embedded GREENnet technology reduces power consumption by up to 50%. -
Page 4: Product Hardware Features
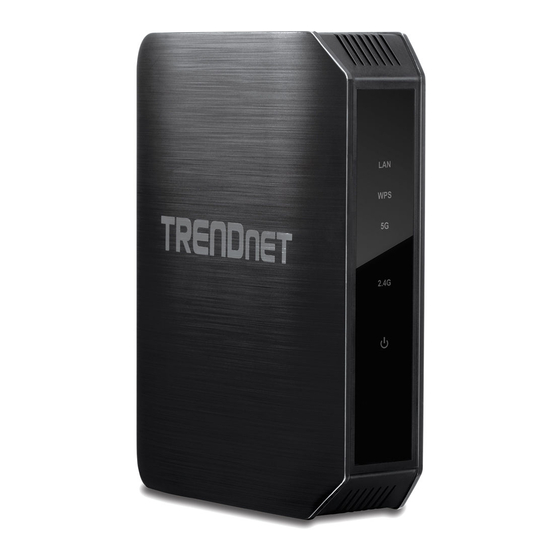
• Reset Button: Press and hold this button for 10 seconds to reset the access point. • WPS Button (Wi-Fi Protected Setup): Push and hold this button for 5 seconds to activate WPS. The Power LED will blink when WPS is activated. © Copyright 2015 TRENDnet. All Rights Reserved. -
Page 5: Basic Access Point Setup
• Wireless 5GHz: This indicator solid green when wireless 5GHz is enabled and blinks during wireless during data transmission • WPS: This indicator blinks green when WPS is activated © Copyright 2015 TRENDnet. All Rights Reserved. -
Page 6: Expanding A Home Network
LAN port. Push the ON/OFF (EU version) A network is a group of computers or devices that can communicate with each other. A switch on the TEW-814DAP to power up the access point. home network of more than one computer or device also typically includes Internet access, which requires a router. - Page 7 Name (SSID) and Wi-Fi Key. You can find these pre-configured settings on the labels at the side and bottom of the TEW-814DAP. You will use this information to connect wirelessly to the access point. To change the Wi-Fi key, please refer to Secure your 5.
-
Page 8: Access Your Access Point Management Page
Note: By default, the device is set to function in access point mode. 1. Log into your access point management page (see “Access your access point management page” on page 8). 2. Click on Main, click on Device Mode. © Copyright 2015 TRENDnet. All Rights Reserved. -
Page 9: Using Access Point Mode
802.11n only: Select this option if you only have 802.11n wireless devices. o Mixed 802.11n and 802.11a: Select this option if you will be using both 802.11n and 802.11a wireless devices. o 802.11ac only: Select this option if you only have 802.11ac wireless devices. © Copyright 2015 TRENDnet. All Rights Reserved. -
Page 10: Wireless Networking And Security
Setting up wireless security is very important. Leaving your wireless network open and connection speeds. TRENDnet recommends setting your access point to this unsecure could expose your entire network and personal files to outsiders. TRENDnet encryption standard. If you find that one of your wireless network devices does not... -
Page 11: Secure Your Wireless Network
(SSID) and security key using WPA2-Personal. The predefined wireless network name and security can be found on the sticker on the side of the access point or on the device label at the bottom of the access point. © Copyright 2015 TRENDnet. All Rights Reserved. - Page 12 Note: It is recommended to use port 1812 which is typical default RADIUS port. • RADIUS server Shared Secret: Enter the shared secret used to authorize your access point with your RADIUS server. © Copyright 2015 TRENDnet. All Rights Reserved.
-
Page 13: Connect Wireless Devices To Your Access Point
The WPS LED will blink to indicate WPS has been activated on your access point. (See “Product Hardware Features” on page 2) For connecting additional WPS supported devices, repeat this process for each additional device. © Copyright 2015 TRENDnet. All Rights Reserved. - Page 14 Guide for length of time) you are connecting. Guide for length of time) you are connecting. 5. Wait for your access point to finsh the WPS process. 6. Wait for your access point to finsh the WPS process. © Copyright 2015 TRENDnet. All Rights Reserved.
-
Page 15: Steps To Improve Wireless Connectivity
If you are still experiencing low or no signal consider repositioning the wireless devices, installing additional access points or wireless extenders. © Copyright 2015 TRENDnet. All Rights Reserved. -
Page 16: Advanced Wireless Settings
• IGMP Snooping: Select this option to enable IGMP snooping feature. • WLAN Partition: Select this option to disable the communication between connected clients. • HT20/40 Coexistence: Select enable to allow the access point to support both 20MHz and 40MHz. © Copyright 2015 TRENDnet. All Rights Reserved. -
Page 17: Wireless Bridge
Note: WDS (Wireless Distribution System) is not currently standardized and may not connect to different model wireless routers or access points, therefore, when using WDS, it is recommended to use the same model and version for wireless bridging. © Copyright 2015 TRENDnet. All Rights Reserved. - Page 18 TEW-814DAP TRENDnet User’s Guide The diagram below illustrates an example of multiple WDS wireless bridge links. © Copyright 2015 TRENDnet. All Rights Reserved.
-
Page 19: Access Point Mode With Wireless Bridge (Wds)
Note: WDS (Wireless Distribution System) is not currently standardized and may not connect to different model wireless routers or access points, therefore, when using WDS, it is recommended to use the same model and version for wireless bridging. © Copyright 2015 TRENDnet. All Rights Reserved. - Page 20 TEW-814DAP TRENDnet User’s Guide The diagram below illustrates an example of multiple WDS wireless bridge links with access point functionality. © Copyright 2015 TRENDnet. All Rights Reserved.
-
Page 21: Planning For Wireless Bridging (Wds)
MAC addresses (red text) of AP2, AP3, and AP4. AP2 needs to enter the remote MAC address of AP1 only, AP3 and AP4 also need to enter the remote MAC address of AP1 only). You can find the wireless MAC address of the access point in the management page under Status > Device Information. © Copyright 2015 TRENDnet. All Rights Reserved. - Page 22 (blue) to prevent IP address conflict. The “wired router” is the only single DHCP server (gray) providing automatic IP address assignment for all client devices in the network. The WDS parameters required to match on all WDS supported access points in order to establish WDS wireless bridging is configured (blue). The wireless MAC of all devices is noted (red). © Copyright 2015 TRENDnet. All Rights Reserved.
-
Page 23: Creating A Wireless Bridge (Wds)
This procedure can apply for both WDS and WDS+AP modes. To configure a wireless bridge (WDS) between two TEW-814DAP access points: • Make note of the wireless MAC address of both access points. See page XX for checking the status page. - Page 24 • WDS+AP (Recommended): Select this option to establish wireless bridging and broadcast your wireless network name for client devices to connect simultaneously. See page 23 for details. Please refer to the section Wireless Bridge (WDS) with Access Point (AP) Mode on page 19 for details on this mode. 4. Review the Bridge Setting section and press Save Settings. © Copyright 2015 TRENDnet. All Rights Reserved.
- Page 25 • Remote AP Mac: Enter the wireless MAC address of the remote WDS supported access point or router. • Bridge Security: Select and configure the wireless security to be used on the WDS connection. This setting must be applied on all WDS devices. © Copyright 2015 TRENDnet. All Rights Reserved.
- Page 26 • WDS+AP (Recommended): Select this option to establish wireless bridging and broadcast your wireless network name for client devices to connect simultaneously. See page 23 for details. Please refer to the section Wireless Bridge (WDS) with Access Point (AP) Mode on page 19 for details on this mode. 4. Review the Bridge Setting section and press Save Settings. © Copyright 2015 TRENDnet. All Rights Reserved.
-
Page 27: Bridging Additional Wds Supported Devices
For multiple point-to-point wireless WDS bridge links, you can follow the entire configuration procedure in the previous section Bridge” on page 23. The TEW-814DAP can support up to 8 wireless WDS bridge connections. © Copyright 2015 TRENDnet. All Rights Reserved. -
Page 28: Client
Client devices with wired network capability such as in a media or entertainment center (ex. Smart TV, Game Console, DVR, etc.) can connect to one of the available LAN port using an Ethernet cable to establish wired connectivity to your network. © Copyright 2015 TRENDnet. All Rights Reserved. -
Page 29: Set The Device To Client Bridge Mode
4. At the bottom, click Next to connect and copy the settings of the selected wireless network. 5. If your wireless network requires wireless security, you will be prompted to enter your wireless key. Enter your Wireless Key required to connect to your existing wireless network and click Connect. © Copyright 2015 TRENDnet. All Rights Reserved. -
Page 30: Link Status
Note: If the Link Status does not display any information after 1 min, please re-attempt the procedure. • Connected Time: Time duration of how long the access point has been connected. • MAC Address: MAC address of the access point is connected © Copyright 2015 TRENDnet. All Rights Reserved. -
Page 31: Wireless Range Extender (Ap Repeater)
Access Point however, wireless range extender mode does not require the other wireless device to support repeater or WDS and can only function using one band at a time, 2.4GHz or 5GHz and other modes cannot be used simultaneously. © Copyright 2015 TRENDnet. All Rights Reserved. -
Page 32: Set The Device Repeater Mode
6. You have the option to broadcast the selected wireless network name (SSID) or assign the access point a different wireless network name (SSID) of the repeated signal. To change the wireless network name uncheck the option. © Copyright 2015 TRENDnet. All Rights Reserved. -
Page 33: Advanced Access Point Setup
Note: MAC filter can be configured to allow access to the listed MAC address and deny all others unlisted or vice versa. The recommended function is to choose to only allow access to the MAC addresses listed and deny all others unlisted because it is easier to © Copyright 2015 TRENDnet. All Rights Reserved. -
Page 34: User Limit
Main > Password management page” on page 8). 1. Log into your access point management page (see “Access your access point 2. Click on Access, click on User Limit. management page” on page 8). © Copyright 2015 TRENDnet. All Rights Reserved. -
Page 35: Ipv6 Connection Settings
3. Under Connection Type, click the drop-down list to select the access point IP address 2. Click on Main, and click on IPv6. settings. 3. Select the IPv6 connection type to assign IPv6 addressing to the access point. © Copyright 2015 TRENDnet. All Rights Reserved. -
Page 36: Set Your Date And Time
URL http://tew-814DAP Your access point can be used as a DHCP (Dynamic Host Configuration Protocol) server to automatically assign an IP address to each wireless device connected. The DHCP © Copyright 2015 TRENDnet. All Rights Reserved. -
Page 37: Create Schedules
• Manually set time: Set your router date and time manually in the Date and Time Settings section. Click Copy Your Computer’s Time Settings if you would like to copy your computer’s time settings. © Copyright 2015 TRENDnet. All Rights Reserved. -
Page 38: Access Point Maintenance & Monitoring
1. Log into your access point management page (see “Access your access point management page” on page 8). 2. Click on Tools and click on Settings Management. 3. Next to Save Settings section, click Save. © Copyright 2015 TRENDnet. All Rights Reserved. -
Page 39: Reboot Your Access Point
Tools > Upload Firmware TRENDnet may periodically release firmware upgrades that may add features or fix problems associated with your TRENDnet access point model and version. To check if 4. A separate file navigation window should open. there is a firmware upgrade available for your device, please check your TRENDnet 5. -
Page 40: Ping Test
8). 2. Click on Tools, and click on Ping Test. 3. Under Host Name or IP address section, enter the hostname (ie TRENDnet.com) or IP address (ie. 192.168.10.100) and click Ping. © Copyright 2015 TRENDnet. All Rights Reserved. -
Page 41: Email Logs
You can view the list of active wireless devices currently connected to your access point. 1. Log into your access point management page (see “Access your access point management page” on page 8). 2. Click on Status, and click on Wireless Client. © Copyright 2015 TRENDnet. All Rights Reserved. -
Page 42: Check The Access Point System Information
(hard or soft reboot) or reset. network. • Channel Width: Current operating channel width set on the access point. • Channel: Displays the current 5GHz wireless channel your access point is operating. © Copyright 2015 TRENDnet. All Rights Reserved. -
Page 43: View Your Access Point Statistics
You can view the current IPv6 status on your access point. 1. Log into your access point management page (see “Access your access point management page” on page 8). 2. Click on Status, and click on IPv6 Wireless Statistics © Copyright 2015 TRENDnet. All Rights Reserved. -
Page 44: Access Point Management Page Structure
WDS + AP • Email Settings Security • Syslog • Advanced • Logout • Security MAC Filter • WPS (Wi-Fi Protected Setup) Status • Device Info • Logs • Statistics • Wireless Client © Copyright 2015 TRENDnet. All Rights Reserved. -
Page 45: Troubleshooting
Q: The Wizard does not appear when I access the access point. What should I do? Q: I typed http://tew-814DAP in my Internet Browser Address Bar, but an error Answer: message says “The page cannot be displayed.” How can I access the access point 1. -
Page 46: Appendix
In MAC OS 10.4, from the Show drop-down list, select Built-in your network status and your IP address settings displayed. Ethernet and select the TCP/IP tab. In MAC OS 10.5/10.6, in the left column, select Ethernet. © Copyright 2015 TRENDnet. All Rights Reserved. - Page 47 Then click Use the following IP address, and assign your network adapter a static IP address. Click OK Windows XP/2000 a. Go into the Control Panel, double-click the Network Connections icon b. Right-click the Local Area Connection icon and the click Properties. © Copyright 2015 TRENDnet. All Rights Reserved.
- Page 48 3. You may be prompted to enter a security key in order to connect to the network. 4. Enter in the security key corresponding to the wireless network, and click Connect. © Copyright 2015 TRENDnet. All Rights Reserved.
- Page 49 This device may not be used for setting up outdoor radio links in France and in some areas The firmware setting is not accessible by the end user. the RF RoHS This product is RoHS compliant. © Copyright 2015 TRENDnet. All Rights Reserved.
- Page 50 For detailed information the end-user should contact the national spectrum authority in reikalavimus ir kitas 1999/5/EB, 2006/95/EB ir 2009/125/EB [Lithuanian] France. Direktyvos nuostatas. TRENDnet tímto prohlašuje, že tento TEW-814DAP je ve shodě se Česky [Czech] Hierbij verklaart TRENDnet dat het toestel TEW-814DAP in Nederlands základními požadavky a dalšími příslušnými ustanoveními směrnice overeenstemming is met de essentiële eisen en de andere relevante...
- Page 51 Download section limited to, duty, tax, and other fees. and look for the desired TRENDnet product to access to the GPL Code or LGPL Code. These codes are distributed WITHOUT WARRANTY and are subject to the copyrights of WARRANTIES EXCLUSIVE: IF THE TRENDNET PRODUCT DOES NOT OPERATE AS the developers.
Need help?
Do you have a question about the TEW-814DAP and is the answer not in the manual?
Questions and answers