Satel CA-64 PTSA Manual
Mimic board
Hide thumbs
Also See for CA-64 PTSA:
- User manual (51 pages) ,
- Manual (8 pages) ,
- System description and installation (41 pages)
Table of Contents
Advertisement
Quick Links
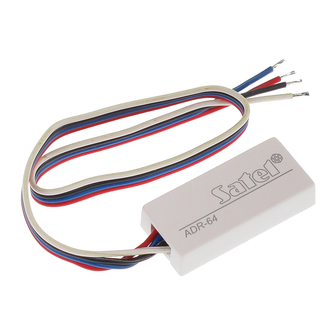
The CA-64 PTSA mimic board can work in conjunction with SATEL made INTEGRA and CA-64
control panels (state visualization for the alarm system partitions and zones) or STAM-1 and STAM-2
monitoring stations (visualization of the monitored premises). The mimic board will automatically
recognize the device with which it operates. It has a built-in 1.3 A switching mode power supply with
battery backup.
This manual applies to the mimic board with electronics version 1.5 and firmware version 4.0 (or
newer).
1. Description of the electronics board
Explanations for Fig. 1:
1
- fuse element of battery charging system (3.15 A).
2
- battery connecting leads (red +, black -).
3
- LED indicator of battery testing/charging.
4
- terminals:
- 18 V AC supply input (from secondary winding of the transformer).
AC
COM - common ground.
TMP - module tamper circuit input (NC).
CLK - clock.
DTA - data.
5
- connector socket for LEDs 1-8.
6
- connector socket for LEDs 9-16.
7
- connector socket for LEDs 17-24.
®
Fig. 1. View of expander electronics board.
MIMIC BOARD
CA-64 PTSA
ca64ptsa_en 07/10
Advertisement
Table of Contents

Subscribe to Our Youtube Channel
Related Manuals for Satel CA-64 PTSA


Summary of Contents for Satel CA-64 PTSA
- Page 1 ® ca64ptsa_en 07/10 The CA-64 PTSA mimic board can work in conjunction with SATEL made INTEGRA and CA-64 control panels (state visualization for the alarm system partitions and zones) or STAM-1 and STAM-2 monitoring stations (visualization of the monitored premises). The mimic board will automatically recognize the device with which it operates.
- Page 2 CA-64 PTSA SATEL - connector socket for LEDs 25-32. - connector socket for LEDs 33-40. 10 - connector socket for LEDs 41-48. 11 - connector socket for LEDs 49-56. 12 - connector socket for LEDs 57-64. 13 - connector socket for LEDs 65-72.
- Page 3 SATEL CA-64 PTSA Switches LED numbers Display mode 1-64 65-96 97-128 zones partition 1-32 partition 1-32 Zones 1-64 and partitions 1-64 armed modes alarms zones partition 1-32 partition 1-32 Zones 65-128 and partitions 65-128 armed modes alarms zones zones zones...
- Page 4 CA-64 PTSA SATEL Programming the LED lighting scheme The LED lighting scheme can be modified by using LCD keypad, D X program (INTEGRA) or LOAD 64 (CA-64 control panel). To program the scheme, define the time segments in which the LED LOAD is to be either ON or OFF (the scheme, which lasts 2 seconds, consists of 8 time segments).
- Page 5 SATEL CA-64 PTSA 3.1 Connecting the main mimic board to monitoring station The mimic board can only be connected to the STAM-1 K card (i.e. the termination receiver card). The dedicated RS-232 port of the mimic board (see Fig. 1) and the port of the STAM-1 K card should be connected with the cable prepared as shown in Fig.
- Page 6 CA-64 PTSA SATEL DIP-switch number Numerical value (for switch in ON position) Table 3. Fig. 7. Examples of address setting. Depending on the address set in the mimic board, the following subscriber objects are presented on the LEDs: 0 - subscribers with numbers from 1 to 64 (subscriber no. 1 on LEDs 1 and 2, subscriber no. 2 on LEDs 3 and 4, etc.);...
-
Page 7: Specifications
2. Connect the 230 V AC cables to the terminals of transformer primary winding. 3. Connect the terminals of transformer secondary winding to the AC terminals on the electronics board of CA-64 PTSA device. 4. Connect the battery to the dedicated leads (the red one to battery plus, the black one to minus). - Page 8 CA-64 PTSA SATEL Latest EC declaration of conformity and product approval certificates are available for downloading on website www.satel.eu SATEL sp. z o.o. ul. Schuberta 79 80-172 Gdańsk POLAND tel. + 48 58 320 94 00 info@satel.pl www.satel.eu...
Need help?
Do you have a question about the CA-64 PTSA and is the answer not in the manual?
Questions and answers