
Related Manuals for Satel ACCO Series


Summary of Contents for Satel ACCO Series
- Page 1 Access control modules Firmware version 2.02 acco-kp_en 04/10 SATEL sp. z o.o. ul. Schuberta 79 80-172 Gdańsk POLAND tel. + 48 58 320 94 00 info@satel.pl www.satel.eu...
- Page 2 SATEL's goal is to continually improve the quality of its products, which may lead to alterations in their technical specifications and firmware. Current information on the introduced modifications is available on our website. Please visit us: http://www.satel.eu...
- Page 3 Changes in the ACCO access control system, version 2.02 New ACCO-KPWG and ACCO-KPWG-PS door controller modules Controller module with support for Wiegand 26 data transmission format. Door blocking / unblocking capability, according to the access Door schedule. New options: − A UTHORIZATION CONTROL −...
-
Page 4: Table Of Contents
SATEL ACCO CONTENTS General ..........................4 1.1 Electronics board ........................5 1.2 Inputs ............................8 1.3 Outputs ............................8 Devices interfacing with the module .................. 9 2.1 ACCO-KLCDR-BG / ACCO-KLCDR-BW keypad ............... 9 2.2 ACCO-SCR-BG keypad with proximity card reader ..............11 2.3 CZ-EMM and CZ-EMM2 proximity card readers .............. - Page 5 ACCO SATEL 6.7.1 Creating a presence report ....................... 44 6.8 Presence control ........................46 6.8.1 Creating presence control list......................47 Using the module ......................48 7.1 Unlocking the door ........................48 7.1.1 Unlocking the door with identifiers ....................48 7.1.2 Unlocking the door without user identification procedure ..............49 7.2 Blocking the door ........................
-
Page 6: General
ACCO 1. General The SATEL company offers four types of access control modules: ACCO-KP-PS, ACCO-KP, ACCO-KPWG-PS and ACCO-KPWG. The door controller module is designed for single door control. It can operate as a fully autonomous unit or be part of a larger access control system. -
Page 7: Electronics Board
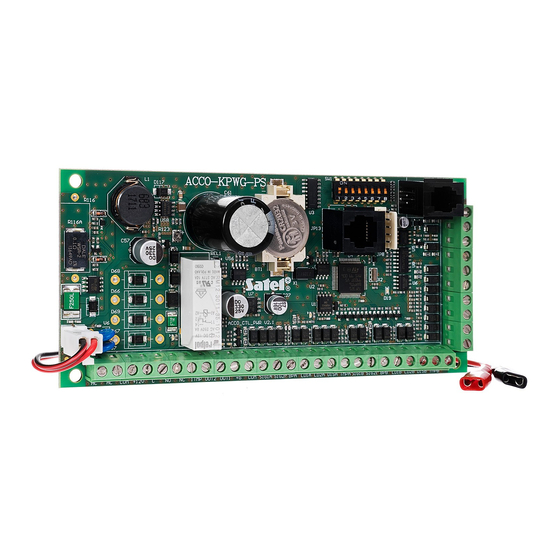
ACCO SATEL 1.1 Electronics board COM +12V ITMP OUT2 OUT1 +GA SIGA COM BPA LD1A LD2A DISA TMPA +GB SIGB COM BPB LD1B LD2B DISB TMPB Fig. 1. Schematic view of electronics board in ACCO-KP-PS door controller module. +GA SIGA COM BPA LD1A LD2A DISA TMPA +GB SIGB COM BPB LD1B LD2B DISB TMPB... - Page 8 SATEL ACCO COM +12V ITMP OUT2 OUT1 SIG1A SIG2A BPA LD1A LD2A DISA TMPA SIG1B SIG2B BPB LD1B LD2B DISB TMPB Fig. 3. Schematic view of electronics board of ACCO-KPWG-PS door control module. COM SIG1A SIG2A BPA LD1A LD2A DISA TMPA SIG1B SIG2B BPB LD1B LD2B DISB TMPB Fig.
- Page 9 9 – RS-232 port (TTL standard) for computer connection (dedicated cable for making the connection is manufactured by SATEL under the name of DB9FC/RJ). By means of PC computer with the ACCO-SOFT-LT program installed, it is possible to configure the device and read the events.
-
Page 10: Inputs
SATEL ACCO 1.2 Inputs Provided on the module electronics board are 5 inputs which can be programmed as NO or NC and serve the following functions (shown in square brackets are descriptions from LCD keypad): Door status control [Door control] – control of the door status. -
Page 11: Devices Interfacing With The Module
ACCO SATEL Forced entry – the output becomes active for a programmed time period after unauthorized opening of the door (the door is locked). Long open door – the input output becomes active for a programmed time period, if the door... - Page 12 SATEL ACCO • Indicator LEDs of the door/module status. • Buzzer generating information beeps after reading the card / entering the code (see section: A ) and signaling operations performed on the keypad. UDIBLE SIGNALING • Backlighting of the display and keys.
-
Page 13: Acco-Scr-Bg Keypad With Proximity Card Reader
ACCO SATEL authority. This will be done automatically after he uses his identifier. DMINISTRATOR The alarm memory will also be automatically cleared when the alarm cause has ceased to exist, if the controller module is connected to the computer (by means of the RS-232 or RS-485 port) and the ACCO-SOFT-LT program. -
Page 14: Cz-Emm And Cz-Emm2 Proximity Card Readers
SATEL ACCO Fig. 6. View of the ACCO-SCR-BG keypad. 2.3 CZ-EMM and CZ-EMM2 proximity card readers • Support of cards, key fobs and other 125 kHz passive transponders (UNIQUE, EM4001, EM4002, EM4003, EM4102). • Transmission format: EM-MARIN. • Two-color indicator LED of the door/reader status. -
Page 15: Cz-Emm3 And Cz-Emm4 Proximity Card Readers
ACCO SATEL Fig. 8. CZ-EMM2 reader. Fig. 7. CZ-EMM reader. The two-color indicator LED in the reader can signal as follows: steady green light – normal operation of the reader. blinking green rapidly – access has been granted to the user, the door has been unlocked and the access time countdown is running, so it is possible to open the door. -
Page 16: Access Control Installation
SATEL ACCO lit, but periodically extinguished – the reader has been blocked after 5 attempts to get access by using an unknown identifier (A is activated). CANNER Fig. 9. CZ-EMM3 reader. Fig. 10. CZ-EMM4 reader. 3. Access control installation Disconnect power supply before making any electrical connections. -
Page 17: Connecting The Acco-Klcdr-Bg / Acco-Klcdr-Bw Keypad
ACCO SATEL Fig. 11. An example of access control installation. Explanations for Fig. 11: 1 – door controller module. 2 – controlled door activator (electromagnetic lock controlled from the module relay output). 3 – controlled door sensor (magnetic detector connected to the module input... -
Page 18: Connecting The Lcd Keypad To Terminals
SATEL ACCO (exit terminal). The information whether the keypad performs the function of terminal A or B can be read out from the display after restarting the keypad (in order to cause the restart, hold down the keys for approximately 10 seconds). -
Page 19: Connecting The Lcd Keypad To Rj Socket
ACCO SATEL ACCO-KP-PS COM +12V ITMP OUT2 OUT1 +GA SIGA COM BPA LD1A LD2A DISA TMPA +GB SIGB COM BPB LD1B LD2B DISB TMPB ACCO-KLCDR-BG Fig. 13. Method of connecting the keypad to ACCO-KP-PS module terminals. 3.1.2 Connecting the LCD keypad to RJ socket The method of connecting the LCD keypad communication bus to the RJ socket is shown on Fig. -
Page 20: Setting The Lcd Keypad Address
SATEL ACCO Note: • If one ACCO-SCR-BG keypad and any proximity card reader is connected to the controller module, the address set in LCD keypad must be different from that set in the keypad: 1 – if address 0 is set in the keypad, 0 –... -
Page 21: Setting The Keypad Address
ACCO SATEL 3.2.1 Setting the keypad address 1. Disconnect the brown, gray and green wires from the module terminals. 2. Short the ends of gray and green wire. 3. Reconnect the brown wire to the +12V terminal. After the power lead is connected, the... -
Page 22: Connecting Activators And Sensors Of The Controlled Door
SATEL ACCO ground. The violet wire (bell) can be connected to the module input programmed as B SIGNAL The black wire available in the CZ-EMM3 and CZ-EMM4 readers is not used and should not be connected to any terminal of the module. -
Page 23: Connecting Power Supply
The ACCO-KP / ACCO-KPWG module requires supply with direct voltage 12 V (±15%). The APS-15 power supply unit, manufactured by SATEL, can be used as supply source for the module. When selecting the power supply, take into account the balance of currents in the system. -
Page 24: Addressing The Module
SATEL ACCO 2. Connect the 230 V AC cables to the terminals of transformer primary winding. 3. Connect the terminals of transformer secondary winding to the AC terminals on the module electronics board. 4. Switch on the 230 V AC supply in the circuit to which the transformer is connected. -
Page 25: Programming From Lcd Keypad
Connect the computer to the bus by means of the ACCO-USB converter manufactured by SATEL (for description of the connection method, see the converter manual). Programming by means of the ACCO-SOFT-LT should be done in the same way for both communication methods. -
Page 26: Data Entry
SATEL ACCO Options Door status control disable Door Unauthorized open – event Unauthorized open – alarm Off if door open Off if door closed Times Access time Door open time Unblocking start Unblocking end Blocking start Blocking end Options Terminal A... -
Page 27: Programming Bit Options
ACCO SATEL The LCD keypad keys make it also possible to enter other characters in the user name entry function. Press the key repeatedly to change the character to another one, according to Table 4. The cursor flashing at the place of the character being entered can be moved by means of the keys. - Page 28 SATEL ACCO and select P , and then C . To change login or add other ROGRAM ACCESS HANGE PASSWORD users who will be authorized to use the program, enter the F menu and select , and then P ROGRAM ACCESS ROGRAM USERS Fig.
- Page 29 ACCO SATEL 1 - enter the system name in this field. The configuration file will be saved under this name on the computer. The field must be filled. 2 - in this field, give additional information system. 3 - enter the system identifier in this field.
- Page 30 SATEL ACCO by means of the module search function or added manually) is displayed on the left-hand side of the window. Displayed on the right are settings of the module selected the list. 7. Each new module must be registered so that the program can establish communication with it and, consequently, to enable reading and writing the data.
-
Page 31: Module Functions And Options
ACCO SATEL 5.3 Module functions and options Presence control – terminal A / B With the option enabled, the module checks presence of keypads and proximity card readers working as terminal A or B. The presence of keypads will be checked first, and only then the presence of proximity card readers. -
Page 32: Functions And Options Related To The Door
SATEL ACCO Clock correction The function enables the clock settings to be adjusted once every 24 hours (at midnight) by a defined time, if the module clock is inadequate. The correction time is programmed in seconds. The maximum correction can be ±15 seconds per 24 hours. -
Page 33: Door Unblocking
ACCO SATEL When the D option is enabled, the O option is disabled. ISABLE DOOR STATUS CONTROL N DUTY Correct execution of the A function is also impossible, i.e. after it is enabled, the PASSBACK user can unlock the door from one terminal side any number of times. Additional information... -
Page 34: Functions And Options Related To The Lcd Keypad
SATEL ACCO 5.5 Functions and options related to the LCD keypad On duty With this option enabled, the following message will be displayed after unlocking the door: If the entry / exit is connected with business duties, the user should press the key. -
Page 35: Adding New Users
ACCO SATEL Access schedules – time limits within which the user is authorized to get access to the door (editing the schedules is available in the ACCO-SOFT-LT program). Rights – additional functions available to the user. The following rights can be granted: Administrator –... - Page 36 SATEL ACCO Fig. 23. View of the U window before adding the users. SERS 2. Click with your mouse on the button designated A . The C window will DD USER REATE USERS be displayed (see Fig. 24). 3. Select the number of users, you want to create.
- Page 37 ACCO SATEL 7. Enter the last name, first name and display name of the user (16 characters) in the U tab. The display name will be created automatically after entering the user's last and DATA first name, however it can be independent of them. The display name only is saved to the module.
-
Page 38: Editing Users
SATEL ACCO 9. Select the manner of adding the card: by entering the card number, or by reading the card on the reader connected to the ACCO-USB converter, or on any terminal unit (except for the terminals with support for Wiegand format) connected to one of the system modules. -
Page 39: Editing A User By Means Of Acco-Soft-Lt Program
ACCO SATEL [Code] Service mode Users Find user Find by name Find by ID Find by card Select the user from Enter the user ID Read the user list number card Edit user Diagram 2. The manner of starting the E function in LCD keypad. -
Page 40: Removing A User By Means Of Acco-Soft-Lt Program
SATEL ACCO [Code] Service mode Users Find user Find by name Find by ID Find by card Select the user from Enter the user ID Read the user list number card Remove user Diagram 3. The manner of starting the R function in LCD keypad. -
Page 41: Automatic Assigning Of User To A Group
ACCO SATEL Fig. 28. An example of user group settings. 2. Click with your mouse on the button designated A . The new group will appear in DD GROUP the list on the left-hand side of the U window. SERS 3. -
Page 42: Automatic Grouping Of Users
SATEL ACCO 4. If a new group is created, it should be given a name. 5. Save the changes made to the module(s) by clicking on the S button. 6.4.3 Automatic grouping of users 1. Click on the U button, available on the program menu bar (see Fig. 21). The U... -
Page 43: Access Schedules
ACCO SATEL Fig. 29. R window. EPORT PARAMETERS 4. Select the user related information which should be included in the report: − A CCOUNT NUMBER − D ESCRIPTION − C (the parameter requires entering program access password); − U (the parameter requires entering program access password);... -
Page 44: Creating The Access Schedule
SATEL ACCO 255 – Access denied (the door will be always locked to this user). The remaining 254 weekly schedules can be created by selecting suitable daily schedules for each day of the week. Daily schedule – defines the user access to the door over the course of 24 hours. From... - Page 45 ACCO SATEL Fig. 31. Window with exceptional dates calendar. 9. Click with your mouse on the button designated A . The exceptional daily DD SCHEDULE schedule will be displayed in the list. At the same time, a time slot will be created for the schedule.
-
Page 46: Presence Reports
SATEL ACCO 10. Assign a name to the created schedule. 11. Define the exceptional time slot parameters (from when to when the door is to be available to the user). If necessary, add further time slots by clicking on the button... - Page 47 ACCO SATEL − in the T field, enter the date up to which all the user(s) entries and exits will be O DATE included in the report. If this option is not enabled, the report will include all the user(s) entries and exits up to current date.
-
Page 48: Presence Control
SATEL ACCO 7. Click your mouse on the E button. A report on the presence of selected users will XECUTE be generated in the window, according to preset parameters. The report consists of the user name and the list of user presence dates with specification of entries and exits. -
Page 49: Creating Presence Control List
ACCO SATEL The P window will be displayed, in which, after suitable options are RESENCE CONTROL selected, a list of all users will appear. The list shows data about the number of present and absent users. Information on the method of monitoring the user presence, depending on the settings, can be shown under the name of each user. -
Page 50: Using The Module
SATEL ACCO Notes: • Adding new users to the system will not result in their being automatically displayed in the window. You must define how they are to be displayed, according to RESENCE CONTROL the above-described procedure. • The defined parameters of the users, whose presence status is to be monitored, are saved and stored in the ACCO-SOFT-LT program data base (file extension *.s3db). -
Page 51: Unlocking The Door Without User Identification Procedure
ACCO SATEL − the access schedule does not provide for granting permission to pass at that moment (3 long beeps); − the door is blocked (3 long beeps); − the user's defined entries limit is exceeded (3 long beeps); − the user is trying to get access at the terminal, from the side of which he has already unlocked and opened the door (3 long beeps) –... -
Page 52: Blocking The Door Without User Identification Procedure
SATEL ACCO In order to block the door by using the code and ACCO-SCR-BG reader, do the following: 1. Make sure that the door operates in normal mode and the door is closed. 2. Enter the code and confirm with the key. -
Page 53: Unblocking The Door Without User Identification Procedure
ACCO SATEL 2. Enter the code and confirm with the key. 2 short beeps will confirm that the door is unblocked. 7.3.2 Unblocking the door without user identification procedure The door can be unblocked by using the module input programmed as D OOR UNBLOCKING –... -
Page 54: Restoring Normal Operation Mode Of The Door Without The User Identification Procedure
SATEL ACCO In order to restore the normal operating mode of the door with the use of code and ACCO-SCR-BG reader, enter the code and confirm with the key. 2 short beeps will confirm that the normal operation mode of the door has been enabled. -
Page 55: Module Factory Settings
ACCO SATEL − tamper of keypad; − loss of communication with the terminal (no terminal). 7.6 Module factory settings The below described settings refer to a new module. The S button available in the ET DEFAULT window will not restore all the factory settings of the module. Only the settings... -
Page 56: Acco-Kp / Acco-Kpwg Module
SATEL ACCO Maximum relay switching current ..................8 A Current-carrying capacity, OC type outputs ..............50 mA Battery charging current ....................350 mA Recommended battery ..................... 12 V / 7Ah Working temperature range ................-10 °C … +55 °C Electronics board dimensions ................151 x 70 mm Weight .......................... -
Page 57: History Of Changes To The Manual
• Contents was updated and a figure added to section "Using the module" (p. 48, 50-51). • Section "Audible signaling" was updated (p. 52). Latest EC declaration of conformity and product approval certificates are available for downloading on website www.satel.eu...
Need help?
Do you have a question about the ACCO Series and is the answer not in the manual?
Questions and answers