Table of Contents
Advertisement
Available languages
Available languages
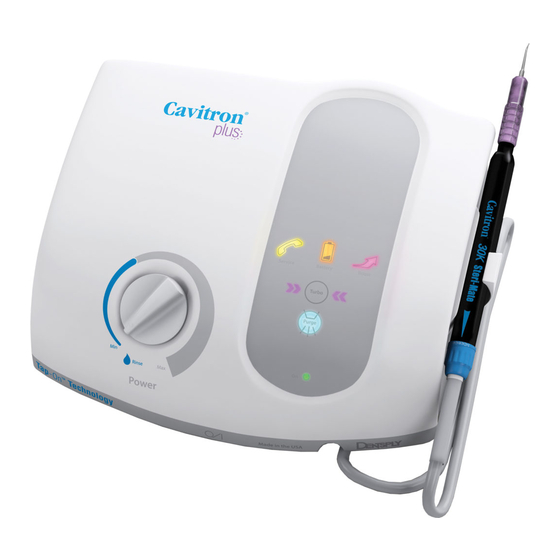
Cavitron
Ultrasonic Scaler
with
Détartreur ultrasonique avec
Escarificador ultrasónico con
Ultraschall-Zahnsteinentfernungsgerät mit
Scaler ultrasonico con
Ультразвуковая система для удаления зубного камня с технологией
Directions For Use
Mode d'emploi
Instrucciones de uso
Gebrauchsanweisung
Istruzioni per l'uso
Указания по применению
Please read carefully and completely before
operating unit.
Prière de lire attentivement et complètement
avant la première utilisation de l'appareil.
Por favor lea cuidadosamente y en su totalidad
antes de operar la unidad.
Bitte vor Inbetriebnahme der Einheit sorgfältig
und vollständig durchlesen.
Si prega di leggere attentamente e
completamente prima di utilizzare l'apparecchio.
Пожалуйста, внимательно и полностью
прочтите перед использованием устройства.
Plus
®
Technologie Tap-On
Technologie Tap-On
Technologie Tap-On
Tap-On
tecnología
TM
Tap-On
tecnología
TM
Tap-On
tecnología
TM
Tap-On
-Technologie
TM
Tap-On
-Technologie
TM
Tap-On
-Technologie
TM
Tap-On
tecnologia
TM
Tap-On
tecnologia
TM
Tap-On
tecnologia
TM
Tap-On
TM
TM
Technologie Tap-On
TM
TM
Tap-On
tecnología
TM
Tap-On
-Technologie
TM
Tap-On
tecnologia
TM
Tap-On
Tap-On
TM
Tap-On
TM
1
Technologie Tap-On
TM
Tap-On
tecnología
TM
Tap-On
-Technologie
TM
Tap-On
tecnologia
TM
Tap-On
TM
TM
TM
Advertisement
Chapters
Table of Contents
Troubleshooting

Related Manuals for Dentsply Sirona Cavitron Plus


Summary of Contents for Dentsply Sirona Cavitron Plus
- Page 1 Cavitron Plus ® Ultrasonic Scaler with Technologie Tap-On Technologie Tap-On Technologie Tap-On Technologie Tap-On Détartreur ultrasonique avec Technologie Tap-On Tap-On tecnología Tap-On tecnología Tap-On tecnología Escarificador ultrasónico con Tap-On tecnología Tap-On tecnología Tap-On -Technologie Tap-On -Technologie Tap-On -Technologie Ultraschall-Zahnsteinentfernungsgerät mit Tap-On -Technologie Tap-On...
-
Page 2: Quick Start Installation Instructions
Quick Start Installation Instructions W at er Set unit to OFF position. Connect POWER supply. Connect WATER supply by pushing BLUE water hose into Symbol: means o . water port. A ir Connect HANDPIECE to cable. Install BATTERIES in wireless Connect AIR supply (if equipped) foot pedal unit. -
Page 3: Quick Start User Guide
Quick Start User Guide To activate Tap-On™ Technology: Relax foot as you scale or air polish. To deactivate Tap-On™ Technology: Tap wireless foot pedal one time quickly. Tap wireless foot pedal one time. Purge Turbo Boost Turbo: When pressed, Boost: Temporary, hands- Purge: Remove insert increases power delivered free activation by pressing... -
Page 4: Quick Reference Guide Diagnostic Display
Quick Reference Guide Power Control Diagnostic Display Power Level Control Turn knob to select ultrasonic power ON/OFF level for operation. Turning the knob Illuminates when the Main Power clockwise increases the distance the On/Off Power switch is in the “ON” insert tip moves (the stroke) without (I) position. -
Page 5: Table Of Contents
English TABLE OF CONTENTS QUICK START INSTALLATION 8 .6 Accessories and User INSTRUCTIONS . . . . . . . . . . . . . . 2 Replaceable Parts . -
Page 6: Introduction
Advanced features that make the Cavitron Plus a wise INTRODUCTION investment include a Tap-On Wireless Foot Pedal with Tap-On™ Technology, Turbo Mode, illuminated diagnostic Congratulations! display, rinse setting, automated purge function, Steri-Mate ® detachable sterilizable handpiece, and 330˚ swivel handpiece... -
Page 7: Indications For Use
SECTION 1: physician for specific recommendations. This unit complies with IEC 60601 Medical Device Standards. Indications For Use • Insufficient water flow could result in elevated water and tip temperature. When operated at the input water • All general supra and subgingival scaling applications temperature specified in the Water Line Requirements •... -
Page 8: Procedural Precautions
Ultrasonics (American Dental Association) standards, and that all • The Cavitron Plus unit works with Cavitron inserts as recommendations be followed in terms of flushing, a system, and was designed and tested to deliver chemical flushing, and general infection control maximum performance for all currently available Cavitron procedures. -
Page 9: Electrical Requirements
7 4 System Installation • The Cavitron Plus System is designed to rest on a level surface. Be sure unit is stable and resting on four feet. • The Cavitron Plus System should not be positioned such that access to the power input and AC power cord are limited. -
Page 10: Tap-On
of the connector in an appropriate container and allow of the Tap-On Foot Pedal open so the red push water to drain. To remove the hose from the system, button is accessible. push on the outer ring of the system’s water inlet and Maintain a distance of no more than 10 feet (3 gently pull out the water line. -
Page 11: Tap-On
SECTION 8: Cavitron Plus Ultrasonic Scaler Description 8 1 System Controls Ultrasonic Power Level Control Turn knob to select the ultrasonic power level for operation. Turning the knob clockwise increases the distance the insert tip moves (stroke) without changing the frequency;... -
Page 12: Diagnostic Display Indicators
8 2 Diagnostic Display Indicators and Control Low Battery Indicator Illuminates when the Tap-On Foot Pedal battery power is approaching end of life. Replace batteries as instructed in Service Indicator section 7.9. Illuminates when the system is not functioning properly. This display has three distinct modes. -
Page 13: Handpiece/Cable
Lavage Control 8 3 handpiece / Cable Turn the Lavage Control to select flow rate during system operation. Flow rate is based on a scale from 1 to 6. Turn clockwise toward 6 to increase flow at insert tip. Turn counter-clockwise toward 1 to decrease flow. -
Page 14: Operation
8 5 Tap-On™ Technology wireless Foot 6. Cavitron DualSelect Dispensing system Pedal Operation ® 7. Steri- MATE Grip ® 8. Steri- MATE Light Lighted Sleeve Using Foot Pedal in Tap-On Mode 8 6 2 User Replaceable Part Kits For scaling procedures,Tap-On Technology eliminates the need to hold the pedal down. -
Page 15: Turbo Mode
warm, increase the flow rate. With experience the Dental • Follow precautions listed in the General and Ultrasonic Healthcare Professional will be able to determine the sections of 4.2 Procedural Precautions best flow rate setting for optimum operating efficiency • The edges of Cavitron Ultrasonic Inserts are intentionally and patient comfort. -
Page 16: System Care
Handpiece Cable, Tap-On Foot Pedal and Cable Cavitron Plus system. A 10-pack of replacement filters is assembly (if applicable), Water Supply and Air Supply available by ordering Part Number 90158 from your local lines as instructed in the Cavitron Infection Control DENTSPLY Professional distributor. -
Page 17: Water Line Filter Maintenance
Troubleshooting Mode. Check the insert for damage and that it is properly Although service and repair of the Cavitron Plus Ultrasonic installed in the handpiece. Scaler should be performed by DENTSPLY personnel, the Check that the handpiece is properly installed to the following are some basic troubleshooting procedures that will cable assembly. -
Page 18: Technical Support And Repairs
Temperature: -40 to 70 Deg. Celsius (-40 to 158 Deg. Fahrenheit) warranty Period Relative Humidity: 10% to 100% (non-condensing) The Cavitron Plus Ultrasonic Scaler is warranted for TWO Atmospheric Pressure: 500 to 1060 hPa YEARS from date of purchase. The Steri-Mate Handpiece ®... -
Page 19: Symbol Identification
SECTION 14: Symbol Identification MEDICAL EQUIPMENT AC POWER WITH RESPECT TO ELECTRIC SHOCK, FIRE AND MECHANICAL HAZARDS ONLY IN ACCORDANCE WITH UL 60601-1CAN/CSA-C22.2 No. 601.1, TYPE B APPLIED PART EQUIPMENT ANSI/AAMI ES60601-1 (2005, 3rd ed.) CAN/CSA-C22.2 No. 60601-1 (2008), 13VA PROTECTIVE EARTH (GROUND) This device complies with part 15 of the FCC Rules. -
Page 20: Electro-Magnetic Compatibility Precautions
SECTION 17: Electro-magnetic Compatibility Precautions Guidance And Manufacturer’s Declaration - Electromagnetic Emissions The Ultrasonic Scaler model G136 is intended for use in the electromagnetic environment specified below. The customer or the user of the Ultrasonic Scaler should assure that it is used in such an environment. - Page 21 Guidance And Manufacturer’s Declaration - Electromagnetic Emissions The Model G136 is intended for use in the electromagnetic environment specified below. The customer or the user of the Model G136 should assure that it is used in such an environment. Compliance IEC 60601 Electromagnetic environment - guidance Immunity test...
- Page 22 Recommended separation distance between Portable and mobile RF communications equipment and the model @ 3Vrms The model G136 is intended for use in an electromagnetic environment in which radiated RF disturbances are controlled. The customer or the user of the Model G136 can help prevent electromagnetic interference by maintaining a minimum distance between portable and mobile RF communications equipment (transmitters) and the Model G136 as recommended below, according to the maximum output power of the communications equipment.
-
Page 23: Quick Refrence Guide: Troubleshooting
QUICK REFERENCE GUIDE: TROUBLEShOOTING ACTION TAKEN SymPTOm Check that the Main Power Switch is in the ON (I) position, and that the detachable power cord is fully seated in the System will not receptacle on back of system. operate: No Power Check that the system’s power cord plug is fully seated in an appropriate AC wall outlet. -
Page 24: Instructions D'installation Rapide
Instructions d’installation rapide W at er Mettez l’unité en position Connectez Branchez la conduite d’EAU OFF. l’ALIMENTATION. en enfonçant le tuyau d’eau BLEU dans le port d’arrivée Symbole : signifie « off » (hors tension). d’eau. A ir Branchez la PIÈcE À MAIN au Branchez la conduite d’AIR Installez les PILES dans la câble. -
Page 25: Guide De Dèmarrage
Guide de démarrage rapide Technologie Tap-On Tap-On tecnología Tap-On -Technologie Tap-On tecnologia Tap-On Pour activer le mode Tap-On Relâchez le pied lorsque vous faites Pour désactiver le mode Tap-On Tapez une fois rapidement sur la pédale sans fil. un détartrage ou un polissage à l’air. Tapez une fois sur la pédale sans fil. -
Page 26: Guide D'utilisation Rapide : Tableau De Diagnostic
Guide d’utilisation rapide PILES FAIBLES S’allume lorsque les piles de la pédale Tableau de diagnostic Tap-On sont presque épuisées. Remplacer les piles conformément aux ON/OFF (MARCHE/ARRÊT) indications de la section 7.9. S’allume lorsque l’interrupteur principal est sur la position Contrôle de la puissance «... - Page 27 Français TABLE DES mATIÈRES 8 .3 Pièce à main/câble . . . . . . . 36 INSTRUCTIONS D’INSTALLATION 8 .4 Inserts ultrasoniques RAPIDE . . . . . . . . . . . . . . 24 Cavitron®...
-
Page 28: Introduction
APERçU DU PRODUIT Numéro de certification/homologation de base de l’appareil Cavitron Plus auprès de la FCC : Code FCC : TF3- DPD81842; IC : 4681B-DPD81842. Numéro de certification/ Le détartreur ultrasonique Cavitron Plus est un instrument ®... -
Page 29: Fournitures Et Pièces
FOURNITURES ET utilisé, à moins que le système ne soit utilisé en association avec le Kit de lavage stérile (N. Pièce PIÈCES DE REChANGE 81340). Pour commander des fournitures et des pièces de rechange • Les personnes porteuses d’un pacemaker, défibrillateur et autre appareil médical implanté... -
Page 30: Précautions D'usage
Système à ultrasons dispersion des aérosols. • L’unité Cavitron Plus fonctionne avec les inserts Cavitron, 6 2 Recommandations concernant formant ainsi un système qui a été conçu et testé l’adduction d’eau pour offrir des performances optimales en association avec tous les inserts à... -
Page 31: Instructions D'installation
La température de l’eau qui arrive au système Cavitron ne doit pas dépasser 25°C (77°F). Si nécessaire, un • Le système Cavitron Plus a été conçu pour être posé sur dispositif permettant de maintenir la température dans une surface horizontale. Assurez-vous qu’il est stable et ces limites sera installé, ou un système de distribution... -
Page 32: Connexion Du Cordon D'alimentation
• Pour retirer la conduite d’eau du système Cavitron Plus, 7 8 Synchronisation de la pédale Tap-On coupez l’alimentation en eau du cabinet dentaire. Vous pouvez ensuite déconnecter la conduite d’eau sur la La pédale sans fil Tap-On™... - Page 33 Placez l’interrupteur principal situé sous le système (partie centrale avant) en position OFF (0). Installez un nouveau jeu de piles « AA/LR6 » dans la pédale (voir la section 7.9). Laissez le couvercle du compartiment à piles de la pédale ouvert de sorte que le bouton rouge reste accessible.
-
Page 34: Commandes Du Système
SECTION 8 : Description du détartreur à ultra-sons Cavitron Plus 8 1 Commandes du système Potentiomètre (commande de puissance des ultrasons) Tournez le bouton pour choisir le niveau de puissance ultrasonique nécessaire. Tournez le bouton dans le sens des aiguilles d’une montre pour allonger la distance de déplacement de l’embout (course) sans modifier la fréquence ;... -
Page 35: Tableau De Diagnostic
8 2 voyants et commandes du tableau de diagnostic Indicateur de piles faibles S’allume lorsque les piles de la pédale Tap-On sont presque épuisées. Remplacez les piles conformément aux instructions de la Indicateur d’anomalie section 7.9. S’allume lorsque le système ne fonctionne pas correctement. -
Page 36: Pièce À Main/Câble
Commande de lavage 8 3 Pièce à main / Câble Tournez la commande de lavage et sélectionnez le débit convenant à votre utilisation. Il y a 6 débits différents. Tournez le bouton dans le sens des aiguilles d’une montre, vers le 6, pour augmenter le débit au niveau de l’embout. Tournez dans le sens inverse, vers le 1, pour le réduire. -
Page 37: Fonctionnement De La Pédale Tap-On Tm
Câble auxiliaire pour pédale Tap-On ™ 8 5 Fonctionnement de la pédale sans fil ® Pièce à main stérilisable Cavitron Steri-MATE Tap-On Inserts ultrasoniques Cavitron 30K Système de distribution Cavitron DualSelect Utilisation de la pédale en mode Tap-On ™ ® Poignée Steri- MATE ®... -
Page 38: Mode Turbo
surface en cours de traitement. Évacuez l’eau d’irrigation au moyen soit d’un éjecteur de salive soit d’un HVE (High Volume Evacuator). 9 5 Exécution des procédures de détartrage par ultrasons Remarque : Pour connaître les procédures générales devant être effectuées au début de chaque journée et entre les patients, veuillez consulter la brochure d’information sur le contrôle des infections et la section 10 de ce manuel. -
Page 39: Considérations Concernant Le Confort Du Patient
• Réglez le bouton d’ajustement de la puissance du • Pour interrompre la purge à tout moment pendant le système sur la puissance la plus faible applicable pour cycle de deux minutes, appuyez sur le bouton Purge cette utilisation et pour l’insert choisi. à... -
Page 40: Procédure De Mise À L'arrêt En Fin De Journée
éviter toute réduction inopportune du débit Assurez-vous que la fiche de connexion du cordon d’eau dans le détartreur ultrasonique Cavitron Plus. Des jeux d’alimentation est complètement enfoncée dans une de 10 filtres de rechange (numéro de pièce 90158) sont prise secteur murale homologuée. - Page 41 Problème : Le système devrait faire sortir de l’eau. Si aucune pédale ne fait fonctionner le système, passez à l’étape Le système fonctionne : le voyant de service suivante. clignote. Resynchronisez une pédale Tap-On au système • Clignotement rapide (3 clignotements par seconde) ™...
-
Page 42: Assistance Technique Et Réparations
Pour les régions à l’extérieur des États-Unis, veuillez contacter votre représentant DENTSPLY Professional. SECTION 12 : Période de garantie Le détartreur ultrasonique Cavitron Plus est garanti pendant DEUX ANS à compter de sa date d’achat. La pièce à main Steri-Mate fournie avec votre système est garantie pendant ®... -
Page 43: Identification Des Symboles
SECTION 14 : Identification des symboles ÉQUIPEMENT MÉDICAL PUISSANCE SECTEUR CONCERNANT LES RISQUES DE CHOC ÉLECTRIQUE, D’IN- CENDIE ET D’ANOMALIE MÉCANIQUE UNIQUEMENT SELON LES NORMES UL 60601-1CAN/CSA-C22.2 N° 601.1, ANSI/ APPAREIL DE TYPE B AAMI ES60601-1 (2005, 3E ÉDITION) CAN/CSA-C22.2 N° 60601-1 (2008), 13VA Cet appareil est conforme aux exigences de la partie 15 RACCORD À... -
Page 44: Précautions Relatives À La Compatibilité Électromagnétique
SECTION 17 : Précautions relatives à la compatibilité électromagnétique Directives et déclaration du fabricant - Emissions électromagnétiques Le détartreur à ultra-sons modèle G136 est destiné à être utilisé dans un environnement électromagnétique tel que défini ci-dessous. Le client ou l'utilisateur du détartreur à ultra-sons doit s'assurer que cette condition d'utilisation est respectée. - Page 45 Directives et déclaration du fabricant - Emissions électromagnétiques Le détartreur à ultra-sons modèle G136 est destiné à être utilisé dans un environnement électromagnétique tel que défini ci-dessous. Le client ou l'utilisateur du Modèle G136 doit s'assurer que cette condition d'utilisation est respectée. Test d'immunité...
- Page 46 Distance de séparation recommandée entre les systèmes de communication radio portables et mobiles et le Modèle à 3 Vrms Le Modèle G136 est destiné à être utilisé dans un environnement électromagnétique où le brouillage radio est contrôlé. Le client et l'utilisateur du Modèle G136 peuvent éviter le brouillage électromagnétique en conservant une distance minimale entre les systèmes de communication radio portables et mobiles (émetteurs) et le Modèle G136, telle que définie ci-dessous, en fonction de la puissance maximum en sortie de ces appareils.
-
Page 47: Dépannage
GUIDE DE RéFéRENCE RAPIDE : DéPANNAGE PROBLÈmE SOLUTIONS Le système ne Assurez-vous que l’interrupteur principal est sur la position ON (I) et que le cordon d’alimentation amovible est complètement enfoncé dans le réceptacle à l’arrière du système. fonctionne pas : le Assurez-vous que la fiche de connexion du cordon d’alimentation est complètement enfoncée dans une prise secteur voyant d’alimentation ne murale homologuée. - Page 48 Worldwide Service Centers Centres internationaux d’assistance technique Centros internacionales de servicio técnico Weltweite Service-Center Centri di assistenza nel mondo Всемирные сервисные центры U n i t e d S t a t e s o f A m e r i c a DENTSPLY Professional Technical Service and Repair Department 1301 Smile Way...
Need help?
Do you have a question about the Cavitron Plus and is the answer not in the manual?
Questions and answers