Table of Contents
Advertisement
Advertisement
Table of Contents

Subscribe to Our Youtube Channel
Related Manuals for Santak CASTLE RACK 6K


Summary of Contents for Santak CASTLE RACK 6K
- Page 1 RACK 6K(S)/10K(S)
- Page 3 Thank you for selecting a SANTAK product to protect your electrical equipment. This manual contains important instructions that you should follow during installation and maintenance of the UPS and batteries. Please read all instructions before operating the equipment and save this manual for future reference.
- Page 4 SAFETY INSTRUCTIONS SAVE THESE INSTRUCTIONS. This manual contains important instructions that should be followed during installation and maintenance of the UPS and batteries. The UPS models that are covered in this manual are intended for installation in an environment within 0 to 50°C, free of conductive contaminant. Certification standards Safety: EN 62040-1 •...
- Page 5 Safety of persons RISK OF VOLTAGE BACKFEED. The system has its own power source (the battery). Isolate the UPS and check for hazardous voltage upstream and downstream during lockout-tagout operation. Terminal blocks may be energized even if the system is disconnected from the AC power source. Dangerous voltage levels are present within the system.
- Page 6 basic insulation requirements for pollution degree 2). Disconnection and overcurrent protection devices shall be provided by others for permanently connected AC input (Normal AC/Bypass AC) and AC output circuits. Check that the indications on the rating plate correspond to your AC powered ...
-
Page 7: Table Of Contents
Contents 1. Introduction ....................1 1.1 Environmental protection ............1 2. Presentation ....................3 2.1 Front panel ................3 2.2 Rear panels ................3 2.3 Circuit diagram ................ 4 3. Installation ...................... 5 3.1 Inspecting the equipment ............5 3.2 Unpacking the Unit ..............5 3.3 Checking the accessory kit ............ - Page 8 9. Specifications ....................30 9.1 Model specifications ............. 30 10 Glossary ....................... 33...
-
Page 9: Introduction
1. Introduction Thank you for selecting UPS to protect your electrical equipment. The UPS has been designed with the utmost care. We recommend that you take the time to read this manual to take full advantage of the many features of your UPS (Uninterruptible Power System). Before installing your UPS, please read the booklet presenting the safety instructions. - Page 10 1.2 Electronic equipment protection The uninterruptible power system (UPS) protects your sensitive electronic equipment from the most common power problems, including power failures, power sags, power surges, brownouts, line noise, high voltage spikes, frequency variations, switching transients, and harmonic distortion. Power outages may occur unexpected, and the power quality will be erratic.
-
Page 11: Presentation
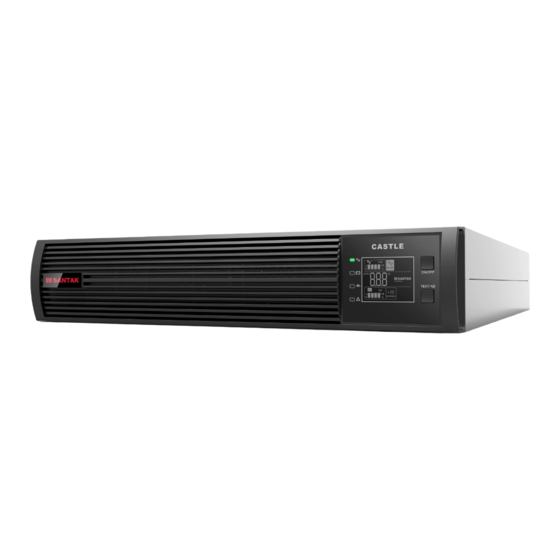
2. Presentation 2.1 Front panel 6K/6KS/10K/10KS UPS 2.2 Rear panels 6K/6KS/10K/10KS... -
Page 12: Circuit Diagram
1. Intelligent slot 2. USB 3. Dry IN/OUT 4. RS232 5. EPO 6. RJ11 (connect to PDU, only for RT model) 7. Parallel card (optional) 8. Output breaker 9. Output socket 10. Input/Output terminal (4pole IPL, IPN, OPL, OPN. PE is screw) 11. -
Page 13: Installation
3. Installation It is recommended to move the equipment to the installation site by using a pallet jack or a truck before unpacking. The system may be installed only by qualified electricians in accordance with applicable safety regulations. The cabinet is heavy, please install it with at least two peoples. 3.1 Inspecting the equipment If any equipment has been damaged during shipment, keep the shipping cartons and packing materials for the carrier or place of purchase and file a... -
Page 14: Checking The Accessory Kit
3.3 Checking the accessory kit Verify that the following additional items are included with the unit: UPS 6K/10K UPS 6KS/10KS Battery power cable USB cable RS232 cable Parallel cable Dry contractor EPO contractor Ear bracket Rail kit User manual V: standard configuration *: assembled to unit O: optional configuration If you ordered other accessories, please contact with local sale center. -
Page 15: Power Cables Connection
recommended to be installed below to UPS. Note that you already installed a ‘rail kit’ to rack cabinet for this operation, and ‘2U’ rail kit is recommended to be selected. 1. Install ‘Ear bracket’ to the unit by the M4 screws(flat head). 2. -
Page 16: Access To Terminal Blocks(Ac To Ups)
Model Protective earthing conductor 6mm^2 (8AWG) 10mm^2 (6AWG) Min cross section Input L, N, G 6mm^2 (8AWG) 10mm^2(6AWG) Min conductor cross section 100A Input fuse Output L,N, 6mm^2 (8AWG) 10mm^2(6AWG) Min conductor cross section It is recommended that an external isolating device should be installed between the mains input and UPS as shown in Figure AC Contactor: 208-240V, 63A (6 kVA) 208-240V, 100A (10 kVA) -
Page 17: Access To Terminal Blocks(Pdu To Ups)(Optional)
2. Connect the AC cable to terminal blocks refer to the indication on rear panel 3. Tie up the AC cable to the rear panel. 4. Install back the cover of terminal block. 4.2 Access to terminal blocks(PDU to UPS)(Optional) If you ordered PDU model, please connect the UPS’s terminal blocks from PDU’s source, detail operation please refer to PDU’s user manual. - Page 18 How to install a new parallel UPS system: 1) Before installing a new parallel UPS system, please prepare the input /output wires, breakers, and a main maintenance mechanical switch or static switch. 2) Independent battery packs for each UPS. 3) Remove the cover plate of parallel port on the UPS, connect each UPS one by one with parallel cable, and make sure the cable is screwed tightly.
- Page 19 5) Connect the input and output wires and make sure all the breakers are turned off. 6) Turn on the input breakers for the parallel UPS. 7) Pressing button continuously for more than 1 second for one UPS of the system, then the system will turn to online mode. 8) Regulate the output voltage of the each UPS separately, and check if the difference of output voltage is less than 0.5V among the parallel system.
- Page 20 system will turn to online mode, after these operations, the system will work normally in parallel mode. Note: The output wiring requirement as below: 1) If the distance between the UPS and breaker panel is less than 20 meters in parallel system, the length difference between input and output cable of the UPSs is required to be less than 20%.
- Page 21 4) Switch off the main O/P breaker and O/P breaker in the parallel system. 5) Remove the wanted UPS and disconnect cables/wires. 6) Switch on the mains breaker and input breaker of the reserved UPS, make sure the UPS work in bypass mode. 7) Switch on the O/P breaker and main O/P breaker.
-
Page 22: Operation
5. Operation 5.1 Control panel The UPS has a graphical LCD. It provides useful information about the UPS itself, load status, events, measurements and settings. The following table shows the indicator status and description: Indicator Status Description ONLINE The UPS is operating normally on Online or on High (Green) Efficiency mode. -
Page 23: Lcd Description
The Buzzer definition as below: UPS condition Buzzer status Continuous Fault active Over Load 2 Beep every second Warning active Beep every second Other Warning active Beep every 4 seconds, if battery low, buzzer Beep every second Battery output Beep every 2 minutes Bypass output 5.2 LCD description The LCD backlight automatically dims after 2 minutes of inactivity (except UPS is... - Page 24 Display Function Input & Output Information It indicates input & output voltage/frequency value, which are displayed alternately. It also indicate load per cent and battery voltage value . UPS Operating Mode Display It indicates UPS operating mode . Load Information It indicates the load level.
-
Page 25: Display Functions
It indicates UPS Brand Logo and UPS system information . 5.3 Display functions Button Name Description Setting Switch UPS operating mode Press 0.5s or more (ON / OFF) : Standby When the UPS is faulty, press the key for ON/OFF Remove the fault alarm more than 0.5s to release the UPS fault alarm... -
Page 26: Ups Startup And Shutdown
two characters under the alarm ID are used to display the ECO mode / CVCF mode and the number of parallel machines. If UPS is set to ECO mode, the character is displayed as EO If UPS is set to CVCF mode, the character is displayed as CF If the UPS is in the parallel system, the total number of parallel machines will be displayed. -
Page 27: Lcd Operation
Pressing button continuously for more than 1 second, the buzzer will beep for300ms, UPS starts to turn on. A few seconds later, the UPS turns into Battery mode. If the utility power comes back, the UPS will transfer to Line mode without output interruption of the UPS. - Page 28 normal mains mode for the load power supply, the default is not enabled. Note: Only one of ECO and CVCF can be set to enable. CVCF is automatically set to disabled when ECO is set to Enabled. ECO is automatically set to Disabled when CVCF is set to Enable.
-
Page 29: Communication
items (for example, "On" enable, "OF" means not enabled). Step5: Press the test key 0.5s above, select the corresponding settings and determine the settings, the setting is completed. Step6: The two buttons simultaneously press more than 4s or without any key operation for more than 1 minute, you can exit the setting mode, UPS resume normal working mode. -
Page 30: Network Management Card (Optional)
Dry in & Dry out Dry in allows remote action to switch On/ switch Off/ maintain bypass the UPS. When contact changes from closed to open, the UPS is switch On/ switch Off/ maintain bypass the UPS. Dry out could indicate the state of UPS. The Dry out port is normally closed, if the Dry out port is open, it indicate that the UPS is Loaded power/ On battery mode /Battery low /Battery disconnected /Bypass output/ups normal. -
Page 31: Ups Maintenance
1. Go to the website: http://www.santak.com 2. Choose the operation system you need and follow the instruction described on the website to download the software. When you finish installation, restart your computer, the WinPower software will appear as a green plug icon located in the system tray, near the clock. -
Page 32: Replacing Batteries
in less than 3 hours. However, recommends that the batteries charge for 48 hours after long-term storage. If the date has passed and the batteries were never recharged, do not use them. Contact your service representative. 7.4 Replacing batteries DO NOT DISCONNECT the batteries while the UPS is in Battery mode. Consider all warnings, cautions, and notes before replacing batteries. -
Page 33: Troubleshooting
Replacing the EBM(s) The EBM is heavy. Lifting the cabinet into a rack requires two people at least. If PDU is connected with the UPS, should turn the MBS to bypass and switch off the input and then replace the EBM(s). If PDU is not connected with the UPS, should turn off the UPS and then replace the EBM. -
Page 34: Typical Alarms And Faults
they are preventive alarms intended to alert the user. Events are silent status information that are recorded into the Event log. Example = "Battery charging". Alarms are recorded into the Event log and displayed on the LCD status screen with the logo blinking. - Page 35 Power overload Power requirements exceed Remove some of the Fault (Red) LED is Flash the UPS capacity equipment from the UPS. 2beep every 1 second The UPS continues to Code: 41 operate, but may switch to Bypass mode or shut down if the load increases.
- Page 36 Back feed UPS has a unexpected bypass Transfer to maintenance Fault (Red) LED is On. current on battery mode bypass and call service. Beep continuous. Code: 93 Inv Overload Fault UPS has transferred to bypass The UPS transfers to Fault (Red) LED is On or fault mode because of Battery mode if supporting Beep continuous.
- Page 37 BUS Softstart Fail Indicates that the BUS could Contact your service Fault (Red) LED is On. not soft start successfully representative Beep continuous. Code: 25 Inv Over Voltage Indicates that the UPS get The UPS transfers to Fault (Red) LED is On. invert over voltage fault Bypass mode if supporting Beep continuous.
- Page 38 Line input different Parallel system,UPS1 line ok, Check the line input Fault (Red) LED is flash UPS2 line loss 1 beep every 1 second Code: E7 Power strategy different Parallel system,UPS mode Check UPS OP mode, Keep Fault (Red) LED is flash OP mode be the same 1 beep every 1 second different...
- Page 39 Nominal frequency 50/60Hz auto-sensing Frequency range 40 Hz– 70 Hz ≤60% rated load 45 Hz– 55 Hz(50Hz system) 54 Hz – 66 Hz (60Hz system) >60% rated load 45 Hz– 55 Hz 54 Hz – 66 Hz >60% rated load Bypass voltage range 176~264Vac (default) Noise filtering...
- Page 40 Harmonic distortion < 1% THDV on linear load < 5% THDV on non-linear load Transfer time Online mode: 0 ms (no break) High Efficiency mode: 10ms maximum (due to loss of utility) Power factor Load crest ratio 3 to 1 * for 208V output, the load level will be derating to 90%.
- Page 41 Table 9. Battery EBMs Rack / Tower 240Vdc 20 x 12V, 7Ah configuration 240Vdc 20 x 12V, 9Ah 192Vdc 16 x 12V, 7Ah 192Vdc 16 x 12V, 9Ah Fuses 100A for 10kVA models and EBM Type Sealed, maintenance-free, valve-regulated, lead-acid, with minimum 3-year float service life at 25°C (77°F).
- Page 42 the load. Backup time Time during which the load can be supplied by the UPS operating on battery power. Load Devices or equipment connected to the UPS output. HE mode Operating mode by which the load is supplied directly by the AC source if it is within the tolerances defined by the user.
- Page 44 SANTAK ELECTRONIC(SHENZHEN)CO.,LTD No.8 Baoshi Rd, Block 72 Baoan, Shenzhen, Guangdong, China www.eaton.com www.santak.com 614-02181XS1-01...
Need help?
Do you have a question about the CASTLE RACK 6K and is the answer not in the manual?
Questions and answers