Table of Contents
Advertisement
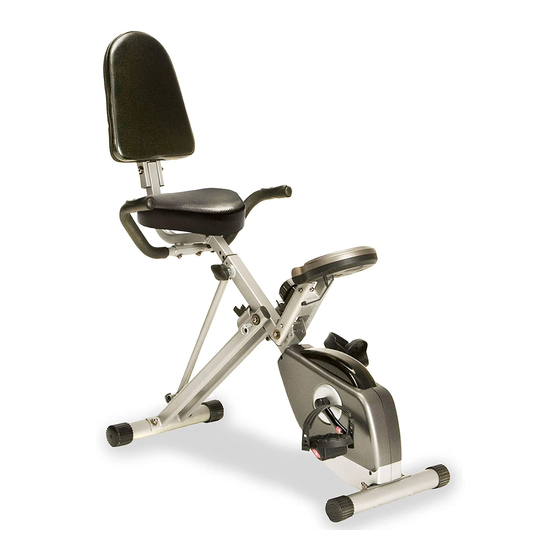
F
Folda
IMPORTA
TANT: Read
Retain th
his owner'
The spec
cifications
without N
Notice
Item
m# 1110
able
Sem
mi‐Rec
d all instru
uctions ca
's manual
for future
e referenc
s of this pr
roduct ma
O
WNE
cumb
bent
arefully be
efore using
e.
ay vary fro
om this ph
hoto, subje
R'S M
MANU
UAL
Bike
e
g this pro
oduct.
ect to cha
ange
Advertisement
Table of Contents

Subscribe to Our Youtube Channel
Related Manuals for Exerpeutic 1110


Summary of Contents for Exerpeutic 1110
- Page 1 Retain th his owner’ ’s manual for future e referenc The spec cifications s of this pr roduct ma ay vary fro om this ph hoto, subje ect to cha ange without N Notice R’S M MANU UAL Item m# 1110 ...
- Page 2 1110.2‐072114 ...
-
Page 3: Table Of Contents
TABLE OF CONTENTS SERVICE------------------------------------------------------------------------------2 LABEL PLACEMENT --------------------------------------------------------------3 PRODUCT SAFETY----------------------------------------------------------------4 PARTS LIST --------------------------------------------------------------------------5 PARTS, HARDWAR & TOOLS LIST -------------------------------------------6 OVERVIEW DRAWING ------------------------------------------------------------7 ASSEMBLY----------------------------------------------------------------------------8 ADJUSTMENTS ---------------------------------------------------------------------13 COMPUTER --------------------------------------------------------------------------14 MAINTENANCE & TROUBLE SHOOTING-----------------------------------15 WARM UP -----------------------------------------------------------------------------16 WARRANTY---------------------------------------------------------------------------17 FAX--------------------------------------------------------------------------------------18... -
Page 4: Service
SERVIC CE MPOR RTANT : FOR NORT TH AM MERICA A ONL To req quest t prod duct servi ice an nd or rder replac ceme ent pa arts, p pleas se cal ll our custo mer s servi ce de epart ment t at:... -
Page 5: Label Placement
LABEL PLACEMENT ... -
Page 6: Product Safety
PRODUCT SAFETY Basic precautions should always be followed, including the following safety instructions when using this equipment: Read all instructions before using this equipment. Read all the instructions in this manual and do warm up exercises before using this equipment. Before exercise, in order to avoid injuring the muscle, warm-up exercise of every position of the body is necessary. -
Page 7: Parts List
PARTS LIST Part # Description Qty Part # Description Rear Frame 1 035 Magnet Bracket Front Frame 1 036 Magnet Rear Stabilizer 1 037 Sensor with Wire Computer Bracket 1 038 Flywheel Seat Post 1 039 Belt Wheel with Crank Axle Seat Cushion 1 040 Bearing Bracket A... -
Page 8: Parts, Hardwar & Tools List
PARTS, HARDWARE & TOOLS LIST Part # Description Qty Part # Description Washer Ø18xØ5.3 1 085 Front Stabilizer Spring Ø8x20 1 086 C-ring Ø10 Belt A 1 087 Hexagon Socket Bolt M8x77L Belt B 1 088 Hand Pulse Sensor Hexagon Socket Bolt M6x12 4 089 Phillips Round Head Screw M4x20L Spring Washer Ø6.2... -
Page 9: Overview Drawing
OVERV VIEW DR R AWING G... - Page 10 SSEMBL ool: Wren nch 13-15 nd up the b base of the e machine by separa ating the R ear and Fr ront Frame es (1, Remove t he Safety Pin A (22) from the F Front Fram me (2) and t the Safety Pin B (62)
- Page 11 ASSEMB BLY Tool: 1 1 7 llen Wrenc ch with Phi illips Screw wdriver move four M6x12 He xagon Soc cket Bolts (73) and fo our Ø6.2 S Spring Was shers (74) ) from the Computer Bracket (4 4). Connec ct the Conn nection Wir re A (15) fr...
-
Page 12: Assembly
ASSEMB LY Tool: Wrench 13-15 Allen Wren nch with Ph hillips Scre wdriver Alig gn bolt hole es on unde erside of Se eat Cushio on (6) with holes on to top of Seat t Post (5), then attac ch with thre ee Ø8.2 Fla at Washer rs (33) and... - Page 13 SSEMBL LY Tool: 8 8 1 Wrench 1 13-15 Allen Wre ench with P Phillips Scr rewdriver move four M8x45L H exagon So ocket Bolts s (31) and four Ø8.2 S Spring Wa ashers (80) ) from the Back Cush hion Frame e (78).
-
Page 14: Right Pedal 1
SSEMBL LY Wrenc h 13-15 Import tant: Screw Right Pe edal (8) i nto right t crank clockw wise! Screw Left Ped dal (7) int to Left c rank counte er-clockw wise! Importa ant: Please m make sure e the right t pedal ma atches up with... -
Page 15: Adjustments
JUSTME ENTS usting the e Tension Control K Knob To i increase th he load, tu rn the tens sion contro ol knob in a a clockwise e direction. To d decrease t the load, tu urn the ten sion contro ol knob in a counterc clockwise... -
Page 16: Computer
OMPUTE ECIFICATI IONS: ME ---------- -------------- -------------- 0:00 0-99:59 MIN N: SEC EED ------- -------------- -------------- 0.0-9 999.9 ML/H STANCE --- -------------- --------------- 0.0-9 999.9 ML LORIE ---- -------------- -------------- 0.0-9 999.9 KCA OMETER -------------- -------------- 0.0-9 999.9 ML LSE -------- -------------- --------------- 40-2... -
Page 17: Maintenance & Trouble Shooting
MAIN NTENANCE E & TROUB BLE SHOO OTING AINTENA ANCE aning e bike can be cleaned d with a so oft cloth an d mild dete ergent. Do o not use abra asives or s solvents on n plastic pa arts. Pleas se wipe yo ur perspira ation off th e bike... -
Page 18: Warm
WARM U UP adriceps S Stretch With h one hand d against a a wall for b balance, re ach behind u and pull y your right fo oot up. Br ring your h eel as clos to y your buttoc cks as poss sible. -
Page 19: Warranty
ARRANT TY MANUF FACTURER R’S LIMITE ED WARR RANTY aradigm H Health & W Wellness w warrants t to the orig ginal purc chaser tha at this pro oduct is fr om defects s in mater rial and wo orkmansh hip when u used for th he purpos... -
Page 20: Fax
FAX FORM Paradigm Health & Wellness, Inc. PARTS REQUEST FAX FORM Please fax this form to (1-626-810-2166) OR YOU CAN EMAIL CUSTOMER SERVICE REQUESTS TO service@paradigmhw.com NAME: _______________________________________________________ ADDRESS: ____________________________________________________ CITY ______________ STATE ______________ ZIP ___________________ TELEPHONE: (Day) _____________________________________________ (Night) ____________________________________________ (Email Address) ____________________________________ SERIAL#: __________________________________________ MODEL#: __________________________________________...
Need help?
Do you have a question about the 1110 and is the answer not in the manual?
Questions and answers