Table of Contents
Advertisement
Quick Links
Advertisement
Table of Contents

Subscribe to Our Youtube Channel
Related Manuals for PR Lighting AQUA 350 BEAM PR-2368


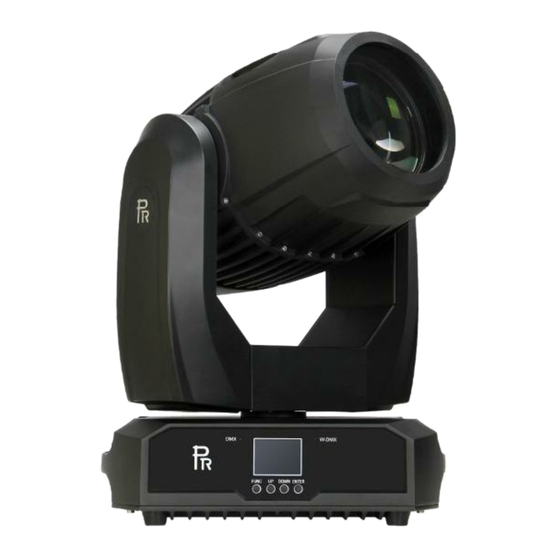
Summary of Contents for PR Lighting AQUA 350 BEAM PR-2368
- Page 1 AQUA 350 BEAM PR-2368 This product manual contains important information about the safe installation and use of this projector. Please read and follow these instructions carefully and keep this manual in a safe place for future reference. PR LIGHTING LTD. http://www.pr-lighting.com...
- Page 2 Any damage caused by improper use will not be assumed by the manufacturer and / or dealer. Note: For the products made by Guangzhou PR lighting Ltd, the warranty for the whole product is one year starting from the delivery date but the light source is not within the warranty.
-
Page 3: Safety And Warnings
1. SAFETY AND WARNINGS NOTE Before a projector’s installation, power-on, operation and maintenance, please carefully read the safety information hereinafter! The following safety signs are used in the user manual. Warning User Electrical Protective Flames High Goggles Manual shock Gloves Temperature When unpacking , check if there is transportation damage before using the projector. - Page 4 There are safety cord holes at the bottom of the base of a projector. In view of safety, please run the safety ● cord supplied through the safety cord holes for safety support. Before any installation, maintenance and cleaning work, please ensure the projector is disconnected from ●...
- Page 5 TROUBLESHOOTING ● PROBLEM ACTION Check the fuse on the power socket. The projector doesn’t switch on Check the lamp. The lamp is on but the projector doesn’t respond Make sure that the fixture’s start address is right ...
-
Page 6: Installation
4. INSTALLATION RIGGING ● safety cord clamp Please run the safety cord through safety cord hole for safety control panel handle Take 2 clamps and 1 safety cords out from the package and mount 2 clamps on the underside of fixture with 4 retainers attached to each clamp. - Page 7 DMX CONTROL CONNECTION ● Connection between controller and projector and between one projector and another must be made with a twin-screened cable, with each wire having at least a 0.5mm in diameter. Connection to and from the projector is via cannon 5 pin (which are included with the projector) or 5 pin XLR plugs and sockets.
- Page 8 INSTALLATION/REPLACEMENT OF A LAMP ● Lock the yoke before fitting/replacing the lamp. Just as Shown by Figure 1, after Opening the airflow cover as shown by loosening 4 tightening screws, the structure like figure 2 will be seen. Just as shown by the figure 2, loosen the 4 tightening screws of the bob-weight block, take it down and the structure like figure 3 will be seen.
-
Page 9: Setup And Configuration
5. SETUP AND CONFIGURATION Front Panel Operation ● Projector configuration can be set conveniently via push button and LCD display. Launch the projector and press button ENTER for more than 5 seconds to unlock the panel, the LCD will show the function menu of the projector, each main menu has its submenus and each submenu has a specific function. -
Page 10: Operation Menu
STAND-ALONE MODE ● Operate the projector without connecting with a controller, enable the master mode through the operation panel, the projector will run in Stand-Alone mode automatically. DMX address can be set at any number within 512. MASTER/SLAVE MODE ● Many projectors can run synchronously in the Master/Slave mode by linking them with each other. - Page 11 Wireless Only Wireless First Wireless To XLR Slave Master/Slave (Default:SLA V) Master Off After Delay Display Mode (Default:Off After Delay) On Always Display Contrast (Default:6) 1-31 Pan amend 1-127 Tilt amend 1-127 Unlink Wireless YES 5 Reset Lamp Hours Reset User Data Reset Option Set Factory Settings Parameter Transm...
- Page 12 Driver 1 X.X.X Fan Board X.X.X Head Sensor Display Board Temperature Pan and Tilt Channel XXX=XXX View DMX Values Electronic SN SN=XXXXXXXXXXXX RDM Device Label Version X.X Fan 1 OK/Error Fan Err View Fan2 OK/Error Fan3 OK/Error X Optocoupler Ok/Er Y Optocoupler Ok/Er X Hall Ok/Er...
- Page 13 Self Test 自动测试 Open Strobe Strobe1 Strobe2 White/ Color1- Color13 Colour Wheel Rotating Reverse Rotating White F-gobo 1- F-gobo 14 Fixed gobo Rotating/ Reverse Rotating FG shake1-14 White R1-gobo 1- 12 Rotating gobo1 Rotating Reverse Rotating R1G shake1-12 Stop Test Mode Gobo Rotating1 Rotating Reverse Rotating...
- Page 14 Strobe 0-255 Diming 0-255 Colour Wheel 0-255 Fixed gobo 0-255 Rotating gobo 0-255 CH6 Gobo Rotating 0-255 Effect 0-255 Static Scene1-16 Effect Rotating 0-255 Prism 0-255 CH10 Prism Rotating 0-255 CH11 Focus 0-255 CH12 Pan Location 0-255 CH13 Tilt Location 0-255 CH14 X&Y Speed...
-
Page 15: Dmx Protocol
7. DMX PROTOCOL Short Standard FUNCTION DESCRIPTION mode mode Strobe Close 000-010 Open 011-025 Strobe from slow to fast 026-225 Strobe Macro(Strobe at random) 226-246 Open 247-255 Dimmer From dark to bright 000-255 000-006 White 007-010 White /Color 1 011-015 Color 1 016-019 Color 1/ Color 2... - Page 16 016-022 Gobo 2 023-029 Gobo 3 030-036 Gobo 4 037-043 Gobo 5 044-050 Gobo 6 051-057 Gobo 7 058-064 Gobo 8 065-071 Gobo 9 Fixed Gobo Wheel 072-078 Gobo 10 079-085 Gobo 11 086-092 Gobo 12 093-099 Gobo 13 100-106 Gobo 14 107-113 Gobo 15...
- Page 17 078-087 Gobo 8 088-097 Gobo 9 098-107 Gobo 10 108-117 Gobo 11 118-127 Gobo 12 Rotation (From slow to Fast) 128-143 Reverse Rotation (From slow to 144-159 Fast) 160-167 Shake 1(From Fast to slow) Shake 2 (From Fast to slow) 168-175 176-183 Shake 3(From Fast to slow)...
-
Page 18: Led Indication
Focus 000-255 Linear Focus Focus Fine 000-255 Focus in 16 bit precision Pan(0° ~540° ) 000-255 Pan Fine Pan in 16 bit precision 000-255 Tilt Tilt(0° ~270° ) 000-255 Tilt Fine Tilt in 16 bit precision 000-255 Pan & Tilt Speeds Pan &... -
Page 19: Technical Data
10. TECHNICAL DATA VOLTAGES: 100V-240V AC,50/60Hz POWER CONSUMPTION: 550W@220V LAMP: Lamp International Brand Lamp 350W Colour Temperature 6800° K 1500hrs Manufacturers Rated Lamp Life COLOR S: 1 Color Wheel 12Dichroic colour filters +CTO+ white Variable speed and bi-directional rainbow effect Linear colour changing is available Color 3 Color 4... - Page 20 GOBOS: 1 Fixed gobo wheel : 16 Interchangeable gobos+ white Shaking and bi-directional wheel scrolling at variable speeds Rotating Gobo Wheel: 1Rotating gobo wheel: 12 gobos+ White Shaking and bi-directional wheel scrolling at variable speeds Gobo changeable. Gobo outer size: Ф12mm, image sizeФ6mm Gobo 1 Gobo 2 Gobo 3...
- Page 21 PRISM/EFFECT WHEEL 3Prisms(standard 8facet prism+16facet prism+ linear prism) (bi-directional rotation) + CTO+ Frost + Open (Optional 3-16 facet prism or gradient prism) FOCUS 0-100% linearly adjustable by DMX STROBE: Double shutter blades, 0.3~20 F.P.S HEAD MOVEMENT: Pan 540º , Tilt 270º with auto position correction CONTROL: International standard DMX512 signal , 3 pin and 5 pin interfaces 15channels in short mode, 19channels in standard mode...
-
Page 22: Light Output
LIGHT OUTPUT: 光照度( Lux ) 180452 101505 1624072 406018 45113 64963 2.1° 射距 (m) 光斑直径 (m) 1.10 0.18 0.92 0.37 0.55 0.73 22/26... -
Page 23: Circuit Diagram And Pcb Connections
11. CIRCUIT DIAGRAM AND PCB CONNECTIONS CIRCUIT DIAGRAM ● 23/26... -
Page 24: Component Order Codes
12. COMPONENT ORDER CODES NAME PART NO. QUANTITY REMARK 040070130 PHILIP 350W BALLAST INTERNATIONAL BRAND 350W LAMP 100070042 192010199 350W POWER SWITCH 270030005 T20A250V 6.3*32mm FUSE 290151438 HTD-384-3M-9 PAN DRIVER BELT1 PAN DRIVER BELT2 290151439 HTD-342-3M-9 TILT DRIVER BELT 290151436 HTD-357-3M-9 EFFECT WHEEL BELT 290151420... - Page 25 25/26...
- Page 26 PR LIGHTING LTD. 1582 Xingye Avenue, Nancun Panyu Guangzhou, 511442 China TEL: +86-20-3995 2888 FAX: +86-20-3995 2330 P/N: 320020507 20170906 Version: 26/26...
Need help?
Do you have a question about the AQUA 350 BEAM PR-2368 and is the answer not in the manual?
Questions and answers