Table of Contents
Advertisement
Quick Links
Advertisement
Table of Contents

Related Manuals for PR Lighting AQUA 580 BEAM


Summary of Contents for PR Lighting AQUA 580 BEAM
- Page 1 AQUA 580 BEAM PR-2569 The user manual contains important information about the safe installation and use of a projector. Please read and follow these instructions carefully and keep the manual in a safe place for future reference. PR LIGHTING LTD.
-
Page 2: Table Of Contents
/ or dealer. Note: For the products made by Guangzhou PR lighting Ltd, the warranty for the whole product is one year starting from the delivery date but the light source is not within the warranty. -
Page 3: Safety And Warnings
1. SAFETY AND WARNINGS NOTE Before a projector’s installation, power-on, operation and maintenance, please carefully read the safety information hereinafter! The following safety signs are used in the user manual. User Electrical Goggles Protective High Warning Flames Manual shock Gloves Temperature ●... -
Page 4: Instructions
●All power cords must conform to related safety and regulations. ●If a projector is not water and dust proof, while being operated it should not be under rains or in humidity to avoid short circuit. ●Do not switch on and off a projector constantly in very short intervals, otherwise the light source’s and other electrical parts’... -
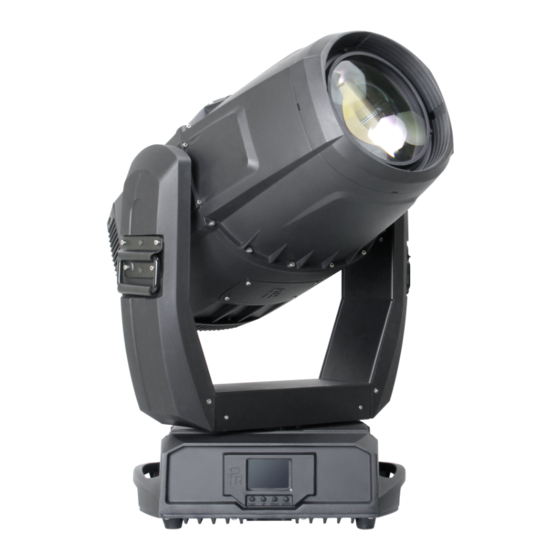
Page 5: Appearance
To ensure smooth movement of gobos and zoom and focus lens, it’s advised rotators’ bearings and 2 sliding bars for zoom and focus lens be lubricated every 2 months. High quality and high temperature lubricant/grease is advised.. ●TROUBLESHOOTING PROBLEM ACTION ... - Page 6 Warning! For safety, please run the safety cord through its hole. Clamp Safety cord Take 2 clamps and the safety cord out from the package and mount 2 clamps on the underside of fixture with 2 retainers attached to each clamp. Hang the fixture on the structure and fasten the screws attached to each clamp. (See the WARNING on the underside of the base as shown above) To pass the SAFETY CORD through the HOLES for safety! Always ensure that the projector is firmly anchored to avoid vibration and slipping whilst functioning.
- Page 7 DMX CONTROL CONNECTION: ● Connection between controller and projector and between one projector and another must be made with a twin-screened cable, with each wire having at least a 0.5mm in diameter. Connection to and from the projector is via cannon 5 pin (which are included with the projector) or 5 pin XLR plugs and sockets.
- Page 8 ALIGNMENT/INSTALLATION/REPLACEMENT OF A LAMP ● Please hold the projector well before adjustment/installation/replacement of lamp. As shown in figure1, remove fan cover of the head and heat sink. Removal/Installation of lamp as shown in figure2 Adjust the lamp as shown in figure3 Before the removal of the lamp, unplug the lamp wires.
-
Page 9: Setup And Configuration
Replacement of the Gobos: Open the chamber cover after loosening 4 screws. Select the rotator for replacement of gobo. Push the rotator at the opposite side of its gear till it is off the holder of the rotating gobo wheel. Remove the rotator gently . - Page 10 fixture’s operation menus. Select DMX Address icon and press ENTER key on the display and select DMX address at the 2 level menu for the address setting. for the DMX address desired. Press or DOWN key Press ENTER key to confirm. Press the FUNC key to go back to the upper level menu.
-
Page 11: Operation Menu
6.OPERATION MENU 2nd LEVEL 3rd LEVEL 4th LEVEL 5th LEVEL LEVEL 1-490(Short Mode) 1-486(Standard Mode) DMX Address 1-482(Extend Mode) Address Default IP Address 2.X.X.X /10.X.X.X IP Address Custom IP Address X.X.X.X SubNet Mask X.X.X.X ArtNet Universe 0-255 Really Reset? Total Reset Confirm or Cancel Really Reset? Pan&Tilt Reset... - Page 12 ARTNET In/XLR Out Normal time out Loss of DMX Hold Last Value Off After Delay Display Mode On Always Invert OFF Display Config Display Invert Invert ON Invert Auto English\Chinese Language Setting Celsius Degree Temperature Unit Fahrenheit Degree Un-Link Wireless Really Un-Link? Confirm or Cancel Restore Defaults?
- Page 13 Software Version xxx xxx Tilt board xxx xxx Driver Board1 xxx xxx Driver Board 2 Electronic SN XXXXXX AQUA 580 Beam RDM Device Label ANSI E1.20 RDM Speed RSpeed Lamp Fan1 xxx xxxx Lamp Fan2 xxx xxxx Fan Status Head Fan...
- Page 14 CYM Macro XXX Cyan XXX Cyan Fine XXX Yellow XXX Yellow Fine XXX Magenta XXX Magenta Fine XXX CTO XXX CTO Fine Service Color Wheel XXX Color Wheel Fine XXX Fixed Gobo Wheel XXX Rot. Gobo Wheel XXX Rot. Gobo Rotation XXX Rot.
- Page 15 Magenta Fine XXX CTO XXX Edit User Memory CTO Fine XXX User Color Wheel XXX Memories Color Wheel Fine XXX Fixed Gobo Wheel XXX Rot. Gobo Wheel XXX Rot. Gobo Rotation XXX Rot. Gobo Rotation F. XXX Prism 1 XXX Prism 1 Rotation XXX Prism 2XXX Prism 2 Rotation XXX...
-
Page 16: Dmx Protocol
Remarks: Lamp fan sensor is only used during lamp adjustment Open: the lamp is affected by the lamp fan. If the lamp fan fails, the lamp won’t be on. Close: the lamp is not affected by the lamp fan. Even if the lamp fan is not installed, the lamp will be on, but Pan and Tilt are without force . - Page 17 104-108 Color9(Dark Blue) 109-113 Color10(UV) 114-118 Color11(Light Yellow) 119-123 Color12(Dark Yellow) 124-127 White 128-191 Rotation ,Clockwise from slow to fast 192-255 Rotation, Anti-clockwise from fast to slow Color Wheel Fine 0000-255 Color Wheel in 16 Bit White 9-15 Gobo1 16-22 Gobo2 23-29 Gobo3...
- Page 18 248-251 Shake effect 16 from slow to fast 252-255 Shake effect 17 from slow to fast 000-015 White 016-031 Gobo1 032-047 Gobo 2 048-063 Gobo 3 064-079 Gobo 4 080-095 Gobo 5 096-111 Gobo 6 112-127 Gobo 7 Rotation (clockwise From slow to Fast) Rotating Gobo 128-156 Wheel l...
-
Page 19: Signs On The Touchscreen
Pan Fine Pan in 16 bit 000-255 Tilt 000-255 Tilt(0° ~270° ) Tilt Fine 000-255 Tilt in 16 bit Pan & Tilt Speeds 000-255 Pan & Tilt Speed from Fast to Slow 000-019 Reserved Keep in the DMX range for more than 5S to activate the following functions. -
Page 20: Technical Data
The system can detect some errors during the reset, if displayed, touch to view the error. The error messages are as follows: Name Type Correction Timeout/magnet Sensor/Encoder Check if wiring, positioning parts and motors are normal Timeout/magnet Sensor/Encoder Check if wiring, positioning parts and motors are normal Tilt Timeout Check if wiring, positioning parts and motors are normal... - Page 21 ELECTRIC PARAMETERS Input voltages 100V~240V AC,50/60Hz Input Power 800W @ 220V Current at Maximum 8A Power factor: PF〉0.9 LAMP SPECIFICATIONS PHILIPS MSD Platinum 25 R Lamp 7800 Color Temperature Manufacturers Rated Lamp Life 1500hours COLORS 1 Color wheel: 12colors+ Open, rainbow effect with bi-directional and variable speeds, Stepping/linear color changing Color 9 Color 10 Color8...
- Page 22 Linear CTO system FIXED GOBO WHEEL 1 Fixed gobo wheel: 18 gobos +Open Bi-directionally rotatable, and shakable at variable speeds Gobo1 Gobo2 Gobo3 Gobo4 Gobo5 Gobo6 Gobo7 Gobo8 Gobo9 Gobo10 Gobo11 Gobo12 Gobo13 Gobo14 Gobo15 Gobo16 Gobo17 Gobo18 ROTATING GOBO WHEEL 1 Rotating gobo wheel: 7Interchangeable Gobos +Open Bi-directionally rotatable, and shakable at variable speeds...
- Page 23 3 pcs of prisms which can be overlapped (8 facet circular prism+ 4facet linear prism) (16 facet circular prism+ frsot) And other optional prisms FOCUS DMX linear Focus DIMMER/STROBE 0-100% Linearly adjustable/ Double shutter blades, 0.3~25 F.P.S HEAD MOVEMENT Pan 540º , Tilt 270º with auto position correction BEAM ANGLE Beam angle 2°...
-
Page 24: Circuit Diagram
LIGHT OUTPUT (lux) 3680000 920000 230000 147200 102222 Flux 408889 DISTANCE DIAMETER(m) 0.18 0.35 0.53 0.71 0.89 1.06 10. CIRCUIT DIAGRAM AND PCB CONNECTIONS . CIRCUIT DIAGRAM... - Page 26 PCB CONNECTIONS ● 8-Channel SLAVE1 :P/N230060735 8 Channel Driver Board 1 M1-1 Motor 24V Input M1-2 Motor Reserved M1-3 Motor Reserved M1-4 Motor HALL1-6Magnet Sensor M1-5 Motor HALL1-5 Magnet Sensor M1-6 Motor HALL1-4 Magnet Sensor M1-7 Motor HALL1-3 Magnet Sensor M1-8 Motor HALL1-2 Magnet Sensor HALL1-1 Magnet Sensor...
-
Page 27: Component Order Codes
12. COMPONENT ORDER CODES NAME PART NO. QTY. REMARKS STEPPER MOTOR 030040121A STEPPER MOTOR 030040221C STEPPER MOTOR 030040224C SCREWMANDREL MOTOR(WITH NUT) 030040243A STEPPER MOTOR 030040246B STEPPER MOTOR 030040254A STEPPER MOTOR 181123 030040277 STEPPER MOTOR 190918 030040278 STEPPER MOTOR 191028 030040284 STEPPER MOTOR 200821 030040292 BLOWER... - Page 28 1582 Xingye Avenue, Nancun Panyu Guangzhou, 511442 China TEL: +86-20-3995 2888 PR lighting will try its best to offer accurate and overall information about a product’s technical data. Any changes won’t be notified if necessary. Patented Products. Counterfeiting Will be Prosecuted! P/N: 3200211**...
Need help?
Do you have a question about the AQUA 580 BEAM and is the answer not in the manual?
Questions and answers