
Related Manuals for Promise Technology Vess A3120


Summary of Contents for Promise Technology Vess A3120
-
Page 1: Quick Start Guide
Vess A3120 Storage Appliance for Video Surveillance Quick Start Guide Version 1.0 © 2018 PROMISE Technology, Inc. All Rights Reserved. - Page 2 Warning The electronic components within the enclosure are sensitive to damage from Electro-Static Discharge (ESD). Observe appropriate precautions at all times when handling the Vess A3120 or its subassemblies. Warning Turn off the power and disconnect the power cord before servicing this device.
- Page 3 Vess A3120 Storage Appliance for Video Surveillance Regulatory Compliance Information Please go to https://www.promise.com/Promotion/Compliance-Information1 Additional Safety Information Please go to https://www.promise.com/Promotion/Safety-precautions...
-
Page 4: Table Of Contents
Promise Technology Quick Installation Guide ..................1 bout this guide ....................1 ntroductIon ..................2 etup 1: u ..................2 npAck A3120 p ................2 Acking ................3 ront pAneL oVerView .................. 4 eAr pAneL oVerView 2: M A3120 ..........6... - Page 5 Vess A3120 Storage Appliance for Video Surveillance ................22 hoosIng A AnguAge ..............23 reAtIng ogIcAl rIves ...................29 ysteM hutdown ................30 roduct egistrAtion ..............31 egister your eries .................33 pen A web support cAse ..............35 ontActIng echnIcAl upport ..............35 echnIcAl upport ervIces...
-
Page 6: A Bout This Guide
This Quick Start Guide provides an introduction to the hardware components of the Vess A3120 Storage Appliance for Video Surveillance, as well as instructions for how to install the device in an equipment rack, and how to connect the power, a keyboard and monitor used for the initial configuration setup. -
Page 7: Etup Ask Ist
Promise Technology Quick Installation Guide etup To setup the Vess A3120 system, perform these hardware and configuration tasks in order: • Task 1: Unpack device • Task 2: Mount Vess A3120 in a standard rack • Task 3: Remove front bezel and install hard disk drives •... -
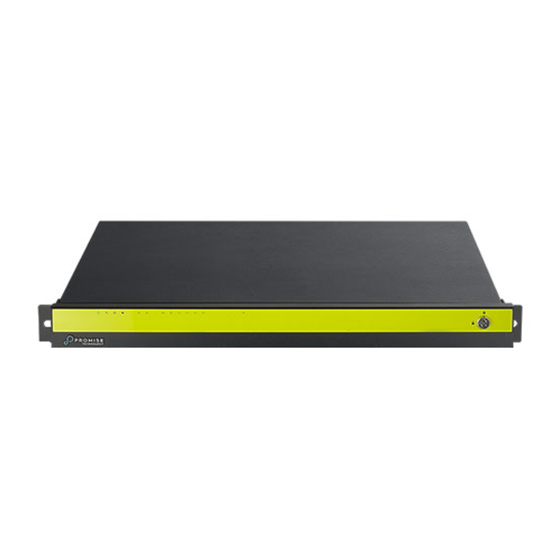
Page 8: F Ront Panel Overview
The left panel contains the power button, various LEDs, USB ports and the tubular lock. See “Power On Vess A3120 ” on page 2 and “Front Panel LEDs” on page 2 in this guide for more information. Front with bezel removed... -
Page 9: R Ear Panel Overview
Quick Installation Guide eAr PAneL oVerView The rear panel of the Vess A3120 provides the network ports for system administra- tion, ports for connection to the IP camera network, and the greater surveillance net- work and data storage network. This is also where the different video and audio ports are located, USB 2.0 and USB 3.0 ports, and the power insert for the power connec-... - Page 10 Vess A3120 Storage Appliance for Video Surveillance Vess A3120 ports on rear panel No. Type USB 2.0 ports VGA port Gigabit Ethernet ports USB 3.0 ports Audio In/Out Display Port HDMI port S/PDIF out...
-
Page 11: Ask 2: M Ounting V Ess
Use only the screws and fasteners included with the shipment of the sliding rail system, or with the Vess A3120. This procedure is de- scribed and illustrated in the sections that follow below. -
Page 12: A Ttach Ear Brackets To Front
Storage Appliance for Video Surveillance ttAch eAr brAckets to front The Vess A3120 ships with two ear brackets, one for the left side, another for the right. These attach at the front sides of the device housing. Once the brackets are securely... -
Page 13: I Nstall The Sliding Rails And Place Device In Rack
Promise Technology Quick Installation Guide nstAll the slIdIng rAIls And plAce devIce In rAck Follow these steps to install the sliding rails in the rack system, then place the Vess A3120 onto the rails and secure the device to the rack. - Page 14 Vess A3120 Storage Appliance for Video Surveillance position. Choose the mounting holes accordingly for your rack system. Note that three holes are required on each front post, the uppermost of the three Press lever to release lock (front right) to be used for the flange nuts to anchor the enclosure to the rack posts.
- Page 15 Make sure the rack rails are aligned, secure, stable and in place. Use the attaching screws that came with the mounting hardware to secure the enclosure to the rack. Front view of Vess A3120 secured to rack and placed on rail system...
-
Page 16: Ask 3: I Nstalling D Isk D
Vess A3120 Storage Appliance for Video Surveillance 3: i nstALLing RiVes The Vess A3120 system supports: • SATA hard disks • 3.5-inch hard disk drives For a list of supported physical drives, download the latest compatibility list from the PROMISE support website. -
Page 17: I Nstall H Ard D Isk D Rives
The instructions below apply to all types of drive carriers intended for use with the Vess A3120 system. Remove a disk drive carrier. Carefully lay the disk drive into the drive carrier at the front, so that the screw holes on the sides line up. -
Page 18: R Eplace S Ecurity C Over
Vess A3120 Storage Appliance for Video Surveillance ePLAce ecurity oVer Replacement of the security cover is optional during setup. It can be done any time after the disk drives are installed. To replace the security cover: Place the cover in position so the guide pins align properly with the holes on the right side of the front tab of each ear bracket. -
Page 19: N Umber Of D Rives R Equired
You can install any suitable disk drive into any slot in the enclosure. The diagram be- low shows how drive slots are numbered on the Vess A3120. Slot numbering is reflected in the web manager GUI and CLI/CLU user interfaces. -
Page 20: Ask 4: M Anagement C
The VGA, Display Port, HDMI and USB ports are located on the back of the Vess A3120.. Connect a VGA, Display Port or HDMI monitor to the appropriate video monitor port, and connect a USB key- board to any USB port on the rear panel. -
Page 21: Network Connection
Attach the other end of the Ethernet cable to one of the Gigabit ports on the back of the Vess A3120 . If you have multiple Vess A3120 systems, Host PCs or Servers, repeat steps 1 and 2 as required. -
Page 22: Ask 5: C Onnecting The P
With the power supplies connected, the system can now be powered on. To power on the Vess A3120 system , press the Power button in the top left corner of the front panel. Observe the LEDs on the front panel to make certain the boot up pro-... -
Page 23: F Ront P Anel Led S
Promise Technology Quick Installation Guide ront AneL LED indicators on front of Vess A3120 Power Fan Network Global RAID HDD Status Link/Act System Recording HDD Activity OPAS USB Status When boot-up is finished, check the LEDs on the front panel to make sure the system is functioning properly. -
Page 24: Ask 6: A Ccess O Perating
To access the installed operating system graphical user interface on the Vess A3120, insert a USB keyboard into any USB port, and connect a monitor using either the VGA or HDMI port. See “Management Path - on site keyboard and monitor” on page 15 for description on how to connect. - Page 25 Promise Technology Quick Installation Guide og in to inDows For Windows 10 installations, once the system has booted up it will be necessary to choose various options to complete the OS setup. You will be prompted to select a de- fault language and other user interface preferences.
-
Page 26: D Rives
Vess A3120 Storage Appliance for Video Surveillance 7: c ReAting ogicAL RiVes Setting up WebPAM PROe consists of the following actions: • Logging into WebPAM PROe • Choosing a Language • Creating Your Logical Drives • Logging out of WebPAM PROe... -
Page 27: C Hoosing A L Anguage
Promise Technology Quick Installation Guide hoosIng A AnguAge WebPAM PROe displays in English, German, French, Italian, Spanish, Russian, Japa- nese, Korean, Traditional Chinese, and Simplified Chinese. Language preference can be chosen at the login screen or after logging in from the WebPAM PROe menu header. -
Page 28: C Reating Y Our L Ogical D Rives
On a newly activated Vess A3120 system, there are no disk arrays or logical drives. To create a logical drive: Log in to Web PAM PROe. If there are no arrays configured, you will be automatically directed to the Disk Array Configuration menu. -
Page 29: Automatic Configuration
Promise Technology Quick Installation Guide Automatic Configuration When you choose the Automatic option, the following parameters appear on the screen: Disk Arrays – The number of physical drives in the disk array, their ID • numbers, configurable capacity, and the number of logical drives to be created •... - Page 30 Vess A3120 Storage Appliance for Video Surveillance Express Configuration When you choose the Express option, a set of characteristics and options appears on the screen. Express Configuration options menu Check the boxes to choose any one or a combination of: •...
- Page 31 Promise Technology Quick Installation Guide From the Application Type menu, choose an application that best describes your intended use for this disk array: • File Server • Video Stream • Transaction Data • Transaction Log • Other Click the Update button.
-
Page 32: Advanced Configuration
Vess A3120 Storage Appliance for Video Surveillance Advanced Configuration Note For an explanation of the parameters under the Advanced option, please download the Product Manual at www. promise.com. When you choose the Advanced option, the Step 1 – Disk Array Creation screen displays. - Page 33 Promise Technology Quick Installation Guide Step 2 – Logical Drive Creation Advanced Configuration (Step 2 Logical Drive Creation) Optional. Enter an alias for the logical drive in the field provided. Maximum of 32 characters; letters, numbers, space between characters, and underline.
-
Page 34: S Ystem S Hutdown
Vess A3120 Storage Appliance for Video Surveillance Click the Update button. A new logical drive is displayed under New Logical Drives. If there is free capacity re- maining, you can specify another logical drive now or wait until later. When you are done specifying logical drives, click the Next button. -
Page 35: Roduct Egistration
Promise Technology Quick Installation Guide Roduct egistRAtion It is good practice to register your Vess A-Series system with PROMISE in order to better support and assist you throughout the life of the product. If you are not a registered, first create a user account, then proceed to register the product. -
Page 36: R Egister Your V Ess A-S Eries
Vess A3120 Storage Appliance for Video Surveillance Support Center online User Registration form Fill in all required informa- tion (marked with an aster- isk * on the menu) and click the Submit button to regis- ter. You will then be logged in on the Support page. - Page 37 Promise Technology Quick Installation Guide Choose the product line and model of the system you want to register. Fill in all required information including Serial Number and Date Purchased, click Complete Registration at the bottom of the page to finish. A confirmation mes- sage will appear letting you know that you have successfully registered.
-
Page 38: Pen A Web Support Case
Vess A3120 Storage Appliance for Video Surveillance Pen A web suPPort cAse It is a good idea to go ahead and open a case now that you are registered and online. This will make it easier for tracking technical support for your product, which can mean faster resolution of issues that might arise in the future. - Page 39 Promise Technology Quick Installation Guide Choose the Host Name (custom Host Names are optional, created in the Product Registration form) and click to check mark the Serial Number box you entered in the Product Registration. Then supply all required information (marked with an asterisk * on the menu) and click on the Submit button to create the new case.
-
Page 40: Ontacting Echnical Upport
Vess A3120 Storage Appliance for Video Surveillance ontActIng echnIcAl upport PROMISE Technical Support provides several support options for PROMISE users to access information and updates. We encourage you to use one of our electronic services, which provide product information updates for the most efficient service and support.
Need help?
Do you have a question about the Vess A3120 and is the answer not in the manual?
Questions and answers