Table of Contents
Advertisement
Quick Links
Advertisement
Table of Contents

Related Manuals for Vertiv DCF 48U


Summary of Contents for Vertiv DCF 48U
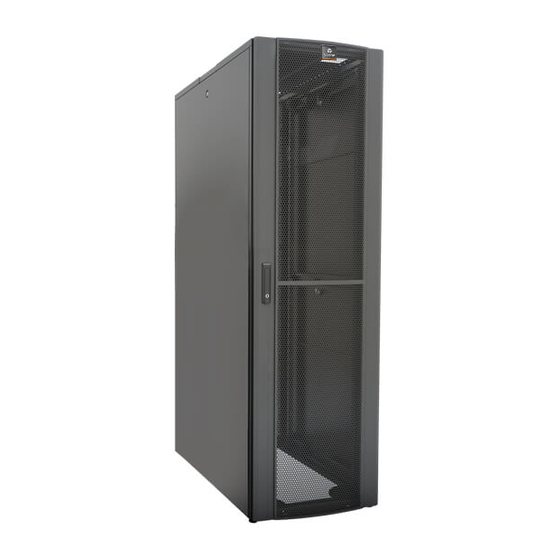
- Page 1 DCF™ Optimized Rack System Installer/User Guide...
- Page 2 Technical Support Site If you encounter any installation or operational issues with your product, check the pertinent section of this manual to see if the issue can be resolved by following outlined procedures. For additional assistance, visit https://www.VertivCo.com/en-us/support/...
-
Page 3: Table Of Contents
4.4.2 Positioning and Attaching Front- and Rear-Mount 19-in. EIA Rails 4.4.3 Removing and Reversing Doors 4.4.4 Removing and Replacing Side Panels 4.5 Mounting Power Distribution Units 4.5.1 Installing a Full-height PDU/Cable-Management Bracket 4.6 Baying the DCF Cabinets 5 Periodic Maintenance Vertiv | DCF Installer/User Guide |... - Page 4 Vertiv | DCF Installer/User Guide |...
-
Page 5: Important Safety Instructions
Code, ANSI/NFPA 70.As appropriate, all wiring and equipment should be installed in accordance with NFPA 70, “National Electrical Code,” and the applicable sections of ANSI C2, “National Electrical Safety Code." We recommend that casters only be used to move empty cabinets. Vertiv | DCF Installer/User Guide |... - Page 6 This page intentionally left blank. Vertiv | DCF Installer/User Guide |...
-
Page 7: Introduction
Depth with door is measured from the front door frame to the rear door frame. Assembly instructions in this manual cover the various configurations of the DCF Optimized Rack System, either a single rack for simple equipment organization or a suite of DCF Optimized Rack System racks. Vertiv | DCF Installer/User Guide |... - Page 8 This page intentionally left blank. Vertiv | DCF Installer/User Guide |...
-
Page 9: Major Components
DCF Optimized Rack System ships standard with 4 swivel, non-locking casters installed. Figure 3.1 Caster plate 3.2 Enclosure Exterior components of the DCF Optimized Rack System are finished in textured powder coat, color RAL 7021. Vertiv | DCF Installer/User Guide |... -
Page 10: Doors
Table 3.3 Side-panel sizes and part numbers RACK HEIGHT, IN (MM) RACK DEPTH, IN (MM) SIDE PANEL PART NUMBERS 43.3 (1100) 546055G1L 78.1 (2000) 47.2 (1200) 546055G2L 43.3 (1100) 546055G3L 88.6 (2250) 47.3 (1200) 546055G4L Vertiv | DCF Installer/User Guide |... -
Page 11: Top Cover
• 50 nylon washers • 1 cage-nut insertion tool • 1 #13/14 wrench • 1 L Key with a T30 Torx head and Phillips head • 9 ft of black edge guard • 1 baying kit Vertiv | DCF Installer/User Guide |... - Page 12 This page intentionally left blank. Vertiv | DCF Installer/User Guide |...
-
Page 13: Installation
4.1 Inspection Upon receiving a DCF Optimized Rack System, examine the packaging for any signs of mishandling or damage. If any damage is noted, notify your local Vertiv™ representative and your carrier immediately. 4.2 Required Setup equipment The DCF ships with the tools necessary to adjust supplied components: •... -
Page 14: Equipment Layout, Repositioning, Removal And Installation
Avoid tipping the unit when it is being moved. 4.4.1 Installing the Edge Guard Press edge guard to the top-cover cut outs by pressing along the edge of the cut out opening as shown in the following figure. Vertiv | DCF Installer/User Guide |... -
Page 15: Positioning And Attaching Front- And Rear-Mount 19-In. Eia Rails
The left- and right-front vertical rails must be the same distance from the front of the rack. The left- and right-rear vertical rails must be the same distance from the rear of the rack. If these conditions are not met, equipment and optional features will be difficult to install. Vertiv | DCF Installer/User Guide |... - Page 16 Determine the installation location of the EIA rails. 2. At the top, bottom, and center-support member, loosen the 2 screws that secure the node- adjustment brackets to the bottom frame member, then slide the bracket down. Vertiv | DCF Installer/User Guide |...
-
Page 17: Removing And Reversing Doors
5. Flip the door. The hinge pin assemblies are now at the bottom of the hinge-pin attachment point. 6. Remove the hardware, flip the hinge pin and reinsert it in the hinge-pin attachment point. Vertiv | DCF Installer/User Guide |... -
Page 18: Removing And Replacing Side Panels
Insert the bottom of the panel into the cut-outs. 2. Move the top of the panel toward the rack. 3. Turn the key counterclockwise to lock the panel in place. 4. Repeat steps for other panels being replaced. Vertiv | DCF Installer/User Guide |... -
Page 19: Mounting Power Distribution Units
To remove a full-height bracket: Loosen the screws in the top and bottom PDU hanging bracket. 2. Lift the bracket up until the hanging bracket clears the frame member and remove the bracket from the cabinet. Vertiv | DCF Installer/User Guide |... -
Page 20: Baying The Dcf Cabinets
The center hole puts the cabinets on metric centers. Connecting the racks is easier if the are in their final installation position before baying. Figure 4.7 Baying brackets ITEM DESCRIPTION Cabinet-connection hole Hole for metric centers Hole for 24-in. centers Vertiv | DCF Installer/User Guide |... -
Page 21: Periodic Maintenance
Dust should be cleaned from installed equipment according to the manufacturer’s recommendations. Clean the interior of the cabinet with a dry cloth. Vertiv | DCF Installer/User Guide |... - Page 22 This page intentionally left blank. Vertiv | DCF Installer/User Guide |...
- Page 24 VertivCo.com | Vertiv Headquarters, 1050 Dearborn Drive, Columbus, OH, 43085, USA © 2017 Vertiv Co. All rights reserved. Vertiv and the Vertiv logo are trademarks or registered trademarks of Vertiv Co. All other names and logos referred to are trade names, trademarks or registered trademarks of their respective owners. While every precaution has been taken to ensure accuracy and completeness herein, Vertiv Co.
Need help?
Do you have a question about the DCF 48U and is the answer not in the manual?
Questions and answers