
Subscribe to Our Youtube Channel
Related Manuals for nvent RAYCHEM Elexant 4010i


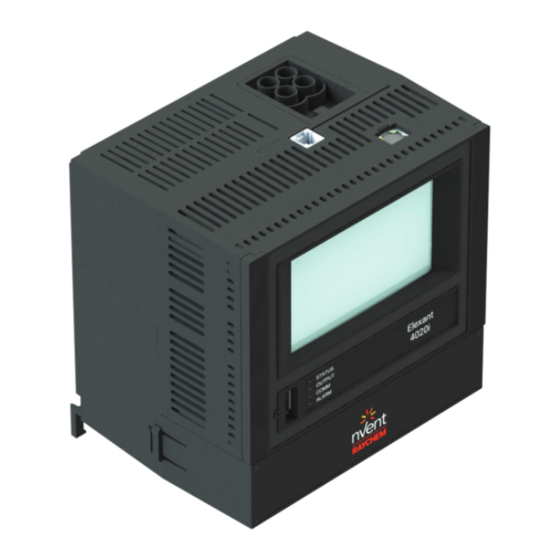
Summary of Contents for nvent RAYCHEM Elexant 4010i
- Page 1 RAYCHEM Elexant 4010i/4020i User Manual nVent.com RAYCHEM-AR-H60624-40X0iOpsManual-EN-1905...
-
Page 2: Table Of Contents
RAYCHEM Elexant 4010i/4020i User Manual CONTENTS OVERVIEW ....................................6 1.1 Introduction ...................................6 1.1.1 Product Overview ..............................6 1.1.2 Product Features ..............................7 1.2 Vital Information ................................8 1.3 Technical Support ................................8 INSTALLATION AND WIRING ............................9 2.1 Initial Inspection ................................9 2.2 Operator Safety Considerations ..........................9 2.3 Elexant 4010i/4020i Assembly..........................9... - Page 3 4.1.9 Functional Test Procedure ..........................39 4.1.10 Test in the Event of a Fault..........................40 4.1.11 Determining Safety Integrity of the nVent RAYCHEM Elexant 4020i-Mod-Is-Lim ........40 4.1.12 PFDavg Safety Function ..........................40 4.1.13 System Failure Modes .............................41 4.1.14 Response to Fault Conditions ........................41 GRAPHICAL USER INTERFACE ............................42...
- Page 4 RAYCHEM Elexant 4010i/4020i User Manual 5.1.9 User Interface ..............................44 5.1.10 Info ..................................44 5.2 Main Screen.................................45 5.2.1 Main Screen: Single Phase Controllers ......................45 5.2.2 Alarm Status ..............................46 5.2.3 Trace Status ...............................46 5.2.4 Main Screen: Three-phase Controller......................47 5.3 Information Screen .........................47 5.4 Control Setup ................................48...
- Page 5 RAYCHEM Elexant 4010i/4020i User Manual 5.12.3 Ethernet ................................85 5.12.4 Profibus (Optional) ............................86 5.13 Safety Limiter Settings Page ..........................86 5.13.1 Safety Limiter Setup ............................87 5.13.2 Safety Limiter Maintenance ..........................88 5.14 User Interface Settings .............................90 5.14.1 Language ................................90 5.14.2 Temperature Units ............................90 5.14.3 Passcode ................................91...
- Page 6 RAYCHEM Elexant 4010i/4020i User Manual LIST OF TABLES Table Page Table 1 - Elexant 4010i Variants.............................6 Table 2 - Elexant 4020i Variants.............................7 Table 3 - On/Off Control Status ............................23 Table 4 - Proportional Control vs Duty Cycle ......................23 Table 5 - Output Overrides ............................24 Table 6- Control Temperature Fail Modes ........................28...
-
Page 7: Overview
This manual provides information pertaining to the installation, operation, testing, adjustment and maintenance of the nVent RAYCHEM Elexant 4010i/4020i Heat Tracing Controllers. Additional copies of this user manual may be ordered separately through your nVent representative or online at nVent.com using the document number H60624. -
Page 8: Product Features
RAYCHEM Elexant 4010i/4020i User Manual Type Description 10380-020 4020i-MOD Elexant 4020i Module 10380-021 4020i-MOD-IS Elexant 4020i Module with IS (Intrinsically Safe) Barrier 10380-022 4020i-MOD-IS-LIM Elexant Module with IS (Intrinsically Safe) Barrier and Limiter 10380-023 4020i-MOD-3P Elexant 4020i 3 Phase Module... -
Page 9: Vital Information
Thermal LLC’s only obligations are those in the nVent Thermal Standard Terms and Conditions of Sale for this product, and in no case will nVent Thermal or its distributors be liable for any incidental, indirect, or consequential damages arising from the sale, resale, use, or misuse of the product. -
Page 10: Installation And Wiring
If the shipment is incomplete or shows visible damage, notify the nearest nVent representative Operator Safety Considerations The Elexant 4010i/4020i controllers using Solid State Relays are suitable for Class 1, Division 2, Groups A, B, C, and D hazardous areas and is IEC Ex/ATEX Zone 2 approved. -
Page 11: Connection And Indicators
2.5.1 Elexant 4010i mounting/removal procedure Mounting and removal of the Elexant 4010i and 4010i-IS should only be attempted by trained personnel. If this is needed, contact nVent Technical Support (See Section 1.3). 2.5.2 Elexant 4020i mounting/removal procedure 2.5.2.1 Elexant 4020i mounting procedure Insert the rear top of the module into the DIN rail, then push down and inwards to engage the clip. -
Page 12: Wiring And Interfaces
RAYCHEM Elexant 4010i/4020i User Manual Figure 3 - Mounting the Elexant 4020i Unit 2.5.2.1 Elexant 4020i removal procedure Push the module downwards to disengage the clip, then rotate the module towards yourself. Figure 4 - Removing the Elexant 4020i Wiring and Interfaces 2.6.1... -
Page 13: Ac Voltage Sense
RAYCHEM Elexant 4010i/4020i User Manual Figure 6 – Elexant 4010i - Load Connections 2.6.3 AC Voltage Sense This section applies only to Elexant 4020i units. These input terminals are used to sense the load voltage and may be directly connected to the load or may be fed from an external step-down transformer. -
Page 14: Rs-485 Out
RAYCHEM Elexant 4010i/4020i User Manual Figure 8 - RS-485 IN 2.6.5 RS-485 OUT Wiring for the RS-485 data connections may be terminated directly on the module TB-2 terminal blocks as shown or on panel mounted terminal blocks. Shielded cables should not be terminated on terminals of TB2. -
Page 15: Ethernet
RAYCHEM Elexant 4010i/4020i User Manual 2.6.6 Ethernet An Ethernet communications connection can be made via the RJ45 connector using a CAT 5E cable. The RJ45 port is available at the top of the unit as shown in the following figure. -
Page 16: Reset Button
RAYCHEM Elexant 4010i/4020i User Manual 2.6.9 Reset Button The reset button is located just left of the USB port. This reset button can be used to force a controller reset or Graphical User Interface (GUI) calibration if the GUI becomes un-useable. See Section 5.14.4 for detailed instructions on GUI calibration. -
Page 17: 4-20 Ma Connections
RAYCHEM Elexant 4010i/4020i User Manual Figure 15 - 2-Wire RTD connections 2.6.12 4-20 mA Connections Wiring for 4-20 mA connections may be terminated on terminal block TB-2 (terminals 1 to 6). Connections are the same for all of the three 4-20 mA channels. Terminate all cable shields on external panel mounted field terminal blocks. -
Page 18: Connections To Ssrs
RAYCHEM Elexant 4010i/4020i User Manual 2.6.13 Connections to SSRs The control output connections to SSRs are made using TB2 (terminals 8 and 9). Note the polarity of the output connections. CAUTION: Shock hazard, disconnect from live voltage before accessing terminals. - Page 19 RAYCHEM Elexant 4010i/4020i User Manual Figure 19 – Elexant 4020i Single Phase Two Pole - Connections to SSRs L2 L1 Circuit Breaker To Load Figure 20 – Elexant 4020i Three Phase - Connections to SSRs nVent.com RAYCHEM-AR-H60624-40X0iOpsManual-EN-1905...
-
Page 20: Alarm Relay
RAYCHEM Elexant 4010i/4020i User Manual 2.6.14 Alarm Relay The alarm relay (terminals 7,8,9 of TB3) is energized in the normal state (when there are no alarms), and configured as Fail Safe. The alarm relay connections provide a Form C dry contact, rated at 277 V maximum (3 A). -
Page 21: Aux 24V Output
RAYCHEM Elexant 4010i/4020i User Manual 2.6.16 AUX 24V Output The 24V DC output (terminals 1, 4 of TB3) may be used to connect peripheral equipment, if required. The Aux 24V output has a rating of 24Vdc, max load of 250mA @ 40°C, de-rated to 165mA @ 60°C. -
Page 22: Contactor Output
RAYCHEM Elexant 4010i/4020i User Manual 2.6.18 Contactor Output When used, the Contactor output (Terminal 3 of TB3) drives the load contactor. Note that this is a wet contact, and provides an output voltage derived from the incoming module power. The load contactor is placed in line with the load connections. -
Page 23: Product Operations
RAYCHEM Elexant 4010i/4020i User Manual CHAPTER–3 3. PRODUCT OPERATIONS Control Features This section describes the control features available in the Elexant 4010i/4020i controllers and how to set their associ- ated parameters. 3.1.1 Output Type The Elexant 4010i/4020i controller supports both Electro-Mechanical Relay (EMR) and Solid-State Relay (SSR) outputs. -
Page 24: Output Overrides
RAYCHEM Elexant 4010i/4020i User Manual 3.1.2.1 On/Off (Default) The controller monitors the temperature of the heating circuit and compares it to the setpoint tempera- ture. If the measured temperature is above the control temperature setpoint by more than the Deadband value, the output is turned off. -
Page 25: Table 5 - Output Overrides
RAYCHEM Elexant 4010i/4020i User Manual The list of overrides in the order of increasing priority is given below: Priority Status Description Normal Heat trace is behaving according to the chosen control algorithm Always On The Always On control mode is in use. (See Section 3.1.2.4) Trace Test Trace test is currently active. - Page 26 RAYCHEM Elexant 4010i/4020i User Manual 3.1.3.2.2 Low Temperature Cut-out (Default: Disabled) The Low Temperature Cut-Out protection algorithm prevents the heating cable from being powered on while temperatures drop below the minimum acceptable temperature for the heating cable. If the measured temperature is below the Low Temperature Cut-Out Setpoint, the control output will be turned OFF until the measured temperature returns to a value above the Low Temperature Cut-Out value.
-
Page 27: Monitoring
RAYCHEM Elexant 4010i/4020i User Manual MONITORING This section describes the various parameters that are used by the Elexant 4010i/4020i to ensure EHT system integrity. 3.2.1 Temperature The following sections contain the configuration parameters and each of the measured and calculated temperatures that the Elexant 4010i/4020i Monitor Module provides to the user. - Page 28 RAYCHEM Elexant 4010i/4020i User Manual 3.2.1.7 Lead Resistance Purpose: This parameter is applicable only to 2-wire 100-Ohm Nickel Iron and 2-wire 100-Ohm Nickel RTDs. Since a 2-wire RTD has no compensation for lead resistance, entering a value will allow the temperature reading to be corrected to compensate for this lead resistance.
-
Page 29: Electrical
RAYCHEM Elexant 4010i/4020i User Manual 3.2.1.9 Failure Alarm Settings a. Enable Purpose: This parameter is used to enable the controller to indicate when the unit is unable to measure a valid temperature due to a sensor open or short circuit condition. See Section 3.5 for more details. - Page 30 RAYCHEM Elexant 4010i/4020i User Manual • Check that all load conductors (including neutrals) return through the controller and are not connected directly to the distribution panel. This can be a common problem if the installation is a retrofit situation.
-
Page 31: Device Maintenance
RAYCHEM Elexant 4010i/4020i User Manual resistance values, 1 – 250% in case of high resistance values). Trace Resistance is calculated (in Ohms) using the average adjusted voltage reading divided by the average adjusted current reading. If the controller’s output switch is on, but no current is present, the RESISTANCE will read "N/A."... -
Page 32: External Devices
Modbus/TCP is supported for use with Ethernet connections. 3.3.1.1 RS-485 The Modbus RTU protocol on an RS-485 link may be used to communicate with devices such as the nVent RAYCHEM TOUCH 1500 or nvent RAYCHEM Supervisor. The RS-485 configuration parameters and defaults are shown below. nVent.com... -
Page 33: Profibus (Optional)
RAYCHEM Elexant 4010i/4020i User Manual Variable Description Default Range/Options Address Modbus Station Address used to identify the unit. 1 to 247 Baud Rate - the rate at which communications occur on Baud 9600 9600, 19200, 38400, 57600 the network. -
Page 34: Device Information
RAYCHEM Elexant 4010i/4020i User Manual DEVICE INFORMATION 3.4.1 Information The following important identifying information is available: • Device Tag – 40 character user configurable alphanumeric string to identify the individual controller. See Section 5.6.7.1 for further information. • Model – The manufactured configuration of the control module (see Section 1.1.1.2 - Product Configurations for model identification information). -
Page 35: Alarm Sources
RAYCHEM Elexant 4010i/4020i User Manual 3.5.3 Alarm Sources The monitored process parameters trigger an alarm if they move beyond the defined setpoints. Important events that impact the function of the device, will also trigger alarms. The table below describes the conditions that trigger each type of alarm. -
Page 36: Profiles
RAYCHEM Elexant 4010i/4020i User Manual Main Screen Page Alarm Source Description Safety Setup Safety Limiter Trip The limiter has tripped. Limiter (Optional) Safety Limiter Configuration The configuration in the limiter cannot be recovered, Failure and defaults are being used. -
Page 37: Graphical User Interface (Gui)
RAYCHEM Elexant 4010i/4020i User Manual The controller will notify the user if any part (user, maintenance, profile 1, profile 2, factory) of the settings are lost. If factory settings are lost, the unit must be replaced. As a precautionary measure, the loss of either the factory or user data will prevent the device from turning on the heat trace. -
Page 38: Safety Limiter
RAYCHEM Elexant 4010i/4020i User Manual CHAPTER–4 4. SAFETY LIMITER Safety Limiter The safety limiter option (-LIM option of the Elexant 4020i, see Table 2 - Elexant 4020i Variants) provides a redundant high temperature cut-out mechanism, suitable for use in safety critical applications. It dis- connects power from the heater, preventing the system from exceeding a safe temperature level. -
Page 39: Resetting The Safety Limiter
Modifying the set point requires physical access to the Elexant 4020i device. The lock out set point may be configured with the touch screen interface of the device or with nVent RAYCHEM Supervisor if its user interface is physically close to the 4020i device. The procedure to modify the limiter set point is the same for all user interfaces. -
Page 40: Main Output Interlock
RAYCHEM Elexant 4010i/4020i User Manual 4.1.6 Main Output Interlock When the safety limiter output is off, for any reason, an internal signal overrides the output of the main output switch, to force it off. The main output can only be switched on if the limiter temperature sensor is connected, and the measured temperature is below the limiter set point. -
Page 41: Test In The Event Of A Fault
Safety Limiter in the Safety Limiter’s Maintenance page, and any active alarms. If no issues are indicated in these locations, or the error cannot be resolved by the installer, the unit may need to be replaced. See Section 1.3 for nVent Customer Care contact information. 4.1.11 Determining Safety Integrity of the Elexant 4020i-Mod-IS-LIM The Elexant 4020i-Mod-IS-LI is a Type B system, as defined in IEC61508-2:2010. -
Page 42: System Failure Modes
Information about the unit, including the device serial number, and limiter firmware version, may be requested by the nVent representative. This information is available via the Info screen on the product GUI (Section 5.3). A list of worldwide representatives can be found on www.nVentthermal.com. -
Page 43: Graphical User Interface
RAYCHEM Elexant 4010i/4020i User Manual CHAPTER – 5 5. GRAPHICAL USER INTERFACE Home Screen The Home Screen is the main menu for the Elexant4010i/4020i User Interface. The user can go back to the Main Screen (see Section 5.2.1) from here, view the Information about the device or select one of the icons to view the cor- responding functionality. -
Page 44: Electrical
RAYCHEM Elexant 4010i/4020i User Manual 5.1.3 Electrical Figure 32 - Electrical Icon Touch this icon to navigate to the GUI screen for Electrical parameters. This screen allows the user to monitor the Trace Current, Voltage, and Resistance, as well as Ground Fault levels. The user can also set the Alarm configurations for these parameters. -
Page 45: Network
RAYCHEM Elexant 4010i/4020i User Manual 5.1.7 Network Figure 36 - Network Touch this icon to navigate to the GUI screen for Modbus and Ethernet communication settings. On Profibus controllers, configuration settings will also be available in this screen. The details are covered in Section 5.12. -
Page 46: Main Screen
RAYCHEM Elexant 4010i/4020i User Manual Main Screen The Main Screen is shown when the user touches the back button in the Home screen. The screen is also automatically displayed after 300 seconds of inactivity on any other screen. 5.2.1... -
Page 47: Alarm Status
RAYCHEM Elexant 4010i/4020i User Manual 5.2.2 Alarm Status The alarm status is indicated by one of the three different states: This icon is shown when there are no alarms. Touching this No Alarms- icon navigates to the Alarm page. -
Page 48: Main Screen: Three-Phase Controller
RAYCHEM Elexant 4010i/4020i User Manual 5.2.4 Main Screen: Three-phase Controller The main screen for a 3-phase Elexant 4020i variant is shown below: Phase Indicator Figure 42 - 3-phase Main Screen The Main Screen of the Three- phase Controller is similar to the Single- phase Controller except that it includes a phase indicator. -
Page 49: Control Setup
RAYCHEM Elexant 4010i/4020i User Manual Control Setup The Control Setup page is divided into five tabs, as described in the following sub-sections. Purpose: This is the temperature that the controller uses to determine whether its output switch should be on or off. -
Page 50: Control Temp Aggregation Mode
RAYCHEM Elexant 4010i/4020i User Manual Figure 47 - Control Temp Setup Page 5.4.2 Control Temp Aggregation Mode Figure 48 - Control Temp Aggregation Mode Purpose: This setting configures how temperature from multiple sensors will be combined into the control tem- perature reading. -
Page 51: Temperature Failure Mode
RAYCHEM Elexant 4010i/4020i User Manual 5.4.3 Temperature Failure Mode Figure 50 - Temperature Fail Mode Setting Purpose: This setting defines the output state of the controller in the case of a sensor failure. Options: Mode Description The heat trace remains off until a control sensor is restored to working condition. -
Page 52: Control Temperature Alarms
RAYCHEM Elexant 4010i/4020i User Manual 5.4.4 Control Temperature Alarms Figure 53 - Control Temperature Alarms Purpose: The settings for the following alarms can be configured using the lower half of the Control Temp page as shown above. Options: • High Temp •... -
Page 53: Control Mode Page
RAYCHEM Elexant 4010i/4020i User Manual Alarm Description Default Value Range Filter This alarm is active when the control tempera- ture surpasses the value of High Temperature -200°C to 0 to 59940 High Temperature 100°C Setpoint. This condition is monitored by the 700°C... -
Page 54: Control Mode
RAYCHEM Elexant 4010i/4020i User Manual 5.5.1 Control Mode Figure 58 - Control Mode Setting Purpose: To set the control mode for the controller. Options: The options are described in the table below: Control Mode Description Algorithm Settings In this mode the controller monitors the tem-... -
Page 55: Algorithm Settings
RAYCHEM Elexant 4010i/4020i User Manual 5.5.2 Algorithm Settings Figure 60 - Deadband Setting Figure 61 - PASC Parameters Settings Figure 62 - Proportional Band Setting nVent.com RAYCHEM-AR-H60624-40X0iOpsManual-EN-1905... -
Page 56: Output Type
RAYCHEM Elexant 4010i/4020i User Manual Purpose: To select the Control Algorithm Options: Setting Description Default Range The hysteresis band within the On/Off Deadband 3°C 1°C to 50°C algorithm. The minimum ambient temperature at which the heat trace design should be able... -
Page 57: Heater Configuration
RAYCHEM Elexant 4010i/4020i User Manual Procedure: Select the Output Type from the drop-down list. Figure 64 - Output Type Select an Inactive or Active EMR Output state when using SSR output types. Default EMR Output: Active Figure 65 - EMR Output Setting When using an SSR as the primary control output, the contactor output will be held in the configured state unless the SSR fails. -
Page 58: Output Limiting Page
RAYCHEM Elexant 4010i/4020i User Manual Figure 67 – Heater Configuration Controller Heater Configura- Voltage Mea- Heater Configu- 4020i Calculated 4020i Calculated Voltage Sense tion surement Pa- ration Parameter Voltage Current onnection rameter Setting Setting Measured current Delta Measured voltage / √3... -
Page 59: Ssr Limiting (Switch Protection)
RAYCHEM Elexant 4010i/4020i User Manual Options: • None • Power • Current • Percent Default: None Procedure: The Output Limiting parameters are set by selecting the Mode, setting the limit value and enabling the desired alarms. Figure 70 - Output Limiting Parameters The Limit alarm, when enabled, only informs the user that the output limiting is active. -
Page 60: Circuit Breaker Limiting
RAYCHEM Elexant 4010i/4020i User Manual Procedure: Touch the SSR Rating text box to display the numeric pad and set the numeric value. Touch the Enable check box to turn on/off the Alarm indication or touch the Latch check box to configure a latching or a non-latching type of alarm. -
Page 61: Turns Ratio Dependent Settings
RAYCHEM Elexant 4010i/4020i User Manual 5.6.3.2 C.B Rating (Circuit Breaker Rating) Figure 75 – C.B Rating Setting Purpose: The Circuit Breaker Rating setting helps prevent in-rush induced nuisance tripping of the circuit breaker immediately upstream of the controller. The Circuit Breaker Limiting alarm, if enabled, will only inform the user that circuit breaker limiting is active. -
Page 62: Load Shedding Page
RAYCHEM Elexant 4010i/4020i User Manual Figure 78 – Invalid Power Rating Figure 79 - Invalid Circuit Breaker Rating 5.6.5 Load Shedding Page Figure 80 - Load Shedding Page Purpose: The Elexant 4010i/4020i controller may be put into a load shedding mode only after receiving a load shedding command issued from a Modbus Master. -
Page 63: Load Shedding Failsafe Mode
RAYCHEM Elexant 4010i/4020i User Manual Options: A controller can be assigned up to 8 different load shedding zones. Procedure: The broadcast sent from the Modbus Master specifies which of these zones are to be load shed. If the controller is a member of a zone specified for load shedding, it will turn its output off. After this... - Page 64 RAYCHEM Elexant 4010i/4020i User Manual Procedure: Touch the field for which the value needs to be modified. 5.6.7.1 Controller Tag Figure 82 - Controller Tag Entry Purpose: This parameter is a 40-character tag assigned to the controller or EHT circuit for easy identification.
- Page 65 RAYCHEM Elexant 4010i/4020i User Manual Flash: Figure 86 - Flash Setting The alarm relay opens and closes alternatively approximately once per second. IMPORTANT: If the alarm output is used to drive a pilot light, it is recommended that Flash be selected to enable flashing operation.
-
Page 66: Temperature Settings Page
RAYCHEM Elexant 4010i/4020i User Manual 5.6.7.6 Heater on Time Figure 89 - Heater on Time Setting Range: 1 to 250,000 hours Default: 100000 Purpose: This generates an alarm if the Heater ON time reaches or exceeds the set number of operational hours. - Page 67 RAYCHEM Elexant 4010i/4020i User Manual 5.7.1.1 Control / Monitor Figure 91 - Temperature Sensor Control Mode Purpose: These radio buttons allow the user to specify whether a sensor should be used for controlling or monitoring purposes. Selecting Control enables the High Temperature and Low Temperature settings and displays the Control Temperature Alarm settings.
- Page 68 RAYCHEM Elexant 4010i/4020i User Manual Purpose: This combo box defines the type of RTD that is being used as a Temperature Sensor. The available selections for the temperature sensor type are: • RTD-PT100 • RTD-NiFe100 • RTD – Ni100 •...
-
Page 69: Temp Limiting
RAYCHEM Elexant 4010i/4020i User Manual Purpose: When “Control” is selected, the alarm settings for the Temperature Sensor can be configured using the lower half of the page as shown above. Procedure: Touch the corresponding Enable check box to turn on/off the corresponding Alarm indication and touch the corresponding Latch check box to define a latching or a non-latching type. -
Page 70: Table 23 - High/Low Limit Cut-Out Settings
RAYCHEM Elexant 4010i/4020i User Manual 5.7.2 .1 TS(x) Selection for High/Low Limit Figure 99 - TS(x) High/Low Limit Settings Purpose: The TS(x) check box allows user to select which sensors are used for High/Low Temperature Limiting. Touch the check box corresponding to the temperature sensor to enable temperature limiting. -
Page 71: Electrical Settings
RAYCHEM Elexant 4010i/4020i User Manual Electrical Settings 5.8.1 Trace Current Figure 101 - Trace Current Settings for 1-Phase Heat Trace Circuit This page displays the live value of the Trace Current associated with a heat trace circuit. 5.8.1.1 High/Low Trace Current Alarm Settings... -
Page 72: Table 24 - High/Low Trace Current Alarm Settings
RAYCHEM Elexant 4010i/4020i User Manual Values Description Default Value Range This alarm is active when the trace current High Trace Current level has surpassed the value of High 30.0 A 0.1 A to 100.0 A Trace Current Setpoint. This alarm is active when the trace current... -
Page 73: Ground Fault
RAYCHEM Elexant 4010i/4020i User Manual 5.8.2 Ground Fault Figure 106 - Ground Fault Page This page displays the live value of the Ground Fault (GF) Current associated with a heat trace circuit. The Elexant 4010i/4020i controller detects ground faults by summing the outgoing and return trace currents through an internal current transformer. -
Page 74: Trace Voltage
RAYCHEM Elexant 4010i/4020i User Manual Values Description Default Value Range This alarm can be used to give a pre-warning High Ground Fault on a circuit whose ground-fault current is 20 mA 10 mA to 500 mA Current increasing but is not yet at Ground Fault Trip Current Setpoint. -
Page 75: Table 26 - High/Low Trace Voltage Alarm Settings
RAYCHEM Elexant 4010i/4020i User Manual intended design, which can cause significant loss of/excess heater output. 5.8.3.1 High/Low Trace Voltage Alarm Settings Procedure: Figure 112 - High/Low Trace Voltage Settings Touch the corresponding Enable check box to turn on/off the corresponding Alarm indication and touch the corresponding Latch check box to select a latching or a non-latching alarm type. -
Page 76: Table 27 - Voltage Measurement
RAYCHEM Elexant 4010i/4020i User Manual Figure 115 - Voltage Measurement Setting Value Description Default Range Value This selection is only visible when using 3-phase variants of the Elexant 4010i/4020i controllers. It has two options: (i) L-N (Line to Neutral): Select this option when the trace voltage is being measured between Line and Neutral. -
Page 77: Trace Resistance
RAYCHEM Elexant 4010i/4020i User Manual 5.8.4 Trace Resistance Figure 117 – Single Phase Trace Resistance Page Trace resistance is used to generate alarms when the heat trace circuit is operating at a resistance that is either lower/higher than the nominal resistance. It can be used to effectively guard against accidental paralleling of heat trace circuits. -
Page 78: Alarms
RAYCHEM Elexant 4010i/4020i User Manual Values Description Default Range Value Used to alarm heater resistance levels that have increased from the nominal resistance setting by more than the selected amount. This will also indicate an open or a high High Trace Resistance resistance connection. - Page 79 RAYCHEM Elexant 4010i/4020i User Manual Procedure: Figure 122 – Alarm Icon Touch the Alarm Icon to open the Alarms page. Figure 123 - Alarms Page • Touch Up/Down button to go to the next page. • To reset an Alarm, select the Alarm.
-
Page 80: Maintenance Page
RAYCHEM Elexant 4010i/4020i User Manual Click on button to confirm or click button to cancel. 5.10 Maintenance Page Figure 125 - Maintenance Page The Maintenance page allows the user to view and reset the minimum and maximum recorded values of certain variables such as voltage, current, temperature, ground fault etc. -
Page 81: Volts And Power
RAYCHEM Elexant 4010i/4020i User Manual 5.10.2 Volts and Power Figure 127 - Volts and Power for Single Phase Controller This page displays the actual AC voltage, and the minimum and maximum voltage values recorded since the last time the values were reset. It also displays the Trace Power and Accumulated Power for the connected load. -
Page 82: Misc
RAYCHEM Elexant 4010i/4020i User Manual This page displays the actual Ground Fault (GF) and Trace Current values, and the maximum values recorded since the last time they were reset. Touch the button to reset the corresponding maintenance data or touch button to reset all of the GF and Trace Current maintenance data. - Page 83 RAYCHEM Elexant 4010i/4020i User Manual 5.10.4.2 Hours in Use This field is used to indicate the total number of hours in use of the controller since its initial operation. It may be useful to log the amount of time a particular controller has been in operation for the purposes of maintenance planning.
-
Page 84: Profiles Page
RAYCHEM Elexant 4010i/4020i User Manual 5.11 Profiles Page Figure 134 - Profile Page The Elexant 4010i/4020i helps simplify the commissioning process by providing ability to load and save User Profiles from a USB flash drive. Supported Profiles: (Refer to Section 3.6 for more details on specified profile default settings) 1. -
Page 85: Network Setup Page
RAYCHEM Elexant 4010i/4020i User Manual Touch the corresponding option to load or save the profiles for User1 and/or User 2 to/from the USB flash drive. Load User(x) Profile from File: Select the file to load and touch the single check mark to load the file or touch to cancel. -
Page 86: Modbus
Modbus is an Industry standard master-slave protocol used communicate with other Modbus compatible devices. 5.12.2 RS-485 RS-485 can be used to communicate with other devices such as the nVent RAYCHEM TOUCH 1500, or a PC running RAYCHEM Supervisor. Variable Description... -
Page 87: Profibus (Optional)
RAYCHEM Elexant 4010i/4020i User Manual 5.12.4 Profibus (Optional) Figure 139 - Profibus Page A Profibus network protocol is used to achieve fast and deterministic response times; small packets of data are used for data exchange. Variable Description Default Range... -
Page 88: Safety Limiter Setup
RAYCHEM Elexant 4010i/4020i User Manual 5.13.1 Safety Limiter Setup Touch the corresponding Enable check box to turn on/off the corresponding Alarm indication and touch the corresponding Latch check box to select a latching or a non-latching alarm type. When latching is selected, then the alarm will need to be manually reset each time the corresponding alarm occurs. -
Page 89: Safety Limiter Maintenance
RAYCHEM Elexant 4010i/4020i User Manual Procedure: Touch the Setpoint field to open a new dialog box with a numeric entry point. Touch the check mark to apply the new value, press the cross mark to cancel. After setting a new setpoint, the user must to press the button on the front panel of the controller to confirm the setpoint change. - Page 90 RAYCHEM Elexant 4010i/4020i User Manual Purpose: This field displays the status of the Limiter temperature sensor. The status can be one of the following: OK – The limiter temperature sensor is reporting a valid temperature reading. Failed Open– One or more leg of the RTD is not connected.
-
Page 91: User Interface Settings
RAYCHEM Elexant 4010i/4020i User Manual 5.14 User Interface Settings Figure 152 - User Interface Settings This page allows the user to configure the unit to their personal preferences. 5.14.1 Language Figure 153 - Language Setting Purpose: This field allows the user to change the language of the Graphical User Interface (GUI). -
Page 92: Passcode
Figure 156 – Passcode Help Contact nVent Technical Support (see Section 1.3) with the displayed number to get a temporary passcode. Note that this process is time sensitive – once the number above has been generated by the controller, you have: •... - Page 93 RAYCHEM Elexant 4010i/4020i User Manual Touch and hold the third point on the GUI for 3 seconds. Figure 160 - Calibrate GUI’s Point 3 Touch the button to complete the calibration. NOTE: If the calibration is not completed correctly, the screen will turn red. A touch anywhere on the screen will bring back the calibration screen.
-
Page 94: Firmware Upgrade
This section describes the steps to upgrade the firmware on the Elexant 4010i/4020i Heat Trace Controller. Procedure: • Obtain the firmware update file and the passcode associated with the firmware update from nVent Technical Support. • Save the updated firmware file to a USB flash drive. -
Page 95: Troubleshooting
RAYCHEM Elexant 4010i/4020i User Manual 7. TROUBLESHOOTING Troubleshooting Indication Description Possible Cause(s) Corrective Action No Display No display • Power to controller is disconnected • Connect power to controller indication • Circuit Breaker Trip • Reset the circuit breaker •... -
Page 96: Table 34 - List Of Abbreviations
RAYCHEM Elexant 4010i/4020i User Manual 8. APPENDIX A LIST OF ABBREVIATIONS E – Enabled D – Disabled L – Latching NL – Non-Latching Table 34 – List of Abbreviations PROFILES - DEFAULT SETTINGS Configuration Default Profile Process Profile Ambient Profile Page Description... - Page 97 RAYCHEM Elexant 4010i/4020i User Manual Configuration Default Profile Process Profile Ambient Profile Page Description Default Default Default State Default Default Default State Setpoint Setpoint State Setpoint /Value /Value /Value TS2 High Temp Alarm D,NL D,NL D,NL TS2 High Temp Filter...
-
Page 98: Table 35 - Profile Default Settings
RAYCHEM Elexant 4010i/4020i User Manual Configuration Default Profile Process Profile Ambient Profile Page Description Default Default Default State Default Default Default State Setpoint Setpoint State Setpoint /Value /Value /Value Address _______ _______ _______ Baud 9600 9600 9600 Network -... - Page 99 RAYCHEM-AR-H60624-40X0iOpsManual-EN-1905...
- Page 100 RAYCHEM Elexant 4010i/4020i User Manual nVent.com RAYCHEM-AR-H60624-40X0iOpsManual-EN-1905...
- Page 101 TRACER nVent.com ©2019 nVent. All nVent marks and logos are owned or licensed by nVent Services GmbH or its affiliates. All other trademarks are the property of their respective owners. nVent reserves the right to change specifications without notice. RAYCHEM-AR-H60624-40X0iOpsManual-EN-1905...
Need help?
Do you have a question about the RAYCHEM Elexant 4010i and is the answer not in the manual?
Questions and answers