Table of Contents
Advertisement
Advertisement
Table of Contents

Related Manuals for Thermo Scientific SPECTRONIC 200


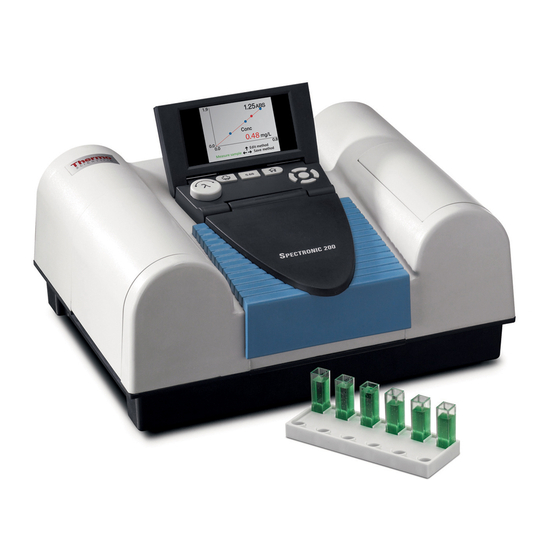
Summary of Contents for Thermo Scientific SPECTRONIC 200
- Page 1 UV Visible SPECTRONIC 200E User Guide TU60001225 Revision A February 2013...
- Page 2 © 2013 Thermo Fisher Scientific Inc. All rights reserved. Epson is a registered trademark of Seiko Epson Corporation. Microsoft and Windows, are registered trademarks of Microsoft Corporation in the United States and other countries. All other trademarks are property of Thermo Fisher Scientific Inc. and its subsidiaries. For U.S.
-
Page 3: Conventions Used
SPECTRONIC 200E USER GUIDE Introduction This manual is a guide for operating and troubleshooting the SPECTRONIC 200. To get the most out of the manual, read all the chapters carefully and follow the procedures as closely as possible. SPECTRONIC 200 has a complete on-board control set and may also be controlled from a remote computer using Thermo Scientific VISIONlite 5 software. -
Page 4: Technical Specifications
SPECTRONIC 200E USER GUIDE Features Features Some of the features of the SPECTRONIC 200 spectrophotometer are: • CCD polychromator based spectrophotometer • Large, easily accessible sample compartment • Removable sample compartment for easy cleaning • Adjustable display angle • 320 x 240 pixel color graphical TFT LCD display •... -
Page 5: Precautions For Safe Operation
Power cable socket Printer port/Memory port Figure 2. Safety warning label for lamp replacement Precautions for Safe Operation NOTICE Be sure that all persons operating this system read the site and safety manual first. Thermo Scientific SPECTRONIC 200E User Guide... -
Page 6: Site Preparation
Make sure that your laboratory meets the environmental and power requirements before installation of the spectrophotometer. The separate document Site and Safety Information for UV-Visible Spectrophotometers contains complete information on recommendations and requirements for locating and using your SPECTRONIC 200 safely. Before Operating Installation Plug the power line mains cord for the power brick into a properly earthed/grounded receptacle. - Page 7 For example, Figure 6. See “Initialization with Error Messages” on page 36 for more detailed information. Figure 6. After initialization is completed, the main menu is displayed and the system is ready for operation. Thermo Scientific SPECTRONIC 200E User Guide...
-
Page 8: Keypad Operation And Mode Selection
Auto Zero: This key is live in all measurement screens. Any time you press 0.00 0.00 , the instrument reads the current transmittance and sets the data as 100%T or 0.00A. SPECTRONIC 200E User Guide Thermo Scientific... - Page 9 Test-tube cuvettes - The screw clamp only needs to be adjusted once for a particular size of test tube. 1. Loosen the thumb-screw and place the test tube cuvette in the holder. Thermo Scientific SPECTRONIC 200E User Guide...
- Page 10 If significant force is required to insert or remove the tube, or if the tube wobbles while in place, adjust the position of the slide component to decrease or increase the grip tension as required. SPECTRONIC 200E User Guide Thermo Scientific...
-
Page 11: Spectronic 200 Modern Interface
SPECTRONIC 200 Modern Interface SPECTRONIC 200 Modern Interface Introduction This interface takes full advantage of all the capabilities of the SPECTRONIC 200 spectrophotometer. The modern interface gives access to experiment and display modes not found in earlier instruments. Available experiment modes are: •... - Page 12 SPECTRONIC 200E USER GUIDE SPECTRONIC 200 Modern Interface Note • Pressing on the keypad while Application is selected takes you directly to the next screen. 0.00 • Place a blank solution cuvette in the sample holder and press before measuring any sample cuvettes.
-
Page 13: Multi Wavelength
SPECTRONIC 200E USER GUIDE SPECTRONIC 200 Modern Interface Figure 11. 8. Press to return to the Home menu. Note You can replace or erase the watermark logo on the Live Display screen. This option is located on the Administration menu. See “Administration”... - Page 14 SPECTRONIC 200E USER GUIDE SPECTRONIC 200 Modern Interface The next screen is shown in Figure Figure 13. • Use to move between wavelength selections. or the λ knob. • Set the measurement wavelengths with 3. Select GO and press to begin live measurements.
-
Page 15: Quantitative Analysis
SPECTRONIC 200E USER GUIDE SPECTRONIC 200 Modern Interface 7. Select GO and press to restart the measurement. Note If you change the measurement wavelength, it may be necessary to re-zero the 0.00 instrument by placing a blank solution in the sample stage and pressing until the screen displays the message Performing Auto Zero. - Page 16 SPECTRONIC 200E USER GUIDE SPECTRONIC 200 Modern Interface Load Option If you selected the Load option and a USB stick is connected to the instrument, all methods stored on the USB memory stick are displayed on the screen. 1. Use to select the method and press to load the method.
- Page 17 SPECTRONIC 200E USER GUIDE SPECTRONIC 200 Modern Interface The instrument will confirm that it is recording the zero absorbance measurement, Figure Figure 18. Place a cuvette with a blank solution in the sample compartment and press the 0.00 button Please wait Performing Auto Zero…...
- Page 18 SPECTRONIC 200E USER GUIDE SPECTRONIC 200 Modern Interface Depending on whether you selected Save or No, under the USB memory option of the setup (Figure 15), either Save method or Measure sample will be highlighted in green. Pressing will execute the highlighted option.
- Page 19 If no USB memory device is present, the instrument will prompt you to connect one. NOTICE If the SPECTRONIC 200 does not recognize your USB memory device, check that it is formatted FAT32. Older USB sticks and sticks of less than 2GB may be formatted FAT16 (usually labeled simply as FAT).
- Page 20 SPECTRONIC 200E USER GUIDE SPECTRONIC 200 Modern Interface 8. To measure a sample, select Measure sample and press The screen will display both the concentration and measured ABS or %T value as shown Figure Figure 25. 9. If you select F in the No. of STDs option, the instrument prompts you to enter the factor...
- Page 21 Figure 28. 11. Select the Measure sample option and press to measure each sample. Analyzer The SPECTRONIC 200 Industry model local control software contains a programmable analyzer mode in the SPECTRONIC 200 Modern software application. Thermo Scientific SPECTRONIC 200E User Guide...
-
Page 22: Using The Analyzer Mode
Figure 30. 2. After loading the method the instrument will prompt the user to place a blank solution in 0.00 the sample compartment and press SPECTRONIC 200E User Guide Thermo Scientific... - Page 23 (Figure 33). Select each character by using the arrow keys on the instrument and pressing to add the character to the text line. Select Enter on the on-screen keyboard to confirm your unit selection. Thermo Scientific SPECTRONIC 200E User Guide...
- Page 24 Use the λ knob or to set each wavelength. Select the word Enter at the bottom of this screen to advance to the factor entry screen. Figure 35. SPECTRONIC 200E User Guide Thermo Scientific...
- Page 25 After saving the method, the software prompts you as shown in Figure NOTICE If the SPECTRONIC 200 does not recognize your USB memory device, check that it is formatted FAT32. Older USB sticks and sticks of less than 2GB may be formatted FAT16 (usually labeled simply as FAT).
- Page 26 %T or Abs. 2. Select Low λ and High λ and use or λ knob to set your lower and higher wavelength limit for scan. 3. Use the arrow keys to select Next. SPECTRONIC 200E User Guide Thermo Scientific...
-
Page 27: Spec 20 D+ Emulation
• Have SOPs that refer to the SPEC20D+ and cannot be changed easily • Have several SPEC20D+ instruments and wish to integrate SPEC200 instruments into the set without adding a new instruction set for instrument use. Thermo Scientific SPECTRONIC 200E User Guide... -
Page 28: Important Differences Between Spectronic 200 And Spectronic 20D
Home menu. See OD600 Mode for Cell Growth Measurements details. SPECTRONIC 200 performs a full spectrum 0%T measurement at startup and retains this information in internal memory. Similarly, when a user places a blank cuvette in the sample 0.00... - Page 29 Place a sample cuvette in the sample stage and press to begin measuring the concentration of sample solutions. Figure Figure 44. This is a live measurement mode. Readings will update as you present samples. Thermo Scientific SPECTRONIC 200E User Guide...
-
Page 30: Od600 Mode For Cell Growth Measurements
Density is a synonym for Absorbance. In the SPECTRONIC 200E, OD 600 measurements are performed in absorbance mode at 600 nm. The SPECTRONIC 200 replaces the SPECTRONIC 20, known as the SPEC 20, which has been used by life scientists to measure cell densities for over 50 years. The fact that OD600 measurements are a scatter measurement means that the amount of transmitted light that reaches the detector varies depending on the optical design of the spectrophotometer. -
Page 31: Corrected To Spec 20 Measurement Mode
SPECTRONIC 200 using the Direct measurement mode and the other instrument. Calculate the multiplication factor required to scale the SPECTRONIC 200E data to match the other instrument’s data and enter it in the User Entered Factor... - Page 32 5. Use identical tubes or cuvettes to measure your samples. The center of the light beam is 15 mm above the base of the test tube so you should have at least 20 mm of sample in the tube. SPECTRONIC 200E User Guide Thermo Scientific...
- Page 33 Once the blank measurement has been recorded and saved the software moves immediately to a Live Display mode. There is no further need to press buttons. Simply insert your samples, wait a few seconds for the reading to update and stabilize, and record the value. Thermo Scientific SPECTRONIC 200E User Guide...
-
Page 34: Connect To A Computer
Connect to a Computer Your SPECTRONIC 200 spectrophotometer can be run remotely from a computer using Thermo Scientific VISIONlite 5. VISIONlite 5 software offers: • More sophisticated options for scanning and manipulation of spectra •... -
Page 35: Printer Selection
The SPECTRONIC 200 supports Epson™ TM-T88V Point of Service (POS) thermal printers and laser printers that use the PCL5e or PCL6 communication protocols. Before connecting a printer to your SPECTRONIC 200, read the specifications for the printer carefully to ensure that it supports one of these protocols. Many page printers, including ink-jet and very low cost laser printers, use proprietary communication protocols and are not supported by the SPECTRONIC 200. -
Page 36: Customize Logo
SPECTRONIC 200. Customize Logo The SPECTRONIC 200 provides the facility to customize the logo shown as a watermark in Live Display mode in the Modern Interface. Logo images must be bitmap (.bmp extension) files that are 320 pixels wide and 195 pixels high. -
Page 37: System Maintenance
SPECTRONIC 200E USER GUIDE System Maintenance NOTICE The SPECTRONIC 200 only recognizes USB memory devices that are formatted FAT32. If your USB memory device is not recognized by the instrument, reformat it using a computer, re-save your logo file and try again. -
Page 38: Initialization With Error Messages
Treat the lamp with extreme care during replacement. If the lamp glass is damaged leakage in the envelope vacuum may occur. The lamp will not function if an impact causes a loss of the vacuum seal. This can occur even when the glass appears undamaged. SPECTRONIC 200E User Guide Thermo Scientific... - Page 39 2. Loosen the brass thumb screw (do not remove it) until you can open the access door by pulling up on the screw. 3. Loosen the silver thumb screw (you may require a Phillps/cross screwdriver for this operation). Thermo Scientific SPECTRONIC 200E User Guide...
- Page 40 7. Grasp the old lamp with your fingers and pull it straight up and away from the base. Discard the old lamp. SPECTRONIC 200E User Guide Thermo Scientific...
- Page 41 10. Turn the metal bracket that holds the top of the lamp back into position over the lamp and re-tighten the long brass thumb screw that holds it in place. Take care not to touch the lamp glass with your bare fingers while performing this operation. Thermo Scientific SPECTRONIC 200E User Guide...
- Page 42 Correct voltage, wattage, and precise height of the filament are essential to proper operation of your SPECTRONIC 200 spectrophotometer. Note Be sure to specify that you require a lamp for the SPECTRONIC 200E. Your SPECTRONIC 200E uses a different lamp than the original SPECTRONIC 200. SPECTRONIC 200E User Guide Thermo Scientific...
- Page 43 SPECTRONIC 200E USER GUIDE System Maintenance This page intentionally left blank. Thermo Scientific SPECTRONIC 200E User Guide...
- Page 44 SPECTRONIC 200E USER GUIDE System Maintenance SPECTRONIC 200E User Guide Thermo Scientific...
Need help?
Do you have a question about the SPECTRONIC 200 and is the answer not in the manual?
Questions and answers
My model came with a separate test tube holder that was not installed. I would like a diagram and instructions on how to install this.
To install the test tube holder on the Thermo Scientific SPECTRONIC 200:
1. Loosen the thumb-screw on the holder.
2. Place the test tube cuvette into the holder.
3. Slide the moving part up against the test tube so it is held securely.
4. Tighten the thumb-screw, but do not over-tighten.
5. Remove and re-insert the test tube without adjusting the thumb-screw.
6. Ensure the tube slides in and out with ease while being held securely.
7. If the tube requires significant force to insert or wobbles, adjust the slide component to modify grip tension.
This answer is automatically generated