Table of Contents
Advertisement
Quick Links
Advertisement
Table of Contents

Related Manuals for Samcon ExCam XF Q1645


Summary of Contents for Samcon ExCam XF Q1645
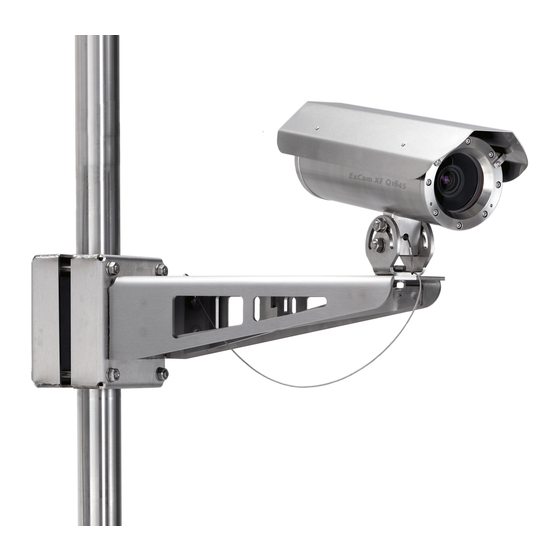
- Page 1 ® ExCam XF Q1645 User Manual...
-
Page 2: Table Of Contents
Table of contents Introduction ......................4 Technical data ......................4 Explosion protection .................... 4 Electrical parameters of the camera ..............5 Connection cable Ex-d - Ex-e (ASKDP03-T) ............5 Video-technical characteristics ................6 Other technical data .................... 6 Safety Instructions ....................7 Installation ........................ - Page 3 Figure 6-1 Removing the weather protection roof (1/2) (this illustration is an example) .. 23 Figure 6-2 Removing the weather protection roof (2/2) (similar illustration) ....23 Figure 6-3 Opening the ExCam XF Q1645 (similar illustration) ........24 Figure 6-4 Structure of the camera (similar illustration) ........... 25 Figure 7-1 Axis IP Utility ....................
-
Page 4: Introduction
Introduction The ExCam XF Q1645 is a powerful mega-pixel IP camera (2-mega-pixel resolution). It is certified by ATEX, IECEx, EAC-Ex and IA. The camera has a high-definition television resolution (1920x1080 with 100/120 images/s) and is equipped with a powerful re- mote zoom and remote focus lens. -
Page 5: Electrical Parameters Of The Camera
Data line: 4 x 2 x AWG22/1 CAT.6a Performance elements: 3G1.5 (BK-BU-GN/YE) Properties: PUR halogen-free, flame-retardant, UV- resistant, chemical resistance, shielded (see www.samcon.eu Quick link: https://www.samcon.eu/fileadmin/documents/en/60-Assembling%26mounting/ASKDP03-T_Datasheet.pdf Figure 2-1 Sectional view of ASKDP03-T Doc.-ID: 190409-PT08BA-ES-ExCam XF-Q1645_en_rev.01, Page 5 of 32... -
Page 6: Video-Technical Characteristics
Video-technical characteristics We use the AXIS Q 1645 Network Camera in a pressure-resistant enclosure. For details, ® please refer to the Product Documentation, video-technical data of AXIS https://www.axis.com/products/axis-q1645 Other technical data Camera (Ex-d) Terminal box (Ex-e) 0°C … +60°C -60°C … +55°C Permissible ambient temperature (for PoE power supply) -60°C …... -
Page 7: Safety Instructions
Please absolutely observe the installation instruction’s safety directions of the T08 ExCam series! Quick link: https://www.samcon.eu/fileadmin/documents/en/22-Ex-Network-Cameras/ExCam-Series-T08-EX-Installation-Manual-2018.pdf It is absolutely mandatory to adhere to the national safety regulations and regula- tions for prevention of accidents, as well as to the safety instructions given below... -
Page 8: Installation
Installation For commissioning and operating the camera, the relevant national regulations, as well as the generally accepted rules of technology shall prevail. Before mounting the camera, thoroughly check it for any transport damage, especially on the housing and cable. Instal- lation, electrical connection and the first start must only be carried out by qualified spe- cialists. -
Page 9: Table 4-1 Mounting Accessories
In case of doubt, take appropriate security measures. Drawings for drill hole patterns and further information can be viewed on our product page: Quick link: https://www.samcon.eu/en/products/network/excam-xf-q1645/ Optional mounting accessories WALL MOUNT EXCAM XF (01569-001) Wall bracket Wall bracket for devices of T08-VA2.3 series WMB-... -
Page 10: Electrical Connection
NOT authorised to do electrical connection procedures inside the pressure-resistant enclosure. Potential equalization Figure 5-1 ExCam XF Q1645 Potential equalization Potential equalization/grounding of the camera housing is absolutely necessary, in order to avoid static charges and thus the formation of sparks. For this purpose, a screw termi- nal is provided at the rear side, at the bottom (right) (see Figure 5-1). -
Page 11: Connection Work At The Device (Terminal Box) And Fuses
Wiring table: Potential Colour (IEC 60757) Cross- Comment section GN/YE 4 mm (rigid) Terminal: Slotted screw M4x0.7 (DIN 84) with washer Ø9mm (DIN 125A), Keep 3 Nm tightening torque! Table 5-1 Potential equalization Connection work at the device (terminal box) and fuses Supply of 24V DC for the heating Voltage supply: 22 V DC <... -
Page 12: Figure 5-2 Camera (Ex-D) And Terminal Box (Ex-E)
ExTB-3 Figure 5-2 Camera (Ex-d) and terminal box (Ex-e) Video Tutorial: Observe our video tutorial: “SAMCON 01 Wiring the cable SKDP03-T to the junction box ExTB-3” https://go.samcon.eu/v01 Doc.-ID: 190409-PT08BA-ES-ExCam XF-Q1645_en_rev.01, Page 12 of 32... -
Page 13: Figure 5-3 Video Tutorial Extb-3
Figure 5-3 Video Tutorial ExTB-3 The pin assignment of the ASKDP03-T is executed in accordance with the standard EIA/TIA-568B for 100BaseTX and 24VDC, as follows: Camera (Ex-d) Colour Terminal Cross- Comment (T568B) ASKDP03-T ExTB-3 sectional (IEC60757) surface Reinforcement YE / GN 2.5 mm Flex WH / OG... -
Page 14: Figure 5-4 Sample Circuit Of Terminal Box Extb-3
Figure 5-4 Sample circuit of terminal box ExTB-3 Figure 5-5 Photo of the wired terminal box ExTB-3 Doc.-ID: 190409-PT08BA-ES-ExCam XF-Q1645_en_rev.01, Page 14 of 32... -
Page 15: External Connection And Protection
Bring the twisted pair composite up to about 10 mm close to the ter- minals, in order to ensure interference immunity. Attention! Use only terminals approved by SAMCON. Attention! Finally, check your network installation with a Class-D Link Test. External connection and protection There are several options of routing the ExTB-3 terminal box to a safe area: 5.3.1... -
Page 16: Routing Via Exconnection Rail (Optional Accessories)
Attention! Cables and wires must comply with the requirements of the IEC 60079- 0/1/7 & 14. Attention! The supply line must have a sufficient cross-section. The cable pro- tection must comply with national and international regulations. 5.3.2 Routing via ExConnection Rail (optional accessories) Figure 5-7 ExTB-3 ->... -
Page 17: Appropriate Cables & Cable Entries
We show the essential procedures in the following video tutorial: Video Tutorial: Please note our video tutorial: “SAMCON 02 Mounting and installing Ex-d barrier glands to ExConnection Rails” https://go.samcon.eu/v02 Doc.-ID: 190409-PT08BA-ES-ExCam XF-Q1645_en_rev.01, Page 17 of 32... -
Page 18: Cable Kits - "Plug And Play" Connection Packages
Figure 5-8 Barrier gland 5.3.4 Cable kits - "plug and play" connection packages As an option, there are various cable kits for different cables are available in different lengths. The connection packages include everything you need for a professional system installation: ... -
Page 19: Table 5-3 Available Cable Kits
Available connection packages: Length Non-reinforced cable Reinforced cable SKDP03-T ASKDP03-T SKDP03-T CABLE EXCAM 10M ASKDP03-T CABLE EXCAM 10M 10 meters (01540-001) (01543-001) This cable set includes: This cable set includes: 10 meters SKDP03-T system cable, digital 10 meters ASKDP03-T system cable, digital 1 barrier gland Ex-d 1 bolted connection Ex-d 5 ml Loctite 243 screw locking... -
Page 20: Fusing
5.3.6 Plug assignments (RJ45) The data transfer of the ExCam XF Q1645 series uses a 100 Mbit/s Ethernet connection (100BASE-TX). If the cable termination uses a plug, the latter should be plugged into the RJ45 PoE slot of the network device (PSE). Prior to connecting it to the camera, the net- work device (PSE) can already be supplied with power, hence there is no „power ON“... -
Page 21: Tests Prior To Switching On Voltage
Detailed instructions on how to connect a RJ45 plug are available in our video tutorial: “SAMCON 03 Mounting and installing the RJ45 jack to SAMCON cables” https://go.samcon.eu/v03 Figure 5-10 Plug assignment, RJ45 5.3.7 Tests prior to switching on voltage Attention! Prior to starting the device, perform all tests as indicated by the na- tional regulations. -
Page 22: Working Inside The Camera Housing (Ex-D)
Pay attention not to damage the housing seals. Keep them clean! The ExCam XF Q1645 is equipped with a weather protection roof. Prior to starting you work, remove this roof! To do so, loosen the 4x8mm lens screws M4*0.7 at the front and rear sides of the bracket holders (Figure 6-1). -
Page 23: Figure 6-1 Removing The Weather Protection Roof (1/2) (This Illustration Is An Example)
Figure 6-1 Removing the weather protection roof (1/2) (this illustration is an example) Figure 6-2 Removing the weather protection roof (2/2) (similar illustration) To open the stainless-steel housing (T07 VA2.3.x.x) of ExCam XF Q1645, loosen the eight cylinder-head hexagon screws (DIN 912/ ISO 4762) together with their spring rings (DIN 127A) on the rear side of the cable and power supply flange (see Figure 6-3). -
Page 24: Figure 6-3 Opening The Excam Xf Q1645 (Similar Illustration)
Figure 6-3 Opening the ExCam XF Q1645 (similar illustration) Carefully pull out the cable and supply flange to the rear, as straight as possible. Be- cause of negative pressure, it may be difficult to remove the flange. The cylindrical clear-... -
Page 25: Removing/Inserting A Sd Memory Card
Removing / inserting a SD memory card Note: The ExCam XF Q1645 has a slot for a micro SDHC memory card. Saved video files can be played and deleted via the web interface. They are also available in a download list. -
Page 26: Hardware Reset
Hardware Reset To set all the parameters of the ExCam XF Q1645 (including the IP address) to default values, you should run a hardware reset. The parameters can be reset via the web interface or manually. If the camera placed in the network can no longer be reached or its state is uncontrollable, the reset should be performed manually. -
Page 27: Battery
- crosswise and evenly! Battery The ExCam XF Q1645 is equipped with a high-temperature resistant Panasonic button cell BR2330A/VAN. This cell supplies energy to the internal real time clock (RTC). The customer is not allowed to replace the battery! In this case, please contact the manufac- turer. -
Page 28: Network Access And Visualization
Interface, please see the User Manual for Axis or visit the following website: https://www.axis.com/products/axis-q1645 The delivered ExCam XF Q1645 is set to the applicable net frequency (50Hz or 60Hz). If the camera is used at a location with a differing net frequency, the image might start to flicker, particularly in surroundings with fluorescent tubes. -
Page 29: Assigning The Ip Address
Assigning the IP address The ExCam XF Q1645 is intended for use in an Ethernet network and requires an IP ad- dress to access and control it. In the most today’s networks, a DHCP server is integrated. This server automatically assigns an IP address. -
Page 30: Maintenance / Modification
(e.g., proper condition of the casing, seals and cable entry points). If maintenance measures are necessary they have to be initiated and/or executed. Repairs may only be carried out with original parts of SAMCON Prozessleittechnik GmbH. Damaged pressure-resistant housings have to be replaced completely. In case of doubt, send the part in question back to SAMCON Prozessleittechnik GmbH. -
Page 31: Drawings & 3D Models
Drawings & 3D models All drawings, 3D models, certificates and other information are available in the download area of the product page on our website: https://www.samcon.eu/en/products/network/excam-xf-q1645/ If you wish additional technical information, please contact us at: support@samcon.eu Certificates and further documentation... - Page 32 Schillerstrasse 17, 35102 Lohra-Altenvers, Germany www.samcon.eu, info@samcon.eu Phone: +49 6426 9231-0, fax: - 31...
Need help?
Do you have a question about the ExCam XF Q1645 and is the answer not in the manual?
Questions and answers