Table of Contents
Advertisement
Available languages
Available languages
SAFETY INSTRUCTIONS
1
IMPORTANT SAFETY INSTRUCTIONS
10
IMPORTANTES INSTRUCTIONS DE SECURITE
11
INSTRUCCIONES DE SEGURIDAD IMPORTANTES
12
WICHTIGE SICHERHEITSHINWEISE
13
ISTRUZIONI CAUTELARI IMPORTANTI
14
BELANGRIJKE VEILIGHEIDSINSTRUCTIES
15
INSTRUÇÕES DE SEGURANÇA IMPORTANTES
Calibration Procedure
ControlTech
ELECTRONIC
TORQUE-ANGLE
WRENCH
TM
Micro
Advertisement
Table of Contents

Summary of Contents for Snap-On ControlTech Micro
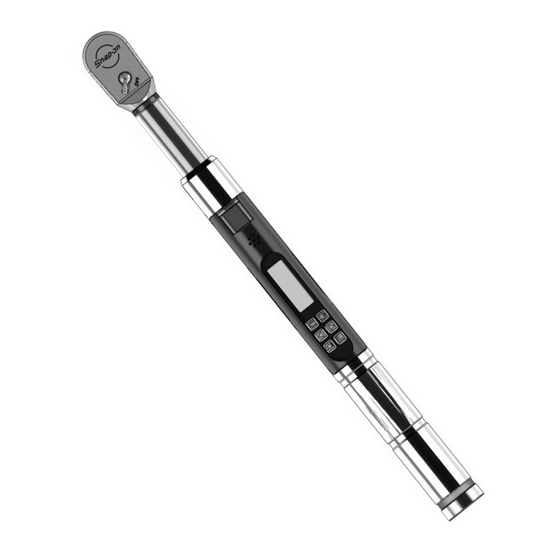
- Page 1 Calibration Procedure ControlTech Micro ELECTRONIC TORQUE-ANGLE WRENCH SAFETY INSTRUCTIONS IMPORTANT SAFETY INSTRUCTIONS IMPORTANTES INSTRUCTIONS DE SECURITE INSTRUCCIONES DE SEGURIDAD IMPORTANTES WICHTIGE SICHERHEITSHINWEISE ISTRUZIONI CAUTELARI IMPORTANTI BELANGRIJKE VEILIGHEIDSINSTRUCTIES INSTRUÇÕES DE SEGURANÇA IMPORTANTES...
-
Page 2: Table Of Contents
MAINTENANCE / SERVICE ......................9 CERTIFICATION .......................... 9 NOTES ............................9 BATTERY REPLACEMENT ......................9 AUTHORIZED SNAP-ON REPAIR CENTERS ................5 Table Of Figures Figure 1 – Torque Calibration Stand ..................... 2 Figure 2 - Wrench on Stand ......................5 Figure 3 - Angle Calibration Fixture .................... -
Page 3: Important Safety Instructions
ControlTech Micro Wrench IMPORTANT SAFETY INSTRUCTIONS WARNING Risk of flying particles. Over-torquing can cause breakage. Force against flex stops on flex head can cause head breakage. An out of calibration angle wrench can cause part or tool breakage. Broken hand tools, sockets or accessories can cause injury. -
Page 4: Torque Calibration Check
± 0.5%. Figure 1 – Torque Calibration Stand The calibration should be performed by an Authorized Snap-on Repair Center or Certified Calibration Laboratory. - Make sure the torque tester is in the “PEAK MODE”. -
Page 5: Torque Calibration
In order to calibrate the electronic torque wrench, a horizontal bench top hand-crank loader must be used which has a minimum accuracy of ± 0.5%. The calibration should be performed by an Authorized Snap-on Repair Center or Certified Calibration Laboratory. - Page 6 ControlTech Micro Wrench 2. Scroll to the CONFIGURE menu selection by pressing the Up key two times: CONFIGURE EXIT SET HEAD LENGTH 3. Press the Enter key to display the Configure menu: EXIT MODE SETUP PRESET LOCK Note: The Wrench real-time-clock Date is stored in non-volatile memory during torque calibration.
-
Page 7: Figure 2 - Wrench On Stand
ControlTech Micro Wrench 16. Press the Up key to scroll to the CAL TORQUE selection then press the Enter key. 17. If the wrench is an Interchangeable head type, the Set Head Length screen will be displayed: Otherwise skip to step 20. SET HEAD LENGTH 3.000 18. -
Page 8: Set Calibration Date
ControlTech Micro Wrench 30. Remove the torque load from the wrench and the Calibration menu will be displayed. 31. Use the UP key to scroll to the CAL CYCLE COUNT menu selection: CAL CYCLE COUNT EXIT CAL TORQUE 32. Press the Enter key to display the Cal Cycle Count screen: COUNT: 0001 CLEAR EXIT... - Page 9 ControlTech Micro Wrench 1. Tighten clutch pressure wheel to 10% of torque wrench rated capacity. 2. From the main screen, press and hold the ENTER key for three seconds. The User choices menu will be displayed. 3. Scroll to the CONFIGURE menu selection by pressing the Up key two times: CONFIGURE EXIT SET HEAD LENGTH...
-
Page 10: Angle Calibration
ControlTech Micro Wrench 17. Rotate the wrench another 45 degrees in the counter-clockwise direction (90° total) and while maintaining torque on the wrench, verify the wrench reads within -87.1° to -92.9°. 18. Rotate the wrench another 45 degrees in the counter-clockwise direction (135° total) and while maintaining torque on the wrench, verify the wrench reads within - 131.6°... -
Page 11: Maintenance / Service
Clean the wrench by wiping with a damp cloth. Do NOT use solvents, thinners or carburetor cleaners. Do NOT immerse in anything. Service, repair and calibration are to be done by Snap-on Service Centers only. Contact your Snap-on Tools representative. Ratchet head repair can be done by Snap-on Representative or user. - Page 12 à l'intérieur d’un état membre de l'Union Européenne si L'emploi de cette clé ControlTech les instructions de fonctionnement ne sont pas dans la langue de l’état en question. Contacter Snap-on si vous avez besoin d’une traduction. Français...
- Page 13 El funcionamiento de la llave no está garantizado en los países miembros de la UE si ControlTech las instrucciones de funcionamiento no figuran en el idioma del país en cuestión. Póngase en contacto con Snap-on si necesita una traducción. Español...
- Page 14 BEWAHREN SIE DIESE ANLEITUNG AUF Haftungsausschluss Es besteht keine Garantie für den Betrieb des ControlTech Schlüssels in einem EU- Mitgliedstaat, wenn die Betriebsanweisungen nicht in der betreffenden Landessprache abgefasst sind. Wenden Sie sich an Snap-on, wenn eine Übersetzung benötigt wird. Deutsch...
- Page 15 Non utilizzare su circuiti elettrici sotto tensione. CONSERVARE QUESTE ISTRUZIONI ESONERO DI RESPONSABILITÀ: Non si garantisce l'uso della chiave ControlTech nei Paesi membri della CEE dove le istruzioni per l'uso non sono in lingua locale. Contattare la Snap-on per l'eventuale traduzione. Italiano...
- Page 16 BEWAAR DEZE GEBRUIKSAANWIJZING Disclaimer Er geldt geen garantie voor het gebruik van de ControlTech -sleutel in lidstaten van de EU als de gebruiksaanwijzing niet in de taal van het land in kwestie beschikbaar is. Neem contact op met Snap-on voor vertalingen. Nederlands...
- Page 17 Aviso de isenção de responsabilidade A operação do torquímetro ControlTech não é permitida em nenhum Estado-membro da União Europeia se as instruções operacionais não estiverem no idioma do Estado em questão. Entre em contato com a Snap-on se uma tradução for necessária. Português...
-
Page 18: Authorized Snap-On Repair Centers
3602 Challenger Way Phone: 61-2-9837-9155 Carson City, NV 89706-0753 Fax: 61-2-9837-9192 Phone: 775-883-8585 Fax: 775-883-8590 Singapore Repair Center Snap-on Tools Singapore Pte Ltd CANADA 25 Tagore Lane, #01-01, Singapore, 787602 Western Repair Centre Phone: 65-64515570 7403-48 Street SE Fax: 65-64515574...


Need help?
Do you have a question about the ControlTech Micro and is the answer not in the manual?
Questions and answers