Mitel SmarT-1 EuroRoute Installation & Programming Manual
Dialer
Hide thumbs
Also See for SmarT-1 EuroRoute:
- Installation & programming manual (64 pages) ,
- Installation and programming manual (40 pages) ,
- Installation & programming manual (52 pages)

Related Manuals for Mitel SmarT-1 EuroRoute


Summary of Contents for Mitel SmarT-1 EuroRoute
- Page 1 SMDrT-1 ™ EuroRoute Dialer Installation & Programming Guide ® Talking Technologies...
- Page 2 The contents of this work are proprietary and confidential and neither the whole nor any part thereof may be used, copied or reproduced in any form or disclosed to any third party without the prior permission of Mitel Telecom Limited. Inclusion of the copyright notice does not imply publication.
-
Page 3: Table Of Contents
Table of Contents SAFETY INFORMATION ....................8 Warning ........................8 Power Supply ......................8 Safety Status of Ports ....................9 Connectivity ......................9 Ringer Equivalents Number (REN) ................9 Regulatory Label .....................10 STATUTORY INFORMATION ..................12 CHAPTER 1 ........................14 EuroRoute Installation General ........................14 Power LED Indications ...................14 Line/Trunk LED Indications ...................14 Standard Installations ....................15 Programming Devices .....................16... - Page 4 Table of Contents CHAPTER 6 ........................32 General Notes On Programming Programming With an MF4 Telephone ..............32 Acknowledgment Tones ..................32 Terminating a Variable Length Entry ..............33 Terminating Variable Length Entries with time-out ..........33 Programming With a Terminal ................33 Legal and Illegal/Invalid Entries ................33 Special Function Commands ...................34 Data Verification (902) ...................35 Conditions ......................35...
- Page 5 Table of Contents CHAPTER 8 ........................50 Line and Trunk Options General ........................50 S00 - Type of Exchange Line ..................50 S01 - Drop and Reseize Feature Enable/Disable ............50 S02 - Rotary Interdigit Pause ..................51 S03 - MF4 Tone Duration ..................51 S04 - MF4 Break Duration ..................51 S05 - On-Hook Timer .....................52 S06 - Off-Hook Timer .....................52 S07 - Off-Hook Digit Refusal Timer ..............53...
- Page 6 Table of Contents 6R3 - General Use Code or Spare Storage Number ..........69 6R4 - Centrex/PABX Number ................70 Access Control Sequence (ACS) Default Data ............70 ACS 615 ......................70 ACS 645 ......................70 ACS 625, 635 and 655 through 685 ..............70 R40/R70 Line Reverse Cancels Interdigit Timing ..........71 R41/R71 - Line Reverse Re-starts Call Timer in CIL ..........71 R44/R74 - Action Due to Call Failure ..............72 6STN Trunk String Registers ..................72...
- Page 7 Table of Contents CHAPTER 13 ........................86 Call Home General ........................86 016 - Call Home Line to Use ..................86 017 - Call Home Route to Use ................86 018 - Call Home Delay before Wait for Access ............87 019 - Call Home Wait for Carrier ................87 600 - Call Home Number ..................87 601 - Call Home Time and Day ................88 CHAPTER 14 ........................90...
- Page 8 To Delete the Old Abbreviated Dialling Access Code .........110 APPENDIX 1 ........................112 Call Logger Formats General ........................112 Call Log Formats ....................112 Controller Format ....................112 Example ......................112 Mitel Format ......................113 Example ......................113 SMarT Format .......................113 Example ......................114 Controller Logger Format ..................114 Example ......................114 APPENDIX 2 ........................116 Other Information Legal EuroRoute Inputs ..................116...
-
Page 9: Safety Information
Safety Information SAFETY INFORMATION The exclamation point within an equilateral triangle is intended to alert the user to the presence of important operating and maintenance (servicing) instructions in the literature accompanying the product. Warning Failure to follow all instructions may result in improper equipment operation and/or the risk of electrical shock. -
Page 10: Safety Status Of Ports
Safety Information Safety Status of Ports SELV † Serial Port SELV † NTP Ports TNV † † SELV and TNV are defined in EN 60950: 1992 Connectivity The EuroRoute is associated with a separate connection box permanently wired between the Test Jack Frame and the Network Terminating Test Point. -
Page 11: Regulatory Label
Safety Information Regulatory Label The regulatory label shown below is located on the back of the EuroRoute in the lower left hand corner. This label contains the regulatory approval number, part number, serial number, revision levels and the necessary approval marks required for use in the United Kingdom. Hardware Revision RA 11 Level... - Page 12 Safety Information 8350-383-113-BA Draft 1A, September 1998...
-
Page 13: Statutory Information
Statutory Information STATUTORY INFORMATION Approval Details The EuroRoute is suitable for connection to a Public Switched Telephone Network (Exchange line) which supports Loop Disconnect (LD) and Multi-Frequency (MF) Signalling. This apparatus has been approved for the following facilities: • Loop Start •... - Page 14 Statutory Information Responsibility to Maintenance Engineers When installation and commissioning are complete, notify the approved maintainer that you have finished and that responsibility for the system passes to them. Advise them of the security codes that have been set. Normally, the Abbreviated Dialling security code will not change. Ensure that the customer’s staff are aware of the appropriate codes.
-
Page 15: Chapter 1
EuroRoute Installation CHAPTER 1 1. EuroRoute Installation 1. 1. General The Dialer is a simple, compact and versatile telephone controller providing the following features: • Versatile programming • Four line capacity • Three-digit abbreviated dialling • Remote maintenance and programming •... -
Page 16: Standard Installations
EuroRoute Installation 1. 4. Standard Installations The Dialer can be installed and programmed by either an MF4 device, modem, or a terminal and is typically installed as a serial device between a Public Switched Telephone Network (Exchange line) trunk and the user’s telephone equipment (Figure 1.1). Figure 1.1 Dialer Installed between a Telephone and Exchange Line The Dialer can also be installed as a serial device between the user’s telephone equipment (PABX/key system) and the exchange line trunk (Figure 1.2). -
Page 17: Programming Devices
Programming from this device through the optional printer chaining cable is not supported. For further information, refer to Chapter 15 on page 96. Contact your local authorised Mitel Distributor for chaining cables or optional printer cables. 8350-383-113-BA Draft 1A, September 1998... - Page 18 EuroRoute Installation 8350-383-113-BA Draft 1A, September 1998...
-
Page 19: Chapter 2
System Requirements CHAPTER 2 2. System Requirements 2. 1. Environmental Requirements The EuroRoute has been designed to be installed in an office environment with the following limits: • temperature within the range of 0ºC to 40ºC • relative humidity within the range of 10% to 85% •... - Page 20 System Requirements 8350-383-113-BA Draft 1A, September 1998...
-
Page 21: Chapter 3
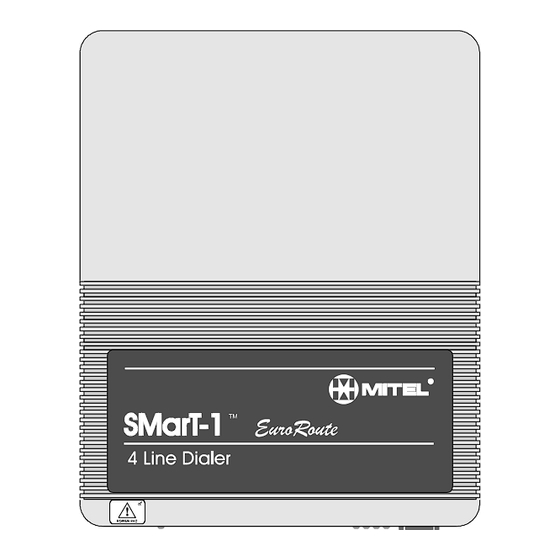
Basic Hardware Installation CHAPTER 3 3. Basic Hardware Installation 3. 1. Mechanical Description The EuroRoute (Figure 3.1) consists of a plastic case, enclosed circuitry and an external power supply. 3. 2. Electrical Description EuroRoute electrical characteristics are provided in the table below: Figure 3.1 EuroRoute Characteristics SERIAL PORT FOR PROGRAMMING AND CALL LOGGING OUTPUT... -
Page 22: Euroroute Flush Mount
Basic Hardware Installation 3. 3. EuroRoute Flush Mount The EuroRoute is mounted by simply rotating the attached brackets so that they are protruding from the top of the EuroRoute, as shown in Figure 3.2. Figure 3.2 . Mounting Position Having rotated the brackets, secure the EuroRoute to the wall with the provided 2.54 cm self- tapping screws, and slide the mounting bracket down until the mounting screws are in the narrow section of the mounting holes, as shown in Figure 3.3. -
Page 23: Optional Euroroute Right Angle Wall Mounting (Part Number 8350-018)
Basic Hardware Installation 3. 4. Optional EuroRoute Right Angle Wall Mounting (part number 8350-018) The EuroRoute must be mounted upright. To right-angle mount the EuroRoute to the wall, attach the right angle bracket to the mounting surface (wall). Slide the mounting bracket down until the mounting screws are in the narrow section of the mounting holes, as shown in Figure 3.4. - Page 24 Basic Hardware Installation If the EuroRoute has the bracket assembly shown in Figure 3.5, the assemblies should be carefully pried off with a screwdriver, as shown in Figure 3.5. Figure 3.5 Mounting Bracket Removal Remove the rubber feet from the top of the EuroRoute base, as shown in Figure 3.6; leave the two lower rubber feet intact.
-
Page 25: Telephone Connections
Basic Hardware Installation 3. 5. Telephone Connections Telephone connections should be made on the customer side of the Network Terminating Point (NTP), following established procedures and techniques. Figure 3.7 illustrates the Connection Box and the cable assembly used by the EuroRoute. Figure 3.7 Distribution Wiring CONNECTIONS BOX SUBSCRIBER... -
Page 26: Line Polarity
Basic Hardware Installation 3. 6. Line Polarity To ensure that the EuroRoute is correctly installed, it is important to ensure that the Connections Box is correctly wired. If the installation is incorrect, a result of false reversal signals being sent to the connected subscriber side equipment could occur. There are two simple steps that can be taken, in order to check whether the wiring is correct. -
Page 27: Power Failure
• L Brackets (Pack of 5) 8350-018 • Printer Cables (Pack of 10) 8350-030 • Chaining Cable 8350-036 • Chaining Cables (Box 240) 8350-036-240. For other spare parts, please consult your local authorised Mitel distributor. 8350-383-113-BA Draft 1A, September 1998... - Page 28 Basic Hardware Installation 8350-383-113-BA Draft 1A, September 1998...
-
Page 29: Chapter 4
Initialisation CHAPTER 4 4. Initialisation Before you can program the EuroRoute for the first time, you must initialise the unit. Initialisation can only be done by using an MF4 telephone. 4. 1. Initialisation 1. Connect an MF4 instrument to the subscriber side of the block (A and B leads of the EuroRoute). - Page 30 Initialisation key. The EuroRoute should respond immediately with a short e. You may 4. Release the hear two short tones (ee) depending on the previous condition of the EuroRoute. If a single or double tone is not heard, return to Step 2, and restart. The tone bursts indicate that the EuroRoute is initialised and remains in programming mode.
-
Page 31: Chapter 5
EuroRoute to accept the data entered by the user. If the EuroRoute is in an idle state for five seconds after the data is entered, the EuroRoute accepts this data. Mitel recommends that you enter a unique security code for each of the Security Access Registers (See Section 5.6 on page 31). -
Page 32: Program Mode Exit
Security Access Registers The third stage starts with the EuroRoute sending an MF4 “D” to the remote point. The EuroRoute restarts the Auto-answer Wait for Security Code Timer and waits for MF4 digits to match the contents of 691 Register or the 695 Register. If there is a match on the first attempt, the EuroRoute sends an MF4 “A”... -
Page 33: Chapter 6
General Notes on Programming CHAPTER 6 6. General Notes On Programming 6. 1. Programming With an MF4 Telephone Programming can be done by using MF4 tones. The default programming code is #0 (contents of the 691 Register). If the entry of # or is not permissible (for example, behind a PABX that will not pass the #, or to the EuroRoute), you should change the programming... -
Page 34: Terminating A Variable Length Entry
Chain Programming see Chaining on page 96). The default programming entry code is #0 (contents of the 690 Register). When you enter the programming entry code, the following screen appears: 8350 REV 134-F02 COPYRIGHT 1987-1998 MITEL INC. ALL RIGHTS RESERVED UK DIALLER - VERSION 2 - MR2 Serial Number BC AAA 0001 ENTERING PROG. -
Page 35: Special Function Commands
General Notes on Programming Note: To correct your entry while in terminal programming mode, use the backspace key or delete key to edit your entry. To properly exit terminal program mode enter X or 987. If power is lost or the EuroRoute is idle in program mode for 2 minutes, it will automatically exit program mode and any programming changes will be lost and the former data will be restored. -
Page 36: Data Verification (902)
6. 8. 2. Procedure To use Data Verification: 1. Enter Programming Mode, the following screen appears: 8350 REV 134-F02 COPYRIGHT 1987-1998 MITEL INC. ALL RIGHTS RESERVED UK DIALLER - VERSION 2 - MR2 Serial Number BC AAA 0001 ENTERING PROG. MODE V>... -
Page 37: Exiting Data Verification
General Notes on Programming 3. Enter the desired parameters. When you enter the parameter the data associated with that parameter appears opposite the entry. If there is no data for the parameter, nothing is displayed. The EuroRoute automatically moves to the next entry position. A typical output for an 808 parameter (default data) is shown below: P>... -
Page 38: Display Route And Line Peg Counter Data (967)
General Notes on Programming 6. 10. Display Route and Line Peg Counter Data (967) The contents of the Route and Line Peg Counters can be displayed by using this command while in terminal/modem programming mode. The counter does not reset when using this command. -
Page 39: Reset Peg Counter (942 969)
General Notes on Programming 6. 11. Reset Peg Counter (942 969) The contents of the Route and Line Peg Counters can be reset by using this command while in programming mode. Once the counters reach “999999”, this command is used as the only method of resetting the counter. -
Page 40: Steps For Cloning
General Notes on Programming • Master unit must not be allowed to exit the programming mode and no off-hook to on-hook transitions can occur in any unit while the Cloning cable is connected between units. These transitions can cause a CIL output that will confuse the units and possibly corrupt the programming. -
Page 41: Tandem Mode (942 908)
General Notes on Programming Because CIL output will confuse the units and possibly corrupt the programming, you may wish to turn the Master unit’s CIL off (by setting 001 = 0, Print Format) during Cloning. You can turn it on after you have finished cloning and have removed the Cloning cable. You should only have the Cloning cable connected while Cloning a unit. -
Page 42: To Initiate A Local Tandem Mode
General Notes on Programming 6. 13. 2. To Initiate A Local Tandem Mode At the local site (using the terminal), enter programming mode. Once in programming mode, enter Tandem Mode with the commands 942 908. The EuroRoute is self-prompting on the screen. -
Page 43: Backspace During Terminal Programming
General Notes on Programming The EuroRoute modem is set to 300 bps, 8N1 and cannot be changed to anything else. It also has an access code set in the Common Data Register 604 (#1 is the default). System register 011 sets the time the modem will present carrier tone to an incoming call AFTER the EuroRoute has detected the access code. -
Page 44: Initialise Lockout (942 968 N)
When the command 970 is entered while in modem or terminal programming mode, the serial number of the EuroRoute is displayed. The serial number is also displayed with the log-on banner. 8350 REV 134-F02 COPYRIGHT 1987-1998 MITEL INC. ALL RIGHTS RESERVED UK DIALLER - VERSION 2 - MR2 Serial Number BC AAA 0001 ENTERING PROG. - Page 45 General Notes on Programming Figure 6.16 Overview of the EuroRoute Operation User Goes Off-hook and begins dialling Line and Trunk Options; Control Timing and Hardware Functions 020 = 1 020 = 0 User Dialled Digits Screened EuroRoute Does Nothing. User in Search Tables Digits Pass Through to the Exchange...
- Page 46 General Notes on Programming 8350-383-113-BA Draft 1A, September 1998...
-
Page 47: Chapter 7
T = 3 For Controller T = 4 For SMarT-1 with CR and LF 001 T T = 5 For Mitel with CR and LF T = 6 For SMarT-1 with CR and LF T = 7 For Controller with CR and LF... -
Page 48: Cil Record Of Incoming Calls
System Wide Data 7. 5. 003 - CIL Record of Incoming Calls Register Default Description T = 0 For Incoming Calls Not Recorded 003 T T = 1 For Incoming Calls Recorded 7. 6. 004 - Routes to Be Monitored for CIL You can control which calls are monitored for CIL. -
Page 49: V.25 Auto-Answer Tone
System Wide Data 7. 9. 012 - V.25 Auto-answer Tone Some V.21 modems require a 3 1/2 second burst of 2100 Hertz before they will respond with an answer. By default the EuroRoute will send out the V.25 Answer Tone. You can either allow, or disable this feature. -
Page 50: Inter-Ring Timing
System Wide Data 7. 13. 025 - Inter-ring Timing This register sets the time the EuroRoute waits after a burst of ringing before reverting to the idle state, assuming another burst of ringing is not forthcoming. Register Default Description T = 1 For 1 sec T = 4 For 4 secs T = 7 For 7 secs T = 2 For 2 secs T = 5 For 5 secs T = 8 For 8 secs 025 T... -
Page 51: Chapter 8
Line and Trunk Options CHAPTER 8 8. Line And Trunk Options 8. 1. General Line and Trunk refer to the physical line that is supplied by the Public Switched Telephone Network (Exchange Line or PSTN). Route refers to the way the EuroRoute will attempt to route the call through the Exchange Line. -
Page 52: S02 - Rotary Interdigit Pause
Line and Trunk Options 8. 4. S02 - Rotary Interdigit Pause Changing the value of this register changes the length of the pause between rotary digits outpulsed to the exchange line. Port Register Default Description 102 T T = 4 For 800 ms 202 T T = 5 For 900 ms 302 T... -
Page 53: S05 - On-Hook Timer
Line and Trunk Options 8. 7. S05 - On-Hook Timer This register specifies the minimum amount of time required by the EuroRoute to detect an on- hook condition. This condition is defined as the removal (loss) of loop current from the Exchange line. -
Page 54: S07 - Off-Hook Digit Refusal Timer
Line and Trunk Options 8. 9. S07 - Off-Hook Digit Refusal Timer You can specify the time between the EuroRoute recognising the off-hook and when it will accept digits on a per trunk basis. Dial tone is given to the user only after the digit refusal timer (S07) has expired. -
Page 55: S10 - Operation At Off-Hook
Line and Trunk Options 8. 12. S10 - Operation at Off-hook You can specify the operation that the EuroRoute will take, once an off-hook condition is detected. Port Register Default Description 110 T T = 0 For Route Call As Normal 210 T T = 1 For Execute ACS defined by S27 immediately 310 T... -
Page 56: S13 - Remote Programming Mf4 Send Rate
Line and Trunk Options 8. 15. S13 - Remote Programming MF4 Send Rate This register defines the on/off time of MF4 tones sent by the EuroRoute during tandem or remote programming. Port Register Default Description 113 T T = 3 For 70 ms For 140 ms 213 T T = 4 For 80 ms... -
Page 57: S18 - Incoming Call Detection
Line and Trunk Options 8. 18. S18 - Incoming Call Detection You can specify the EuroRoute’s sensitivity to incoming ringing on a scale of 0 to 9 (where 0 is the most sensitive and 9 the least sensitive). If the setting is too sensitive, outgoing calls may not be routed. -
Page 58: S22 - Interdigit Timer For 0+ (National) Calls
Line and Trunk Options 8. 20. S22 - Interdigit Timer for 0+ (National) Calls This register sets the time the caller has to enter each digit after the first digit has been dialled for a 0+ call. Port Register Default Description 122 T T = 0 For No Time-out... -
Page 59: S24 - Interdigit Timer For The Destination Number
Line and Trunk Options 8. 22. S24 - Interdigit Timer for the Destination Number This register sets the time the caller has to enter each digit after the first digit has been dialled. Port Register Default Description 124 T T = 0 For No Time-out 224 T T = 1 For 1 Sec T = 9 For 9 Secs... -
Page 60: S26 - Interdigit Timer For Buffer C
Line and Trunk Options 8. 24. S26 - Interdigit Timer for Buffer C This register sets the time the caller has to enter each digit after the first digit has been dialled, while screening in Buffer C. (Buffer C Represents the second cost centre code buffer). Port Register Default... -
Page 61: S30 - Pabx (Centrex) Enable/Disable
Line and Trunk Options 8. 27. S30 - PABX (Centrex) Enable/Disable You can enable or disable the PABX option. Port Register Default Description 130 T T = 0 For Disabled 230 T T = 1 For Enabled 330 T 430 T To change all Ports to the same value use 530 T. -
Page 62: S33 - Time To Auto-Answer
Line and Trunk Options 8. 29. S33 - Time to Auto-Answer You can specify the time in which the EuroRoute waits before answering an incoming call, after the detection of ringing. Caution: Use extreme caution when lowering the auto-answer time. If the user does not answer the call prior to the auto-answer time, the EuroRoute will answer the call automatically. -
Page 63: S35 - Auto-Answer Incorrect/Failed Security Code Trunk Lockout Timer
Line and Trunk Options 8. 31. S35 - Auto-Answer Incorrect/Failed Security Code Trunk Lockout Timer Failure to enter the correct programming password during the time specified by the S34 Register enables this timer. You can specify the time a trunk is locked out. If the S34 time-out occurs, the trunk is locked out as specified or until the user side of the line goes off-hook. - Page 64 Line and Trunk Options 8350-383-113-BA Draft 1A, September 1998...
-
Page 65: Chapter 9
Access Control Sequences CHAPTER 9 9. Access Control Sequences (ACS) 9. 1. General Call Control Data defines such system wide information as the EuroRoute’s access number and authorisation code. Information entered here provides site specific information. Each entry must be terminated with a “##”. 9. -
Page 66: Access Control Sequences (6R5)
Access Control Sequences 9. 3. Access Control Sequences (6R5) Access Control Sequences (ACS) instruct the EuroRoute on how to access a particular carrier- telephone network. Calls are routed in the ACS after a match in the Search Tables is detected. Each entry (6R5) can be any sequence of commands taken from the following tables, with a maximum of 80 characters per entry. -
Page 67: Access Control Sequences (6R5) Continued
Access Control Sequences 9. 3. Access Control Sequences (6R5) Continued Register Token Description Dials MF4 Fourth Column Digit A Dials MF4 Fourth Column Digit B Dials MF4 Fourth Column Digit C Where R Dials MF4 Fourth Column Digit D Equals 1 - 8 for Dials Contents of Select Digit Buffer A Routes... -
Page 68: A, B, C, And D Dial Tone Detection Parameters
Access Control Sequences 9. 4. A, B, C, and D Dial Tone Detection Parameters 9. 4. 1. A and B Dial Tone Detection Parameters The EuroRoute expects a certain minimum duration of dial tone to occur within a specified time before attempting to dial. They are specified by the A and B timers in the first set of tables below. -
Page 69: Format Example
Access Control Sequences 9. 4. 3. Format Example #XABCD Dial Tone Frequency to Monitor Minimum Dial Tone Duration to Detect Time allowed to Detect the Duration of Dial Tone Action on Failure of Dial Tone Detection Action on Successful Detection of Dial Tone 9. -
Page 70: 6R0 - Name Of Route
Access Control Sequences 9. 6. 6R0 - Name of Route You can program Route names to appear on CIL records. This ability can provide identification of the carrier used per Route. The R (1 through 8) is the Route number. All entries must be terminated with a ##. -
Page 71: 6R4 - Centrex/Pabx Number
Access Control Sequences 9. 10. 6R4 - Centrex/PABX Number When defined, the Centrex/PABX Number will be output on routed calls where the ACS Token 24 is used. Register Description Where R is the Route Number 1 through 8. This entry may contain up to 80 characters maximum, and is Blank by default. -
Page 72: R40/R70 Line Reverse Cancels Interdigit Timing
Access Control Sequences 9. 12. R40/R70 Line Reverse Cancels Interdigit Timing If a line reversal is detected while the ACS token 11 is executing, the interdigit timer is cancelled. Route Register Default Description Route 1 140 T T = 0 for Disable Route 2 240 T T = 1 for Enable... -
Page 73: R44/R74 - Action Due To Call Failure
Access Control Sequences 9. 14. R44/R74 - Action Due to Call Failure You can specify the action, due to a call failure (as set out in the Access Control Sequence, see section 9.4 on page 67) Route Register Default Description Route 1 144 T T = 1 For Choose Route 1... -
Page 74: Trunk String Register Acs Token
Access Control Sequences 9. 15. 1. Trunk String Register ACS Token The ACS Token that will be used to dial out the contents of the Trunk String Registers is 60N, with N representing the String Number for the trunk currently in use. Refer to the example below on how to use the Trunk String Register ACS Token. -
Page 75: Chapter 10
Callback CHAPTER 10 10. Callback 10. 1. Callback Caution: When using the Callback feature, this product must be connected between a telephone and a direct Exchange line. This feature may not be used when the EuroRoute is installed in conjunction with a PABX system. The ACS has the ability, via a token, to drop the Exchange line side of the EuroRoute, while holding the user side off-hook. -
Page 76: Callback Disconnect Sequence
Callback 10. 3. Callback Disconnect Sequence The EuroRoute has the ability to send terminating characters, for instance an MF4 #, to clear the local Exchange line after a routed call has been made. After the user hangs up the telephone, the Exchange line will be disconnected for the time specified by the S05 Register (On-hook Timing). -
Page 77: Chapter 11
Search Tables CHAPTER 11 11. Search Tables 11. 1. Search Tables Search Tables consist of a three digit number that always starts with an ‘8’ as the first digit, followed by two digits that indicate the length of the digit string. The following digits specify the number for the EuroRoute to monitor, followed by an action digit telling the EuroRoute what to do once a match of digits has been detected. -
Page 78: Digits In A Table
Search Tables 11. 3. Digits In a Table When selecting a Search Table, you must enter enough digits to fill the Search Template. For example, if you select Search Table 815, you must enter 15 digits. NNNNNNNNNNNNNNN Digits You Expect the User to Register Number Action Code End of Entry... -
Page 79: Action Codes For Primary Destination Number Search Tables (Buffer A)
Search Tables 11. 5. Action Codes for Primary Destination Number Search Tables (Buffer A) Action Code Description ACS † Prefer Route 1 Prefer Route 2 Prefer Route 3 Prefer Route 4 Prefer Route 5 Prefer Route 6 Prefer Route 7 Prefer Route 8 Force Route 1 Force Route 2... -
Page 80: Action Codes For Secondary Search Table #1 (Buffer B)
Search Tables 11. 6. Action Codes for Secondary Search Table #1 (Buffer B) Action Code Description ACS † Prefer Route 1 Prefer Route 2 Prefer Route 3 Prefer Route 4 Prefer Route 5 Prefer Route 6 Prefer Route 7 Prefer Route 8 Force Route 1 Force Route 2 Force Route 3... -
Page 81: Action Codes For Secondary Search Table #2 (Buffer C)
Search Tables 11. 7. Action Codes for Secondary Search Table #2 (Buffer C) Action Code Description ACS † Prefer Route 1 Prefer Route 2 Prefer Route 3 Prefer Route 4 Prefer Route 5 Prefer Route 6 Prefer Route 7 Prefer Route 8 Force Route 1 Force Route 2 Force Route 3... -
Page 82: Search Tables Default Data
Search Tables 11. 8. Search Tables Default Data The following sections outline the default data that is loaded into each Primary Search Table (as a Search Template), and a brief explanation of each piece of data. The shaded cell of each default entry represents the action code being used. -
Page 83: Search Tables 804
Search Tables 11. 8. 3. Search Tables 804 Note 1 Note 2 Note 3 Note 1: If the first four digits dialled are 1470, then copy the digits to the Select Digits Buffer A, then restart screening in Buffer A. Note 2: If the first four digits dialled are 1471, the EuroRoute dials the digits to the Exchange without routing. - Page 84 Search Tables 8350-383-113-BA Draft 1A, September 1998...
-
Page 85: Chapter 12
Common Option Data CHAPTER 12 12. Common Option Data Common Option Data refers to data that is common to all aspects of the EuroRoute. Each entry must be terminated with a ##. 12. 1. 602 - Machine Identifier Every EuroRoute can be assigned a unique ID. This register is especially useful when using Chaining or an RS-232 (Serial) multiplexer, as it places the machine’s identifier in the CIL output. -
Page 86: Spare Register
Common Option Data 12. 4. 606 - Spare Register Register Description Default This register is blank by default, and may be a maximum of 80 digits. This register can be dialled by the Blank Access Control Sequence Token 26. Example: 606 1234567890## 12. -
Page 87: Chapter 13
Call Home CHAPTER 13 13. Call Home 13. 1. General The Call Home feature allows the EuroRoute to call a pre-programmed phone number on a specific day and time. The phone number dialled by the EuroRoute is intended to reach a maintainer’s database, at which time the maintainer can update or re-program the EuroRoute. -
Page 88: Call Home Delay Before Wait For Access
Call Home 13. 4. 018 - Call Home Delay before Wait for Access This register is used to select the amount of time before the EuroRoute will wait for the access code in the 604 Register before providing origination tone. Register Default Description... -
Page 89: Call Home Time And Day
Call Home 13. 7. 601 - Call Home Time and Day This register defines the date and time that the EuroRoute should Call Home. The Call Home feature is disabled when this register is blank. Register Description Default DD = day of the month (00 - 31) 601 DDHHMM HH = hour of the day (00 - 23) Blank... - Page 90 Call Home 8350-383-113-BA Draft 1A, September 1998...
-
Page 91: Chapter 14
Cost Centre Code Options CHAPTER 14 14. Cost Centre Code Options 14. 1. General The EuroRoute can control user access to the Exchange line, or carriers by means of Cost Centre Codes. The EuroRoute can also use the Cost Centre Codes as Personal Identification Numbers. -
Page 92: R43/R73 - Cost Centre Codes Enabled/Disabled
Cost Centre Code Options 14. 3. R43/R73 - Cost Centre Codes Enabled/Disabled You can specify Cost Centre Codes on each Route. This register must be enabled in order to use Buffer B and Buffer C. Route Register Default Description Route 1 143 T T = 0 For Cost Centre Code Enabled Route 2... -
Page 93: Cost Centre Code Table Description
Cost Centre Code Options 14. 5. Cost Centre Code Table Description The Cost Centre Code portion of the users dialled digits is divided into two separate areas of equal size, known as call buffers. Cost Centre Code Areas Buffer Table Range Buffer Type 821 - 835 Verifiable Cost Centre Code... -
Page 94: Acs Cost Centre Code Table Tokens
Cost Centre Code Options 14. 7. ACS Cost Centre Code Table Tokens Each Cost Centre Code Table has an ACS Token, that is used to dial out the digits input into the Table. For further information on the ACS refer to 9.3 on page 65. Access Control Sequence Table Tokens Token Description... -
Page 95: Forced Cost Centre Codes Not Verified
Cost Centre Code Options 14. 8. 2. Forced Cost Centre Codes Not Verified This example explains where the customer dials the number, and the EuroRoute prompts the user with a specified number of beeps, indicating that the customer should enter a Cost Centre Code. - Page 96 Cost Centre Code Options 8350-383-113-BA Draft 1A, September 1998...
-
Page 97: Chapter 15
15. Chaining 15. 1. Introduction The Chaining feature allows multiple Dialers to be “Chained” through their DB 9 pin RS-232 Serial ports via chaining cables. The cables are available through your local authorised Mitel Distributor. Chaining provides the following features: 1. -
Page 98: Commands For Chain Programming
Chaining 15. 4. Commands for Chain Programming Commands Description Enter MF4 Chain Programming Mode. 944 N Select Dialer Number “N” in Chain to accept MF4 Chain Programming. Select all Dialers in Chain to accept MF4 Chain Programming. 946 N Deselect Dialer Number “N” in Chain from accepting MF4 Chain Programming. Deselect all Dialers in Chain from accepting MF4 Chain Programming. -
Page 99: Example
Chaining 15. 6. Example 15. 6. 1. Dialer # 1 Action Result Hear e Dial #0 Hear e Dial 013 Hear ee Dial 1 Dial 987 Exits programming mode 15. 6. 2. Dialer # 2 Action Result Hear e Dial #0 Hear e Dial 013 Hear ee... - Page 100 Chaining 7. Each Chaining Cable has one Male RJ -11 Connector, one Female RJ -11 Connector, and one Male DB 9 RS-232 Serial Connector (See Diagram Below). Figure 15.17 Chaining Cable Note: This chaining cable cannot be used as an optional printer cable to install a recording device.
-
Page 101: Installation Of A Recording Device
It is recommended that to exit a Chain to enter 959 e 987, then Hang up the Telephone. 15. 7. Installation of a Recording Device Obtain an Optional Printer Cable from your local authorised Mitel Distributor before installing a recording device. -
Page 102: Call Information Logging And Chaining
Chaining Figure 15.20 Optional Printer Cable Setup 3. Connect a Male DB 25 RS-232 Cable from the Female DB 25 of the Optional Printer Cable to the Serial Printer. 4. Follow step 9, 10 and 11 described in section 15.6 on page 98. 5. - Page 103 Chaining The following Table shows the printable and non-printable characters used to perform the polling scheme. Function ASCII Control Codes CIL enquiry (command to send CIL buffer status) Start of buffer status report RS (Note 2) End of buffer status report FS (Note 2) Dump CIL (start of binary dump number) ~ (Note 1)
-
Page 104: Example Of Cil Record
Chaining Example of CIL Record <SOH><SOH><SOH> ~<NUL><NUL><SOH><SOH>~ <CR><LF><NUL><NUL>[CIL DATA] <EOT> <SOH> Enquiry Command to dump CIL Start of CIL dump CIL Record End of CIL dump Enquiry As a printout, the output from this example would be: ...(previous CIL record)... 01/27 09:49 00:02:34 13153933336 T3 ROUTED CHN ~~;... -
Page 105: Optional Printer Cable Pin-Out
Chaining 15. 8. 3. Optional Printer Cable Pin-out Signal Ground (Frame) Transmit Strapped pins 6,8,20 Strapped pins Ground (Signal) 15. 9. Programming Via Modem Chain Programming A Chain may be programmed via modem program. Refer to section 6.15 on page 41 for more information. -
Page 106: Example
Chaining When in Modem Chain Programming: >V Enter 950 to enter Modem Chain Programming >P Enter 952 N, where N = the Dialer number >V Enter 967 15. 12. 1. Example V>967 00046500000003717600260300132500000002189400154700093600005800 11770000420006170000340018120001860001460000000252240018180202620013 11013258000898006804000443 Sent from Dialer Comments and Explanation V>950 P>952 1 V>967... -
Page 107: Clearing Peg And Line Counters While In Chain Programming Mode
Chaining 15. 13. Clearing Peg and Line Counters while in Chain Programming Mode To clear the Route and Line counters exit verify mode using the 959 command, select a Dialer using the 944 N, or select all by using the 945 Command while in the Chain Programming Mode. - Page 108 Chaining 8350-383-113-BA Draft 1A, September 1998...
-
Page 109: Chapter 16
Abbreviated Dialling CHAPTER 16 16. Abbreviated Dialling Programming 16. 1. Setting up an Abbreviated Dialling Number - Method 1 Abbreviated Dialling can be programmed by two methods. Method 1 is used at the time of the EuroRoute installation and has the following format: 7NNN DK MM...MM P..P ## 7NNN... -
Page 110: To Program Abbreviated Dialling
Abbreviated Dialling 16. 2. To program Abbreviated Dialling Register (Format) Definition Approximately 980 Abbreviated Dialling Numbers Format for approximately 980 entries. NNN is the are available service code to be dialled by the subscriber and 7NNNDKMM...MM## MM..MM is the number to which the code is translated. -
Page 111: Setting Up An Abbreviated Dialling Number - Method 2
Abbreviated Dialling 16. 4. Setting up an Abbreviated Dialling Number - Method 2 Generally, Abbreviated Dialling is used after an installation is complete. All trunks will have access to Abbreviated Dialling, and all calls are screened because of the DK values (as outlined previously is automatically set to 08). - Page 112 Abbreviated Dialling 8350-383-113-BA Draft 1A, September 1998...
-
Page 113: Call Logger Formats
This appendix provides information concerning Call Logging Formats. A.1. 2. Call Log Formats The EuroRoute can print records in different formats (called Controller, Mitel, SMarT, and Control Logger). Each format provides slightly different information, as described in the following paragraphs. Discuss what type of format you want with your Maintainer. -
Page 114: Mitel Format
01/01 11:08 00:08:04 T100 A.1. 5. SMarT Format SMarT Format is similar to Mitel Format but has a reduced printing width to fit in 80 columns and the RR field is in ASCII instead of numeric. Position (Line 1) Format... -
Page 115: Example
Appendix 1 Call Logger Formats A.1. 5. 1. Example 01/01 10:09 00:00:05 0891 T T1 PTT 01/01 10:22 00:00:06 012914 T1 R02 01/01 11:19 00:00:08 0129141 T1 R02 01/01 11:23 00:20:14 01234567890 T1 R03 01/01 11:27 00:05:43 01347456789 T1 R02 01/01 11:41 00:08:05 T1 INWARD A.1. - Page 116 Appendix 1 Call Logger Formats 8350-383-113-BA Draft 1A, September 1998...
-
Page 117: Other Information
Appendix 2 Other Information APPENDIX 2 A.2. Other Information A.2. 1. Legal EuroRoute Inputs This table describes the Legal allowed EuroRoute inputs from either an MF4 Telephone or Terminal. From Standard MF4 Telephones From Terminal MF4 Conversions 0 through 9 0 through 9 0 through 9 A or a... -
Page 118: Fourth Column Digits From A Terminal
Appendix 2 Other Information These letters represent a value for a particular register and give 16 choices. The HEX numbering plan is used, where 0 - 9 decimal equals 0 - 9 HEX and 10 - 15 decimal equals A - F in HEX, which gives more of a choice with only one digit to represent a value. -
Page 119: Hex Codes
Appendix 2 Other Information A.2. 5. Hex Codes Character Hex Code Character Hex Code Character Hex Code Character Hex Code ´ “ & < > — 8350-383-113-BA Draft 1A, September 1998... - Page 120 Appendix 2 Other Information 8350-383-113-BA Draft 1A, September 1998...
-
Page 121: Appendix 3
Appendix 3 Default Data APPENDIX 3 DEFAULT DATA A.3. 1. System Registers Register Default Description Page No. Baud Rate EuroRoute Format No Incoming Record All Routes Monitored Called Party Programming Modem Presentation Time Enable/Disable V.25 Auto-answer Tone Chain Sequence Number Last Chain Sequence Number Call Home Line to Use Call Home Route to Use... - Page 122 Appendix 3 Default Data A.3. 3. Line and Trunk Registers Continued Register Default Description Page No. Operation at Off-hook Switch Hook Flash Time Between Release of Exchange Line and Next Attempt to Connect Remote Programming MF4 Send Rate MF4 or Rotary Outgoing Recognition MF4 or Rotary Incoming Recognition Incoming Call Detection Interdigit Timer 100 (Operator Calls)
- Page 123 Appendix 3 Default Data A.3. 5. Common Option Data Register Default Description Page No. BLANK Call Home Number BLANK Call Home Time and Day 3031 Machine Identifier #82100 Tone Detector to Use After Flash Remote MF4 Access Security Code BLANK Authorisation Code or STD Code BLANK Spare Register...
- Page 124 Appendix 3 Default Data A.3. 7. Security Access Register Register Default Description Page No. 23302A Installer ASCII Password Installer MF4 Password Abbreviated Dialling Manager MF4 Password A.3. 8. Trunk String Registers Register Default Description Page No. 6 TN BLANK Trunk String Registers A.3.
-
Page 125: Appendix 4
Appendix 4 Abbreviations and Glossary of Terms APPENDIX 4 ABBREVIATIONS AND GLOSSARY OF TERMS Represents a burst of 400 Hertz tone transmitted over the phone to the subscriber. Access Control Sequence. Buttset A one-piece telephone used to dial out in pulse or tone, which allows for testing and monitoring of phone lines. -
Page 126: Abbreviations And Glossary Of Terms
Appendix 4 Abbreviations and Glossary of Terms force or select route action code is encountered within a Search Table. PSTN Public Switched Telephone Network. Random Access Memory. Ringer Equivalence Number. Ring B-Wire. Read Only Memory. Rotary Dialling Pulse dialling. Route A Route is a set of pre-programmed dialling rules that can include access codes to be used to place a telephone call over a particular service or carrier. -
Page 127: Appendix 5
Appendix 5 Hardware Specifications APPENDIX 5 HARDWARE SPECIFICATIONS Hardware Specifications Typical Units REN † IDLE LINE Impedance Between Tip and Ring (300 - 3400Hz) K Ohms Impedance Tip to earth, Ring to earth, and Tip + Ring to earth (300 - 3400Hz) K Ohms RINGER SENSITIVITY: 15 - 60 Hz... -
Page 128: Hardware Specifications
Appendix 5 Hardware Specifications 8350-383-113-BA Draft 1A, September 1998...
Need help?
Do you have a question about the SmarT-1 EuroRoute and is the answer not in the manual?
Questions and answers