
Subscribe to Our Youtube Channel
Related Manuals for Reinecker mezzo


Summary of Contents for Reinecker mezzo
- Page 1 User manual mezzo Please read this user manual carefully prior to installation, use and maintenance for your own safety and in order to avoid damages on your system.
- Page 3 RoHS II (Council directive 2011/65/EEC) Die CE– Kennzeichnung auf dem Gerät dokumentiert diese Übereinstimmung. The CE mark on the system points out this accordance. M. Reinecker Geschäftsführer Alsbach-Hähnlein, M. Reinecker General Manager 28.02.2017 ....................Ort und Datum der Ausstellung...
-
Page 4: Table Of Contents
Disposal of the unit according to EU directive 2002/96/EEC ........8 Power supply .......................8 Safety of batteries .......................8 Safety instructions to avoid damage ................9 II. Instructions for the reading system mezzo ............10 Delivery content ......................10 Overview of all available mezzo models ..............10 Available options .......................10 The mezzo cameras ....................10... - Page 5 Overview mode ....................18 Right button: ......................18 Automatic colour saturation ................18 Brightness/Contrast ....................18 Line marker and shadowing at mezzo Vario ............19 Line marker and shadowing at mezzo Focus.............19 Power ON / OFF ......................19 Operation with power supply and cables ............19 Power ON ......................19 Power OFF ......................19...
-
Page 6: General Information
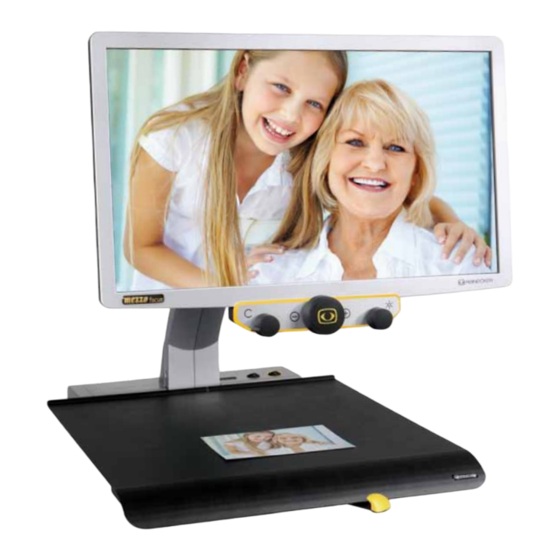
Product description mezzo is a compact desktop video magnifier system, which magnifies text and pic- tures. It may be used permanently for private and professional appliance. The text or pictures are being captured by the integrated camera and then displayed on the monitor. -
Page 7: Medical Device
Safety advice mezzo has to be installed in closed and dry rooms only. Do not plug mezzo into an electrical circuit that is also being used for any life sustaining or support systems. -
Page 8: Reinstatement/Installation And Maintenance
● Relative air humidity 30% to 80% Disposal of the unit according to EU directive 2002/96/EEC mezzo contains of electronic components. To avoid damage to the environment, the country-specific rules have to be respected. Power supply Only use the original power supply and cables which are included in the delivery by Reinecker Vision GmbH. -
Page 9: Safety Instructions To Avoid Damage
2. Do not touch the AC adapter with wet hands. 3. Only use the original power supply and cables which are included in the delivery by Reinecker Vision GmbH. The use of any other equipment might lead to a product damage. -
Page 10: Ii. Instructions For The Reading System Mezzo
- Technology (Natural-Evolutionary-Light-Experiance) optional for mezzo Focus only ZBMEFONE The mezzo cameras mezzo is available in combination with the following camera types: Vario camera: FullHD camera with optical zoom/auto-focus ● Magnification from approx. 1x to 100x (dependent on monitor size) ●... -
Page 11: Installation Of The System
- Technology: high quality pictures with virtually no picture noise Installation of the system Unpack your mezzo carefully and place it on a solid horizontal surface. If you have not purchased an optionally available stand that fits to the product you must provide a solid surface for the system with sufficient surface area. -
Page 12: Connection Of The Unit (Mains And Battery Operation)
Connection of the unit Connect the power supply to a mains wall socket and plug the adapter end of the cable into the AC input socket (12V DC) located on the base plate of the mezzo. Note: The supplied plug-in power supply is exclusively for the operation of this device. -
Page 13: Alignment Of Monitor
90 degree in order to make column reading easier. The image will adapt automatically to the monitors position. (22" monitors as well as all mezzo Focus devices can not be rotated. The monitor of mezzo Focus 16" can be rotated only for packaging. -
Page 14: Alignment Of The Xy-Table Mezzo
Alignment of the XY-table mezzo If your mezzo has a XY-table (ZBXTFIX0 or ZBXTFIXM) with friction brakes, the friction can be continuously adjusted with the lever located in front of the table by pushing the lever slowly from the left to the right. -
Page 15: Description Of The Control Elements
Power switch ON / OFF Only after connecting mezzo successfully to the power supply, the device can be switched ON or OFF using the toggle switch. After switching ON, the green power LED above the toggle switch lights up. -
Page 16: Base Plate Control Panel - Mains/Battery Operation
Control panel on base plate – for all mezzos with battery operation Power switch ON / OFF The device can be switched ON or OFF by briefly pressing the yellow button. When the device is switched ON the green LED lights on. When the device will be turned OFF, the latest used settings are saved automatically. -
Page 17: Monitor Control Panel
6 combinations to four, these four combinations are evenly divided on the posi- tions of the button. Menu selection ON/OFF (mezzo Vario) Keep the left button pressed for approx. 2 sec. to enter the internal menu. To exit, turn the central button to the menu selection “exit” and press the central button briefly to confirm exit. -
Page 18: Central Button
The last magnification set will be memorized and displayed when turning the mezzo ON again. The current magnification will be displayed briefly at the bottom of the screen (this display can be deactivated in the user menu). -
Page 19: Line Marker And Shadowing At Mezzo Vario
AC input 12V DC. Power ON Press the ON/OFF button to switch ON the device. When the mezzo and the base plate is illuminated, you can put a page or an object onto the table. All the possible settings – for example zoom, colour or brightness- can be adjusted individually. -
Page 20: Important Note To The Use Of Power Supply
Please only use the power supply included in the delivery. Use of any other power supply will void the warranty! Operation of rechargeable battery (mezzo with battery operation only) Attention: In order to assure a long life span of the rechargeable battery you must follow the instructions for charging and operating the battery: ●... -
Page 21: Description Of The Menu Settings Mezzo Vario
Description of the menu settings mezzo Vario Menu selection Press the colour selection button for approx. 2 seconds until the menu appears on the screen. Main Menu Brightness Contrast Colour Saturation - 30 Ruler / Mask Ruler / Mask Settings... -
Page 22: Explanation Of The Menu Content
Explanation of the menu content The image shows in detail how the menu is structured. Main Menu Menu level 1 Advanced Settings Menu level 2 Special Settings Menu level 3 Customize Buttons Menu level 4 Function adjustment range | explication Menu settings Main Menu... - Page 23 Main Menu Ruler / Mask Settings Ruler Colour adjustment range from 0 to 31 Green adjustment range from 0 to 31 Blue adjustment range from 0 to 31 Return Main Menu AF Mode Semi-Automatic | Semi-Autom. + Zoom | Continuous/Zoom Reset to Factory Settings Return to factory settings Recall User Settings...
- Page 24 Main Menu Advanced Settings Colour Combination Setup Colour Combination 1-6 Mode Disabled | Full Colour | Grayscale | False Co- lour Foreground Black | Red | Green | Blue | Yellow | Magenta | Cyan | White | User 1 | User 2 Background Black | Red | Green | Blue | Yellow | Magenta | Cyan | White | User 1 | User 2...
- Page 25 Main Menu Advanced Settings OSD Messages ON | OFF Special Settings (see overview) Return Overview: Special Settings Zoom Extension Max. Digital Zoom 3.5x Customize Buttons Store User Settings Recall User Settings Reset to Factory Settings Expert Settings Monitor size 19" Return Main Menu Advanced Settings...
-
Page 26: Description Of The Menu Settings Mezzo Focus
Description of the menu settings mezzo Focus Menu selection Press the colour selection button for approx. 3 to 4 seconds until the menu appears on the screen. Main Menu Colour Saturation Language English AF Mode auto Min. magnification standard Max. magnification... -
Page 27: Explanation Of The Menu Content
Explanation of the menu content The image shows in detail how the menu is structured. Main Menu Menu level 1 Advanced Settings Menu level 2 Colour Combination Setup Menu level 3 User colours Menu level 4 Function adjustment range | explication Menu settings... - Page 28 Main Menu Advanced Settings Colour Combination Setup Colour Combination 1-6 Disabled | Full Colour | Grayscale | False Co- Mode lour Foreground Black | Red | Green | Blue | Yellow | Magenta | Cyan | White | User 1 | User 2 Background Black | Red | Green | Blue | Yellow | Magenta | Cyan | White | User 1 | User 2...
-
Page 29: Troubleshooting
Battery does not charge or Check that the power supply is correctly connect- battery charging indicator ed to the mains socket and that the adapter cable does not light. is correctly connected to the mezzo. -
Page 30: Technical Details
Focus height adjustable, vertically inclinable Colour True colours, preset and individually modes adjustable artificial colour modes Auto-focus Can be switched OFF * Exchanging of battery: The battery exchange may only be executed by Reinecker Vision GmbH or a licensed partner. -
Page 31: Warranty Information
Warranty Information 1. Reinecker Vision GmbH grants a warranty of 24 months (warranty period only valid within the European Union) against defects in manufacture counted from date of invoice ex Reinecker Vision GmbH. 2. All parts that have been replaced when repairing the unit will automatically become property of Reinecker Vision GmbH. -
Page 32: Notes
Notes... - Page 35 Type: mezzo Serial number: Manufacturer: Reinecker Vision GmbH Final examination: Power supply: 100 VAC – 240 VAC 50-60 Hz With plug-in power supply: 12V DC / 5000mA Power consumption: max. 80 watt...
- Page 36 Reinecker Vision GmbH In case service is necessary, please International Contact contact your authorized distributor. sales department, customer relations: Sandwiesenstraße 19 DE-64665 Alsbach-Hähnlein customer service: Erlenweg 3 DE-64665 Alsbach-Hähnlein Tel.: +49 6257 9311-0 Fax: +49 6257 9311-8230 Email: international@reineckervision.de www.reineckervision.com...
Need help?
Do you have a question about the mezzo and is the answer not in the manual?
Questions and answers