Sign In
Upload
Download
Table of Contents
Contents
Add to my manuals
Delete from my manuals
Share
URL of this page:
HTML Link:
Bookmark this page
Add
Manual will be automatically added to "My Manuals"
Print this page
×
Bookmark added
×
Added to my manuals
Manuals
Brands
FLIR Manuals
Security Camera
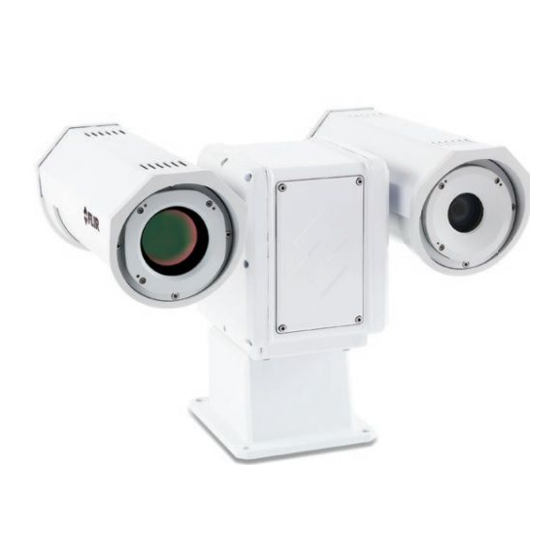
PT-606Z HD
Installation manual
FLIR PT-606Z HD Installation Manual
Hide thumbs
1
2
Table Of Contents
3
4
5
6
7
8
9
10
11
12
13
14
15
16
17
18
19
20
21
22
23
24
25
26
27
28
29
30
31
32
33
34
35
36
37
38
39
40
41
42
43
44
45
46
47
page
of
47
Go
/
47
Contents
Table of Contents
Troubleshooting
Bookmarks
Table of Contents
Table of Contents
PT-Series HD Camera Installation
Camera Overview
Installation Overview
Camera Connection Options
Serial Communications Overview
Supplied Components
Required Components
Location Considerations
Bench Testing
Camera Mounting
Galvanic Isolation
Earth Ground Connection
Installation of Camera and Galvanic Isolation Kit
Camera Connections
Remove the Back Cover
Connecting Power
Video Connections
Ethernet Connection
Serial Connection
Serial Communications Settings - Hardware DIP Switches
Cable Gland Sealing
PT-Series HD Camera Specifications
Basic Operation and Configuration
IP Camera, ONVIF Profile S Compliant
Serial And/Or IP Communications
Server Configuration
Camera Bench Test
Set IP Address Using the FLIR Discovery Network Assistant (DNA)
Log into the Camera Web Page
Live Video Page
Camera Control and Status
Web Control Panel
Camera Configuration
Expert and Admin Accounts
Setup Menu
Maintenance Menu
Thermal Imaging Overview
Troubleshooting Tips
Serial Address: Decimal to Binary Conversion
Address Conversion Table
Advertisement
Quick Links
1
Camera Connection Options
2
Connecting Power
3
Ip Camera, Onvif Profile S Compliant
4
Set Ip Address Using the Flir Discovery Network Assistant (Dna)
5
Troubleshooting Tips
Download this manual
Installation
Manual
PT-Series HD
Table of
Contents
Previous
Page
Next
Page
1
2
3
4
5
Advertisement
Table of Contents
Need help?
Do you have a question about the PT-606Z HD and is the answer not in the manual?
Ask a question
Questions and answers
Related Manuals for FLIR PT-606Z HD
Security Camera FLIR PT Series Installation And User Manual
(58 pages)
Camera Accessories FLIR PT-602CZ Installation Manual
(49 pages)
Security Camera FLIR PT-602CZ Installation Manual
Pt-602cz camera (38 pages)
Security Camera FLIR PTZ-35 MS Installation And Operation Manual
High resolution multi sensor camera (35 pages)
Security Camera FLIR PTZ-35x140MS Installation And Operation Manual
(43 pages)
Security Camera Flir Photon User Manual
Uncooled microbolometer camera (77 pages)
Security Camera FLIR PT series Installation Manual
(48 pages)
Security Camera FLIR PT-Series Installation Manual
(27 pages)
Security Camera FLIR PT-Series Installation Manual
Flir pt-series camera installation manual (24 pages)
Security Camera FLIR PatrolIR B User Manual
Pan and tilt (36 pages)
Security Camera FLIR P143E4 SERIES Quick Start Manual
4mp hd ip eyeball dome camera (2 pages)
Security Camera FLIR PT-608 HD Installation Manual
(47 pages)
Security Camera FLIR PT-612 HD Installation Manual
(47 pages)
Security Camera FLIR PT-625 HD Installation Manual
(47 pages)
Security Camera FLIR PT-644 HD Installation Manual
(47 pages)
Security Camera FLIR PT-617 HD Installation Manual
(47 pages)
This manual is also suitable for:
Pt series hd
Pt-612 hd
Pt-608 hd
Pt-625 hd
Pt-602cz hd
Pt-644 hd
...
Show all
Pt-617 hd
Table of Contents
Print
Rename the bookmark
Delete bookmark?
Delete from my manuals?
Login
Sign In
OR
Sign in with Facebook
Sign in with Google
Upload manual
Upload from disk
Upload from URL


Need help?
Do you have a question about the PT-606Z HD and is the answer not in the manual?
Questions and answers