Table of Contents
Advertisement
Quick Links
Be sure ALL installers read, understand, and have access to this manual at all times.
Genuine Broaster Chicken®, Broasted®, Broaster Chicken®, Broaster Foods®. and Broasterie® are registered
trademarks. Usage is available only to licensed operators with written authorization from the Broaster Company.
FOR EXPORT USE ONLY
OPERATION MANUAL
BROASTER
PRESSURE FRYER
The Broaster Company
2855 Cranston Road, Beloit, WI 53511-3991
608/365-0193 broaster.com
Manual #16285 8/05
®
2400XP
Rev: 11/14
© 2014 the Broaster Company
Printed In U.S.A.
Advertisement
Table of Contents

Subscribe to Our Youtube Channel
Related Manuals for Broaster 2400XP


Summary of Contents for Broaster 2400XP
- Page 1 Be sure ALL installers read, understand, and have access to this manual at all times. Genuine Broaster Chicken®, Broasted®, Broaster Chicken®, Broaster Foods®. and Broasterie® are registered trademarks. Usage is available only to licensed operators with written authorization from the Broaster Company. The Broaster Company 2855 Cranston Road, Beloit, WI 53511-3991 608/365-0193 broaster.com...
- Page 3 All adjustments and repairs shall be made If at any time the POWER by an authorized Broaster Company repre- ON light does not turn off sentative. when the cook/filter switch is moved to...
-
Page 5: Table Of Contents
TABLE OF CONTENTS 1 – LIMITED WARRANTY ..................... 1-1 2 – OWNER’S RESPONSIBILITY ..................2-1 3 – INSTALLATION INSPECTION ..................3-1 4 – GETTING TO KNOW YOUR BROASTER ® PRESSURE FRYER ........4-1 5 – PRE-COOKING PREPARATIONS .................. 5-1 O-RING LUBRICATION ....................5-1 COVER CHECK ........................ - Page 6 COVER, YOKE, AND LIFT TIPS ................13 - 4 PRESSURE SYSTEM TIPS..................13 - 4 PRODUCT TIPS......................13 - 5 Fresh Chicken ....................13 - 5 Frozen IQF Chicken..................13 - 6 FILTERING TIPS ....................... 13 - 7 broaster.com Manual #16284 8/05 Rev: 1/14...
-
Page 7: Limited Warranty
1 – LIMITED WARRANTY Subject to the terms and conditions of this warranty, The Broaster Company (Company) warrants that all equipment and parts manufactured and sold by the Company and purchased new from an autho- rized Broaster Distributor or Export Management Company are free from defects in material and work- manship for a period of one year from date of installation if installation is made by a qualified installer in accordance with applicable laws and regulations. -
Page 9: Owner's Responsibility
Pressure Fryer so records • Allow only properly trained personnel to may be updated. ® operate, clean and maintain a Broaster If you are a new owner of a used unit or Pressure Fryer. have relocated your Broaster Pressure Fryer, please take a minute to notify us •... -
Page 11: Installation Inspection
Gas Conversion This can be done by installing the unit in USA and Canada a battery of appliances, in an alcove or • Contact your local Broaster Company with adequate ties. representative for converting from one type of gas to another. -
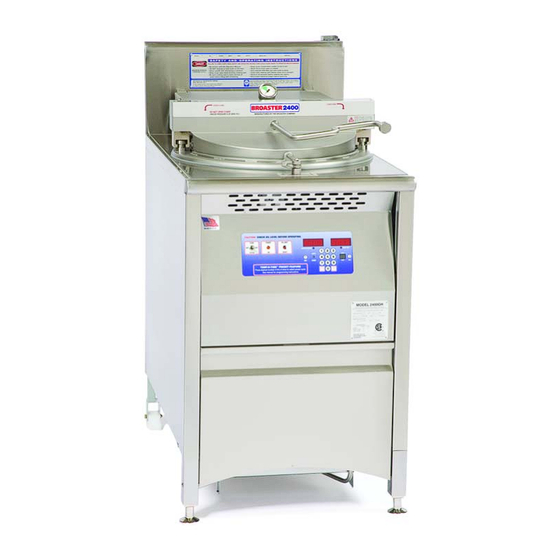
Page 13: Getting To Know Your Broaster Pressure Fryer
4 – GETTING TO KNOW YOUR ® BROASTER PRESSURE FRYER CAUTION! CHECK OIL LEVEL BEFORE OPERATING For Gas Models Only 4–1 broaster.com Manual #16285 8/05 Rev: 2/14... - Page 14 Drip Pan Drain horizontal, valve is closed. When verti- Line. Drip Pan is removable for clean- cal, valve is open. ing. Drip Pan Drain Line: Directs counter- top liquid toward Condensate Pan. 4–2 broaster.com Manual #16285 8/05 Rev: 2/14...
- Page 15 Allow valve to snap closed. 16. Pressure Gauge: Indicates pressure within the cooking well. Normal oper- ating pressure is 12-14 PSI. 4–3 broaster.com Manual #16285 8/05 Rev: 2/14...
- Page 16 Check oil level before DO NOT rest basket on turning cook/filter switch top flange of cooking well. to COOK. Damage to area in contact with O-ring can cause leaking under pressure or O-ring failure. 4–4 broaster.com Manual #16285 8/05 Rev: 2/14...
-
Page 17: Pre-Cooking Preparations
Check oil level before spots. They could discolor the cooking turning cook/filter switch well, damage a heating element, scorch to COOK. or burn shortening, reducing its useful life. 5–1 broaster.com Manual #16285 8/05 Rev: 2/14... -
Page 18: Oil Level
If using ® Genuine Broaster breading and mari- nades, you can obtain a Trademark Authori- zation allowing the use of the Broaster Company trademarks in your advertising and menus. 5–2 broaster.com Manual #16285 8/05 Rev: 2/14... -
Page 19: 1800Gh Lighting Instructions
To light pilot and main burners, turn cook/ filter switch to COOK. This switch is not used on gas pressure fryers manufactured for use in the European Union. 5–3 broaster.com Manual #16285 8/05 Rev: 2/14... - Page 21 Cycle Count Display to zero. is CLOSED. CONTROLLER BASIC Time Display: Shows time countdown during a cook cycle, program values PROGRAMMING during programming, and pro- Normal Operating Mode grammed time during idle period. 6–1 broaster.com Manual #16285 8/05 Rev: 5/14...
- Page 22 Response: Controller returns to idle mode. Set Time Action: Press Cook Time Button twice within 5 seconds. Response: Programming mode has been entered. Flashing Time Display reads “##:##.” (##:## = time value in minutes:seconds, such as 08:00). 6–2 broaster.com Manual #16285 8/05 Rev: 2/14...
-
Page 23: Choose Preset Cook Cycle
Repeat the process as described. After the Response: The TEMP display turns off presets for #9 are displayed, pressing the and the TIME display flashes. RESET button again causes the control to return to normal operation. 6–3 broaster.com Manual #16285 8/05 Rev: 2/14... -
Page 25: Cooking Weight, Temperature And Time
Fish 0.09 kg (3 oz) Filets 182° C (360° F) 3:00 - 4:00 minutes Onion Rings 9.53 - 12.70 mm (3/8 - 1/2 inch) 182° C (360° F) 2:00 - 3:00 minutes thick 7–1 broaster.com Manual #16285 8/05 Rev: 2/14... - Page 26 24 pieces 168° C (335° F) 17:00 - 19:00 min. Wings 60 pieces 168° C (335° F) 12:00 - 14:00 min. Mixed Load 48 pieces 168° C (335° F) 17:00 - 19:00 min. 7–2 broaster.com Manual #16285 8/05 Rev: 2/14...
- Page 27 Min. 182°C (360°F) .91 kg (2 lb.) 4.54 kg (10 lbs) ALWAYS COOK ALL BROASTER FOODS UNTIL THE INTERNAL TEMPERATURE REACHES THE FOLLOWING MINIMUMS: Chicken, White - 170°F; Chicken, Dark - 180°F; Corn Dogs/Pork - 160°F to 170°F; Fish - 155°F 7–3...
-
Page 29: Cooking Oil Care And Filtering
• Store cooking oil at room temperature: tained. Straining methods only remove ° - 75° F. ® crumbs. Using a built-in filter, Broaster fil- ® ter paper and Broaster filtering com- • Do not reuse the oil container. -
Page 30: Filtering
Be sure filter pan, with components, is installed under unit properly. Ensure O-ring is installed on (5) Riser Line and is aligned with suction line. Turn cook/ filter switch OFF and OPEN cooking well cover. 8–2 broaster.com Manual #16285 8/05 Rev: 11/14... -
Page 31: Filtering Hints
Filter pan cover must be wiped clean after each filtering cycle. Return clean filter pan (equipped with all necessary clean filter components including cover) under the fryer before operation. 8–3 broaster.com Manual #16285 8/05 Rev: 2/14... -
Page 33: Cleaning
To ensure 14.0 gallons of warm tap water. Thor- cover remains OPEN when cleaning, ® oughly dissolve 14 oz. of Broaster install cleaning flag #12814 over latch cooking well cleaner in the water. column. Cleaning flag is supplied with... -
Page 34: Food Basket
Use O-ring tool #12791 to Hot oil could splash causing serious clean O-ring groove. Use a non-metal- burns. lic heavy duty commercial scouring pad that is USDA approved to clean cover. 9–2 broaster.com Manual #16285 8/05 Rev: 2/14... -
Page 35: Splash Shield
Wipe gas springs with clean cloth or paper towel. Slide splash shield (4) forward and up toward the end of the cover handle (1). Assemble in reverse order. 9–3 broaster.com Manual #16285 8/05 Rev: 2/14... -
Page 36: Probe Guard
It is very important to periodically check the screws fastening the probe guard and basket guides to ensure that they do not loosen. If you find that they are coming loose, tighten them immediately. 9–4 broaster.com Manual #16285 8/05 Rev: 2/14... -
Page 37: Minimum Preventive Maintenance Requirements
Filter Cooking Oil See FILTERING Clean and Lubricate O-Ring Slide Rods Gas Spring Cover Clean Temperature Sensor Probe Guard & Basket Guides Note: If cooking volume is high, perform above requirements more frequently. 9–5 broaster.com Manual #16285 8/05 Rev: 2/14... -
Page 39: Nightly Shutdown
Dispose of all oil-soiled papers and rags in a trash container that Clean food basket. is in a ventilated area away from all cooking equipment or other heat Clean condensate pan. sources such as direct sunlight. 10–1 broaster.com Manual #16285 8/05 Rev: 2/14... -
Page 41: Seasonal Shutdown
Lubricate cover O-ring and food bas- on page 8-1. Discard cooking oil. ket with olive oil. See “Cleaning” on page 9-1. CLOSE cover and pressure regulating valve. Turn main circuit breaker OFF and unplug electrical cord. 11–1 broaster.com Manual #16285 8/05 Rev: 2/14... -
Page 43: Troubleshooting
12 – TROUBLESHOOTING All adjustments and repairs shall be made by an authorized Broaster Company representative. ELECTRICAL TIPS COMPLAINT CAUSE REMEDY Main power OFF Turn ON. Cook/filter switch OFF Turn to COOK. POWER ON light not illu- Hi-limit tripped Turn cook/filter switch OFF. -
Page 44: Solid State Controller Tips
INSTRUCTIONS” on page 5- Gas control OFF Turn ON. Main burner will not ignite Controller in program mode Exit program mode. Cook/filter switch OFF Turn to COOK. Hi-limit tripped Turn cook/filter switch OFF. Contact service person. 12–2 broaster.com Manual #16285 8/05 Rev: 2/14... -
Page 45: Cover, Yoke, And Lift Tips
Contact service person. position Port is plugged Clean port on bottom of Pressure Gauge does not cover. indicate rising pressure when exhaust valve is Pressure gauge is dam- Replace pressure gauge. closed. aged 12–3 broaster.com Manual #16285 8/05 Rev: 2/14... -
Page 46: Pressure System Tips
REMEDY Pressure regulating valve CLOSE. OPEN Pressure regulating valve Contact service person. No pressure dirty or blocked open Leaks around cover Replace O-ring. O-ring Turn cook/filter switch OFF. Excess pressure Contact service person. 12–4 broaster.com Manual #16285 8/05 Rev: 2/14... -
Page 47: Product Tips
Cook time too short Increase cook time. No flavor Improper marination Check procedures. Product stuck together Float basket while loading. White spots Food basket overloaded Decrease load size. Dark spots Dirty oil Filter or replace oil. 12–5 broaster.com Manual #16285 8/05 Rev: 2/14... - Page 48 Increase cook time. Overcooked Check cook time. No flavor Old product Discard Product stuck together Float basket while loading. White spots Food basket overloaded Decrease load size. Dark spots Dirty oil Filter or replace. 12–6 broaster.com Manual #16285 8/05 Rev: 2/14...
-
Page 49: Filtering Tips
See “Cooking Oil Care pumping when oil is level installed or crumbs under and Filtering” on page 8- with top of hold down, filter paper or hold down approximately 1 inch of oil in bottom 12–7 broaster.com Manual #16285 8/05 Rev: 2/14... - Page 52 The Broaster Company 2855 Cranston Road, Beloit, WI 53511-3991 608/365-0193 broaster.com...
Need help?
Do you have a question about the 2400XP and is the answer not in the manual?
Questions and answers