Broaster 1600 Installation Manual
Pressure fryer
Hide thumbs
Also See for 1600:
- Service manual (131 pages) ,
- Operation manual (57 pages) ,
- Installation manual (56 pages)
Table of Contents
Advertisement
Quick Links
INSTALLATION MANUAL
®
BROASTER
1600 AND 1800
PRESSURE FRYER
Be sure ALL installers read, understand, and have access to this manual at all times.
Genuine Broaster Chicken®, Broasted®, Broaster Chicken®, Broaster Foods®. and Broasterie® are registered
trademarks. Usage is available only to licensed operators with written authorization from the Broaster Company.
The Broaster Company
2855 Cranston Road, Beloit, WI 53511-3991
608/365-0193 broaster.com
Design Certified By:
© 1999 the Broaster Company
1600: CSA, NSF and UL
Printed In U.S.A.
1800: CSA (AGA & CGA), NSF and UL
#14678 1/99 Rev: 5/14
Advertisement
Table of Contents

Subscribe to Our Youtube Channel
Related Manuals for Broaster 1600


Summary of Contents for Broaster 1600
- Page 1 Be sure ALL installers read, understand, and have access to this manual at all times. Genuine Broaster Chicken®, Broasted®, Broaster Chicken®, Broaster Foods®. and Broasterie® are registered trademarks. Usage is available only to licensed operators with written authorization from the Broaster Company. The Broaster Company 2855 Cranston Road, Beloit, WI 53511-3991 608/365-0193 broaster.com...
- Page 3 OFF. DO NOT service immediately. attempt to operate unit during a power fail- 1600/1800E Solid State Controls: If at any ure. time the POWER ON light does not turn off when the cook/filter switch is moved...
-
Page 5: Table Of Contents
2 - OWNER’S RESPONSIBILITY..................2 - 1 3 - INSTALLATION INSPECTION ..................3 - 1 4 - GETTING TO KNOW YOUR BROASTER PRESSURE FRYER........4 - 1 5 - PRE-COOKING PREPARATIONS .................. 5 - 1 O-RING LUBRICATION ....................5 - 1 COVER CHECK...................... - Page 6 FRESH PRODUCTS ...................... 8 - 1 FROZEN IQF CHICKEN ....................8 - 2 1600 Broaster Recipe Product Cooking Chart ............. 8 - 3 1800 Broaster Recipe Product Cooking Chart ............. 8 - 4 9 - COOKING OIL CARE AND FILTERING ............... 09 - 1 OIL CARE .........................
-
Page 7: Limited Warranty
1 – LIMITED WARRANTY Subject to the terms and conditions of this warranty, The Broaster Company (Company) warrants that all equipment and parts manufactured and sold by the Company and purchased new from an autho- rized Broaster Distributor or Export Management Company are free from defects in material and work- manship for a period of one year from date of installation if installation is made by a qualified installer in accordance with applicable laws and regulations. -
Page 9: Owners Responsibility
Pressure Fryer so records • Allow only properly trained personnel to may be updated. ® operate, clean and maintain a Broaster If you are a new owner of a used unit or Pressure Fryer. have relocated your Broaster Pressure Fryer, please take a minute to notify us •... -
Page 11: Installation Inspection
• Units manufactured for use in the EU are PRESSURE FRYER (Section 4). DO not convertible from one type of gas to NOT install unit where traffic area’s are another. on either side or in back of unit. 3–1 broaster.com Manual #16284 8/05 Rev 1/14... -
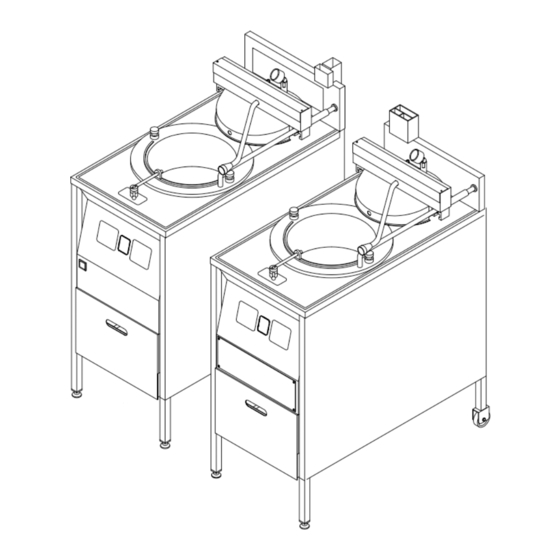
Page 13: Getting To Know Your Broaster Pressure Fryer
4 - GETTING TO KNOW YOUR ® BROASTER PRESSURE FRYER Model 1600: 4–1 broaster.com Manual #16284 8/05 Rev 1/14... - Page 14 Model 1800: 4–2 broaster.com Manual #16284 8/05 Rev 1/14...
- Page 15 Model 1800GHCE: 4–3 broaster.com Manual #16284 8/05 Rev 1/14...
- Page 16 7. Model 1800GH Pilot Burner: A small flame used to ignite the main burner. * This switch is not on gas pressure fryers manufactured for use in the European Union. 4–4 broaster.com Manual #16284 8/05 Rev 1/14...
- Page 17 Allow valve to snap closed. 14. Pressure Gauge: Indicates pressure within the cooking well. Normal oper- ating pressure is 12-14 PSI. 4–5 broaster.com Manual #16284 8/05 Rev 1/14...
- Page 18 Check oil level before turning cook/filter switch to COOK. 20. 1600/1800E Hot Oil Level: Indicates proper level when oil is at operating temperature. 1800GH: HOT OIL LEVEL is stamped on capillary guard. Model 1600: 21.
-
Page 19: Pre-Cooking Preparations
Solid shortening must be soft enough to be packed around and completely cover heating elements on the 1600/1800E and sides and bottom of cooking well on the 1800GH. If not, there will be places on heating elements and cooking well not covered with shortening. -
Page 20: Oil Level
They have all been tested for the best possible results in the unit. By ® using Genuine Broaster condiments, you can obtain a Trademark Authorization ® allowing the use of the Broaster Company trademarks in your advertising. broaster.com Manual #16284 8/05 Rev 1/14... -
Page 21: 1800Gh Lighting Instructions
5. To light pilot and main burners, turn cook/filter switch to COOK. * This Switch is not used on gas pressure fryers manufactured for use in the European Union. broaster.com Manual #16284 8/05 Rev 1/14... -
Page 23: 1600 Mechanical Control Panel
6 - 1600 MECHANICAL CONTROL PANEL FAMILIARIZATION 1. Timer: Outer dial indicates desired 6. Hi-Limit Control: Turns the power off cooking time. Inner pointer indicates if the oil temperature exceeds the set time countdown during a cook cycle. point of the control. Turn unit OFF and DO NOT attempt to operate unit until it 2. - Page 24 4. Valve Closed Indicator Light: Illumi- If not, it is correctly reset. nates when pressure regulating valve is CLOSED. 6. Temperature Control: Regulates oil temperature. 7. Heat On Indicator Light: Illuminates when oil is being heated. broaster.com Manual #16284 8/05 Rev 1/14...
-
Page 25: Solid State Control Panel
5. Valve Closed Indicator Light: Illumi- 8. Rotary Knob: Changes program val- nates when pressure regulating valve ues. is CLOSED. broaster.com Manual #16284 8/05 Rev: 1/14... -
Page 26: Controller Programming
“###F.” (### = temperature value ie: Response: Controller returns to idle 360°F) mode. Action: If desired, turn rotary knob to change displayed value. Press cook temperature button to enter new value into memory. Response: Controller returns to idle mode. broaster.com Manual #16284 8/05 Rev: 1/14... -
Page 27: Dual Display Familiarization
9. Time Display: Shows time count- 16. Cycle Count Reset Button: Resets down during a cook cycle, program the cycle count display to “zero”. values during programming and pro- grammed time during idle period. broaster.com Manual #16284 8/05 Rev: 5/14... -
Page 28: Controller Programming
5 seconds. before reaching “99.” Upon the next cycle completion, the dis- Response: Programming mode has play will begin counting at “01.” been entered. Flashing Time Display reads “##:##.” (##:## = time value ie: 08:00) broaster.com Manual #16284 8/05 Rev: 1/14... -
Page 29: Temp-N-Time Familiarization
6. Time Display: Shows time count- 13. Cycle Count Reset Button: Resets down during a cook cycle, program the cycle count display to “zero”. values during programming and pro- grammed time during idle period. broaster.com Manual #16284 8/05 Rev: 5/14... -
Page 30: Controller Basic Programming
Response: Controller returns to idle mode. Set Time: Action: Press Cook Time Button twice within 5 seconds. Response: Programming mode has been entered. Flashing Time Display reads “##:##.” (##:## = time value ie: 08:00) broaster.com Manual #16284 8/05 Rev: 1/14... -
Page 31: Chose Preset Cook Cycle
TIME display will Repeat the process as described. After the flash. presets for #9 are displayed, pressing the RESET button again will cause the control to return to normal operation. broaster.com Manual #16284 8/05 Rev: 1/14... -
Page 33: Cooking Weight, Temperature And Time
MAXIMUM LOAD: Corn Dogs/Pork - 160 to170°F; Fresh bone-in chicken Fish - 155°F 1600: 3.2 Kg (7 lbs.) The charts below give suggested tempera- 1800: 6.4 Kg (14 lbs) ture and time settings. Actual cook times may vary depending on a products internal Placing more then the temperature before cooking. -
Page 34: Frozen Iqf Chicken
(IQF) CHICKEN, FROZEN aximum Load Size: ALWAYS COOK ALL BROASTER RECIPE • 1600: 2 chickens (16 pieces) PRODUCTS UNTIL THE INTERNAL • 1800: 4 chickens (32 pieces) TEMPERATURE REACHES THE FOLLOWING MINIMUMS: Chicken, White - 170°F;... -
Page 35: Cooking Oil Care And Filtering
9 - COOKING OIL CARE AND FILTERING OIL CARE ® Using a built in filter, Broaster filter paper IMPORTANT ® and Broaster filtering compounds, you • Store cooking oil at room temperature: can increase useful oil life up to 200%. -
Page 36: Filtering
(1800) of Bro-Clean filtering com- pound on top of filter paper and/or 5 oz. (1600) or 10 oz. (1800) of XL filtering com- pound to cooking well, and (4) Filter Cover. For best results change paper after each fil- ter cycle. -
Page 37: Filtering Hints
Using a clean cloth or paper towel, wipe crumbs from filter hold down, filter pan interior and top & bottom of filter pan cover. Never use soap and water. broaster.com Manual #16284 8/05 Rev 1/14... -
Page 39: Cleaning
5. Close drain valve. Fill cooking well aid instructions on container. (1600: 4.5 gallons OR 1800: 9 gallons) with warm tap water. Thoroughly dis- When cleaning with solve 4.5 oz. (1600) OR 9.0 oz. (1800) ® water, use Broaster ® of Broaster cooking well cleaner in cooking well cleaner #99500. -
Page 40: Food Basket
COVER. Wipe with a clean cloth or paper cover. towel. No lubrication is necessary. 6. Remove any oil or grease build-up from Pressure Relief Valve and Pres- sure Gauge Ports on bottom of cover. 10-2 broaster.com Manual #16284 8/05 Rev 1/14... -
Page 41: Splash Shield
Dispose of all oil-soiled papers and rags in a trash container that is in a ventilated area away from all cooking equipment or other heat sources such as direct sunlight. 10-3 broaster.com Manual #16284 8/05 Rev 1/14... -
Page 42: Probe Guard & Basket Guides
The probe guard and basket guides for Models 1600 and 1800GH, or a 7/ can be placed in the cooking well 16” wrench for the Model 1800E. while soaking. -
Page 43: Minimum Preventive Maintenance Requirements
After each filter- Clean Filter Pan Cover ing cycle Filter Cooking Oil See FILTERING Clean and Lubricate O-Ring Slide Rod Probe Guard & Basket Guides If cooking volume is high, perform above requirements more frequently. 10-5 broaster.com Manual #16284 8/05 Rev 1/14... - Page 45 OFF. 8. CLOSE cover and pressure regulating 4. Wipe oil and crumbs from unit sur- valve. faces with a clean cloth. 5. Clean food basket. 6. Clean condensate pan. 11-1 broaster.com Manual #16284 8/05 Rev 1/14...
-
Page 47: Troubleshooting
12 - TROUBLESHOOTING All adjustments and repairs shall be made by an authorized Broaster Company representative. ELECTRICAL TIPS COMPLAINT CAUSE REMEDY 1. Main power OFF 1. Turn ON 2. Cook/filter switch OFF 2. Turn to COOK POWER ON light not illu- 3. -
Page 48: Solid State Controller Tips
(1800GH) off valve Display reads CHEC 3. Open or faulty wall fuse 3. Check wall fuse or circuit breaker 4. Oil temperature not rising 4. Turn cook/filter switch properly OFF. Contact service person. 12-2 broaster.com Manual #16284 8/05 Rev 1/14... -
Page 49: 1800Gh Gas Tips
2. Turn ON 3. Controller in program 3. Exit program mode Main burner won’t ignite mode 4. Cook/filter switch OFF 4. Turn to COOK 5. Hi-limit tripped 5. Turn cook/filter switch OFF. Contact service person. 12-3 broaster.com Manual #16284 8/05 Rev 1/14... -
Page 50: Cover And Yoke Tips
2. Pressure regulating valve 2. Contact service person No pressure dirty or blocked open 3. Leaks around cover O- 3. Replace O-ring ring 1. Turn cook/filter switch Excess pressure OFF. Contact service person. 12-4 broaster.com Manual #16284 8/05 Rev 1/14... -
Page 51: Product Tips
1. Improper marination 1. Check procedures 1. Product stuck together 1. Float basket while load- White spots 2. Food basket overloaded 2. Decrease load size Dark spots 1. Dirty oil 1. Filter or replace 12-5 broaster.com Manual #16284 8/05 Rev 1/14... -
Page 52: Filtering Tips
1. See COOKING OIL CARE pumping when oil is level installed or crumbs under AND FILTERING with top of hold down, filter paper or hold down approximately 1 inch of oil in bottom 12-6 broaster.com Manual #16284 8/05 Rev 1/14... - Page 54 The Broaster Company 2855 Cranston Road, Beloit, WI 53511-3991 608/365-0193 broaster.com...
Need help?
Do you have a question about the 1600 and is the answer not in the manual?
Questions and answers