Broaster 2400 Series Installation Manual
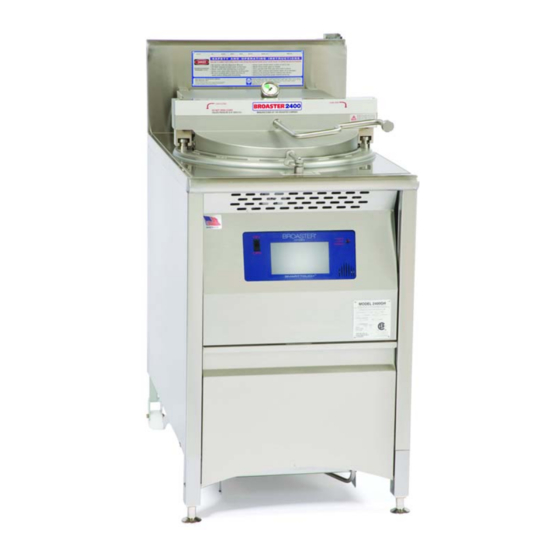
Pressure fryer w/smarttouch
Hide thumbs
Also See for 2400 Series:
- Service manual (92 pages) ,
- Operation manual (64 pages) ,
- Installation manual (30 pages)
Table of Contents
Advertisement
Quick Links
INSTALLATION MANUAL
BROASTER
2400
®
PRESSURE FRYER w/SmartTouch
Be sure ALL installers read, understand, and have access to this manual at all times.
Genuine Broaster Chicken®, Broasted®, Broaster Chicken®, Broaster Foods®. and Broasterie® are registered
trademarks. Usage is available only to licensed operators with written authorization from the Broaster Company.
Broaster Company
2855 Cranston Road, Beloit, WI 53511-3991
608/365-0193 broaster.com
Design Certified By:
© 2013 Broaster Company
Manual 17278 9/13 Rev 9/16
CSA & NSF
Printed In U.S.A.
Advertisement
Table of Contents

Subscribe to Our Youtube Channel
Related Manuals for Broaster 2400 Series


Summary of Contents for Broaster 2400 Series
- Page 1 Be sure ALL installers read, understand, and have access to this manual at all times. Genuine Broaster Chicken®, Broasted®, Broaster Chicken®, Broaster Foods®. and Broasterie® are registered trademarks. Usage is available only to licensed operators with written authorization from the Broaster Company. Broaster Company 2855 Cranston Road, Beloit, WI 53511-3991 608/365-0193 broaster.com...
- Page 3 OFF position, disconnect the power to If there is a power failure, turn cook/filter the fryer and contact your local Broaster switch OFF. On the Model 2400GH, also Company representative for service slide switch on gas valve OFF.
- Page 4 CSA 1.8 to guard against transmission of strain to the gas connectors. Failure to restrain the fryer could allow it to move, causing hot shortening to spill out, or a possible break in the gas line causing an explosive condition. broaster.com Manual #17278 9/13 Rev: 10/15...
-
Page 5: Table Of Contents
Unit Dimensions For Gas Hook-Up ..............3 - 4 GAS PIPING ........................3 - 5 Example Of Piping System Design ..............3 - 6 Wiring Diagrams....................3 - 7 Domestic: 2400GH ..................3 - 7 Export: 2400GHXP ..................3 - 7 EU: 2400GHCE.....................3 - 8 broaster.com Manual #17278 5/02 Rev: 6/16... - Page 6 COVER ASSEMBLY ....................5 - 1 INITIAL START-UP.......................5 - 1 ELECTRIC ......................5 - 1 GAS ........................5 - 2 LIGHTING INSTRUCTIONS ..................5 - 2 Start-Up ......................5 - 2 Shut Down ......................5 - 3 MAIN BURNER FLAME ADJUSTMENT .............5 - 3 broaster.com Manual #17278 5/02 Rev: 10/15...
-
Page 7: Pre-Installation
• DO NOT install unit where traffic areas are on either side or in back of unit. broaster.com Manual #17278 9/13 Rev 6/15... -
Page 8: Recommended Ventilation Requirements
1800 cu. ft./minute. Canopy hood open on three sides or less: 1200 cu. ft./minute. 5. Exhaust Air Velocity: All exhaust ducts should be sized to provide an air velocity in the ducts of at least 1500 ft./minute. broaster.com Manual #17278 9/13 Rev 2/14... -
Page 9: Hood Dimensions In Inches
DANGER MA XI MU M WO RK I NG PR ES SU RE 1 5 P SI OPEN C AUT ION ! CHE CK OIL LE VEL BE FOR E O PER ATI NG broaster.com Manual #17278 9/13 Rev 2/14... -
Page 10: Hood Dimensions In Millimeters
Hood Dimension In Millimeters: broaster.com Manual #17278 9/13 Rev 2/14... -
Page 11: Filter Pan Assembly
2. Install riser line onto pan. First install 3. Tighten all nuts and bolts. line into fitting (2) on bottom center of pan while the mounting plate fits over studs (3) on front of pan. broaster.com Manual #17278 9/13 Rev 2/14... -
Page 13: 2400Gh Installation
> Install and ANSI Z83.11/CSA 1.8 com- pliant restraining device (such as Broaster > US & Canada: Installation must con- Company part number 17708) per manu- form with local codes, or in the absence of facturers instructions. -
Page 14: Electrical Characteristics
National Electrical Code, ANSI/NFPA 70, or receptacle. DO NOT cut or remove the Canadian Electrical Code, CSA C22.2, grounding prong from this plug. as applicable. broaster.com Manual #17278 9/13 Rev 10/15... -
Page 15: Gas Characteristics
Maximum gas supply line pressure: Natural (G20) Gas: 7” wc (17.4mbar) Propane (G31) Gas: 14” wc (34.9 mbar) broaster.com Manual #17278 9/13 Rev 6/16... -
Page 16: Gas Conversion
Gas Conversion: High Altitude: USA & Canada • For operation at elevations above 2,000 • Contact your local Broaster Company feet above sea level, gas input must be representative for converting from one reduced 4% for each 1,000 feet. Con- type of gas to another. -
Page 17: Gas Piping
• Pressure loss in the piping must not exceed 0.3” W.C. • Be sure gas supply piping is of the proper size for the BTU input. Take into consideration all other gas appliances broaster.com Manual #17278 9/13 Rev 10/15... - Page 18 4,100 8,300 1,270 2,000 3,600 7,400 1,150 1,850 3,250 6,800 1,050 1,700 3,000 6,200 1,600 2,800 5,800 1,500 2,600 5,400 1,400 2,500 5,100 1,250 2,200 4,500 1,130 2,000 4,100 1,050 1,850 3,800 1,700 3,500 broaster.com Manual #17278 9/13 Rev 10/15...
-
Page 19: Wiring Diagrams
Wiring diagrams: MODEL 2400GH: DOMESTIC MODEL 2400GHXP: EXPORT broaster.com Manual #17278 9/13 Rev 10/15... - Page 20 MODEL 2400GHCE & UK: broaster.com Manual #17278 9/13 Rev 6/16...
-
Page 21: 2400E Installation
When installed, the unit must be electrically grounded in accordance with local codes, or in the absence of local codes, with the National Electrical Code, ANSI/NFPA 70, or the Canadian Electrical Code, CSA C22.2, as applicable. broaster.com Manual #17278 9/13 Rev 10/15... -
Page 22: Electrical Hook-Up
3 phase. In this case, applied connections to be sure voltage must be connected to L1, L2 they are fully tightened for proper electri- and L3 of contactor C1 and a ground cal continuity. wire to the GND connector. broaster.com Manual #17278 9/13 Rev 9/16... - Page 23 2400E 208 or 240VAC: broaster.com Manual #17278 9/13 Rev 9/16...
- Page 24 EXPORT: 2400E ST 220/380VAC to 240/415VAC broaster.com Manual #17278 9/13 Rev 9/16...
-
Page 25: Eu: 2400Ece
EU: 2400ECE ST 230/400V: broaster.com Manual #17278 9/13 Rev 10/15... -
Page 27: Operational Check-Out
OPEN. 9. If CHEC appears in display, turn unit off and back on. broaster.com Manual #17278 9/13 Rev 10/15... -
Page 28: Gas
9. Set time and temperature as described in section 6 of the operation 5. To light pilot and main burners, turn manual. power switch ON. broaster.com Manual #17278 9/13 Rev 10/15... -
Page 29: Shut Down
5. Replace the side panel. To get the best flame sev- eral adjustments, both up and down and front and back, may be necessary. broaster.com Manual #17278 9/13 Rev 10/15... - Page 32 Broaster Company 2855 Cranston Road, Beloit, WI 53511-3991 608/365-0193 broaster.com...
Need help?
Do you have a question about the 2400 Series and is the answer not in the manual?
Questions and answers