Table of Contents
Advertisement
Quick Links
Advertisement
Table of Contents

Subscribe to Our Youtube Channel
Related Manuals for Stratasys Dimension BST 1200


Summary of Contents for Stratasys Dimension BST 1200
- Page 1 BST 1200 / SST 1200 User Guide...
- Page 2 Notice The information in this document is subject to change without notice. STRATASYS, INC. MAKES NO WARRANTY OF ANY KIND WITH REGARD TO THIS MATE- RIAL, INCLUDING, BUT NOT LIMITED TO, THE IMPLIED WARRANTIES OF MERCHANT- ABILITY AND FITNESS FOR A PARTICULAR PURPOSE. Stratasys, Inc. shall not be liable for errors contained herein or for incidental or consequential damages in connection with the furnishing, performance, or use of this material.
-
Page 3: Introduction
Breakaway Support Technology (BST) or Soluble Support Technology (SST), your completed parts are quickly available for review and test. Dimension is an innovative combination of proprietary hardware, software, and material technology. Congratulations… you’ve made a smart choice! Dimension BST 1200 / SST 1200 User Guide... -
Page 4: How To Use This Manual
User Interface (UI) on the front panel of the printer. Throughout the User Guide, text representing messages that appear on the UI are presented in a specific format. Interface Messages appear as a bold, serif, fixed-pitch (mono-space) font. Dimension BST 1200 / SST 1200 User Guide... -
Page 5: Sections Of The Manual
Allows you to perform some problem diagnosis and correction procedures in the event that your printer has a problem. A Troubleshooting Checklist, Fault Determination Codes, and a procedure to recover from a Loss of Extrusion are provided. Dimension BST 1200 / SST 1200 User Guide... - Page 6 Dimension BST 1200 / SST 1200 User Guide...
-
Page 7: Table Of Contents
Display Panel and Keypad ............. 29 Inserting a Modeling Base............30 Powering On Dimension ............30 Powering Off Dimension ............31 Cycling Power ................ 31 Loading Material..............32 Unloading Material ..............35 Dimension BST 1200 / SST 1200 User Guide... - Page 8 Remove Debris Buildup ............... 50 Vacuum Build Chamber ............... 50 Clean Door Glass................. 50 Chamber Light Bar ............... 50 Tip Area Clean-up ................ 51 Tip Shroud Replacement ............. 52 Tip Replacement ................53 Dimension BST 1200 / SST 1200 User Guide...
- Page 9 Troubleshooting ..............59 Troubleshooting Checklist............59 Fault Determination Codes ............ 61 Loss of Extrusion..............61 Diagnosing Loss of Extrusion............61 Recovering From Loss of Extrusion ..........63 Dimension BST 1200 / SST 1200 User Guide...
- Page 10 Dimension BST 1200 / SST 1200 User Guide...
-
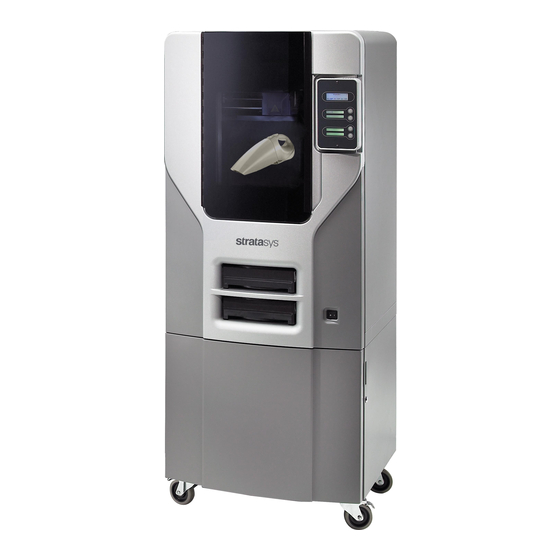
Page 11: Overview
Tip Cleaning Assembly Extrusion Tips Purge Container Guide Rods 10 Modeling Base Lead Screw 11 Z Platform Model Material Cartridge 12 Platform Retainers (2) Support Material Cartridge 13 Power Switch Display Panel Dimension BST 1200 / SST 1200 User Guide... - Page 12 12 Overview Figure 2: Dimension Rear View Item Nomenclature Item Nomenclature Fan Cover UPS Connection Main Circuit Breaker Diagnostic Hookup Power Cord Adapter Network Cable Connection Dimension BST 1200 / SST 1200 User Guide...
-
Page 13: Finding More Information
CatalystEX are available through the application. Help is displayed in the Dynamic Help window ...or... you can access them at from the Menu Bar - Help>Contents. World Wide Web Additional information is available at: http://www.dimensionprinting.com Dimension BST 1200 / SST 1200 User Guide... -
Page 14: Supplies
SST 1200 Tip Replacement Kit Miscellaneous 540.00101 Tip Cleaning Kit (1 brush, 5 flickers) 300-00100 Z-Stage (Krytox) Grease 300-01100 ABS Glue (case of 12) To order supplies for your Dimension system, contact your local Dimension reseller. Dimension BST 1200 / SST 1200 User Guide... -
Page 15: Setup
Temperature: 18–30°C (65-86°F) • Relative Humidity: 30-70%, Non-condensing • Ethernet 10/100 Base T network • Optional UPS for power interruptions (brown-out conditions): Rated Power – 2200 VA Output Power – 1600 watts Dimension BST 1200 / SST 1200 User Guide... -
Page 16: Unpacking
The Lead Screw and Guide Rods are lubricated with a thin coat of Krytox grease. Krytox grease can cause skin irritation. Be careful not to get the grease on your hands or clothing. Dimension BST 1200 / SST 1200 User Guide... - Page 17 Extrusion Head. Foam Tubes (4) Figure 3: Foam tubes isolating the extrusion head from the Z-axis frame 9. After unpacking, inspect the printer and report any shipping damage to the carrier. Dimension BST 1200 / SST 1200 User Guide...
-
Page 18: Installing Forklift Access Covers
1. Connect the male end of the supplied power cord directly into a grounded electrical outlet, as shown in Figure 5 on page 19. (If using a Uninterrupted Power Supply (UPS), connect the cord directly into the UPS). Dimension BST 1200 / SST 1200 User Guide... - Page 19 2. Connect the female end of the power cord directly into the rear of the cabinet. 3. Switch the Dimension circuit breaker to the on (up) position. The Dimension system is now ready to have power applied. Dimension BST 1200 / SST 1200 User Guide...
-
Page 20: Powering On Dimension
(see Figure 6). After the switch is pushed, Dimension boots up in three to seven minutes. Figure 6: Location of Power Switch (View From Front of Printer) Dimension BST 1200 / SST 1200 User Guide... -
Page 21: Insert Modeling Base
You can clean the build surface with isopropyl alcohol if necessary. Slide modeling base into the side tray guides. Retainer (1 of 2). Figure 7: Inserting a modeling base Dimension BST 1200 / SST 1200 User Guide... -
Page 22: Installing Software
Verifying controller software version: 1. Check the version displayed on the system keypad. • From Idle, press Maintenance. The version number will be listed in the top display window under System Maintenance. Dimension BST 1200 / SST 1200 User Guide... -
Page 23: Networking Your Printer
C. The UDN for your printer is listed here. This is preset at the factory and cannot be changed. 3. From your PC, start the CatalystEX application. A. From the General Tab, click the ‘Manage 3D Printers’ button. Dimension BST 1200 / SST 1200 User Guide... - Page 24 Press Increment to increase the value one digit at a time. Press Next Digit to move the cursor one place to the right. Press Last Digit to move the cursor one place to the left. Dimension BST 1200 / SST 1200 User Guide...
- Page 25 B. Click the ‘Add Manually...’ button in the lower right corner of the pop-up. C. In the pop-up, ‘Add 3D Printer’, enter a Name and Location (your choice) for your printer in the appropriate fields. Dimension BST 1200 / SST 1200 User Guide...
-
Page 26: Connecting Directly To Your Pc
Detailed instructions for using CatalystEX can be found in the CatalystEX Help file. A. From the General Tab, click the ‘Manage 3D Printers’ button. B. Click the ‘Add from Network...’ button in the lower right corner of the pop-up. Dimension BST 1200 / SST 1200 User Guide... - Page 27 Double click or highlight and click the ‘Properties’ button. iv. From the ‘General’ Tab of the ‘Internet Protocol TCP/ IP’ Properties pop-up click the ‘Obtain an IP address automatically’ radio button. Click OK, then OK again. Dimension BST 1200 / SST 1200 User Guide...
- Page 28 PC should connect to your printer. vii. If you are still unable to connect to your printer, recheck your connections and settings. Contact your local reseller for additional customer service. Dimension BST 1200 / SST 1200 User Guide...
-
Page 29: Operation
The lower three lines of the large display show details related to the current operation. At times there will be an item blinking in the lower (context- sensitive) displays. The blinking item is usually the most logical selection. Dimension BST 1200 / SST 1200 User Guide... -
Page 30: Inserting A Modeling Base
Powering On Dimension Refer to “Powering On Dimension” on page 20 for instructions. Dimension BST 1200 / SST 1200 User Guide... -
Page 31: Powering Off Dimension
5. Wait for the system to prepare itself for normal operation. NOTE When the system is ‘cycled’ in this manner, it may take up to 15 minutes for it to reach its normal operating state. Dimension BST 1200 / SST 1200 User Guide... -
Page 32: Loading Material
B. Lift up the plug to remove it from the cartridge - discard (or recycle) the plug. Figure 9: Remove red plug before loading 3. Find the end of the material filament taped with a “flag”. Dimension BST 1200 / SST 1200 User Guide... - Page 33 The above step makes sure that the filament will feed freely from the spool. 5. With the cutter from your Startup Kit, snip the filament flush with the end of the cartridge (see Figure 11 on page 34). Dimension BST 1200 / SST 1200 User Guide...
- Page 34 Did Model Material Purge? • Press Yes (to continue) or No (to return to Load Material) as appropriate — or press Purge Again if you’re unsure which to choose. Dimension BST 1200 / SST 1200 User Guide...
-
Page 35: Unloading Material
Of course, you will also need to replace the cartridges when they are empty. Dimension BST 1200 / SST 1200 User Guide... - Page 36 3. To store a partially used cartridge, place a small flag of tape on the filament near the cartridge. Cut off and discard the remaining material. The tape flag ensures the filament does not retract into the cartridge. Dimension BST 1200 / SST 1200 User Guide...
-
Page 37: Building A Test Part
Send a “job” to Dimension: 1. Create an STL file with your CAD software. 2. Click on the CatalystEX icon on the desktop of your PC. The CatalystEX main window opens (Figure 13 on page 38). Dimension BST 1200 / SST 1200 User Guide... - Page 38 Dimension printer to create your part. NOTE For more information about STL files, CMB files, part orientation, modeling envelope placement, print ’job’ efficiency, and other print controls refer to the CatalystEX Help file. Dimension BST 1200 / SST 1200 User Guide...
-
Page 39: Building A Part From Your File
You can also turn the light on continuously. Go to the Idle or Ready to Build mode. Press Maintenance and then press Next until Setup Maintenance is displayed. Press Lights Always. The light will remain ON until the system is powered OFF. Dimension BST 1200 / SST 1200 User Guide... -
Page 40: Pausing Build
Start Model begins blinking. 2. Press Start Model to begin modeling. (Dimension may require a few minutes to warm up to proper build temperatures. You can view the temperature values in the display.) Dimension BST 1200 / SST 1200 User Guide... -
Page 41: Canceling A Job
1. Open the modeling chamber door. 2. Release the modeling base retainers and pull the modeling base towards you, out of the tray guides. 3. Insert a new modeling base. 4. Close the modeling chamber door. Dimension BST 1200 / SST 1200 User Guide... -
Page 42: Removing Support Material
Dimension BST uses breakaway supports. Removing breakaway support is a simple matter of gently removing material by scraping, or twisting. Basic tools such as a pick or needle-nose pliers can facilitate material removal from cavities. Dimension BST 1200 / SST 1200 User Guide... -
Page 43: Soluble Supports
Refer to the SST Process Guide for details regarding the removal of soluble support material. Dimension BST 1200 / SST 1200 User Guide... - Page 44 44 Operation Dimension BST 1200 / SST 1200 User Guide...
-
Page 45: Maintenance
Putty Knife • Cutters • Brush (bronze) • Magnifier WARNING Krytox grease can cause skin irritation. Avoid contact with skin and clothing when it is being handled. • 2 oz. Tube Krytox Grease Dimension BST 1200 / SST 1200 User Guide... -
Page 46: After Each Build
1. Locate the lower fan on the rear panel of Dimension and remove the plastic frame (snaps on and off) that secures the fan filter. 2. Clean the filter with soap and water, and blot it dry. 3. Reassemble. Dimension BST 1200 / SST 1200 User Guide... -
Page 47: Tip Cleaning Assembly (Brush/Flicker Assembly)
7. Install the new tip cleaning brush, but do not tighten the mounting screws. 8. With a glove on your hand, move the head so that the tips are above the tip cleaning brush. Dimension BST 1200 / SST 1200 User Guide... - Page 48 Bottom of nipple Top of must hit brush Flicker Screws brush just and top half of touches exposed flicker. bottom of Tip Shroud Flicker Brush Mounting Screws Figure 17: Replacing the tip cleaning brush Dimension BST 1200 / SST 1200 User Guide...
-
Page 49: 2000 Hour Maintenance
Lubricate using the Krytox grease provided in the Startup Kit. Use the grease sparingly. X-axis Y-axis Guide Guide Rods (1 of 2) Z-axis Z-axis Guide Lead Rods Screw Figure 18: Lead Screw and Guide Rod Identification Dimension BST 1200 / SST 1200 User Guide... -
Page 50: As Needed Maintenance
2. Locate the wiring harness leading away from the bottom of the light bar. 3. Disconnect the light bar from the wiring harness by squeezing the wiring harness clip while pulling down. Dimension BST 1200 / SST 1200 User Guide... -
Page 51: Tip Area Clean-Up
2. Clean the area of all material using the needle nose pliers supplied with your Start Up Kit. 3. Exit Maintenance. Build Up Area Figure 19: Material Buildup Behind Tips Dimension BST 1200 / SST 1200 User Guide... -
Page 52: Tip Shroud Replacement
Tip Shroud and Tip Shield (Figure 3. Pry off the Tip Shroud. To pry off the old shroud, insert blade of putty knife between shroud and shield. Figure 21: Tip Shroud Removal Dimension BST 1200 / SST 1200 User Guide... -
Page 53: Tip Replacement
- or until the top of the screws are flush with the metal cover. B. Use needle nose pliers to grasp the stainless steel shield of the tip. Dimension BST 1200 / SST 1200 User Guide... - Page 54 A MODEL tip must be used on the RIGHT side of the head assembly (See Figure 23 on page 55). The Model tip comes in a Red capped container. The Support tip comes in a Black capped container. Dimension BST 1200 / SST 1200 User Guide...
- Page 55 Push the tip toward the back of the printer once it is all the way up against the heater block. G. Verify the tip is fully inserted into the heater block and that the stainless steel shield is aligned (See Figure 24 on page 56). Dimension BST 1200 / SST 1200 User Guide...
- Page 56 You must unlatch/latch the cartridges to continue. If there is a delay in the unlatch/latch process, the printer will display Both Cartridges Not . Select , then unlatch/ Replaced Or Invalid Retry latch the cartridges. Dimension BST 1200 / SST 1200 User Guide...
- Page 57 A. Use the magnifier from the Startup Kit to view the support road (shown in red). B. Identify the location on the +X or –X side of the part where the support road is best centered within the model boundaries (shown in blue). Dimension BST 1200 / SST 1200 User Guide...
- Page 58 4. Select Done after you have input the X and Y offsets. The printer will return to Maintenance. Figure 25: Example XY Tip Offset Part. This example requires an adjustment of X = + 2 mils, Y = - 4 mils Dimension BST 1200 / SST 1200 User Guide...
-
Page 59: Troubleshooting
“Cycling Power” on Panel page 31 Cannot communicate with system Make sure network cables are connected - at the through network printer, at the PC, and where cables connect to network boxes. Dimension BST 1200 / SST 1200 User Guide... - Page 60 Cartridge Try a different cartridge. Display Panel displays Retry with same cartridge. Load Failed Try a different cartridge. Filament may be jammed in extrusion head (see “Loss of Extrusion” on page 61 Dimension BST 1200 / SST 1200 User Guide...
-
Page 61: Fault Determination Codes
Sagging structures due to lack of support materials WARNING The head area is very hot!! Use gloves when working in this area of printer! Diagnose loss of extrusion: 1. Press Cancel and remove any parts from the printer. Dimension BST 1200 / SST 1200 User Guide... - Page 62 12. If material steadily flowed from the support tip, the support tip is not experiencing loss of extrusion. 13. Return the printer to the Maintenance state - Push Done, then answer Yes when the printer displays Is Material Loaded? Dimension BST 1200 / SST 1200 User Guide...
-
Page 63: Recovering From Loss Of Extrusion
26). This can be done manually - push on the extended bar end. Liquefier Tubes Toggle Bar extends equally from both sides of head. Figure 26: Tip Toggle Bar in Neutral Position Dimension BST 1200 / SST 1200 User Guide... - Page 64 Figure 27 illustrates the model side): Figure 27: Create Access Space for Cleaning - Model Tip Side Repeat for Support Tip Side Dimension BST 1200 / SST 1200 User Guide...
- Page 65 5. Remove excess material from the top of the liquefier. • Use needle nose pliers to carefully grip and remove excess material from the top of the liquefier. Dimension BST 1200 / SST 1200 User Guide...
- Page 66 (See “Unloading Material” on page NOTE It is recommended that an unload be performed for each material. 12. Load material (See “Loading Material” on page 32 Dimension BST 1200 / SST 1200 User Guide...
- Page 67 Troubleshooting 67 Dimension BST 1200 / SST 1200 User Guide...
- Page 68 68 Troubleshooting 14950 Martin Drive Eden Prairie, MN 55344 USA Telephone: (952) 937-3000 Fax: (952) 937-0070 Web Site: www.dimensionprinting.com Stratasys Document # 204398-0001 Dimension BST 1200 / SST 1200 User Guide...
Need help?
Do you have a question about the Dimension BST 1200 and is the answer not in the manual?
Questions and answers
Can the internal temperature be changed to 45-55 degrees Celsius?