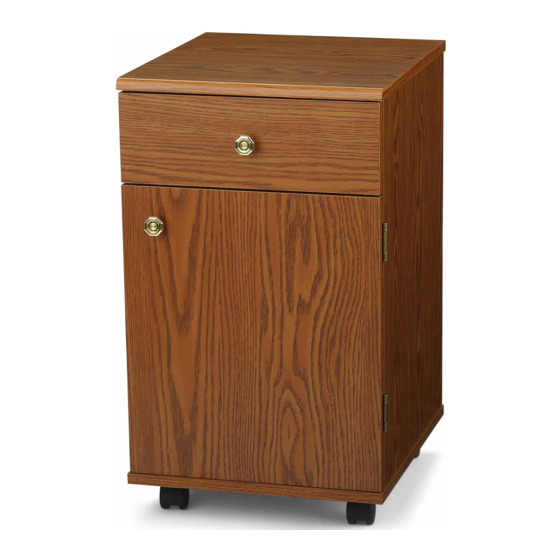
Summary of Contents for Arrow SUZI 800
- Page 1 SUZI STORAGE SIDEKICK Where Creativity Meets Color! OWNER’S MANUAL Assembly Instructions Model Numbers: 800 Oak 801 White 802 Cherry 803 Black 804 Pistachio Green 809 Blue IMPORTANT: Please read these instructions before assembling!
-
Page 2: Warranty
Replacement Part Shipping Policy: Arrow is committed to preserving our natural resources by reducing our use of excess packaging and lowering our fossil fuel consumption through the elimination of unnecessary deliveries. - Page 3 803 (Black) cs@arrowcabinets.com 804 (Green) 1-800-533-7347 809 (Blue) Arrow Cabinets • Production ID Number P.O. Box 307, Delavan, WI 53115 • Number of Part Required TO ORDER REPLACEMENT PARTS CALL •...
-
Page 4: Hardware Included
Hardware Included Connecting Bolts x44 Cams x44 Drawer Runners x8 #6x1” Flathead Screw x32 #4x1/2” Door Hinge x2 Gold Flathead Screws x14 Door Magnet x1 #8x5/16” #6x5/8” Flathead Screws x4 Drawer Stoppers x4 Gold Panhead Screws x2 #8/32x1” #4x1/2” Door Knob x2 Door Knob Bolt x2 Strike Plate x1 Bronze Flathead Screw x1... -
Page 5: Cabinet Assembly
Cabinet Assembly Step 1. Place Top (E), Bottom (F), Back (B), Left into each hole flush with surface. The arrow on the and Right Sides (C, D) on a flat protected surface Cams should be turned to face the hole, in each (to prevent scratching of part). - Page 6 Step 2. Attach Drawer Runners (x8) to Left and Magnet (x1) on Left Side (C) using #6x5/8” Gold Right Sides (C,D) using #6x1” Flathead Screws (x32). Panhead Screws (x2) (as shown in Fig. 2). The Attach on Right Side (D) Door Hinges (x2) using metal side of the magnet faces panel edge.
- Page 7 For additional strength dab wood glue on the tip of Step 4. Attach Plate Casters (x4) to Bottom (F) screws before attaching. using #8x1/2” Silver Panhead Screws (x16) into holes provided (as shown In FIG.4). FIG. 4. #8x1/2” Silver Panhead Screws x16 into holes in Back (B), turn Cams to locked position Step 5.
- Page 8 Step 6. Place Top (E) on the floor, guide sides (C,D) FIG. 6. and Back (B) assembly onto Connecting bolts with the opening facing the tapered edge of Top panel (E), turn Cams to locked position. Attach Bottom (F) w/casters, guide Connecting Bolts into holes in sides (C,D), turn Cams to locked position (as shown in FIG.
- Page 9 Step 10. Attach the Knob to the Top Drawer Front Step 8. Thread Connecting Bolts (32 total) Into (I) using 8/32x1” Bolt (x1) for Knob (as shown in pre-drilled holes in Top Drawer Front (Ix1) and Drawer Front/Back (Lx7). Install Cams (32 total) FIG.
- Page 10 Wood Parts and Part Numbers Back Left Side Right Side Drawer Bottom Bottom Door Drawer Side Top Drawer Front Drawer Front/Back Ref. Description Part# Part# Part# Part# Part# Part# Cabinet Model# 800 (Oak) 801 (White) 802 (Cherry) 803 (Black) 804 (Green) 809 (Blue) Back 003315...
- Page 11 Hardware Included with Part Numbers #8x1/2” Silver Panhead Screws Door Hinge Door Knob #4x1/2” Flathead Screws Drawer Runners #8x5/16” Flathead Screws Strike Plate #8/32x1” Bolt Drawer Stoppers #6x1” Flathead Screw #6x5/8” Gold Panhead Screws Item Description Part No. #8x1/2” Panhead Screw 002614 Connecting Bolts #4x1/2”...
- Page 12 Enhance your sewing experience with a custom-made Our sewing chairs are designed to provide comfort, insert for your Arrow or Kangaroo cabinet. Inserts are support, and the fashionable look you want for your designed to reduce the gap between the machine space.


Need help?
Do you have a question about the SUZI 800 and is the answer not in the manual?
Questions and answers