Advertisement
Quick Links
Advertisement

Summary of Contents for Arrow Judy 101
- Page 1 ASSEMBLY INSTRUCTIONS Judy ITEM NO.: 101 White Teak...
-
Page 2: General A Ssembly Guidelines
Insert bolt through pre-drilled Screw cam bolts flush as Turn clockwise to lock cam with bolt. illustrated. surface. The arrow direction must hole in edge of panel. be in the direction of the hole. Tip: place a small bit of WD-40 or similar lubricant into the pre-installed cam bolt holes to help the cam bolts screw in better. - Page 3 Parts List: Panels ITEM DESCRIPTION QTY. PACK. Top Panel 1 of 1 Bottom Panel 1 of 1 Left Side Panel 1 of 1 Right Side Panel 1 of 1 Back Panels 1 of 1 Platform 1 of 1 Door Bin Front Panel 1 of 1 Door Bin Sides 1 of 1...
-
Page 4: Parts List: Hardware
Parts List: Hardware 6x30 Dowel Pin x6 Cam Bolt 8x30 Dowel Pin x12 Magnet and Catch Plate Set x1 5x5/8 Panhead Screw x2 5x3/8 Brass Flathead Screw x1 50mm Non-Locking Caster 12mm Cam Lock x8 10mm Cam Lock x8 10x60mm Screw x4 Caster Bracket x1 50mm Locking Caster Cover Cap... -
Page 5: Step 1: Cabinet Shell
Step 1: Cabinet Shell Attach 2 Locking Casters with Washers to the front edge of Panel B. Attach 2 Non-Locking Casters with Washers to the back edge of Panel B. Tighten with Wrench. Flip Panel B over. 50mm Non-Locking Caster 50mm Locking Caster Caster Washer Wrench x1... - Page 6 Step 1: Cabinet Shell 12mm Cam Lock x8 Magnet and Catch Plate Set x1 8x30 Dowel Pin x8 5x5/8 Panhead Screw x2 4x14 Screw Lift Rail Lift Rail (Left) x1 (Right) x1 Insert 4 12mm Cam Locks into Panel C. Insert 4 8x30 Dowel Pins into the edg- es of Panel C.
- Page 7 Step 1: Cabinet Shell 8x30 Dowel Pin x4 10x60mm Screw x4 Cover Cap Insert 8x30 Dowel Pins into edges of both Panel E pieces as shown. Insert Dowels on Panel E pieces into Panels C and D. Using 10x60mm Screws, attach Panel E pieces Panels C and D as shown below.
- Page 8 Step 1: Cabinet Shell ⁄ “ Cam Cover Attach Panel B as shown. Tighten Cam Locks and apply Cam Covers. Lock casters and flip Cabinet onto its wheels. Judy Assembly Instructions...
- Page 9 Step 2: Lift and Top LIFT INSTALLATION WARNING: DO NOT remove the small wooden block from the Lift until assembly is complete. If the block is removed or falls out before lift assembly is complete, the cables will retract, making installation more difficult. If the block falls out before complete assembly, Please call Customer Service at 1-800-533-7347, ext.
- Page 10 Step 2: Lift and Top Cable Plastic guides on Lift Lift rail Rail tabs Lift rail Guide Lift onto Lift Rails using plastic guides. Insert ends of cable into rail tabs; make sure the cable is hooked into the rail tabs on both sides.
- Page 11 Step 2: Lift and Top Cam Bolt Attach Cam Bolts to Panel A as shown. Judy Assembly Instructions...
- Page 12 Step 2: Lift and Top ⁄ “ Cam Cover Lower Panel A onto Panels C, E and D. Tighten Cam Locks and apply Cam Covers. Judy Assembly Instructions...
- Page 13 Step 3: Door 5x3/8 Brass Flathead Screw x1 Magnet Catch Plate x1 Flush Hinge x3 50mm Non-Locking Caster Cam Bolt Wrench x1 4x14 Screw Caster Bracket x1 Handle x1 Fix Bolt x2 Attach Flush Hinges to Panel K as shown, using 4x14 Screws.
- Page 14 Step 3: Door 4x14 Screw Attach Panel K to Panel C using 4x14 Screws. Judy Assembly Instructions...
- Page 15 Step 3: Door 6x30 Dowel Pin x6 10mm Cam Lock x8 Cam Bolt Insert 4 10mm Cam Locks into each of the Panel I pieces. Attach Cam Bolts to Panel H. Insert 6x30 Dowel Pins into edges of Panel H. Judy Assembly Instructions...
- Page 16 Step 3: Door ⁄ “ Cam Cover Attach Panel I (2) to Panel J as shown. Attach Panel H to Panels I and J as shown. Tighten cam locks and apply Cam Covers. Judy Assembly Instructions...
- Page 17 Step 3: Door ⁄ “ Cam Cover Attach Door Bin assembly to Panel K as shown. Tighten cam locks and apply Cam Covers. Judy Assembly Instructions...
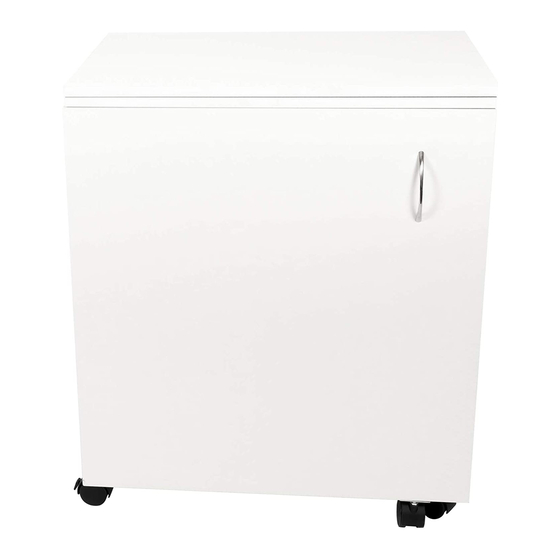
- Page 18 Completed Judy Sewing Cabinet Judy Assembly Instructions...
-
Page 19: Limited Warranty
(detailed receipt), and photos of the product. Arrow will replace any defective part (at its sole option), excluding labor. Replacement parts will be warranted for only the remaining period of the original Warranty. - Page 20 COMPLETE YOUR SEWING STUDIO! Elevate your sewing experience with Arrow’s Best-Selling Accessories! Custom Sewing Inserts Sewing Chairs Enhance your sewing experience with a custom acrylic Arrow’s #1 Rated Height Adjustable Sewing Chair is sewing insert! Custom acrylic sewing inserts are...


Need help?
Do you have a question about the Judy 101 and is the answer not in the manual?
Questions and answers