Advertisement
Quick Links
Advertisement

Summary of Contents for Arrow 3531
- Page 1 ASSEMBLY INSTRUCTIONS 3 Shelf Display ITEM NO.: 3531 White...
-
Page 2: General A Ssembly Guidelines
Insert bolt through pre-drilled Screw cam bolts flush as Turn clockwise to lock cam with bolt. illustrated. surface. The arrow direction must hole in edge of panel. be in the direction of the hole. Tip: place a small bit of WD-40 or similar lubricant into the pre-installed cam bolt holes to help the cam bolts screw in better. - Page 3 Par ts List: Panels ITEM DESCRIPTION QTY. PACK. Hardware Box 1 of 4 Top Panel 2 of 4 Bottom Panel 2 of 4 Left Side Panel 3 of 4 Right Side Panel 3 of 4 Back Panels 4 of 4 Shelf Back Panels 4 of 4 Shelf Ledge Panels...
-
Page 4: Par Ts List: Hardware
Par ts List: Hardware TIP: Keep all the parts in their individually labeled bags. This will make finding parts easier as you assemble your cabinet. ⁄ “ 6x35 Cam Bolt x55 8x30 Dowel Pin x38 Cam Cover Allen Wrench x1 8x16 Fix Bolt Locking Plate Caster x5 3 Shelf Display... - Page 5 Par t 1: Preparing Bottom Panel Congratulations and welcome to Arrow Sewing Furniture! We can’t wait to get your brand new 3-Shelf Display Cabinet up and running. Please contact our Customer Service Team at 1-800-533-7347 ext. 1 during normal business hours with any assembly related questions.
- Page 6 Par t 2: Preparing Shelf Panels 6x35 Cam Bolt x9 8x30 Dowel Pin x18 ⁄ “ Cam Cover Attach c1 Cam Bolts and d1 Dowel Pins to Panels O1 and O2 as shown. Repeat two more times (3 shelves total). Connect Panels O1 and O2 by inserting cam bolts into cam locks.
- Page 7 Par t 3: Preparing Side and Back Panels 6x35 Cam Bolt x32 8x30 Dowel Pin x20 Attach c1 Cam Bolts to Panels X and Z as shown. Insert d1 Dowel Pins into the edges of Panels X and Z as shown. Insert d1 Dowel Pins into the edges of Panel D as shown.
- Page 8 Par t 4: A ssembling Sides, Back, Shelves ⁄ “ Cam Cover Attach shelves (Panel O1/O2 assem- bly) to Panel X by inserting cam bolts into cam locks. Tighten cam locks and apply c2 Cam Covers. 3 Shelf Display Assembly Instructions...
- Page 9 Par t 4: A ssembling Sides, Back, Shelves ⁄ “ Cam Cover Attach back panels (Panel D) to Panel X as shown, inserting cam bolts into cam locks. Tighten cam locks and apply c2 Cam Covers. 3 Shelf Display Assembly Instructions...
- Page 10 Par t 4: A ssembling Sides, Back, Shelves ⁄ “ Cam Cover Carefully lower Panel Z onto shelves and D Panels, inserting cam bolts into cam locks as shown. Tighten cam locks and apply c2 Cam Covers. 3 Shelf Display Assembly Instructions...
- Page 11 Par t 4: Attaching the Bottom Turn the cabinet onto its back. You may need a friend to help you, but it is not required. ⁄ “ Cam Cover Attach Panel G to Panels X, D and Z as shown, inserting cam bolts into cam locks.
- Page 12 Par t 4: Top Turn the cabinet up onto its wheels. You may need a friend to help you, but it is not required. 6x35 Cam Bolt x7 Attach c1 Cam Bolts to Panel A as shown. 3 Shelf Display Assembly Instructions...
- Page 13 Par t 4: Top ⁄ “ Cam Cover Lower Panel A onto Panels X, D and Z as shown, inserting cam bolts into cam locks. Tighten cam locks and apply c2 Cam Covers. 3 Shelf Display Assembly Instructions...
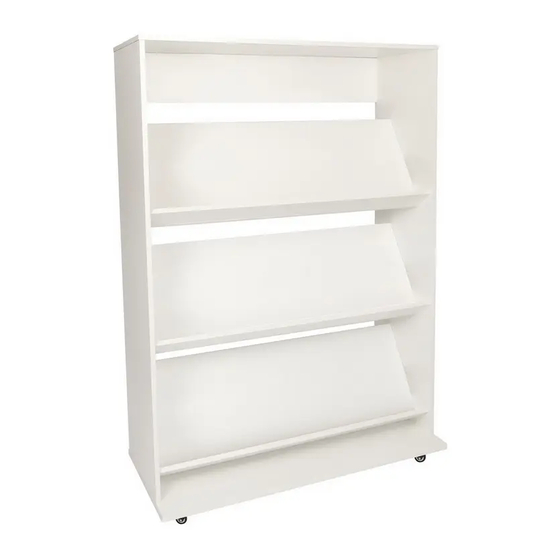
- Page 14 Completed 3 -Shelf Display Cabinet 3 Shelf Display Assembly Instructions...
-
Page 15: Limited Warranty
(detailed receipt), and photos of the product. Arrow will replace any defective part (at its sole option), excluding labor. Replacement parts will be warranted for only the remaining period of the original Warranty. - Page 16 COMPLETE YOUR SEWING STUDIO! Elevate your sewing experience with Arrow’s Best-Selling Accessories! Custom Sewing Inserts Sewing Chairs Enhance your sewing experience with a custom acrylic Arrow’s #1 Rated Height Adjustable Sewing Chair is sewing insert! Custom acrylic sewing inserts are...


Need help?
Do you have a question about the 3531 and is the answer not in the manual?
Questions and answers