Cornelius IDC PRO 255 Operator's Manual
Hide thumbs
Also See for IDC PRO 255:
- Service manual (50 pages) ,
- Operator's manual (46 pages) ,
- Installation manual (43 pages)

Related Manuals for Cornelius IDC PRO 255


Summary of Contents for Cornelius IDC PRO 255
- Page 1 IDC PRO 255 Operator’s Manual Release Date: MAR, 08 2017 Publication Number: 621058649OPR Revision: A Revision Date: MAR, 08 2017 Visit the Cornelius web site at www.cornelius-usa.com for all your Literature needs.
- Page 2 Commercial Warranty. Cornelius will not be responsible for any repair, replacement or other service required by or loss or damage resulting from any of the following occurrences, including but not limited to, (1) other than normal and proper use and normal...
-
Page 3: Table Of Contents
TABLE OF CONTENTS Safety Instructions ..............1 Read and Follow ALL Safety Instructions . -
Page 4: Safety Instructions
IDC Pro 255 Operator Manual SAFETY INSTRUCTIONS ALL S EAD AND OLLOW AFETY NSTRUCTIONS Safety Overview • Read and follow ALL SAFETY INSTRUCTIONS in this manual and any warning/caution labels on the unit (decals, labels or laminated cards). • Read and understand ALL applicable OSHA (Occupational Safety and Health Administration) safety regulations and/or national and local codes before operating this unit. -
Page 5: Qualified Service Personnel
IDC Pro 255 Operator Manual UALIFIED ERVICE ERSONNEL WARNING: Only trained and certified electrical, plumbing and refrigeration technicians should service this unit. ALL WIRING AND PLUMBING MUST CONFORM TO NATIONAL AND LOCAL CODES. FAILURE TO COMPLY COULD RESULT IN SERIOUS INJURY, DEATH OR EQUIPMENT DAMAGE. -
Page 6: Unit Location
IDC Pro 255 Operator Manual OCATION CAUTION: The unit is not designed for a wash-down environment and MUST NOT be placed in an area where a water jet (pressure washer) could be used. CAUTION: This appliance is not intended for use by personnel (including children) with reduced physical, sensory or mental capabilities or lack of experience and knowledge, unless given supervision or instruction concerning use of the appliance by a person responsible for safety. -
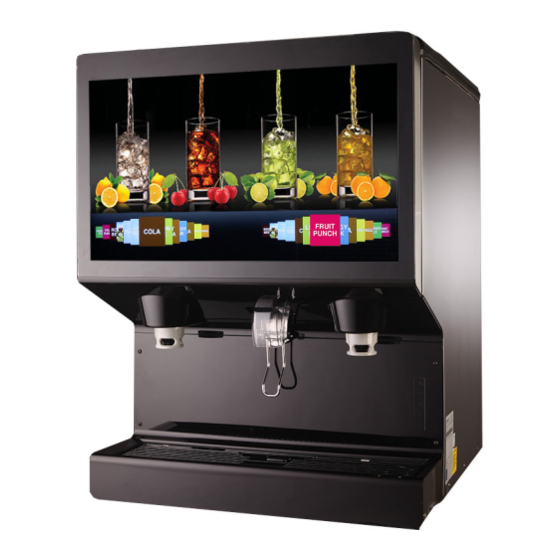
Page 7: System Overview
SYSTEM OVERVIEW The Refresh IDC PRO 255 unit solves your ice and beverage service needs in a sanitary, space saving, economical way. It is designed to be manually filled with ice from any remote ice making source. The unit distributes cubes (up to 1-1/4 inch in size), cube-lets and compressed (not flaked) ice. - Page 8 IDC Pro 255 Operator Manual Figure 1. © 2016, Cornelius Inc. - 5 - Publication Number: 621058649OPR...
-
Page 9: Operation
IDC Pro 255 Operator Manual OPERATION WARNING: Only trained and certified electrical, plumbing and refrigeration technicians should service this unit. ALL WIRING AND PLUMBING MUST CONFORM TO NATIONAL AND LOCAL CODES. FAILURE TO COMPLY COULD RESULT IN SERIOUS INJURY, DEATH OR EQUIPMENT DAMAGE. -
Page 10: Ada Keypad Operation
IDC Pro 255 Operator Manual ADA K EYPAD PERATION The ADA keypad is located on the lower right side of the splash panel. The ADA keypad, shown in Figure 2 illumi- nates when the ADA activation button is selected. ADA Activation... -
Page 11: Cleaning And Maintenance
IDC Pro 255 Operator Manual CLEANING AND MAINTENANCE WARNING: Disconnect power to the unit before servicing. Follow all lock out/tag out procedures established by the user. Verify all power is off to the unit before performing any work. Failure to comply could result in serious injury, death or damage to the equipment. -
Page 12: Daily Cleaning
IDC Pro 255 Operator Manual Daily Cleaning To perform a daily cleaning of the unit, perform the procedure as shown inTable 2. Table 2. Step Action Remove the cup rest from the drip tray and clean it with warm soapy water, rinse it with clean water and allow it to air dry. - Page 13 IDC Pro 255 Operator Manual Table 2. Step Action Figure 6. Select the Screen Cleaning lockout button to display the Screen Cleaning Screen, as shown Figure 6. Touch the screen to start the countdown for cleaning as shown Figure 7. This...
- Page 14 IDC Pro 255 Operator Manual Table 2. Step Action Reinstall the diffuser by pushing it vertically upward by aligning the key-slot as shown in Figure 10. Figure 10. Re-install the nozzle in the unit by rotating it in clockwise direction as shown in the Figure 11.
-
Page 15: Weekly Cleaning And Maintenance
IDC Pro 255 Operator Manual Table 2. Step Action Spray the ice chute inside and out with sanitizer and allow it to air dry. Figure 13. Pour warm soapy water down the drain to keep it clean and flowing properly. - Page 16 IDC Pro 255 Operator Manual Loosen the thumbscrews on both sides of the drip tray cover. Thumbscrew Figure 15. Remove the drip tray cover from the unit. Wipe down the cup holder and drip tray cover with warm soapy water, rinse them with clear water and allow them to air dry.
-
Page 17: Monthly Cleaning And Maintenance
IDC Pro 255 Operator Manual ONTHLY LEANING AND AINTENANCE Perform the daily and weekly cleaning procedures in addition to the monthly cleaning procedures in the following sections. The monthly cleaning procedures are: • Daily Cleaning and Maintenance • Weekly Cleaning and Maintenance •... -
Page 18: Cleaning And Sanitizing The Hopper
IDC Pro 255 Operator Manual To clean the hopper, perform the procedure as shown inTable 5. Table 5. Step Action Remove all the ice from the hopper. Clean and sanitize the hopper. See “Cleaning Interior Surfaces” section on page 29. -
Page 19: Quarterly Cleaning And Maintenance
IDC Pro 255 Operator Manual Using a mechanical spray bottle filled with sanitizing solution, spray the entire interior and the agitator assembly. Allow them to air dry. Figure 20. Replace the hopper cover or close the manual fill door on the ice maker (if equipped). -
Page 20: Annual Cleaning And Maintenance
IDC Pro 255 Operator Manual Locate and remove any debris from the drain trough. Check that the cold plate drain holes are not plugged. Cold Plate Access Pour a small amount of warm soapy water through the upper cold plate openings in the hopper. -
Page 21: Maintenance Procedures
IDC Pro 255 Operator Manual MAINTENANCE PROCEDURES ENERAL CAUTION: Operators must not make any adjustments to the equipment without approval from a supervisor. PERATION WARNING: This unit must be grounded to avoid possible electrical shock to the operator. The unit power cord is equipped with a three pronged plug. -
Page 22: Changing To A Different Brand Or Flavor
IDC Pro 255 Operator Manual Step Action Input the proper password for your access level (technician) and press Enter. < Enter Figure 24. Select the Shutdown button to display the Shut- down/Restart Screen, as shown in Figure 25. Shutdown Figure 25. -
Page 23: Replenishing The Co Supply
IDC Pro 255 Operator Manual EPLENISHING THE UPPLY DANGER: displaces oxygen. Strict attention MUST be observed in the prevention of CO gas leaks in the entire CO soft drink system. If a CO gas leak is suspected, particularly in a small area, IMMEDIATELY ventilate the contaminated area before attempting to repair the leak. - Page 24 IDC Pro 255 Operator Manual Table 11. Step Action Input the proper password for your access level (Operator, Store Manager or Technician) and press Enter. The Service UI screen is dis- played, as shown in Figure 29 depending on your access level.
-
Page 25: Mapping Brands
IDC Pro 255 Operator Manual Mapping Brands To map the valves to the available brands, perform the procedure as shown in Table 12. Table 12. Step Action Display the keypad screen by tapping each corner of the video screen starting in the upper... - Page 26 IDC Pro 255 Operator Manual Table 12. Step Action Press the brand mapping button as shown in Figure 33. Brand Mapping Flavor Mapping Figure 33. Press the Brand or Flavor icon that is to be remapped. Figure 34. The Brand Selection screen opens as shown in Figure 35.
-
Page 27: Purging The Syrup Lines
IDC Pro 255 Operator Manual Purging The Syrup Lines The purge process is performed as part of the “Syrup Line Cleaning & Sanitizing” section on page 25. If a BIB con- tainer is replaced, the syrup lines need to be purged and sanitized. To purge the lines, perform the procedure in Table Table 13. -
Page 28: Syrup Line Cleaning & Sanitizing
IDC Pro 255 Operator Manual Table 13. Step Action Valve Purge The Unit Setup screen is displayed. Press the Valve Purge button. Valve Purge Figure 39 The Valve Purge screen is displayed. Select up to 4 syrup and 2 water at a time, per side, to purge. -
Page 29: Adjusting The Water To Syrup Ratio (Brix)
IDC Pro 255 Operator Manual Fill a suitable bucket with a soap solution. Submerge all disconnects (gas and liquid) in the soap solution and then clean them using a nylon bristle brush. (Do not use a wire brush.) Rinse with clean, potable water. - Page 30 IDC Pro 255 Operator Manual Table 15. Step Action Display the keypad screen by tapping each corner of the video screen starting in the upper right corner (1) and continuing to tap each corner in a counterclockwise direction, in a sequence of 1,2,3 and 4 as shown in Figure 44.
- Page 31 IDC Pro 255 Operator Manual Table 15. Step Action Select the Brix setup screen as shown in Figure 47. Brix Setup Figure 47. All instructions and volumes below are based on the pour rate of 3 oz/sec Figure 48. Place a graduated cylinder or brix cup under the valve.
-
Page 32: Cleaning Interior Surfaces
IDC Pro 255 Operator Manual Syrup Valves Water Valves Flavor Shots (Black) (White) (Purple) (Same layout as opposite side) Figure 49. Cleaning Interior Surfaces As part of the monthly cleaning and sanitizing the hopper, perform the procedure in Table 16. - Page 33 IDC Pro 255 Operator Manual Table 16. Step Action Reassemble agitator assembly. Take special care to ensure that the thumbscrew is tight. Figure 52. Using a mechanical spray bottle filled with sanitizing solution, spray the entire interior and the agitator assembly.
-
Page 34: Updating Software Revisions
IDC Pro 255 Operator Manual Table 16. Step Action With a nylon bristle brush or sponge, clean the inside of the ice chute, gasket, and cover with soap solution and rinse thoroughly to remove all traces of detergent. Figure 55. - Page 35 IDC Pro 255 Operator Manual Table 17. Step Action On the back of the display, unplug the USB connection to the ADA panel and plug in the USB stick as shown in Figure 57 with the software update loaded on it.
-
Page 36: Editing The Media Play-List
IDC Pro 255 Operator Manual Table 17. Step Action The Software Updater screen is displayed. Press the Update Software button. Figure 60. The second Update Software screen is displayed. Figure 61. Select the software version to be installed by selecting from the list on the left side of the screen. If the list on the left side of the screen is empty, press the Scan button. - Page 37 IDC Pro 255 Operator Manual Table 18. Step Action First, enter the Service Screen at either manager or technician level permissions. Display the keypad screen by tapping each corner of the video screen starting in the upper right corner (1) and...
- Page 38 IDC Pro 255 Operator Manual Table 18. Step Action First, to manipulate the play-list and their schedule. A new play-list can be added by selecting the second button on the bottom left (with the + symbol). This will add a new play-list in addition to the default play-list.
- Page 39 IDC Pro 255 Operator Manual Table 18. Step Action All the videos or images currently on the machine are shown on the right. A USB stick that is connected to any of the (3) available ports will be displayed on the left.
-
Page 40: Reporting Sales Data
IDC Pro 255 Operator Manual EPORTING ALES Sales data can be transfered to a USB flash drive for external analysis. To transfer sales data to a USB flash drive, perform the procedure in Table 19. Table 19. Step Action Open the dispenser door. - Page 41 IDC Pro 255 Operator Manual Table 19. Step Action Figure 73 Select Export Data from the Marketing Data screen, Figure 74. Sales data appears as shown in Figure 75 Figure 75. Publication Number: 621058649OPR - 38 - © 2016, Cornelius Inc.
- Page 43 Cornelius Inc. www.cornelius-usa.com...
Need help?
Do you have a question about the IDC PRO 255 and is the answer not in the manual?
Questions and answers