Table of Contents

Related Manuals for Cornelius Pioneer 2.0 M


Summary of Contents for Cornelius Pioneer 2.0 M
- Page 1 Pioneer 2.0_M EVERAGE ISPENSER Installation, Operation & Service Manual Publication Number: Revision Date: June 23, 2022 Revision: 1 Visit the Cornelius web site at www.cornelius.com for all your Literature needs.
- Page 2 This Product is warranted only as provided in Cornelius’ Commercial Warranty applicable to this Product and is sub- ject to all of the restrictions and limitations contained in the Commercial Warranty.
-
Page 3: Table Of Contents
Reinstall Panels ............................. 14 Adjust Water-To-Syrup Ratio ........................15 Adjusting Flow Rates..........................15 ..........................16 PERATION Instructions ..............................16 Dispensing Product ............................17 Replenishing Syrup Supply ........................... 17 Tank System ............................ 17 Bag-In-Box System .......................... 17 ©2016, Cornelius Inc. - 3 -... - Page 4 Carbonator Pump Replacement ........................25 Pump Motor Replacement ..........................25 Agitator Motor Replacement ......................... 25 Controller Board Replacement ........................25 Condenser Fan Motor Replacement ......................25 ........................27 ROUBLE HOOTING ......................... 31 EFERENCE ATERIAL Wiring Diagram ............................31 Plumbing Diagram............................32 ©2016, Cornelius Inc.
-
Page 5: Safety Instructions
Cleaning and user maintenance shall not be made by children without supervision. • Keep your unit in proper working condition and do not allow unauthorized modifications to the unit. UALIFIED ERVICE ERSONNEL WARNING: ©2016, Cornelius Inc. -
Page 6: Safety Precautions
Cord section should be minimum nominal cross-sectional area of 1.0mm^2; • Plug should also be earthling type and obtain approval with above cord. OUND EVEL The A-weighted sound pressure level has been determined to be below 70dBA. ©2016, Cornelius Inc. -
Page 7: Unit Location
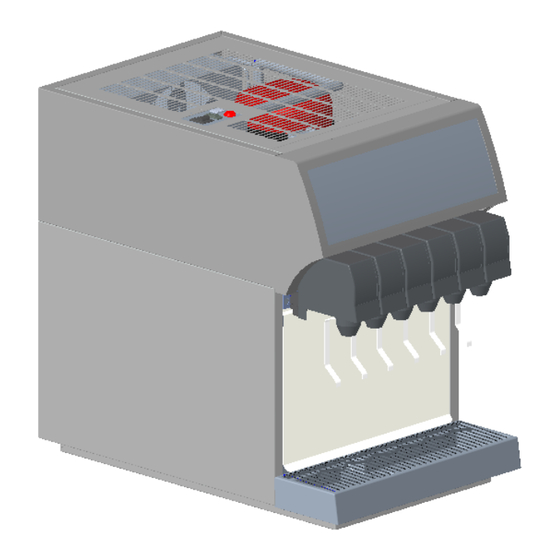
The Pioneer over the counter, post-mix, beverage dispenser offers the following features: • Key-lock switch • Circuit breaker • Lighted merchandiser • Built-in carbonator • Syrup pump kit (optional) • Removable refrigeration deck (s) • Removable drip tray ©2016, Cornelius Inc. -
Page 8: Unit Specification
– 3 oz./sec. (85g / sec.) dispensing rate – 90°F (32.2°C) ambient temperature – Two 12-oz. (340g) drinks per minute < < – Drink temperature 40°F (4.4°C) for CSD and 42°F (5.5°C)for NCB Draw Capacity: 99 cups at 12OZ/cup per minute at 90°F(32.2°C) ambient ©2016, Cornelius Inc. -
Page 9: Theory Of Operation
Syrup and carbonated water meet simultaneous at the dispensing valve resulting in a carbonated drink being dispensed. A still (non-carbonated) drink is dispensed in the same manner as the carbonated drink except plain water is substituted for carbonated water. ©2016, Cornelius Inc. - Page 10 Pioneer Service Manual Notes ©2016, Cornelius Inc.
-
Page 11: Installation
If any damages exist, file a claim with the shipment carrier. Table2 Accessories Part No. Quantity Cup rest Power cord Drain Hose 50119 Clamps 70339 Decals Varies with dispenser 1 set Manual IMENSIONS Figure 2 ©2016, Cornelius Inc. -
Page 12: Installation Requirements
CAUTION — This unit is designed for indoor installation only (in non harsh environments). CAUTION — If the unit is exposed to freezing temperature ,water in the unit will freeze and may damage the unit. CAUTION — Avoid spillage into the top vents. ©2016, Cornelius Inc. -
Page 13: Installation Procedure
Figure 3 Remove the Drip tray Figure 4 Remove the Splash panel 3. Do not insert the power cord plug before installation. Remove front merchandiser, disconnect wires to valve key lock switch, and light switch. Lift Figure 5 ©2016, Cornelius Inc. - Page 14 Figure 7 NOTE -- Water bath must be filled with water before the unit will run. 6.Re-install the top cladding, screws on the panel . 7.Connect the light ,valve harness and install the merchandiser. ©2016, Cornelius Inc.
- Page 15 The Unit remains turned off until the ice bank control three stainless-steel pins are free of ice. Once this happens, the ice bank control module starts the refrigeration compressor and the condenser fan motor. ©2016, Cornelius Inc.
-
Page 16: Connect Syrup, Water And Carbonated Water Lines
6. Check the system for gas leaks by pressurizing the system and then turning off the cylinder valve. Wait a couple of minutes and check the cylinder gauge to see if the pressure has dropped. 7. Check the system for water and syrup leaks. ©2016, Cornelius Inc. -
Page 17: Primary And Secondary Co2 Regulator Settings
4. Check the system for water and syrup leaks. Reinstall Panels 1. Shut the power off at the circuit breaker or fuse. Then reinstall top panel, close front merchandiser panel, and front splash panel. 2. Turn power ON. ©2016, Cornelius Inc. -
Page 18: Adjust Water-To-Syrup Ratio
Turn the flow adjuster 1/4 of a turn at a time and recheck the flow.To increase reading turn clockwise. 5. Next set syrup flow adjuster to get the desired ratio. 6. Test the valve and adjust until a consistent ratio is delivered three consecutive times. 7. Repeat procedure for other valves. Figure 11 ©2016, Cornelius Inc. -
Page 19: Adjusting Flow Rates
Voltage Cutout Protection The control board monitors the input line for high and low voltage conditions. If the voltage is outside of the acceptable range, the control will not allow certain operations (to protect motors from damage). ©2016, Cornelius Inc. -
Page 20: Operation
To avoid possible personal injury or property damage, DO NOT remove the syrup tank cover until CO2 pressure has been released from the tank. 1. Disconnect Syrup: Remove quick disconnects from syrup tanks and rinse in potable water. 2. Wash System ©2016, Cornelius Inc. -
Page 21: Sanitizing Bag-In-Box Syrup System
3. Disassemble the check valve. Clean and inspect each part, especially check the ball for damage. Replace damaged or worn out parts. 4. Always install a new seat (P/N 315-250-12). 5. Re-assemble and install the check valves. ©2016, Cornelius Inc. -
Page 22: Condenser Cleaning
2.Flexible version (The default setting is all CSD) Face to the merchandiser , The valve 1,2 and valve 6 is fixed CSD, the Valve 3,4,5 are NCB/CSD conversion valve ( and the valve4,5 are in the same water circuit) ©2016, Cornelius Inc. - Page 23 Pioneer Service Manual Change over introduction Close position (lower) Open position (higher) Loop 2 Loop 1 Valve4 Valve2,3 ©2016, Cornelius Inc.
- Page 24 The delivery system pressure must be relieved before starting the operation. Notes must complete the 6 steps for a correct conversion! And The Narrow side of the pistons hander must be front like the picture in any configuration ©2016, Cornelius Inc.
-
Page 25: Service
2. Remove the condenser filter from top accessible slot. 3. Lift the merchandiser up. 3. Remove top panel and side cladding. 4. Vacuum or use a soft brush to clean condenser coil. If available, use low pressure compressed air. ©2016, Cornelius Inc. -
Page 26: Clean Bib Connectors
CAUTION:Ensure that only these handles are used to lift the deck. Do not hold to any other components or structures Figure 13 Failure to comply could result in serious injury, death or damage to the equipment. ©2016, Cornelius Inc. - Page 27 Pioneer Service Manual ©2016, Cornelius Inc.
- Page 28 Pioneer Service Manual Notes ©2016, Cornelius Inc.
-
Page 29: Component Service
1. Disconnect power to the unit. 2. Remove top panel, side panels and back panel. 3. Unplug motor harness. 4. Remove fan mounting Screw 5. Lift up fan Motor Assembly. 6. Remove fan motor. 7. Install new motor by reversing this procedure. ©2016, Cornelius Inc. - Page 30 Pioneer Service Manual NOTES ©2016, Cornelius Inc.
-
Page 31: Trouble Shooting
1. Use clean cups or glasses. Dispensed product comes out of 2. Do not use ice directly from freezer. dispensing valve clear but foams in Allow ice to become “wet” before cup or glass. using. (refer to following NOTE). ©2016, Cornelius Inc. - Page 32 Compressor operates continuously 2. Unit located in excessively hot area or 2. Relocate unit or check and if but does not form sufficient ice bank. air circulation through condenser coil is necessary, clean condenser coil as restricted. instructed. ©2016, Cornelius Inc.
- Page 33 (see note). Carbonator pump not operating 4. Inoperative carbonated water tank 4. Replace probe (see note). water level probe. 5. Inoperative carbonator pump or motor. 5. Replace pump or motor. 6. Inoperative control board. 6. Replace control board. ©2016, Cornelius Inc.
- Page 34 Fan Motor Not Operating” in this section. 10. Inoperative overload protector or start 10. Replace inoperative part. relay. 11. Replace ice bank probe. 11. Inoperative ice bank probe. 12. Replace control board. 12. Inoperative control board. ©2016, Cornelius Inc.
-
Page 35: Reference Material
Pioneer Service Manual REFERENCE MATERIAL IRING IAGRAM Figure 14 ©2016, Cornelius Inc. -
Page 36: Plumbing Diagram
Pioneer Service Manual LUMBING IAGRAM Figure 15 ©2016, Cornelius Inc. - Page 37 Cornelius Inc. www.cornelius.com...
Need help?
Do you have a question about the Pioneer 2.0 M and is the answer not in the manual?
Questions and answers