Sign In
Upload
Download
Table of Contents
Contents
Add to my manuals
Delete from my manuals
Share
URL of this page:
HTML Link:
Bookmark this page
Add
Manual will be automatically added to "My Manuals"
Print this page
×
Bookmark added
×
Added to my manuals
Manuals
Brands
Sony Manuals
Camcorder
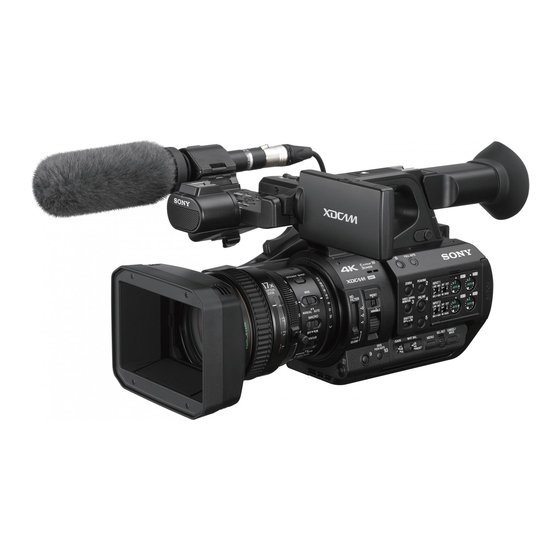
PXW-Z280T
Operating instructions manual
Sony PXW-Z280T Operating Instructions Manual
Solid-state memory camcorder
Hide thumbs
1
Table Of Contents
2
3
4
5
6
7
8
9
10
11
12
13
14
15
16
17
18
19
20
21
22
23
24
25
26
27
28
29
30
31
32
33
34
35
36
37
38
39
40
41
42
43
44
45
46
47
48
49
50
51
52
53
54
55
56
57
58
59
60
61
62
63
64
65
66
67
68
69
70
71
72
73
74
75
76
77
78
79
80
81
82
83
84
85
86
87
88
89
90
91
92
93
94
95
96
97
98
99
100
101
102
103
104
105
106
107
108
109
110
111
112
113
114
115
116
117
118
119
120
121
122
123
124
125
126
127
128
129
130
131
132
133
134
135
136
137
138
139
140
141
142
143
144
145
146
147
148
149
150
151
152
153
154
page
of
154
Go
/
154
Contents
Table of Contents
Troubleshooting
Bookmarks
Table of Contents
Table of Contents
Overview
Location and Function of Parts
Main Unit
Screen Display
Lcd/Viewfinder Screen
Status Screen
Preparation
Power Supply
Using a Battery Pack
Using AC Power
Turning the Camcorder On/Off
Setting the Clock
Attaching Devices
Attaching the Lens Hood
Attaching the Large Eyecup
Adjusting the Screens
Adjusting the LCD Screen
Adjusting the Viewfinder
Adjusting the Brightness of the Lcd/Viewfinder Screen Using an Assignable Button
Using Sxs Memory Cards
About Sxs Memory Cards
Inserting Sxs Memory Cards
Removing an Sxs Memory Card
Switching between Sxs Memory Cards
Formatting (Initializing) an Sxs Memory Card
Checking the Remaining Recording Time
Restoring an Sxs Memory Card
Using Other Media
XQD Memory Cards
SD Cards
Shooting
Basic Operation Procedure
Adjusting the Zoom
Adjusting the Focus
Monitoring Audio While Shooting
Changing Basic Settings
Video Format
Adjusting the Brightness
Adjusting for Natural Colors (White Balance)
Setting the Audio to Record
Image Stabilization
Time Data
Useful Functions
Direct Menu Operation
Face Detection AF
Color Bars/Reference Audio Tone
Shot Marks
OK/NG/KEEP Flags (Exfat, UDF)
Reviewing a Recording (Rec Review)
Assignable Buttons
Interval Recording (Interval Rec)
Continuous Recording (Clip Continuous Rec) (Exfat, UDF)
Picture Cache Recording (Picture Cache Rec)
Slow & Quick Motion
Simultaneous Recording in 2 Slots (Simul Rec)
4K & HD (Sub) Recording
High Dynamic Range (HDR) Recording
Adjusting the Flange Focal Length Automatically
Saving and Loading Configuration Data
Planning Metadata
Acquiring Location Information (GPS)
Proxy Recording
Supported SD Cards
Formatting (Initializing) SD Cards
Checking the Remaining Capacity
Proxy Recording (Proxy Rec)
Changing Proxy Recording Settings
About the Recorded File
Storage Destination of the Recorded File
About the File Name
Recording Proxy Data Only
Connecting to Other Devices Via LAN
Connecting Using Wireless LAN Access Point Mode
Connecting Using Wireless LAN Station Mode
Connecting to a Device Using a LAN Cable
Connecting to the Internet
Connecting Using a Modem
Connecting Using Wireless LAN Station Mode (Wi-Fi Station Mode)
Connecting Using a LAN Cable
List of Functions for Network Connections
Uploading a File
Preparations
Selecting a File and Uploading
Uploading Proxy Files Automatically
Uploading Using Secure FTP
Transmitting Streaming Video and Audio
Starting Streaming
Stopping Streaming
Network Client Mode
Using Web Remote Control
Web Remote Control Menu
Video Monitoring Settings (Monitoring Settings)
File Transfer Settings (Upload Settings)
File Transfer Management (File Transfer)
Thumbnail Screen
Configuration of the Thumbnail Screen
Playing Clips
Playing Recorded Clips
Playing the Selected and Subsequent Clips in Sequence
Adding Shot Marks During Playback (Exfat, UDF)
Monitoring Audio During Playback
Clip Operations
Thumbnail Menu Operations
Displaying Clip Properties
Protecting Clips (Exfat, UDF)
Copying Clips
Deleting Clips
Adding/Deleting Clip Flags (Exfat, UDF)
Filtering the Clips Displayed Using the Filtered Clip Thumbnail Screen (Exfat, UDF)
Deleting Shot Marks (Exfat, UDF)
Filtering Clips (Frames) Using the Essence Mark Thumbnail Screen (Exfat, UDF)
Changing the Information Displayed on the Thumbnail Screen
Changing the Index Picture of a Clip
External Device Connection
Connecting External Monitors and Recording Devices
External Synchronization
Managing/Editing Clips on a Computer
Connecting Using a USB Cable
Connecting an External HDD/USB Media
Menu Display and Settings
Setup Menu Configuration and Hierarchy
Setup Menu Hierarchy
Setup Menu Operations
Editing the User Menu
Setup Menu List
User Menu
Edit User Menu Menu
Camera Menu
Paint Menu
Audio Menu
Video Menu
LCD/VF Menu
TC/UB Menu
Recording Menu
Thumbnail Menu List
Media Menu
File Menu
Network Menu
System Menu
Appendix
Important Notes on Operation
Using Your Camcorder Abroad
Video Formats
About Recording Media
Special Recording Modes and Compatible Formats
Maximum Recording Time for a Clip
Output Formats and Limitations
Video Formats and Output Signals
Network and Video Output Combinations
Limitations between Recording Functions
Troubleshooting
Power Supply
Recording/Playback
External Devices
Wireless LAN Connection
Internet Connection
ND Filter Dial
Error/Warning Indications
Error Indications
Warning Indications
Caution and Operation Messages
Block Diagrams
Specifications
General
Lens
Camera
Wireless LAN
Inputs/Outputs
Display
Internal Microphone
Media Slots
Supplied Accessories
Index
Advertisement
Quick Links
Download this manual
4-740-705-11(1)
Solid-State Memory
Camcorder
Operating Instructions
Before operating the unit, please read this manual thoroughly
and retain it for future reference.
PXW-Z280V/PXW-Z280T
© 2018 Sony Corporation
Table of
Contents
Previous
Page
Next
Page
1
2
3
4
5
Advertisement
Table of Contents
Need help?
Do you have a question about the PXW-Z280T and is the answer not in the manual?
Ask a question
Questions and answers
Related Manuals for Sony PXW-Z280T
Camcorder Sony PXW-Z280V Operating Instructions Manual
Solid-state memory camcorder (154 pages)
Camcorder Sony PXW-Z280 Setup Manual
Wireless network connection (48 pages)
Camcorder Sony PXW-Z280 V5.0 Setup Manual
Wireless network connection (65 pages)
Camcorder Sony PXW-Z200 Help Manual
Solid-state memory camcorder (313 pages)
Camcorder Sony PXW-Z100 Operating Manual
Digital 4k video camera recorder (72 pages)
Camcorder Sony PXW-Z150 XDCAM Operating Manual
Solid-state memory camcorder (151 pages)
Camcorder Sony PXW-Z150 Operating Manual
Solid-state memory camcorder (152 pages)
Camcorder Sony PXW-Z150 Firmware Update
Solid-state memory camcorder (100 pages)
Camcorder Sony PXW-Z450 Manual
Solid-state memory camcorder (99 pages)
Camcorder Sony PXW-Z90T Operating Manual
Solid-state memory solid-state memory camcorder (176 pages)
Camcorder Sony PXW-Z190T Operating Instructions Manual
(170 pages)
Camcorder Sony PXW-Z190 Operating Instructions Manual
Solid-state memory camcorder (160 pages)
Camcorder Sony PXW-Z190V Operating Instructions Manual
Solid-state memory camcorder (120 pages)
Camcorder Sony PXW-Z190V Service Manual
Solid-state memory camcorder (107 pages)
Camcorder Sony PXW-Z450KC Zoom Lens Manual
Solid-state memory camcorder (11 pages)
Camcorder Sony PXW-Z750 Operating Instructions Manual
Solid-state memory camcorder (172 pages)
This manual is also suitable for:
Pxw-z280v
Table of Contents
Save PDF
Print
Rename the bookmark
Delete bookmark?
Delete from my manuals?
Login
Sign In
OR
Sign in with Facebook
Sign in with Google
Upload manual
Upload from disk
Upload from URL


Need help?
Do you have a question about the PXW-Z280T and is the answer not in the manual?
Questions and answers