Table of Contents
Advertisement
Advertisement
Table of Contents

Related Manuals for Sony PXW-Z150 XDCAM


Summary of Contents for Sony PXW-Z150 XDCAM
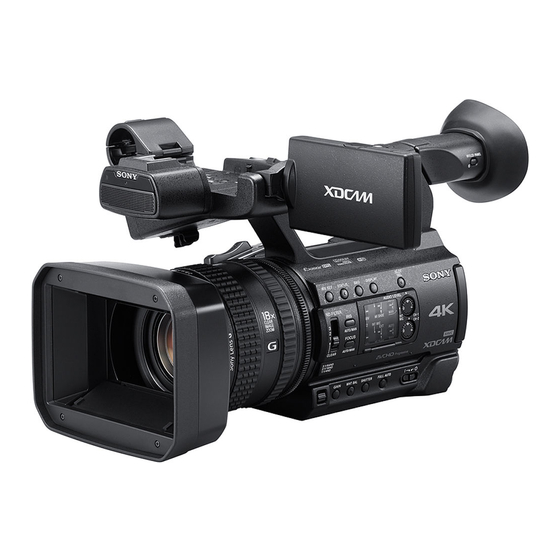
- Page 1 4-586-804-11(1) Solid-State Memory Identifying Parts and Controls Camcorder Getting Started Recording Operating Guide Playback Using Network Functions Editing Using the Menu Troubleshooting Additional Information ® http://www.sony.net/ © 2016 Sony Corporation Printed in Japan PXW-Z150...
-
Page 2: Read This First
Read this first Before operating this unit, please read this manual thoroughly, and retain it for future reference. Precautions when using the the LCD screen. This is not a malfunction. These points are normal results of the camcorder manufacturing process and do not affect the •... - Page 3 recovered. Save important data on the memory a result, you may not be able to record and save card on other media such as a computer, before images properly. If this happens, save images on a formatting the memory card. PC, then format the memory card (p.
-
Page 4: Table Of Contents
Table of Contents Read this first ................... 2 Identifying Parts and Controls Identifying Parts and Controls ..............8 Body ..................... 8 Wireless Remote Commander ............16 Screen Indicators ................... 17 Getting Started Step 1: Checking supplied accessories ..........19 Step 2: Charging the battery pack ............20 Step 3: Attaching the accessory shoe ............ - Page 5 Adjusting the brightness .................40 Adjusting the iris ................40 Adjusting the gain ................41 Adjusting the shutter speed ............... 41 Adjusting the light level (ND filter) ............42 Adjusting the color tone ................43 Adjusting the white balance ............... 43 Audio setup ....................45 Recording sound from the internal microphone ........
- Page 6 Table of Contents (Continued) Connecting without using the NFC function (iPhone/iPad) ....81 Configuring a wireless LAN ..............82 Selecting and registering an access point ......... 82 Registering an access point using the WPS function ......83 Registering an access point using the WPS PIN method ....84 Registering an access point manually ..........
- Page 7 Troubleshooting Troubleshooting ..................115 Warning indicators and messages ............122 Additional Information Recording time ..................126 Function limitations when recording .............129 Limitations for each file format ............129 Slow & Quick Motion and High Frame Rate recording limitations ... 130 Proxy recording supported formats ............131 Streaming supported formats ...............132 Using your camcorder abroad ..............134 File/folder structure on the recording media .........135...
-
Page 8: Identifying Parts And Controls
Identifying Parts and Controls Identifying Parts and Controls Body The numbers in ( ) are reference pages. A Hook for shoulder strap B Accessory shoe receptacle (p. 22) C ASSIGN4/LAST SCENE button (p. 61) D Microphone holder (p. 9) E Multi Interface Shoe (p. 46) F Power zoom lever (p. - Page 9 Attaching the microphone (sold separately) This section explains how to connect an external microphone (sold separately). Put the cable in the outer cable holder. 1 Place the microphone A into the microphone holder B . 2 Connect the plug of the microphone to the INPUT1 jack or INPUT2 jack C .
- Page 10 Identifying Parts and Controls (Continued) A Lens (G lens) Q AUDIO LEVEL (CH-2) dial (p. 45) B Lens cover with hood (p. 11) R AUTO/MAN (CH-2) switch (p. 45) C Internal microphone (p. 45) S CH-2 (INT MIC/EXT/MI SHOE) switch (p. 45) D Remote control sensor (p.
- Page 11 Attaching the lens cover with hood PUSH (lens hood removal) button Align the marks on the lens hood to those on the camcorder, and turn the lens hood in the direction of the arrow until it is locked. Removing the lens cover with hood Press and hold the PUSH (lens hood removal) button, and turn the lens hood in the opposite direction to the arrow.
- Page 12 Identifying Parts and Controls (Continued) A SDI OUT jack (p. 70) M Tripod receptacles (1/4 inch, 3/8 inch) Supports 1/4-20UNC and 3/8-16UNC B VIDEO OUT jack/AUDIO OUT jack screws. (p. 70) For mounting on a tripod (sold C HDMI OUT jack (p. 70) separately, screw length 5.5 mm or shorter) D Multi/Micro USB jack (p.
- Page 13 of the cable clamper using a cable tie or similar object. Cable clamper Loop clamper b Note • Do not use the cable clamper/loop clamper for any purpose other than securing cables (for example, attaching a strap for carrying the camcorder).
- Page 14 Identifying Parts and Controls (Continued) A Focus ring (p. 34) B Lens cover lever (p. 11) C Zoom ring (p. 33) D Iris ring (p. 40) E Hook for shoulder strap F Eye sensor (p. 24) G Viewfinder (p. 25) H Large eyecup (p.
- Page 15 A LCD screen (p. 24) B MENU button (p. 98) C V/v /B/b /SET buttons (p. 98) D THUMBNAIL button (p. 64) E Memory card slot A/Memory card access lamp (p. 27) F Memory card slot B/Memory card access lamp (p. 27) G i (headphones) jack (p.
-
Page 16: Wireless Remote Commander
Identifying Parts and Controls (Continued) b Notes Wireless Remote Commander • Aim the Wireless Remote Commander towards the remote sensor to operate your camcorder. Remove the insulation sheet before using • Point the remote sensor away from strong light the Wireless Remote Commander. sources such as direct sunlight or overhead Insulation sheet lighting. -
Page 17: Screen Indicators
Screen Indicators Center Indicator Meaning Upper left Upper right Warning (p. 122) Playback indicator (p. 64) Processing Relay recording (p. 31) SDI/HDMI REC CONTROL (p. 104) Bottom Upper right Upper left Indicator Meaning Indicator Meaning VF/LCD PANEL (p. 25) 100% Remaining battery INTELLIGENT AUTO Estimated remaining... - Page 18 Screen Indicators (Continued) Indicator Meaning White balance (p. 43) Histogram (p. 107) LOW LUX (p. 49) Audio level display (p. 109) Digital extender (p. 99) NIGHTSHOT (p. 49) ND filter (p. 42) Multi Interface Shoe video light (p. 101) Manual volume adjustment (p.
-
Page 19: Getting Started
Lens cover with hood (p. 11) supplied with your camcorder. If, for any reason, there is something missing, contact your Sony dealer. The number in the parentheses indicates the number of that item supplied. • Memory cards are sold separately. -
Page 20: Step 2: Charging The Battery Pack
• You can use a large capacity battery pack, NP- recorded movies, using the “Catalyst F970 (sold separately), with your camcorder. Browse” application software. For details, see the supplied brochure. Sony Professional products website: U.S.A. http://pro.sony.com Canada http://www.sonybiz.ca Latin America http://sonypro-latin.com Europe, Middle East, and Africa http://www.pro.sony.eu... - Page 21 When charging ends Connect the DC plug to the DC IN The CHG lamp turns off when the battery is jack of the camcorder. fully charged. Disconnect the AC Adaptor from the DC IN jack. z Tip • You can check the remaining battery life with the status check function (p.
-
Page 22: Step 3: Attaching The Accessory Shoe
Step 3: Attaching the Step 2: Charging the battery pack (Continued) accessory shoe On the battery pack To mount the accessory shoe • Always turn the ON/STANDBY switch to Mount the accessory shoe on the accessory STANDBY (1 ) before changing the battery shoe mount as illustrated. -
Page 23: Step 4: Turning On The Camcorder And Setting The Date And Time
Step 4: Turning on the camcorder and setting the date and time Turning on the camcorder Setting the date and time Set the date and time when you use your Turn the ON/STANDBY switch to ON camcorder for the first time. (❙... -
Page 24: Step 5: Adjusting The Lcd Screen And Viewfinder
Step 5: Adjusting the Step 4: Turning on the camcorder and setting the date and time (Continued) LCD screen and viewfinder Using the LCD screen The LCD screen can be rotated in the range as illustrated below, allowing a person other than the camera operator to see the image. -
Page 25: Adjusting The Viewfinder Focus
b Note Large eyecup The LCD screen and the viewfinder do not (supplied) operate at the same time. Adjusting the viewfinder focus Diopter adjustment dial Move it until the picture becomes clear. b Note • Do not remove the eyecup attached to the camcorder. - Page 26 Step 5: Adjusting the LCD screen and viewfinder (Continued) • The eye sensor will be activated if the eye sensor is blocked, even if you are not looking into the viewfinder. Using buttons Press the ASSIGN6/VF/LCD PANEL button. The [VF/LCD PANEL] menu setting changes with each press of the button.
-
Page 27: Step 6: Inserting A Memory Card
Step 6: Inserting a memory card Supported memory cards File format Supported memory cards AVCHD SD, SDHC, SDXC memory cards (Class 4 or U1 or faster) Memory Stick PRO Duo (Mark2), Memory Stick PRO-HG Duo AVCHD SDHC, SDXC memory cards (Class 10 or U1 or faster) (Slow &... - Page 28 Step 6: Inserting a memory card (Continued) Selecting the memory card slot to be Open the cover, and insert the used for recording memory card with the notched edge Press the SLOT SEL button to change in the direction as illustrated until it which slot is selected for recording.
-
Page 29: Recording
Recording Recording Recording lamp Handle record button Lens cover with hood START/STOP button Recording Your camcorder records movies on memory cards. The factory setting for recording is XAVC HD. Do the following steps to record. Open the shutter of the lens cover with hood. Continued ,... - Page 30 Recording (Continued) Turn the ON/STANDBY switch to ON (❙ ). Press the START/STOP button (or the handle record button) to start recording. [STBY] t [REC] The recording lamps light up during recording. To stop recording, press the START/STOP button (or the handle record button) again. b Notes •...
-
Page 31: Continuous Recording On The Memory Cards (Relay Rec)
z Tips • For details about changing the screen display during recording, see page 68. • For details about screen display during recording, see page 17. • The recording lamps can be set to stay off ([REC LAMP], p. 113). Continuous recording on the memory cards (Relay Rec) Insert memory cards each in both slots A and B so the camcorder switches memory card A (or B) just before the remaining space on the other one runs out, and continues recording on the... -
Page 32: Recording Movies Using Both Memory Card A And B (Simul Rec)
Recording (Continued) Recording movies using both memory card A and B (Simul Rec) You can record movies on both memory card A and memory card B simultaneously. Press MENU t select (REC/OUT SET) t [REC SET] t [SIMUL/RELAY REC] t [SIMULTANEOUS REC] with the V/v /B/b /SET button. -
Page 33: Adjusting The Zoom
z Tip Adjusting the zoom • You can turn the handle zoom function on/off, and change the zoom operation speed ([HANDLE ZOOM], page 100). Adjusting the zoom with the zoom ring You can zoom at the desired speed by turning the zoom ring B . Fine adjustment is also possible. -
Page 34: Adjusting The Focus
Adjusting the focus You can adjust the focus manually for different recording conditions. During recording or standby, Use this function in the following cases. press the FOCUS AUTO/MAN – To record a subject behind a window covered button B to set the focus to with raindrops. -
Page 35: Focusing On A Detected Face (Face Detection)
Press the ASSIGN5/FOCUS MAG Select (CAMERA SET) t button. [FACE DETECTION] t [ON] with the V/v /B/b /SET button D . The center of the screen is magnified. The setting changes with each press of the When the faces are detected, frames button. - Page 36 Adjusting the focus (Continued) • Face detection is not available in the following cases. – When streaming is ON during XAVC HD/ QFHD recording – When HDMI output or proxy recording is ON during XAVC QFHD recording • For details about limitations of face detection, see “Function limitations when recording”...
-
Page 37: Selecting The File Format And Recording Format
Selecting the file format and recording format • Frame rate: 30/25/24 Supported file formats • Scanning system: p (progressive) • Bit rate: 100 Mbps/60 Mbps The following five file formats are supported (default setting in bold). XAVC HD • XAVC QFHD (4K mode) (Default setting in bold) •... -
Page 38: Setting The Output Destination When Recording In 4K Mode
Selecting the file format and recording format (Continued) Setting the output destination 1080/60i (1440) 1080/50i (1440) HQ when recording in 4K mode 720/60p HQ 720/50p HQ You can select the output for the video signal when recording in XAVC QFHD. •... -
Page 39: Proxy Recording
Proxy recording – Face detection function This function allows you to simultaneously – Proxy recording (however, not supported record a low bitrate proxy file at the same when all the conditions below are met) time as recording the high bitrate original •... -
Page 40: Adjusting The Brightness
Adjusting the Proxy recording (Continued) brightness You can adjust the image brightness by Select the desired image size in adjusting the iris, gain or shutter speed, or (REC/OUT SET) t [REC by adjusting the light volume with the ND filter switch B . SET] t [PROXY REC MODE] t [SIZE] t... -
Page 41: Adjusting The Gain
Press the GAIN button E . next to the gain value disappears, and the gain value is highlighted. Iris value Turn the iris ring A to adjust the value. The volume of the light increases the Gain value more that you open the aperture (decreasing F value). -
Page 42: Adjusting The Light Level (Nd Filter)
Adjusting the brightness (Continued) • You can switch the shutter speed display between seconds and degrees ([SHUTTER Press the SHUTTER button F . DISPLAY], p. 109). next to the shutter speed value disappears, and the shutter speed value To adjust automatically is highlighted. -
Page 43: Adjusting The Color Tone
Adjusting the color tone ND filter switch B suppresses this Adjusting the white balance phenomenon and gives better recording results. You can adjust and fix the white balance according to the lighting conditions of recording environment. You can store white balance values in memory A ( A) and memory B ( respectively. - Page 44 Adjusting the color tone (Continued) 2 Press the WHT BAL button B to highlight the white balance value. Select PRESET, A, or B using the manual lever A . 3 Select A ( A) or B ( B) using the manual lever.
-
Page 45: Audio Setup
Audio setup Audio level controls The jacks, switches and dials shown below allow you to set the sound that is recorded. E : AUTO/MAN (CH-1) switch See page 9 for details about connecting a I : AUTO/MAN (CH-2) switch microphone. F : AUDIO LEVEL (CH-1) dial J : AUDIO LEVEL (CH-2) dial Recording sound from the... -
Page 46: Recording Sound From An External Audio Device
Audio setup (Continued) • If [INPUT CH SELECT] is set to Recording sound from an [INPUT1/INPUT1] in the [XLR SET] external audio device menu, the audio input on the INPUT1 jack is recorded to both CH1 and CH2. Use the following procedure if using a [XLR SET] >... -
Page 47: Setting The Audio Recording Level
Connect the Multi Interface Shoe Select (AUDIO SET) t compatible microphone (sold [HEADPHONE OUT] with the V/v / separately) to the Multi Interface B/b /SET button. Shoe. Select one of the following. Set the CH-1 (INT MIC/EXT/MI [HEADPHONE SHOE) switch D and CH-2 (INT Headphones audio output OUT] setting MIC/EXT/MI SHOE) switch H to... -
Page 48: Useful Functions
Useful functions Selecting suitable settings Press the V/v /B/b /SET button B , automatically (auto mode select [AUTO], [INTELLIGENT setting) AUTO], or [SCENE SELECTION], and press the button again. You can make optimal recordings in various situations. b Notes • When you select [INTELLIGENT AUTO], [STEADYSHOT] is set to [ACTIVE], and the angle of view shifts 1.08 times toward the telephoto side. -
Page 49: Shooting In Dimly Lit Locations (Low Lux)
Setting values Recording conditions Press the ASSIGN button. Shoots distant subjects • is displayed. clearly. This setting also prevents your camcorder • To cancel, press the ASSIGN button Landscape* from focusing on any again. ([LANDSCAPE]) glass or mesh in windows between the camcorder and the subject. -
Page 50: Customizing The Picture Quality (Picture Profile)
Useful functions (Continued) Customizing the picture quality Select (CAMERA SET) t (Picture Profile) [PICTURE PROFILE] t desired picture profile number You can customize the picture quality by using the V/v /B/b /SET button, adjusting picture profile items such as then press the button again. [GAMMA] and [DETAIL]. - Page 51 6 Press the V/v /B/b /SET button, select [OK], then press the button again. The picture profile indicator is displayed. Continued ,...
- Page 52 Useful functions (Continued) BLACK LEVEL To set the black level. Item Description and settings Sets the black level. –15 to +15 GAMMA To select a gamma curve. Item Description and settings [STANDARD] Standard gamma curve [STILL] Gamma curve to create the tone of a still image. [CINEMATONE1] Gamma curve 1 for producing tone of film camera images [CINEMATONE2]...
- Page 53 KNEE To set knee point and slope for video signal compression to prevent over-exposure by limiting signals in high intensity areas of the subject to the dynamic range of your camcorder. When selecting [STANDARD] or [STILL] in [GAMMA], [KNEE] is set to off if [MODE] is set to [AUTO].
- Page 54 Useful functions (Continued) SATURATION To set the color level. Item Description and settings –32 (light) to +32 (dark) COLOR PHASE To set the color phase. Item Description and settings –7 (greenish) to +7 (reddish) COLOR DEPTH To set the color depth for each color phase. This function is more effective for chromatic colors and less effective for achromatic colors.
- Page 55 Item Description and settings MEMORY1 COLOR Sets the color stored in Memory 1. [PHASE]: Sets color phase. 0 (purple) to 8 (red) to 16 (yellow) to 24 (green) to 31 (blue) [PHASE RANGE]: Sets color phase range. 0 (no color selection), 1 (narrow: to select only a single color) to 31 (wide: to select multiple colors in similar color phase) [SATURATION]: Sets saturation.
- Page 56 Useful functions (Continued) WB SHIFT To set items for the white balance shift. Items you can adjust differ depending on the filter type. Item Description and settings [FILTER TYPE] Selects a color filter type for the white balance shift. [LB-CC] : Film type (color conversion and correction) [R-B] : Video type (correction of R and B levels) [LB[COLOR TEMP]]...
-
Page 57: Setting Time Data
COPY Setting the time code To copy the settings of the picture profile to another picture profile number. 1 Press the MENU button, press the V/v / B/b /SET button and select (TC/ RESET UB SET) t [TC PRESET], then press the button again. -
Page 58: Slow-Motion Recording At High Frame Rate (Hfr)
Useful functions (Continued) 3 Press the V/v /B/b /SET button, select the first two digits, then press the button again. 4 Set other digits by repeating step 3 . 5 Press the V/v /B/b /SET button, select [OK], then press the button again. To reset the user bits Select [RESET] in step 2 of “Setting the user bits”... - Page 59 MPEG HD 422/MPEG HD 420 slow motion or quick motion images. The images recorded with the Slow & Quick When [60i] is selected Motion function will appear smoother than slow or fast-forward playback of images REC FORMAT recorded at normal speed. MEDIA 1080/24p 1080/30p...
- Page 60 Useful functions (Continued) 1080/24p 35Mbps – MPEG HD 422 (Default setting in bold) 1080/25p 50Mbps 1080/30p 50Mbps 1080/24p 50Mbps – MPEG HD 420 (Default setting in bold) 1080/25p HQ 1080/30p HQ 1080/24p HQ – AVCHD (Default setting in bold) 1080/60p PS 1080/50p PS 1080/30p FX 1080/25p FX...
-
Page 61: Reviewing The Most Recently Recorded Scene (Last Scene Review)
Recording in Slow & Quick Motion Reviewing the most recently mode recorded scene (Last Scene 1 Select (CAMERA SET) t [S&Q Review) MOTION] t [EXECUTE] with the V/ v /B/b /SET button B or press the You can review the most recently recorded ASSIGN3/S&Q button C . -
Page 62: Assigning Functions To The Assign Buttons
Assigning functions to the ASSIGN buttons Some functions can be assigned to the • CAMERA DATA DISPLAY (p. 108) ASSIGN buttons. • AUDIO LEVEL DISPLAY (p. 109) You can assign a single function to each of • DATA CODE (p. 109) the ASSIGN1 to 6 buttons. - Page 63 Press the MENU button A . Select (OTHERS) t [ASSIGN BUTTON] with the V/v /B/b /SET button B . Press the V/v /B/b /SET button B , select the ASSIGN button that you want to set, then press the button again. Press the V/v /B/b /SET button B , select the function that you want to assign, then press the button...
-
Page 64: Playback
Playback Playback THUMBNAIL button Playback Open the LCD panel. - Page 65 Press the THUMBNAIL button. The THUMBNAIL screen appears after a few seconds. Memory card Playback mode Back Thumbnails Next Current movie data (p. 66) • You can turn on or off the date and time display on the thumbnails by pressing the DISPLAY button. •...
- Page 66 Playback (Continued) 3 Select the thumbnail you want to play using the V/v /B/b buttons, and press the SET button. Selecting the thumbnail will show information about the movie in the lower part of the LCD screen. A Date and time of recording started B Resolution C Frame rate D Recording mode...
- Page 67 To return to recording mode Press the THUMBNAIL button. On playing back movies • Movies recorded using this camcorder may not be played back normally on devices other than this camcorder. Also, movies recorded on other devices may not play back properly on this camcorder.
-
Page 68: Changing/Checking The Settings In Your Camcorder
Changing/checking the settings in your camcorder Displaying recording data (Data Code) You can display information, including date, time and camera data automatically stored during recording on the screen during playback. Select (DISPLAY SET) t DATA CODE and choose the data that you want to display, or press the ASSIGN button to which the DATA CODE function is assigned, during... -
Page 69: Checking The Settings In Your Camcorder (Status Check)
F Camera shake correction (Steady Shot) • Battery Info You can check the remaining capacity of the attached battery. b Notes • Data code is not recorded in XAVC QFHD, XAVC HD, and MPEG HD modes. • When you play back the memory card on other devices, the camera data may be displayed incorrectly. -
Page 70: Connecting To A Monitor Or A Tv
Connecting to a monitor or a TV Playback image quality depends on the type of monitor or TV, or the jacks used to make the connection. SDI cable (sold separately) To SDI input jack To video input jack Video cable (sold separately) To audio input jack Audio cable (sold separately) To HDMI input jack... -
Page 71: Selecting Jacks For External Output
Notes • It is recommended that you use an authorized cable with HDMI logo or a Sony HDMI cable. • Images are not output from the HDMI OUT jack of your camcorder, if copyright protection signals are recorded in the movies. -
Page 72: Output Signal Formats
Connecting to a monitor or a TV (Continued) Output signal formats The signal format of the outputs from the SDI OUT jack, HDMI OUT jack, and multi/micro USB jack is shown below. SDI OUT/HDMI OUT output format (when [60i] is selected) XAVC QFHD –: Independent of set value Menu item... - Page 73 Menu item Recording format SDI/HDMI 24p/30p SDI OUT output HDMI OUT output REC/OUT SET> REC/OUT SET> REC/OUT SET> signal format signal format REC SET> VIDEO OUT> VIDEO OUT> REC FORMAT SDI/HDMI 24p/30p 2160/30p 2160p/1080p/480i 24p/30p 1080/30p 2160/30p 24PsF/30PsF 1080/30psf 60P(Pull Down) 1080/60p 2160p/720p/480i –...
- Page 74 Connecting to a monitor or a TV (Continued) XAVC HD/MPEG HD 422/MPEG HD 420/AVCHD –: Independent of set value Menu item Recording format SDI/HDMI 24p/30p SDI OUT output HDMI OUT output REC/OUT SET> REC/OUT SET> REC/OUT SET> signal format signal format REC SET>...
- Page 75 Menu item Recording format SDI/HDMI 24p/30p SDI OUT output HDMI OUT output REC/OUT SET> REC/OUT SET> REC/OUT SET> signal format signal format REC SET> VIDEO OUT> VIDEO OUT> REC FORMAT SDI/HDMI 24p/30p 1080/60p 2160p/1080p/480i – 1080/60p 1080/60p 720/60p 2160p/720p/480i 720/60p 720/60p 1080/60i 2160p/1080i/480i...
- Page 76 Connecting to a monitor or a TV (Continued) SDI OUT/HDMI OUT output format (when [50i] is selected) XAVC QFHD –: Independent of set value Menu item Recording format SDI/HDMI SDI OUT output HDMI OUT output REC/OUT SET> REC/OUT SET> REC/OUT SET> signal format signal format REC SET>...
- Page 77 XAVC HD/MPEG HD 422/MPEG HD 420/AVCHD –: Independent of set value Menu item Recording format SDI/HDMI SDI OUT output HDMI OUT output REC/OUT SET> REC/OUT SET> REC/OUT SET> signal format signal format REC SET> VIDEO OUT> VIDEO OUT> REC FORMAT SDI/HDMI 1080/25p 2160p/1080p/576i...
-
Page 78: Using Network Functions
Using Network Functions Using with a Smartphone The Wi-Fi function of the camcorder enables you to operate the camcorder remotely by a smartphone. You need iOS 7.0 or later. • You cannot use NFC One-touch when you use iOS. b Notes •... -
Page 79: Connecting The Camcorder To An Android Smartphone Equipped With The Nfc Function Using One-Touch
iPhone/iPad: page 81 z Tip • You can assign [SMARTPHONE CONNECT] to an ASSIGN button. You can start [CTRL W/SMARTPHONE] by pressing that ASSIGN button when the shooting screen is displayed (p. 62). Functions that can be controlled using [CTRL W/SMARTPHONE] •... -
Page 80: Connecting Without Using The Nfc Function (Android)
Using with a Smartphone (Continued) Connecting without using the Touch the smartphone on the NFC function (Android) camcorder. The smartphone connects to the camcorder, and “Content Browser Select [Settings] on your Mobile” is activated. smartphone, then select [Wi-Fi] [CTRL W/SMARTPHONE] starts on and the SSID (displayed on the the camcorder. -
Page 81: Connecting Without Using The Nfc Function (Iphone/Ipad)
Connecting without using the Confirm connection to the SSID NFC function (iPhone/iPad) displayed on the camcorder. Select [Settings] on the iPhone or iPad, then select [Wi-Fi] and the SSID (displayed on the camcorder). z Tip • The next time that you want to connect to the camcorder, select the camcorder in the device list in the Connect menu, and select [Connect]. -
Page 82: Configuring A Wireless Lan
Configuring a wireless Using with a Smartphone (Continued) You can connect the camcorder to a Confirm connection to the SSID network using a wireless LAN. displayed on the camcorder. Selecting and registering an access point You can connect the camcorder and an access point using a wireless LAN. -
Page 83: Registering An Access Point Using The Wps Function
Priority Connection Select (NETWORK SET) t Select whether to configure connection [Wi-Fi SET] t [WPS] with the V/v / priority for access points. B/b /SET button. z Tip • After a short delay, the following • Selecting [DNS server setting] on the IP screen appears. -
Page 84: Registering An Access Point Using The Wps Pin Method
Configuring a wireless LAN (Continued) • [Registered.] appears when the access • The camcorder and access point may not connect or the distance between them for point is registered successfully. The successful communication may be short, SSID of the registered access point is depending on the surrounding environment, also displayed. -
Page 85: Changing The Device Name
b Note Select , and press the • If ten access points have been registered in the camcorder, another access point cannot be MENU button to close the menu registered and a message appears. Select screen. [Delete], and delete any access points that are no longer required. -
Page 86: Configuring A Wired Lan
Configuring a wired Configuring a wireless LAN (Continued) You can connect the camcorder to a Screen items Functions network using a wired LAN. 5 Move cursor Moves the cursor in the input box to the left or right 6 Delete Deletes the character preceding the cursor Switches between... -
Page 87: Using The Streaming Function (Streaming)
Using the streaming function (STREAMING) You can connect the camcorder to a Press the MENU button. network and stream a movie in real-time to external devices. Streaming formats Select (NETWORK SET) t [WIRED LAN SET] t There are limitations on the size of the ADDRESS SET] with the V/v /B/b / original file movie and the streaming move. -
Page 88: Streaming Distribution
Using the streaming function (STREAMING) (Continued) Select/set the setting value. Press the THUMBNAIL button to start streaming distribution. • The screen icon changes to Press the MENU button to return to the shooting screen. Press the THUMBNAIL button again to stop streaming distribution. -
Page 89: Using The Ftp Transfer Function
Using the FTP transfer function – FACE DETECTION When the camcorder is connected to a – COLOR BAR network, you can transfer recorded movie – DATE REC files directly to an FTP server. Proxy files can also be transferred. – SIMULTANEOUS REC/RELAY REC •... -
Page 90: Selecting An Ftp Server
Using the FTP transfer function (Continued) USER INFO SET User name and password Select the media, where the files you want to transfer are stored, b Note and the file format on the • It is recommended that [Secure Protocol] be set thumbnail screen. -
Page 91: Checking Ftp Transfer Results
Select whether to turn the Select (NETWORK SET) t camcorder off (YES) or not (NO) [FTP TRANSFER] t [FTP automatically when the FTP RESULT]. transfer is completed. • The transfer results are displayed. • File transfer starts. • The displayed transfer results contains the following items. -
Page 92: Importing A Root Certificate
• If a problem occurs due to inadequate security measures or due to foreseeable circumstances, Sony Corporation is not Insert the memory card with the responsible for any resulting damage. root certificate into memory card slot A of the camcorder. -
Page 93: Resetting Network Settings
Resetting network settings The following settings are reset when resetting network settings. • SSID/password for smartphone operation (p. 80) • Streaming settings (p. 87) • FTP transfer settings (p. 89) • FTP transfer result (p. 91) • Wired LAN settings (p. 86) •... -
Page 94: Protecting Movies (Protect)
Editing Protecting movies Dividing a movie (Protect) Protect movies to avoid deleting them by You can divide a movie at a designated point. mistake. Press the MENU button while Press the MENU button when the playing back movies. THUMBNAIL screen is displayed. Press the V/v /B/b /SET button, Press the V/v /B/b /SET button, then select... -
Page 95: Deleting Movies
Deleting movies You can free media space by deleting movies from a memory card. Select , successively, according to the screen display. b Notes • You cannot restore images once they are deleted. • Do not remove the battery pack, the AC Adaptor, or the memory card from your camcorder during the operation. -
Page 96: Formatting A Memory Card
Formatting a memory Deleting all data from card the memory card completely Formatting deletes data from the memory card to recover recordable free space. If a memory card is used repeatedly, b Notes garbage data accumulate which may prevent the image data from being written •... -
Page 97: Repairing The Image Database File
Repairing the image database file b Notes This function checks the database information and the consistency of movies • It may take from several minutes to several hours to empty a memory card, depending on on the memory card, and repairs any the capacity. -
Page 98: Using The Menu
Using the Menu Operating the menu You can change various settings or make detailed adjustments using the menu items Press the V/v /B/b /SET button, displayed on the LCD screen. select the desired menu icon, then press the button again. MENU button CAMERA SET (p. -
Page 99: Menu Items
Menu items The function and setting value of each menu item are as follows. The default settings are marked with bold text. The display sequence of menu items may vary from the device. CAMERA SET menu CAMERA SET Menu item Sub-items/Settings Description AGC LIMIT... - Page 100 Menu items (Continued) CAMERA SET Menu item Sub-items/Settings Description ZOOM SET ZOOM TYPE Selects the type of zoom used when operating OPTICAL ZOOM the zoom lever. ONLY, ON[CLEAR OPTICAL ZOOM ONLY: Uses optical zoom IMAGE ZOOM], only. ON[DIGITAL ZOOM] ON[CLEAR IMAGE ZOOM]: Uses clear image zoom in addition to optical zoom.
- Page 101 CAMERA SET Menu item Sub-items/Settings Description AUTO MODE SET AUTO, INTELLIGENT Sets auto mode to optimize settings to suit the AUTO, SCENE scene to record (p. 48). SELECTION SCENE SELECTION NIGHT SCENE, Sets the scene to use when auto mode is set to SUNRISE&SUNSET, [SCENE SELECTION] (p.
-
Page 102: Rec/Out Set Menu
Menu items (Continued) CAMERA SET Menu item Sub-items/Settings Description COLOR BAR ON/OFF Displays and records color bars, and outputs OFF, ON audio tone signals. • This function is automatically set to [OFF] when you switch the format, execute a function with the MENU button, or turn off the camcorder. - Page 103 REC/OUT SET Menu item Sub-items/Settings Description VIDEO OUT OUTPUT SELECT Selects the output destination for the video OUTPUT SELECT signal. SDI, HDMI, VIDEO Selects the output destination for the video QFHD REC OUTPUT signal when recording in XAVC QFHD (p. 38). VF/LCD PANEL, EXTERNAL OUTPUT SDI/HDMI...
-
Page 104: Audio Set Menu
Menu items (Continued) REC/OUT SET Menu item Sub-items/Settings Description HDMI TC OUTPUT Sets whether to output time code to other OFF, ON professional-use devices, using HDMI. SDI/HDMI REC When the camcorder is connected to an external CONTROL recorder, sets whether the external recorder OFF, ON automatically starts/stops recording based on the camcorder’s operation. - Page 105 AUDIO SET Menu item Sub-items/Settings Description XLR SET INPUT CH SELECT Selects the signals for recording on CH-1 and INPUT1/INPUT1, CH-2 (p. 46). INPUT1/INPUT2 INPUT1/INPUT1: Records the input on INPUT1 signal to both CH-1 and CH-2. INPUT1/INPUT2: Records the INPUT1 signal to CH-1, and the INPUT2 signal to CH-2.
- Page 106 Menu items (Continued) AUDIO SET Menu item Sub-items/Settings Description INPUT1 TRIM Adjusts the input signal level when recording –18dB to +12dB (0dB) the signal from the INPUT1 jack or INPUT2 jack. INPUT2 TRIM • If the recording level is set to “AUTO” and –18dB to +12dB (0dB) INPUT TRIM is set to [0dB], a –48 dBu input will be recorded at the reference recording...
-
Page 107: Display Set Menu
DISPLAY SET menu DISPLAY SET Menu item Sub-items/Settings Description HISTOGRAM OFF, ON, ON[ZEBRA Sets whether to display a histogram. POINT] The histogram displays the luminance distribution that shows how many pixels for each brightness level exist in the image. OFF: Does not display a histogram. ON: Displays a histogram. - Page 108 Menu items (Continued) DISPLAY SET Menu item Sub-items/Settings Description MARKER ON/OFF Sets whether to display markers. OFF, ON You can display multiple types of markers at the same time. • Markers are not recorded on the memory card. • During marker display, only the time code, zebra, peaking, and face detection indicators are output, even if [DISPLAY OUTPUT] is set to [ALL OUTPUT].
- Page 109 DISPLAY SET Menu item Sub-items/Settings Description AUDIO LEVEL ON, OFF Sets whether to display the audio level meters. DISPLAY ZOOM DISPLAY BAR, NUMBER Sets whether to display the zoom position as a bar or number. FOCUS DISPLAY METER, FEET Sets the display of the focus distance in meters or feet.
-
Page 110: Tc/Ub Set Menu
Menu items (Continued) TC/UB SET menu TC/UB SET Menu item Sub-items/Settings Description TC/UB DISPLAY TC, U-BIT Switches the display to time code or user bits. TC PRESET PRESET, RESET Sets the time code (p. 57). UB PRESET PRESET, RESET Sets the user bits (p. 57). TC FORMAT DF, NDF Switches the time code recording method when... -
Page 111: Network Set Menu
TC/UB SET Menu item Sub-items/Settings Description TC MAKE PRESET, Sets how the time code continues. REGENERATE PRESET: Records a preset set time code on the memory card. REGENERATE: Reads the last recorded time code from the memory card, and starts recording with a consecutive time code. - Page 112 Menu items (Continued) NETWORK SET Menu item Sub-items/Settings Description Wi-Fi SET ACCESS POINT SET • Selects and configures an access point (p. 82). • Registers an access point using the WPS PIN method (p. 84). • Registers an access point manually (p. 84). Registers an access point using the WPS function (p.
-
Page 113: Others Menu
OTHERS menu OTHERS Menu item Sub-items/Settings Description STATUS CHECK Checks the settings in your camcorder (p. 69). CAMERA PROFILE MEMORY CARD A, Loads, saves, and deletes camera profiles. MEMORY CARD B • A camera profile saves configuration settings, such as menu, picture profile, and button settings. -
Page 114: Edit Menu
Menu items (Continued) OTHERS Menu item Sub-items/Settings Description 60i/50i SEL Switches the current frame rate. 60i: For recording 24p, 30p, 60i, or 60p. 50i: For recording 25p, 50i, or 50p. MEDIA FORMAT MEMORY CARD A, Formats a memory card (p. 96). MEMORY CARD B REPAIR IMAGE DB MEMORY CARD A,... -
Page 115: Troubleshooting
(OTHERS) t INITIALIZE. This operation will reset the date, time, and area settings. 4 Consult your Sony dealer or local authorized Sony service facility. • Power sources/LCD screen/Wireless Remote Commander (p. 115) • Memory cards (p. 117) • Recording (p. 117) •... - Page 116 Troubleshooting (Continued) The remaining battery indicator does not indicate the correct figure. • Ambient temperature is too high or too low, or the battery pack has not been charged enough. This is not a malfunction. • Fully charge the battery again. If the problem persists, the battery may be worn-out. Replace with a new battery (page 20, 137).
- Page 117 Memory cards The camcorder does not operate with the memory card inserted. • The memory card was formatted on a computer. Format it on this camcorder (p. 96). The data file name is incorrect, or flashing. • The file is damaged. •...
- Page 118 Troubleshooting (Continued) The actual recording time for movies is less than the estimated recording time. • Depending on the recording conditions, the time available for recording may be shorter, for example when recording a fast moving object, etc. (p. 126). The camcorder does not keep the setting changes.
- Page 119 The subjects passing by the frame very fast appear crooked. • This is called focal plane phenomenon. This is not a malfunction. Because of the way that the image device (CMOS sensor) reads out image signals, the subjects passing by the frame rapidly might appear crooked depending on the recording conditions.
- Page 120 Troubleshooting (Continued) The data file name is incorrect, or flashing. • The file is damaged. • The file format is not supported on your camcorder (p. 136). • Only the file name is displayed, if the folder structure does not conform to the universal standard.
- Page 121 Copying/Editing/Connecting to other devices Time code and other information appear on the display of the connected device. • Set [DISPLAY OUTPUT] to [LCD PANEL] (p. 109). Sound cannot be added after recording. • You cannot add sound after recording on your camcorder. Copy cannot be done correctly using the HDMI cable.
-
Page 122: Warning Indicators And Messages
If the problem (Warning indicator pertaining to persists even after you have tried a couple the video light) of times, contact your Sony dealer or local authorized Sony service facility. • The battery level is too low. C:04:s s... - Page 123 If you connect to a computer on which - (Warning indicators software is installed, you can copy the pertaining to the write-protect of the backed up movies. memory card)* However, the loading of all moves is not guaranteed. • The write-protect switch is set to lock position on the memory card.
- Page 124 (NETWORK SET) t [Wi-Fi your camcorder (p. 27). SET] t [ACCESS POINT SET], and • Contact your Sony dealer. register an access point. Do not eject the memory card during Cannot find connectable access writing. Data may be damaged. point. Set the access point setting.
- Page 125 Failed to acquire an IP address. Change the IP address setting. Could not acquire the IP address. If connecting to a network via a wireless LAN, select (NETWORK SET) t [Wi-Fi SET] t [ACCESS POINT SET], and specify the IP address manually. If connecting to a network via a wired LAN, select (NETWORK SET) t...
-
Page 126: Additional Information
Additional Information Recording time Estimated time of recording and Estimated recording time playback with each battery pack (Unit: minute) Approximate time available when you use a XAVC QFHD fully charged battery pack. Recording time 2160 4K (QFHD) 60Mbps 100Mbps (Unit: minute) 64GB Continuous Typical... - Page 127 50Mbps (3M) 64GB 64GB (305) (360) (495) (665) (105) (100) • When using Sony memory cards. MPEG HD 420 • The number in ( ) is the minimum recordable time. 1080 1080 MPEG (1440) b Note HD 420 • The recording time may vary depending on the...
- Page 128 Recording time (Continued) – MPEG HD 420 HQ: 35Mbps (max) 1920×1080 HQ: 35Mbps (max) 1440×1080 HQ: 35Mbps (max) 1280×720 – AVCHD PS: max 28Mbps 1920×1080 FX: max 24Mbps 1920×1080, 1280×720 FH: approx. 17Mbps (avg) 1920×1080, 1280×720 HQ: approx. 9Mbps (avg) 1280×720...
-
Page 129: Function Limitations When Recording
Function limitations when recording For details about limitation when streaming is ON, see page 88. Limitations for each file format Yes: Supported, No: Not supported Functions XAVC QFHD XAVC HD MPEG HD AVCHD RELAY REC (p. 31) SIMULTANEOUS REC (p. 32) FACE DETECTION (p. -
Page 130: Slow & Quick Motion And High Frame Rate Recording Limitations
Function limitations when recording (Continued) Slow & Quick Motion and High Frame Rate recording limitations Yes: Supported, No: Not supported Slow-motion at high frame rate Functions Slow & Quick Motion (XAVC HD only) RELAY REC (p. 31) SIMULTANEOUS REC (p. 32) FACE DETECTION (p. -
Page 131: Proxy Recording Supported Formats
Proxy recording supported formats b Notes • Proxy recording is not supported when the following three are selected at the same time. – Recording mode: 4K (XAVC QFHD) – Recording format bit rate: 100Mbps – Simultaneous/relay recording: ON • Proxy recording is not supported when the output during XAVC QFHD recording is set to external output. •... -
Page 132: Streaming Supported Formats
Streaming supported formats Original file (XAVC) Streaming data Image size 1280×720 640×360 Frame rate (fps) 30(25)p 60(50)p 30(25)p Bit rate (Mbps) 3840×2160 30(25)p 1920×1080 60(50)p 60(50)i 30(25)p 1280×720 60(50)p Original file (AVCHD) Streaming data Image size 1280×720 640×360 Frame rate (fps) 30(25)p 60(50)p 30(25)p... - Page 133 Original file (MPEG HD 422) Streaming data Image size 1280×720 640×360 Frame rate (fps) 30(25)p 60(50)p 30(25)p Bit rate (Mbps) 1920×1080 60(50)i 30(25)p 1280×720 60(50)p Original file (MPEG HD 420) Streaming data Image size 1280×720 640×360 Frame rate (fps) 30(25)p 60(50)p 30(25)p Bit rate...
-
Page 134: Using Your Camcorder Abroad
Using your camcorder abroad Power supply You can use your camcorder in any country/region using the AC Adaptor supplied with your camcorder within the AC 100V to 240V, 50Hz/60Hz range. Viewing on TV The following shows which countries and regions use 60i and 50i models. Countries and regions for [60i] use Bahama Islands, Barbados, Bermuda, Bolivia, Canada, Central America, Chile,... -
Page 135: File/Folder Structure On The Recording Media
• Do not modify the files or folders on the camcorder from the computer. Doing so might damage image files, or prevent image files from being played back. • Sony accepts no responsibility for the results of operation using data copied from a PC to a memory card. -
Page 136: Maintenance And Precautions
Maintenance and precautions 1920×1080/24p, 1280×720/60p About the XAVC format When [50i] is selected: 1920×1080/50i, 1920×1080/25p, Recording and playback on your 1280×720/50p camcorder Audio: LPCM 2 ch Your camcorder can record 4K (QFHD) Recording media: Memory card and HD (high definition) based on the * The camcorder is not able to play back data that XAVC format. -
Page 137: About The "Infolithium" Battery Pack
About “Memory Stick” media – If you eject the memory card, turn the power off on your camcorder, or remove the battery pack for replacement while your camcorder is Recording/ Types of “Memory Stick” media reading or writing image files on the memory Playback card (while the access lamp is lit or flashing). - Page 138 Maintenance and precautions (Continued) About battery life – Put the battery pack in a pocket to warm it up, and install it in your camcorder right before • Battery capacity decreases over time and you start taking shots. through repeated use. If decreased usage time •...
-
Page 139: About Handling Of Your Camcorder
(or casing, unplug your camcorder and have it vice versa) or when you use your camcorder in a checked by a Sony dealer before operating it humid place as shown below. any further. - Page 140 Maintenance and precautions (Continued) How to avoid moisture condensation • Store in a well-ventilated location subject to little dirt or dust. When you bring your camcorder from a cold place • To prevent mold, periodically clean the lens as into a warm place, put your camcorder in a plastic described above.
- Page 141 To prevent electromagnetic interference from portable communications and other wireless devices The use of portable telephones and other communications devices near this camera can result in malfunctions and interference with audio and video signals. It is recommended that the portable communications devices near this camera be powered off.
-
Page 142: Specifications
Specifications General MPEG HD422: MPEG-2 422P@HL Power r equir ements 4:2:2 Long profile 8.4 V DC (using AC Adaptor) MPEG HD420: MPEG-2 MP@HL 7.2 V DC (using battery pack) 4:2:0 Long profile Power consumption MPEG HD Proxy: MPEG-4 AVC/ While recording XAVC HD, using H.264 4:2:0 Long profile viewfinder: Approx. - Page 143 (equivalent to f = 29.0 mm to 348.0 mm 12× (optical zoom), 24× (clear image on 35 mm lens) zoom), 192× (digital zoom) Ir is F2.8 to F4.5 (auto/manual selectable) White balance Preset (Indoor: 3200K, Outdoor: 5600K Focus ± 7 steps, Color temperature set range: Auto/manual selectable 2300K to 15000K), One-push A, B, 10 mm to ∞...
- Page 144 Specifications (Continued) Rechargeable battery pack (NP-F770) Viewfinder 1.0 cm (0.39-type) OLED Maximum output voltage Approx. 1.44M dots 8.4 V DC Output voltage Internal microphone 7.2 V DC Omni-dir ectional ster eo electr et Maximum char ging voltage condenser micr ophone 8.4 V DC Maximum char ging cur r ent Wireless LAN...
-
Page 145: Index
Index CHG lamp ......20 FOCUS DISPLAY .....109 CH-1/CH-2 switches .... 45 FOCUS MAG button....34 AC Adaptor.....19, 20 CLOCK SET ......23 FOCUS MAG RATIO..108 Access point......82 COLOR BAR ..... 118 Focus Magnifier....34 Accessory shoe .....22 COLOR DEPTH ....54 Focus ring ......34 AE SHIFT......118 COLOR MODE .... - Page 146 Index (Continued) IRIS AUTO/MAN button..40 MENU button ...... 98 Iris ring .........40 MIC+48V......45 REC BUTTON SET.....32 Microphone REC FORMAT ....37 attaching ......9 REC LAMP ......113 KNEE ........53 internal ......45 REC/OUT SET menu..102 Multi Interface Shoe ..46 REC SET ......102 Moisture condensation ..
- Page 147 Specifications......142 Viewfinder ......25 START/STOP button ...30 diopter adjustment dial ........ 25 STATUS button ....69 VOLUME..... 66, 104 STATUS CHECK....113 Status check ......69 STEADYSHOT ....100 Warning indicators ..... 122 STREAMING ....87, 111 Warning messages....123 Streaming ......87 WB OUTDOOR LEVEL ..99 supported formats ..132 WB PRESET......
- Page 148 Trademarks Notes on the License • “XDCAM” logo is a trademark of Sony ANY USE OF THIS PRODUCT OTHER THAN Corporation. CONSUMER PERSONAL USE IN ANY MANNER THAT COMPLIES WITH THE • “XAVC” and are registered trademarks MPEG-2 STANDARD FOR ENCODING of Sony Corporation.
- Page 149 GPL/LGPL. Source code is provided on the web. Use the following URL to download it. http://www.sony.net/Products/Linux/ We would prefer you do not contact us about the contents of source code. Licenses (in English) are recorded in the internal memory of your camera.
Need help?
Do you have a question about the PXW-Z150 XDCAM and is the answer not in the manual?
Questions and answers