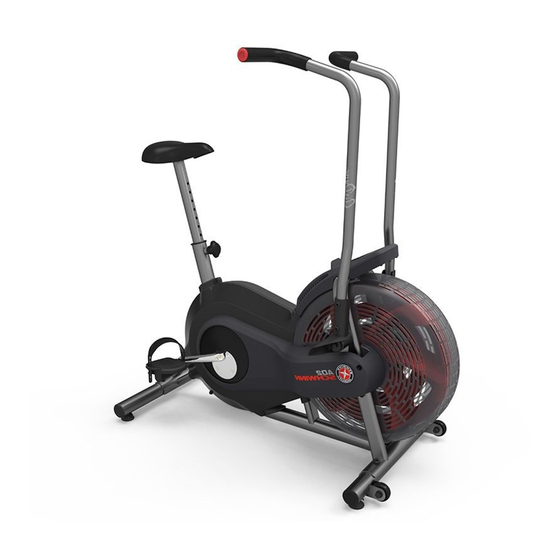
Schwinn Airdyne AD2 Service Manual
Hide thumbs
Also See for Airdyne AD2:
- User manual ,
- Assembly manual (28 pages) ,
- Assembly manual / owner's manual (28 pages)
Table of Contents
Advertisement
Table of Contents
Nautilus, Inc., (800) NAUTILUS / (800) 628-8458, www.NautilusInc.com - Customer Service: North America (800) 605-3369, outside U.S. +01-360-859-5180 | Printed in USA | © 2012
Nautilus, Inc., All rights reserved. ™ and ® indicate a trademark or registered trademark. Nautilus, Inc. (www.nautilus.com) trademarks include NAUTILUS®, BOWFLEX®, SCHWINN®
and UNIVERSAL® and respective logos. Other trademarks are the property of their respective owners.
Important Safety Instructions
This icon means a potentially hazardous situation which, if not avoided, could result in death or serious injury. Read and
understand all Warnings on this machine.
Before servicing or using this equipment, obey the following warnings:
W A R N I N G
Read and understand the Service Manual before working on the machine. Failure to obey the instructions and safety
warnings could cause injury to the service technician or bystanders.
D A N G E R
• Keep bystanders and children away from the product being serviced at all times.
• Make sure that the repair is done in an appropriate work space away from foot traffic and exposure to bystanders.
A T T E N T I O N
• Some components of the equipment can be heavy or awkward. Enlist the service of a second person when you do maintenance
steps involving these components. Do not try to do heavy or awkward steps on your own.
IMMEDIATE ACTION REQUIRED
• Use only replacement parts and hardware that are supplied or approved by Nautilus. Failure to use Nautilus-approved replacement
parts can adversely affect the safety and functionality of the equipment creating a risk to users.
C A U T I O N
• Be sure that all warning stickers and instructional placards applied to the product stay present and in good condition when doing
maintenance or replacing components. If necessary, request replacement warning stickers or placards from Nautilus customer
service.
• Do not try to change the design or functionality of the machine being serviced as this can adversely effect user safety.
• Do not put the machine back in service until all shrouds, instructions, warning labels and correct functionality have been verified
and tested for correct performance.
• This product contains magnets. Magnetic fields can interfere with the normal use of certain medical devices at a close range. Users
may come into proximity of the magnets in the assembly, maintenance, and/or use of the product. Given the obvious importance of
these devices, such as a pacemaker, it is important that you consult with your medical provider in connection with the use of this
equipment. Please consult the "Safety Warning Labels and Serial Number" section to determine the location of the magnets on this
product.
Schwinn
Disconnect all power and allow to sit for 5 minutes before you service this machine.
Airdyne
AD2 (Model Year '12)
®
®
1
2
2
2
3
4
5
6
6
7
8
8
9
9
10
Service Manual
004-4755.103012.B
11
12
13
15
16
19
21
23
25
27
29
31
Advertisement
Table of Contents

Related Manuals for Schwinn Airdyne AD2


Summary of Contents for Schwinn Airdyne AD2
-
Page 1: Table Of Contents
Nautilus, Inc., (800) NAUTILUS / (800) 628-8458, www.NautilusInc.com - Customer Service: North America (800) 605-3369, outside U.S. +01-360-859-5180 | Printed in USA | © 2012 Nautilus, Inc., All rights reserved. ™ and ® indicate a trademark or registered trademark. Nautilus, Inc. (www.nautilus.com) trademarks include NAUTILUS®, BOWFLEX®, SCHWINN®... -
Page 2: Safety Warning Labels And Serial Number
Safety Warning Labels and Serial Numbers • • • • 250lbs. (113kg). • • • • • • 250lbs. (113kg). • • Reading the Serial Number The instructions below show how to decode the information contained on the serial number. SERIAL NO. -
Page 3: Maintenance
Maintenance Read all maintenance instructions fully before you start any repair work. In some conditions, an assistant is necessary to do the necessary tasks. Equipment must be regularly examined for damage and repairs. The owner is responsible to make sure that regular maintenance is done. -
Page 4: Leveling/Moving The Machine
Leveling Your Machine If your workout area is uneven, you must level your machine. To adjust: Loosen the upper locking nut. Turn the leveler to adjust the height. Tighten the upper locking nut to lock the leveler. Do not adjust the levelers to such a height that they detach or unscrew from the machine. -
Page 5: Troubleshooting
Troubleshooting Condition/Problem Things to Check Solution Console will not power up/turn Batteries Make sure batteries are installed correctly. If batteries are on/start correctly installed, replace with a set of new batteries. Check data cable integrity All wires in cable should be intact. If any are visibly crimped or cut, replace cable. -
Page 6: Mechanical Procedures
Mechanical Service Procedures Fan Tension Adjustmennt Disconnect the data cable from the console before you service this machine. Note: Your machine may not match the image. For reference only. Tools required: pedal wrench, #2 Phillips screwdriver, 11mm open end wrench or socket and wrench (or nutdriver) Remove the Pedals. -
Page 7: Belt Tension Adjustment
Belt Tension Adjustment Disconnect the data cable from the console before you service this machine. Note: Your machine may not match the image. For reference only. Figure 1 Tools required: pedal wrench, #2 Phillips screwdriver, M8 socket and wrench Remove the Pedals. Refer to the “Replacing the Pedals” procedure in this manual. -
Page 8: Electronics Procedures
Electronics Service Procedures Service Mode Service Mode lets you set the units of measure to either English or Metric, see machine statistics and firmware version (for technician use only). When the Console is in Workout Mode or Pause Mode, push and hold down the button for 5 seconds to go into Service Mode. Note: Tap the button to move through the Service Mode Menu options. -
Page 9: Part Replacement
Replacing Parts Disconnect the data cable from the console before cleaning, maintaining or repairing the machine. For instructions to replace the following parts, please refer to the Assembly Manual for your bike: • Seat • Seat Post • Front Stabilizer •... -
Page 10: Console
Replacing the Console Disconnect the data cable from the console before you service this machine. Note: Your machine may not match the image. For reference only. 1. Be sure the Data Cable is disconnected from the back of the Console. Push the Locking Tab (A) on the back of the Console to disengage it from the Console Bracket (B). -
Page 11: Handlebars And Footpegs
Replacing the Handlebars and Footpegs Disconnect the data cable from the console before you service this machine. Note: Your machine may not match the image. For reference only. Tools required: 6 mm hex key 1. Loosen and remove the Hardware (A) that attaches the Footpeg and Handlebar to the Arm Pivot. -
Page 12: Arm Pivots
Replacing the Arm Pivots Disconnect the data cable from the console before you service this machine. Note: Your machine may not match the image. For reference only. Tools required: pedal wrench, 4mm hex key, #2 Phillips screwdriver, 13mm socket and wrench Remove the Pedals. -
Page 13: Shrouds And Vent Cover
Replacing the Shrouds and Vent Cover Disconnect the data cable from the console before you service this machine. Note: Your machine may not match the image. For reference only. Tools required: pedal wrench, #2 Phillips screwdriver Remove the Pedals. Refer to the “Replacing the Pedals” procedure in this manual. - Page 14 3. Be sure the Data Cable is disconnected from the Console. Remove the Console and set it safely aside. NOTICE: Do not crimp the cable. Using a #2 Phillips Screwdriver, remove the hardware that attaches the Vent Cover and remove it. Set the hardware safely aside for reassembly.
-
Page 15: Crank Arms
Replacing the Crank Arms Disconnect the data cable from the console before you service this machine. Note: Your machine may not match the image. For reference only. Tools required: pedal wrench, 4mm hex key, #2 Phillips screwdriver, 13mm socket and wrench Remove the Pedals. -
Page 16: Crank Covers And Connector Arms
Replacing the Crank Covers and Connector Arms Disconnect the data cable from the console before you service this machine. Note: Your machine may not match the image. For reference only. Tools required: #2 Phillips screwdriver, 13mm socket and wrench (or nutdriver), Spindle Removal Plate tool (plate, 2 hex head bolts and press-in spacer), 10mm socket and wrench Remove the Pedals. - Page 17 Align the holes in the Spindle Removal Plate (G1) on the 2 screw holes (C1) near the Spindle (H) in the Connector Arm (C). Carefully tighten the 2 Spindle Removal Bolts (G2) through the holes into the Connector Arm until the Connector Arm (C) disengages from the Drive Pulley (I).
- Page 18 Put the Press-in Spacer (G3) on the Spindle (H). Be sure the wide opening on the Press-in Spacer is against the Connector Arm (C). Tighten the Crank Arm Hex Head Bolt (A1) into the Press-in Spacer and Spindle until the Connector Arm engages the Spindle. Loosen and remove the Crank Arm Hex Head Bolt and the Spacer.
-
Page 19: Fan Covers
Replacing the Fan Covers Disconnect the data cable from the console before you service this machine. Note: Your machine may not match the image. For reference only. To remove the Front Fan Cover: Tools required: pedal wrench, #2 Phillips screwdriver Remove the Pedals. - Page 20 To remove the Rear Fan Covers and Bottom Fan Cover: Remove the Pedals. Refer to the “Replacing the Pedals” procedure in this manual. Carefully remove the Shrouds, Console and Vent Cover. Refer to the “Replacing the Shrouds and Vent Cover” procedure in this manual.
-
Page 21: Speed Sensor
Replacing the Speed Sensor Disconnect the data cable from the console before you service this machine. Note: Your machine may not match the image. For reference only. Tools required: pedal wrench, flathead screwdriver, #2 Phillips screwdriver, hook or bent wire Remove the Pedals. - Page 22 When the Speed Sensor (A) is past the bottom opening (D) in the tube, use the hook to catch the data cable. Carefully pull out the Speed Sensor and cable through the opening. Install the new Speed Sensor (A) to the Main Frame. Reinstall the Console.
-
Page 23: Drive Belt
Replacing the Drive Belt Disconnect the data cable from the console before you service this machine. Note: Your machine may not match the image. For reference only. Tools required: pedal wrench, #2 Phillips screwdriver, 13mm open end wrench or socket and wrench (or nutdriver) Remove the Pedals. - Page 24 Slowly turn the Drive Pulley (F) backward and carefully ease the Drive Belt (G) off the Drive Pulley to the outside. Be sure to keep fingers clear of all pinch hazards as you turn the Drive Pulley. Carefully move the Fan Assembly (H) forward to disengage from the Main Frame brackets (I).
-
Page 25: Belt Tensioner Assembly (Idler Assembly)
Replacing the Belt Tensioner Assembly (Idler Assembly) Disconnect the data cable from the console before you service this machine. Note: Your machine may not match the image. For reference only. Tools required: pedal wrench, flathead screwdriver, #2 Phillips screwdriver, 13 mm open end wrench or socket and wrench Remove the Pedals. - Page 26 Loosen and remove the Belt Tensioner hardware (B, C, D). Remove the Belt Tensioner assembly (A) from the Main Frame bracket (G). Discard the old Belt Tensioner assembly. Installation is the reverse procedure. Note: Be sure that the upper portion of the Drive Belt (F) is under the bearings on the Belt Tensioner (A).
-
Page 27: Fan Assembly And Fan Tensioner Assembly
Replacing the Fan Assembly and Fan Tensioner Assemblies Disconnect the data cable from the console before you service this machine. Note: Your machine may not match the image. For reference only. Tools required: pedal wrench, #2 Phillips screwdriver, 13mm open end wrench or socket and wrench (or nutdriver), 11mm open end wrench or socket and wrench (or nutdriver) Remove the Pedals. - Page 28 Make a note of the setting of the Fan Tensioner Assemblies (H): the number of threads showing on the bolt (H1). Loosen and remove the Fan Tensioner Assemblies from the Main Frame brackets (G). Discard the old Fan Tensioner Assemblies. Install the replacement Fan Tensioner Assemblies (H) in the Main Frame brackets (G).
-
Page 29: Drive Pulley, Pulley Shaft And Crank Bearing
Replacing the Drive Pulley, Pulley Shaft and Crank Bearing Disconnect the data cable from the console before you service this machine. Note: Your machine may not match the image. For reference only. Tools required: #2 Phillips screwdriver, M8 socket and wrench, M6 socket and wrench, Spindle Removal Plate tool, safety goggles or other eye protection, snap ring removal tool, rubber mallet (or wooden block and hammer) - Page 30 Using eye protection, remove the C-Clip (G) from the Pulley Shaft Assembly (F). 10. Using eye protection and a rubber mallet (or wooden block and hammer), gently strike the Pulley Shaft Assembly (F) until it works out of the Frame and releases the Crank Bearings (H). Note: One Crank Bearing will be left in the Frame after the axle is removed.
-
Page 31: Maintenance Parts Exploded View
Maintenance Parts Exploded View Your machine may differ. Use only as a guide. Console Crank Arms Speed Sensor Magnet Handlebars Crank Covers Data Cable Fan Assembly Pedals RPM Sensor Fan Covers Shroud, Right Levelers Footpegs Shroud, Left Seat Arm Pivots Drive Pulley Seat Post Connector Arms...
Need help?
Do you have a question about the Airdyne AD2 and is the answer not in the manual?
Questions and answers
AD2 makes a klunking sound when pedaled at speeds below 50 RPM.