Sign In
Upload
Download
Table of Contents
Contents
Add to my manuals
Delete from my manuals
Share
URL of this page:
HTML Link:
Bookmark this page
Add
Manual will be automatically added to "My Manuals"
Print this page
×
Bookmark added
×
Added to my manuals
Manuals
Brands
SonicWALL Manuals
Firewall
PRO 200
Installation manual
SonicWALL PRO 200 Installation Manual
Internet security appliances
Hide thumbs
1
Table Of Contents
2
3
4
5
6
7
8
9
10
11
12
13
14
15
16
17
18
19
20
21
22
23
24
25
26
27
28
29
30
31
32
33
34
35
36
37
38
39
40
41
42
43
44
45
46
47
48
49
50
51
52
53
54
55
56
57
58
59
60
61
62
63
64
65
66
67
68
69
70
71
72
73
74
75
76
77
78
79
80
81
82
83
84
85
86
87
88
page
of
88
Go
/
88
Contents
Table of Contents
Troubleshooting
Bookmarks
Table of Contents
Table of Contents
About this Guide
Copyright Notice
Quick Start Installation Guide
Check Package Contents
Installing the Sonicwall
Check Link Leds
Network Addressing Information
Setting up Your Management Station
Logging into the Sonicwall
Configuring Computers on the LAN
1 Introduction
Inspecting the Package
Internet Service Provider (ISP) Information
Sonicwall Configuration Overview
2 Performing the Initial Configuration
Installing the Sonicwall
Setting up a Management Station
Setting up Your Management Station
Connecting the Sonicwall to the Network
Configuring Your Sonicwall to Access the Internet
Configuring the Sonicwall in NAT (Network Address Translation) Enabled Mode
Configuring NAT Enabled with Pppoe
Configuring NAT with DHCP Client Mode
Log into the Sonicwall Management Interface
Basic Network Terminology and Configurations
Network Hardware Components
Network Types
Firewalls
Gateways
Network Protocols
IP Addressing
3 Registering at Mysonicwall.com
Creating a New User Account
Problems Creating a Mysonicwall.com User Account
Registering Your Sonicwall Internet Security Appliance
Managing Your Sonicwall
Applicable Services for Sonicwall Internet Security Appliances
Activating Services Using Mysonicwall.com
4 Hardware Description
Sonicwall PRO 200 and PRO 300 Front Panel
Sonicwall PRO 200 and PRO 300 Back Panel
Sonicwall PRO 100 Front Panel
Sonicwall PRO 100 Back Panel
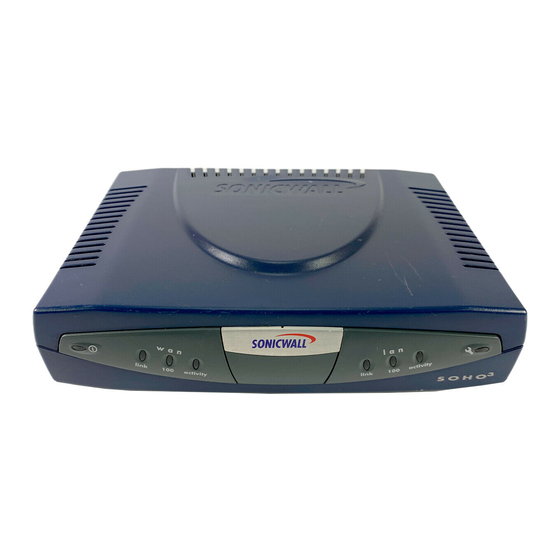
Sonicwall SOHO3 and TELE3 Front Panel
Sonicwall SOHO3 and TELE3 Back Panel
Sonicwall GX 250 and GX 650 Front Panel
5 Troubleshooting Guide
Tips for Cable/Dsl Modem Users
Erasing the Firmware
6 Sonicwall Support Solutions
Support Offers
Sonicwall Support 24X7
Deliverables
Sonicwall Support 8X5
Deliverables
Warranty Support - North America
Deliverables
Warranty Support - International
Deliverables
Advertisement
Quick Links
1
Table of Contents
2
Quick Start Installation Guide
3
Installing the Sonicwall
4
Installing the Sonicwall
5
Erasing the Firmware
Download this manual
SONICWALL
Installation Guide
Table of
Contents
Previous
Page
Next
Page
1
2
3
4
5
Advertisement
Table of Contents
Need help?
Do you have a question about the PRO 200 and is the answer not in the manual?
Ask a question
Questions and answers
Related Manuals for SonicWALL PRO 200
Firewall SonicWALL PRO 2040 Getting Started Manual
(30 pages)
Firewall SonicWALL SMA 210 Deployment Manual
Secure mobile access (26 pages)
Firewall SonicWALL TZ 150 Wireless Getting Started Manual
Sonicwall tz 150 wireless getting started guide (38 pages)
SonicWALL NSa 4650/5650/6650 - Network Security appliance Quick Start Guide
(article)
Firewall SonicWALL 1RK33-0D9 Safety And Regulatory Reference Manual
(62 pages)
Firewall SonicWALL TZ670 Quick Start Manual
(2 pages)
Firewall SonicWALL NSA 2650 Getting Started Manual
High availability firewall (60 pages)
Firewall SonicWALL NSa 2700 Quick Start Manual
(2 pages)
SonicWALL TZ80, TZ Series Manual
(article)
SonicWALL TZ300, TZ300 Wireless Manual
(article)
Firewall SonicWALL TZ 100 Series Getting Started Manual
Sonicwall network security appliances (44 pages)
Firewall SonicWALL SMA 400 Administration Manual
(44 pages)
Firewall SonicWALL TZ270 Quick Start Manual
(2 pages)
SonicWALL TZ570, TZ570W - Firewalls Quick Start Guide
(article)
Firewall SonicWALL NSA 240 Getting Started Manual
Network security appliances (90 pages)
This manual is also suitable for:
Pro 300
Pro 100
Gx 250
Gx 650
Soho3
Tele3
Table of Contents
Print
Rename the bookmark
Delete bookmark?
Delete from my manuals?
Login
Sign In
OR
Sign in with Facebook
Sign in with Google
Upload manual
Upload from disk
Upload from URL


Need help?
Do you have a question about the PRO 200 and is the answer not in the manual?
Questions and answers