
Subscribe to Our Youtube Channel
Related Manuals for SonicWALL PRO 2040


Summary of Contents for SonicWALL PRO 2040
- Page 1 COMPREHENSIVE INTERNET SECURITY ™ SSSSSSSSSS bSo n i c WALL Security Ap p l i a n c e s SonicWALL PRO 2040 Getting Started Guide...
-
Page 2: Before You Begin
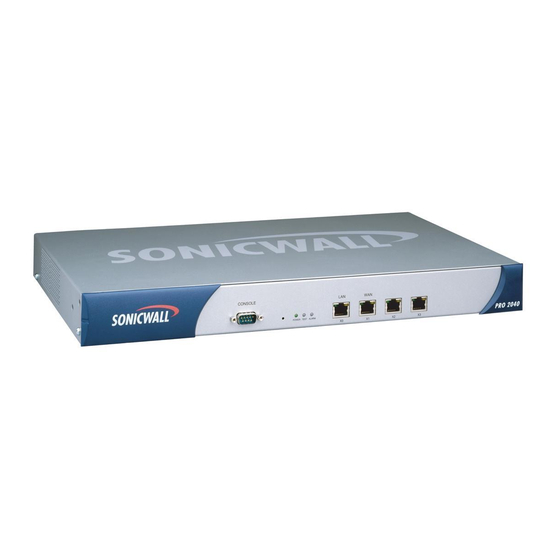
SonicWALL PRO 2040 Security Appliance Getting Started Guide The SonicWALL PRO 2040 is a total security platform for complex networks, utilizing a deep packet inspection engine and six* fully configurable Ethernet interfaces to provide cost-effective, enterprise-class firewall throughput and VPN concentration. As a... -
Page 3: Table Of Contents
An Internet connection SonicWALL PRO 2040 Configuration Steps “Collecting Required Information” on page 2 “Applying Power to the SonicWALL PRO 2040” on page 3 “Connecting the SonicWALL PRO 2040” on page 4 “Accessing the Management Interface” on page 5 “Using the SonicWALL Setup Wizard” on page 6 “Testing Your Connection”... -
Page 4: Applying Power To The Sonicwall Pro 2040
(default: password) Applying Power to the SonicWALL PRO 2040 1. Plug the power cord into the SonicWALL PRO 2040 and into an appropriate power outlet. 2. Turn on the power switch on the rear of the appliance next to the power cord. -
Page 5: Connecting The Sonicwall Pro 2040
The LED for the LAN port you used lights up indicating an active connection. This may take several seconds. When you connect the LAN, the SonicWALL PRO 2040 automatically checks for a DHCP server on the LAN. If it does not find one, it automatically enables its own DHCP server. -
Page 6: Accessing The Management Interface
Accessing the Management Interface The computer you use to manage the SonicWALL PRO 2040 must be set up to accept a dynamic IP address, or have an unused IP address in the 192.168.168.x/24 subnet, such as 192.168.168.20. For instructions on configuring your IP address, see “Configuring Computers for Your LAN”... -
Page 7: Using The Sonicwall Setup Wizard
Keep your new password in a safe place. If you lose your password, you will have to reset the SonicWALL PRO 2040 to factory settings, losing your configuration. For instructions on resetting your SonicWALL PRO 2040, See the SonicOS Standard Administrator’s Guide available on the SonicWALL Resource CD and on the Web at:... - Page 8 Static IP Select Static IP if you want to manually assign the SonicWALL PRO 2040 a specific, unchanging IP address. DHCP Select DHCP if your ISP automatically assigns your computer a dynamic IP Address. DHCP is commonly used with cable modems.
- Page 9 Gateway (Router) Address Enter the IP address of your internet gateway provided by your ISP. DNS Server Address Enter the IP address of the DNS server for your network. DNS Server Address #2 You can enter a secondary, back-up DNS server to use if the (optional) first one fails.
- Page 10 PPPoE Password Enter the password for your internet account. Inactivity Disconnect (min- Check this box if you want the SonicWALL PRO 2040 to dis- utes) connect from the Internet if there is no traffic for the number of minutes you enter.
- Page 11 6. LAN DHCP Settings - The LAN DHCP Settings page allows you to select whether or not to use the DHCP Server in the SonicWALL PRO 2040 to automatically distribute IP addressing information to computers and other network devices on your LAN.
- Page 12 Cancel, no settings will be applied to the SonicWALL security appliance. The Storing SonicWALL Configuration page with a yellow status indicator displays, showing that the SonicWALL PRO 2040 is storing the new configuration. When it is finished the Setup Wizard Complete page displays.
-
Page 13: Testing Your Connection
If you can view the SonicWALL home page, you have configured everything correctly. If you cannot view the SonicWALL home page, restart your computer to make sure it synchronizes with the new network settings of th SonicWALL PRO 2040. If you still cannot connect, use the Setup Wizard to configure the SonicWALL PRO 2040 again: Return to step 4, “Accessing the Management... - Page 14 Get SonicWALL technical support Before You Register Make sure the DNS and Time settings on your SonicWALL PRO 2040 are correct when you register the device. Configure Time settings in the System > Time page. Configure DNS settings in the Edit Interface window from the Network > Interfaces page.
- Page 15 7. When the mySonicWALL.com server has finished processing your account, you will see a page saying that your account has been created. Click Continue. Congratulations. Your mySonicWALL.com account is activated. Now you need to log into mySonicWALL.com to register your SonicWALL PRO 2040. Page 14...
-
Page 16: Registering Your Sonicwall Pro 2040
Registering Your SonicWALL PRO 2040 1. If you are not logged into the SonicWALL PRO 2040 management interface, log in with the username admin and the administrative password you set in the Setup Wizard. 2. If the System > Status page is not displaying in the management interface, click System in the left-navigation menu, and then click Status. - Page 17 Mount your SonicWALL PRO 2040 on a wall or to any vertical surface Activate Your Free Trials of the SonicWALL Security Services When you register your SonicWALL PRO 2040, you are eligible for a Free Trial of the SonicWALL Security Services: •...
- Page 18 SonicWALL security appliance. Use the following instructions to configure each service with its default values. For complete configuration instructions, see the administrative guides available on your SonicWALL resource CD and on the Web at: http://www.sonicwall.com/support/documentation.html. Enabling Premium Content Filtering Service 1.
- Page 19 Enabling Gateway Anti-Virus Service 1. Select the Security Services > Gateway Anti-Virus page in the SonicWALL management interface. 2. In the Gateway Anti-Virus Global Settings section, click the Enable Gateway Anti-Virus on Interface checkbox, and check the WAN and LAN interface boxes.
- Page 20 Connecting Computers to Your SonicWALL PRO 2040 You can attach an unlimited number of computers to your SonicWALL PRO 2040. Hub / Switch Internet Connect a computer, hub or switch in your LAN to the LAN / X0 port. If you are using a DHCP server on your LAN, you need to configure the computers to accept dynamic network settings.
- Page 21 Configuring Computers for Your LAN DHCP If you enabled the DHCP Server in the Setup Wizard, each computer on your network must be configured to obtain its IP address dynamically. The following steps provide instruction on changing the Local Area Connection settings for several versions of Windows.
- Page 22 IP address field. 4. Type 255.255.255.0 in the Subnet Mask field. 5. Type the SonicWALL PRO 2040 LAN IP Address into the Default Gateway field. 6. Type the DNS IP address in the Preferred DNS Server field. If you have more than one address, type the second one in the Alternate DNS server field.
- Page 23 6. Type an IP address from your LAN IP range IP address field. 7. Type 255.255.255.0 in the Subnet field. 8. Type the SonicWALL PRO 2040 LAN IP Address into the Default Gateway field. 9. If you have a DNS Server IP address from your ISP, enter it in the Preferred DNS Server field.
- Page 24 Internet to protect sensitive information. WAN - A Wide Area Network is a geographically distributed network composed of multiple networks joined into a single large network. The Internet is a global WAN. SonicWALL PRO 2040 Getting Started Guide Page 23...
-
Page 25: Cable Connections
SonicWALL Web site: <http://www.sonicwall.com>. Lithium Battery Warning The Lithium Battery used in the SonicWALL Internet security appliance may not be replaced by the user. The SonicWALL must be returned to a SonicWALL authorized service center for replacement with the same or equivalent type recommended by the manufacturer. - Page 26 • Use the mounting hardware recommended by the rack manufacturer and ensure that the rack is adequate for the application. SonicWALL includes a rack mounting kit with the SonicWALL PRO 2040 that is compatible with most computer equipment racks. •...
-
Page 27: Copyright Notice
Specifications and descriptions subject to change without notice. Trademarks SonicWALL is a registered trademark of SonicWALL, Inc. Microsoft Windows 98, Windows NT, Windows 2000, Windows XP, Windows Server 2003, Internet Explorer, and Active Directory are trademarks or registered trademarks of Microsoft Corporation. - Page 28 Notes SonicWALL PRO 2040 Getting Started Guide Page 27...
- Page 29 Notes Page 28...
- Page 30 F: 408.745.9300 © 2005 SonicWALL, Inc . SonicWALL is a registered trademark of SonicWALL, Inc . Other product and company names mentioned herein may be trademarks and/ or registered trademarks of their respective companies. Specifications and descriptions subject to change with out notice.
Need help?
Do you have a question about the PRO 2040 and is the answer not in the manual?
Questions and answers