Advertisement
Quick Links
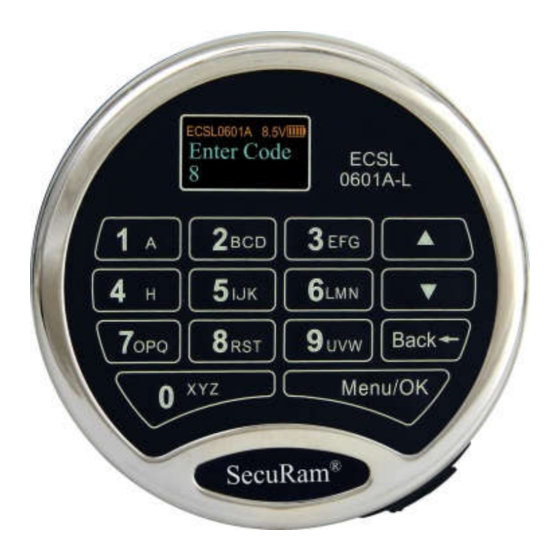
ProLogic L66
ProLogic L66 Operation Instructions
Document No: EC-0601A-L66-180510
Version No: V1.01
1.0 System Installation
1.1 System Components
1.2 Pairing the EntryPad with the Lock(s)
1.3 Lock and EntryPad Installation
1.4 Installing Battery
1.5 Test Lock Operation
2.0 Code Length Options
2.1 PW L – 6 / Users 10
2.2 PW L – 8 / Users 30
2.3 PW L – 6 / Users 30
3.0 Lock Operation
3.1 Opening the Lock
3.2 Opening the Lock in Time Delay
3.3 Opening the Lock Under Duress
3.4 Opening the Lock in Dual Control
3.5 Opening the Lock with a Multi-Lock System
4.0 Set Date and Time
4.1 Set Clock Time
4.2 Show Clock Time
4.3 DayLight Savings Time
5.0 Code Management
5.1 Enrolling New users
5.2 Change Code
5.3 Delete One User
5.4 Delete All Users
5.5 Disable/Enable User
5.6 Obfuscate Code Entry
5.7 Set ID01 to Master
5.8 Renew Code Period
Operation Instructions
6.0 System Identification
6.1 System Info
7.0 Time Delay
7.1 Set/Cancel Time Delay
7.2 Set Duress Time Delay
7.3 Setting Time Delay Override Users
8.0 Audit Trail Functionality
8.1 Show Audit Trail
8.2 Uploading Audit Trail
9.0 Manager Mode
9.1 Enable Manager Mode
9.2 Disable Manager Mode
10.0 Single or Dual Control
10.1 Enable Dual Mode
10.2 Dual Mode Group ID
11.0 Setting Time Lock
11.1 Set Timer
11.2 Set Time Table
11.3 Set Holidays
11.4 See Timer
12.0 Door Management
12.1 Max. Door Open Time
12.2 Configuring a Multi-lock system
12.3 Set Number of Locks
12.4 Authorize Locks
12.5 Enable Sequence
13.0 Duress Management
13.1 Duress Setup and Wiring Configuration
13.2 Duress Code Shift
14.0 Wireless Management
14.1 Set Device ID
14.2 Set Host ID
14.3 Wireless Connection
15.0 Data Management
15.1 Restore Data
15.2 Backup Data
15.3 Encryption Key Set
1
Advertisement

Related Manuals for Securam ProLogic L66


Summary of Contents for Securam ProLogic L66
- Page 1 7.1 Set/Cancel Time Delay 7.2 Set Duress Time Delay 7.3 Setting Time Delay Override Users 8.0 Audit Trail Functionality 8.1 Show Audit Trail ProLogic L66 Operation Instructions 8.2 Uploading Audit Trail Document No: EC-0601A-L66-180510 Version No: V1.01 9.0 Manager Mode 9.1 Enable Manager Mode...
- Page 2 SecuRam safe lock systems can operate in two different modes depending upon the type of EntryPad being used with the lock body. The ProLogic L66 is a digital lock system and therefore the lock must also be programmed in digital mode. Both modes follow the same steps to reset / set which is done by following the steps detailed below: Step 1: Ensure the battery is connected to the Entry Pad.
- Page 3 “Fail to Link with Lock”, repeat the reset procedure. Be sure to hold down the reset button through steps 5-7. If you have difficulty resetting the lock, please call SecuRam Tech Support at (805) 988-8088 or email info@securamsys.com.
- Page 4 ProLogic L66 Operation Instructions Ensure that the lock cable is positioned so that it lies in the channel on the back of the lock. This channel is provided to protect the lock cable from damage or crimping during installation.
- Page 5 IMPORTANT: This must be completed before any programming. The ProLogic L66 allows you the ability to select the code length for all safe lock operators and the total number of users allowable on the lock. Setting the code length and number of Users is a global setting and applies to all safe lock operators.
- Page 6 ProLogic L66 Operation Instructions Step 3: The display will prompt you to enter a valid code. Enter the Super Code (ID00) only . This function is not available to Manager Codes ID01 or ID02. The “Select Menu” message will be displayed as follows: Step 4: Scroll ...
- Page 7 ProLogic L66 Operation Instructions Step 4: Scroll and to the menu selection “PW L – 8; Users – 30” and Press OK Step 5: The LCD will display a warning followed by “Delete All Users?”, press OK to confirm.
- Page 8 ProLogic L66 Operation Instructions Step 4: Scroll and to the menu selection “PW L – 6; Users – 30” and Press OK Step 5: The LCD will display a message to indicate that this setting does not meet the UL requirement.
- Page 9 ProLogic L66 Operation Instructions No. of Audit Events After this initial power up it will also check to ensure that the system is communicating correctly. The display will read “Link with Lock OK”. If the Display reads: “Fail to Link with Lock” proceed to Section 1.2 entitled “Pairing the EntryPad and the Lock”...
- Page 10 3.3 Opening the Lock Under Duress The ProLogic L66 has a Duress Feature, which allows a User or Admin to open the lock and send a silent Duress signal indicating that you are in danger. By default, the duress function is active and cannot be disabled.
- Page 11 Step 2: The system will now prompt you to enter the number of the Lock to open 4.0 Set Date and Time The ProLogic L66 is an audit lock and it tracks events based on user, activity, date, and time. In order to set the system date and time complete the following process.
- Page 12 ProLogic L66 Operation Instructions Step 2: Using the and, scroll to the System Menu and press OK. Step 3: The display will prompt you to enter a valid code. Enter either the Super Code (ID00) or the Manager Code (ID01). The “Select Menu” message will be displayed as follows: Step 4: Scroll ...
- Page 13 ProLogic L66 Operation Instructions The ProLogic L66 can be set to manage Daylight Savings Time and automatically updating preset date and time. Using this menu selection, you can turn on Daylight Savings Time management or turn it off. **Note: The example below shows that Daylight Savings Time will start in March (3 month), 2nd full week at 2:00 am on the first day of the week (Sunday).
- Page 14 It is strongly recommended that both these default codes are changed before the lock system is put into service. The ProLogic L66 has the capability to add up to 29 codes, in addition to the default codes. ID02 is a Manager Code and therefore has management functionality (the same as ID01).
- Page 15 ProLogic L66 Operation Instructions 5.1 Enrolling New Users Step1: Press the Menu/OK button. Step 2: Using the and , scroll to the System Menu and Press Menu/OK Step 3: The display will prompt you to enter a valid Administrator code Enter either the Super Code (ID00) or the Manager Code (ID01).
- Page 16 ProLogic L66 Operation Instructions Step 3: The display will prompt you to enter a valid code. Enter the code to be changed The “Select Menu” message will be displayed as follows: Step 4: Scroll to the menu selection “Change Code” and Press OK Step 5: The display will show this message on the display “Set Code of IDXX”...
- Page 17 ProLogic L66 Operation Instructions Step 6: The system will ask which User Code is to be deleted. Press and until the desired USER ID is reached. Step 7: Press OK. This User Code is now deleted from the system.
- Page 18 ProLogic L66 Operation Instructions After the code has been disabled, it can be re-enabled at a later time, following the same process by selecting “Enable User”. Step1: Press the Menu/OK button. Step 2: Using the and , scroll to the System Menu and Press Menu/OK.
- Page 19 ProLogic L66 Operation Instructions Step 3: The display will prompt you to enter a valid code. Enter either the Super Code (ID00) or the Manager Code (ID01). The “Select Menu” message will be displayed as follows: Step 4: Scroll and to the menu selection “Obfuscate Code Entry” and Press OK All digit entries will now be display as “*”...
- Page 20 ProLogic L66 Operation Instructions Step 4: Scroll to the menu selection “Set ID01 to Master” and Press OK. The system will confirm that ID01 is now the Master Code. To cancel this programming command, select “Set ID01 to Manager”, and the management menu will be restored to default for ID02.
- Page 21 This menu feature would be used to determine the type of safe lock system being used. Many of the SecuRam ProLogic EntryPads look the same, but the features sets and capabilities vary greatly depending upon the software being utilized. To determine the type of ProLogic Safe Lock system, follow...
- Page 22 ProLogic L66 Operation Instructions Step 3: The display will prompt you to enter a valid code. Enter either the Super Code (ID00) or the Manager Code (ID01). The “Select Menu” message will be displayed as follows: Step 4: Scroll UP to the menu selection “Set/Cancel Time Delay” and Press OK.
- Page 23 ProLogic L66 Operation Instructions Step 5: Press the and to adjust the Time Delay value (0-99 minutes). Press OK. Step 6: The system will now display the Time Window. This is the preset length of time allowed to enter a valid code after Time Delay has expired.
- Page 24 8.0 Audit Trail Functionality The ProLogic L66 records 500 date and time stamped audit trail events. It stores the most recent 500 events and overwrites the oldest first. The Audit Trail can be viewed on the LCD screen or downloaded wirelessly to the Wireless Station Management software.
- Page 25 ProLogic L66 Operation Instructions b. The WSM software must have an established connection to the Safe Lock system – See Section 13.0 of this guide. c. The Device ID on the EntryPad must be set and it must match the Device ID registered in the WSM software –...
- Page 26 ProLogic L66 Operation Instructions Manager Mode offers a simple TimeLocking method. 9.1 Enable Manager Mode: This menu selection allows you to set the Manager Mode as described above. Step1: Press the Menu/OK button. Step 2: Using the and , scroll to the System Menu and Press OK.
- Page 27 Manager Mode is now disabled. ID01 and ID02 functionality has been restored to original. 10.0 Single or Dual Control The ProLogic L66 has the ability to operate in either Single Control mode or Dual Control Mode: Single Control Mode: One valid code will open the safe lock system.
- Page 28 Disable Dual Mode. Therefore to Disable Dual Mode follow the steps above. 10.2 Dual Mode Group ID The ProLogic L66 has the ability to establish a management rule related to the Dual Mode function. This management rule is established in the menu selection “Dual Mode Group ID”. By enabling this function, the available User codes of the lock are divided into two groups: Group A would be “Dual Mode...
- Page 29 11.0 Setting Time Table The ProLogic L66 has TimeLock functionality. With TimeLock, you can set a timetable during which users can open the safe lock system. Outside of this timetable, no users can enter their code to open the safe lock system.
-
Page 30: Time Table
ProLogic L66 Operation Instructions Step1: Press the Menu/OK button. Step 2: Using the and , scroll to the System Menu and Press OK. Step 3: The display will prompt you to enter a valid code. Enter either the Super Code (ID00) or the Manager Code (ID01). - Page 31 ProLogic L66 Operation Instructions Also by default Time Table 02 is set to “N” which means this profile is disabled and its Time Table will not be followed. By default the daily settings are set from 00:00 to 00:00 – which means the safe can be opened all day as shown below: Changing the Y to N on any given day will disable the Time Table for that day in this profile.
- Page 32 ProLogic L66 Operation Instructions Step 3: Set Time Table 02 to Y, meaning this Time Table is enabled Step 4: Set each daily setting to Y, with an Opening Time of 07:00 to 23:59 The users affected by Time Table will be users ID01-ID30. ID00 can override the Time Table settings and cannot be changed.
- Page 33 12.2 Configuring a Multi-Lock system The ProLogic L66 is capable of managing 4 locks. A CB11-1T4 is required to operate 4 locks with the ProLogic L66 EntryPad. In order to manage more than one lock, you need to tell the system how many locks are connected, and then identify the locks with a number.
- Page 34 ProLogic L66 Operation Instructions 12.3 Set Number of Locks Step1: Press the Menu/OK button. Step 2: Using the and , scroll to the System Menu and Press OK. Step 3: The display will prompt you to enter a valid code. Enter either the Super Code (ID00) or the Manager Code (ID01).
- Page 35 ProLogic L66 Operation Instructions Step 4: Scroll to the menu selection “Authorize Locks” and Press OK. Step 5: Now select the range of User IDs to have access to these locks. The system will display programmed users. First select the beginning of the range “From USER ID XX”.
- Page 36 10 seconds later the selected inner compartment lock will open. 13.0 Duress Management The ProLogic L66 offers Duress functionality. In the event of a burglary, or specifically a “hold up” at your place of business where the culprit demands entrance to the safe, Users can provide entrance to the safe.
- Page 37 Duress code is now disabled and a valid code entered +/- 1 digit will show as an invalid code. 14.0 Wireless Management The ProLogic L66 has a built-in wireless transmitter/receiver. This wireless feature allows you to connect to the safe lock wirelessly in a number of different ways depending upon your security requirements: Download audit trails at the safe location using SecuRam’s Wireless Link.
- Page 38 EntryPad using a four digit number format from 0010-9999 and press OK. 14.2 Set Host ID Next, we will set the Host ID. This is the number of the Host device that the ProLogic L66 will be permitted to communicate with.
- Page 39 You will see a progress report on the LCD as the data is transferred. 15.0 Data Management The ProLogic L66 can receive and send data using its built-in wireless transmitter/receiver. As a security measure, all data that is transmitted or received by the EntryPad is encrypted. This includes data sent across the 4 pin lock cable from the EntryPad to the lock, such as User codes.
- Page 40 15.3 Encryption Key Set The ProLogic L66 sends and receives data to the lock in an encrypted form. This is a security measure to ensure that all data is protected. The Encryption Key is set during the manufacturing process with a...
- Page 41 The alpha numeric code must be deciphered using SecuRam’s Authorization Code Generator Software. The alpha-numeric code is entered into the software together with the encryption code. Through the software, these codes are deciphered to generate a One Time Use Reset Code.
- Page 42 Step 6: The LCD screen will display a Key Code. Record this number and call an authorized SecuRam Recovery Center or SecuRam Tech Support at 1-805-988-8088 for an Authorization Code. This code remains valid for a period of 20 minutes only.
- Page 43 Step 4: The LCD screen will display an alpha-numeric number random key. Record this number and call an authorized SecuRam Recovery Center or SecuRam Tech Support at 1-805-988-8088. This Key Code remains valid for a period of 20 minutes only.
- Page 44 ProLogic L66 Operation Instructions Step 5: After receiving the One Time Use Recovery Code from the Recovery Center, press the “back” button; and you will be prompted to enter your Recovery Code. Step 6: Your system will now be restored and will display this message: The Super Code will now be reset to 111111 (PW L 6/Users 10 or PW L 6/Users 30) or 11111100 (PW L 8/Users 30).
- Page 45 Note: The pairing of the StrikeBolt and the ProLogic L66 EntryPad is not UL listed. If the lock body that you are pairing the ProLogic L66 with has been paired previously with an analog system, for example the SafeLogic Basic (or any other SafeLogic Series EntryPad)or was set at the factory...
- Page 46 1) Cycle Testing 2)Hardware Testing This is a very unique feature to SecuRam safe lock systems. As the access system on a fortified steel box – the safe -- it is imperative that safe locks can provide solid performance. SecuRam offers this unique menu selection that allows you to test the lock system performance through actual Cycle Testing.
-
Page 47: Hardware Testing
18.0 Menus There are two menus on the ProLogic L66, the root menu and a sub-menu. The sub-menu is accessible by entering a valid code. The menu selections in the sub-menu change depending upon the level of the code entered. - Page 48 ProLogic L66 Operation Instructions Backup Data Duress Code Shift* PW L 6/Users 30* Dual Mode Group ID PW L 8/Users 30* Enable Dual Mode PW L6/ Users 10* Disable User Disable Recover Enable User ...
Need help?
Do you have a question about the ProLogic L66 and is the answer not in the manual?
Questions and answers